The topic of today’s article is Premiere Pro AV1. Check out this article to find out if this professional video editing software supports importing or exporting AV1 videos.
Does Premiere Pro Support AV1
As the industry-leading video editing application, Adobe Premiere Pro supports importing multiple native video and audio formats (such as Apple ProRes, ASF, AVI, H.264, HEVC, M2TS, WAV, etc.) and a wide range of native media formats from the latest DSLR cameras. Does Premiere Pro support AV1? If you want to edit AV1 videos in this program, you might have this question in mind.
Unfortunately, the AV1 codec is not included in the latest update of Premiere Pro. In other words, AV1 is not natively supported by Premiere Pro. Therefore, you cannot import MP4, MKV, and WebM files that use AV1 encoding for editing in Premiere.
When you try importing an AV1 video into Premiere Pro, you receive an error message stating “File format not supported”. Likewise, you can’t open AVIF images that use AV1 compression algorithms.
2 Ways to Import AV1 Files into Premiere Pro
Here are two solutions to fix the Premiere Pro AV1 incompatibility issues.
Way 1: Convert Video for Premiere Pro
Adobe Premiere Pro supports various video files that use the H.264 codec, such as MP4 and MOV. Therefore, you can convert an AV1 video to H.264 MP4, and import the converted file into Premiere Pro.
How can you convert AV1 to MP4? Here is a quick and easy way for you – MiniTool MovieMaker. It’s designed to help everyone to create videos from images, short video clips, and music in minutes. Due to the support for popular video codecs and container formats, it also functions as a simple video converter, allowing you to convert MP4, MKV, and WebM videos encoded with AV1, HEVC, MPEG-4 Part 2, VP9, VP8, and more to H.264 MP4, MOV, and more.
Here’s how to convert AV1 to MP4 using MiniTool MovieMaker.
MiniTool MovieMakerClick to Download100%Clean & Safe
Step 1. Launch this program after completing the installation.
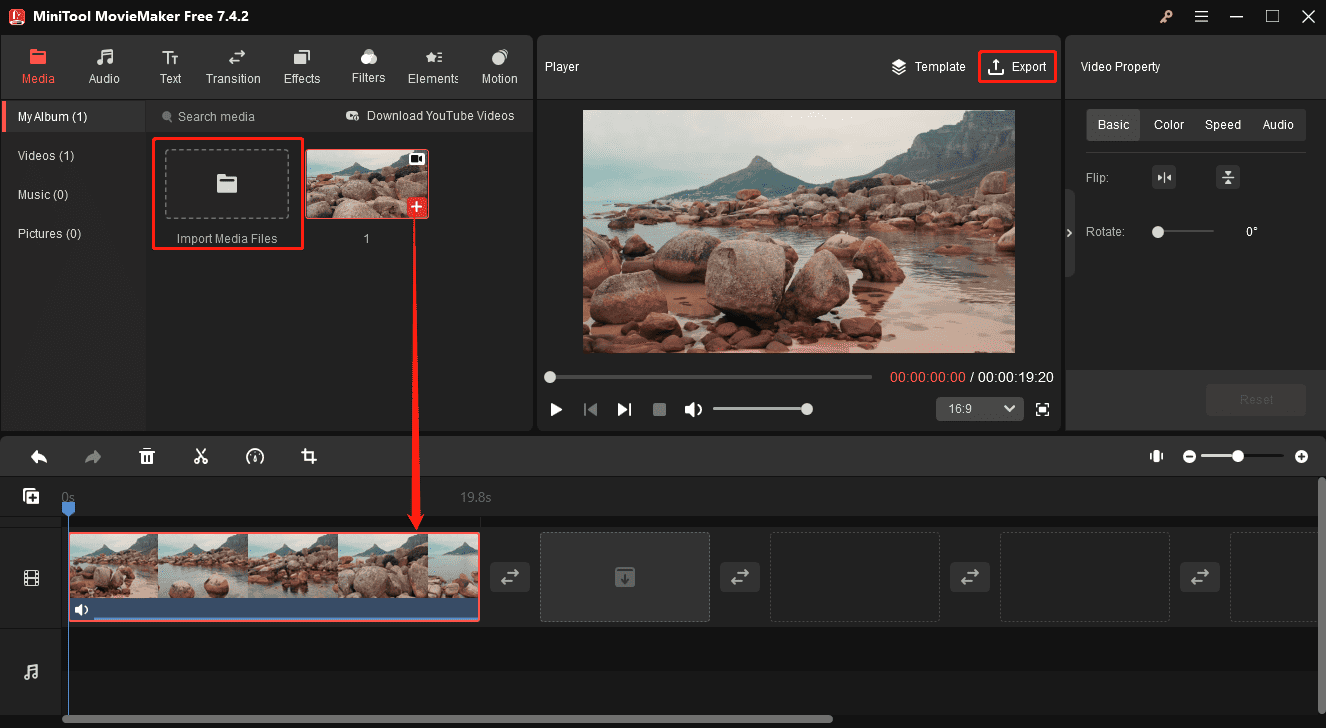
Step 2. Open this AV1 to MP4 converter and close the promotion window. Then, click the Import Media Files button to import your AV1 video and add it to the timeline.

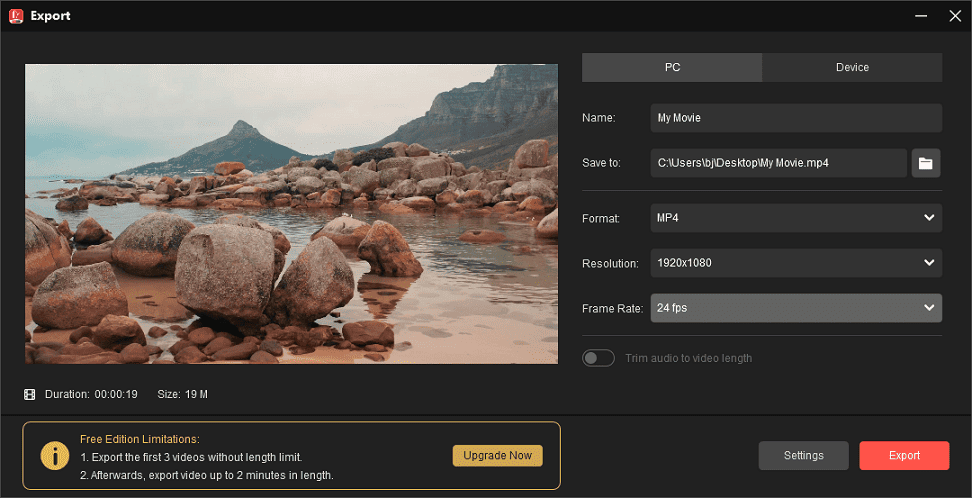
Step 3. Click the Export button in the top right corner, set Format to MP4, select the video resolution, frame rate, and output folder, and click Export to start the conversion.

Also, if you want to edit AV1 videos simply, such as trimming, cropping, combining files, applying filters, special effects, and aspect ratio adjustment, MiniTool MovieMaker is sufficient for these tasks. It’s one of the best AV1 video editors for beginners.
Way 2: Use a Premiere Pro AV1 Plugin
Adobe Premiere allows users to install various plugins to improve video editing. Therefore, if you want Premiere Pro’s advanced features, use Autokroma’s Influx plugin to import AV1 files directly into the program. This plugin supports a variety of video and audio codecs and formats, making it easy to import and edit these files in Premiere Pro, Media Encoder, After Effects, and Audition.
Autokroma’s Influx plugin offers a free trial with some limitations. To unlock all of the features, you should purchase a license. However, if you’re on a budget, try a free video converter – MiniTool Video Converter to convert AV1 and other video files for import into Premiere Pro.
MiniTool Video ConverterClick to Download100%Clean & Safe
How to Export Video to AV1 in Premiere Pro
As mentioned above, AV1 is a video codec with extremely high data compression, making it ideal when working with large video files. You can export videos to AV1 to reduce file size and save storage space. However, Premiere Pro does not support AV1 export natively. If you want to encode videos to AV1, here is a free tool for you, Voukoder, a free video and audio encoding service for Windows.
Step 1. Download and install Voukoder on your Windows computer.
Step 2. To export video from Premiere Pro, go to File > Export > Media to open Export Settings.
Step 3. Open the Format drop-down list, scroll down, and select Voukoder. Then, open the VOUKODER tab under AUDIO, and click the Configure button. Under Video’s Encoder, select the AV1 (VST) option, next move to Options to set the video bitrate, and click OK to save changes.
Step 4. Configure other output settings in Premiere Pro and click the Export button to start rendering the video.
Conclusion
Currently, Premiere Pro does not natively support importing and exporting AV1 videos, but third-party plugins fix this problem. I hope you can enjoy a better editing experience with these tools.


![[6 Methods] How to Fix Adobe Premiere Pro Media Pending Error](https://images.minitool.com/moviemaker.minitool.com/images/uploads/2023/03/premiere-pro-media-pending-thumbnail.jpg)
User Comments :