Do you want to spruce up the text in your next video? In this post, we’ll show you how to place video inside text with three excellent movie maker apps, CapCut, Adobe Premiere Pro, and DaVinci Resolve. Follow the steps below to turn your ordinary video into something extraordinary.
How to Place Video Inside Text in CapCut
CapCut is a popular video editor working on computers and smartphones, known for its simple operation and comprehensive features. It offers a set of tools and various effects to create stunning and high-quality videos, such as cropping, filters, transitions, masks, noise reduction, and video stabilization. In this section, let’s see how to place video inside text using CapCut on your PC.
Step 1. Download and install the CapCut desktop app on your PC. Then, open the app and log in with your Google or TikTok account.
Step 2. Click the + Create project button on the top of the home page to access the main interface.
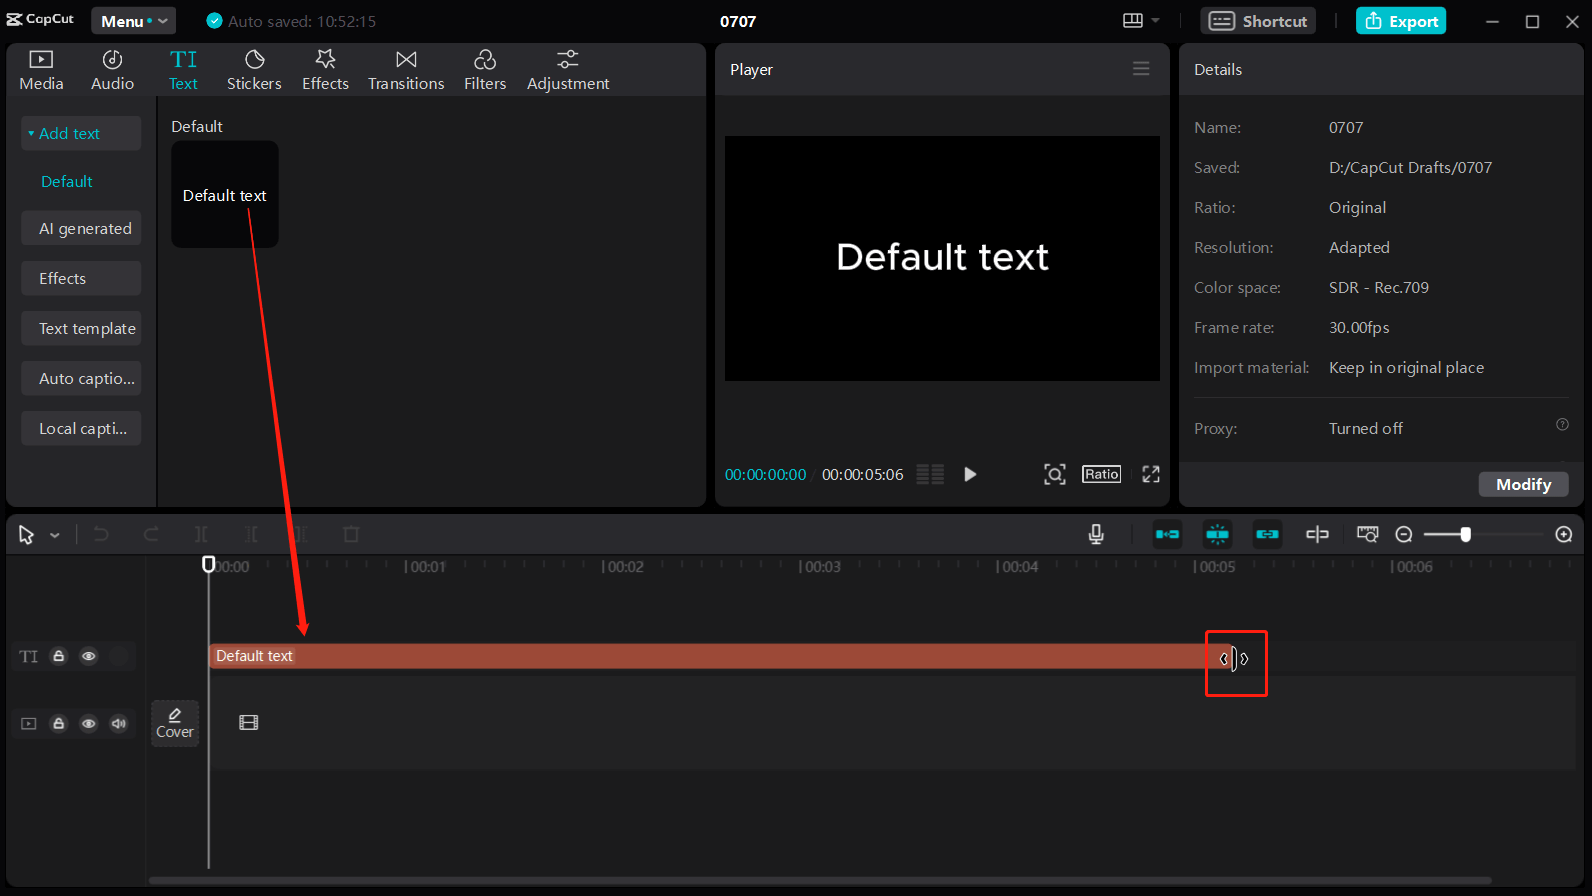
Step 3. Go to Text, browse these text templates, and add your favorite text to your timeline. Then, adjust the duration of the text track to match the length of the video. Hover over the edge of the text track and drag the arrow to lengthen or shorten it.
Next, edit your text. Type the desired words in the Text editor, and you select the font, font size,
Step 4. Click the Export button, browse for an output folder, and click Export to export the video.
Step 5. Go back to the main interface of the app, and click the + Import button to open the video you just exported and your footage.
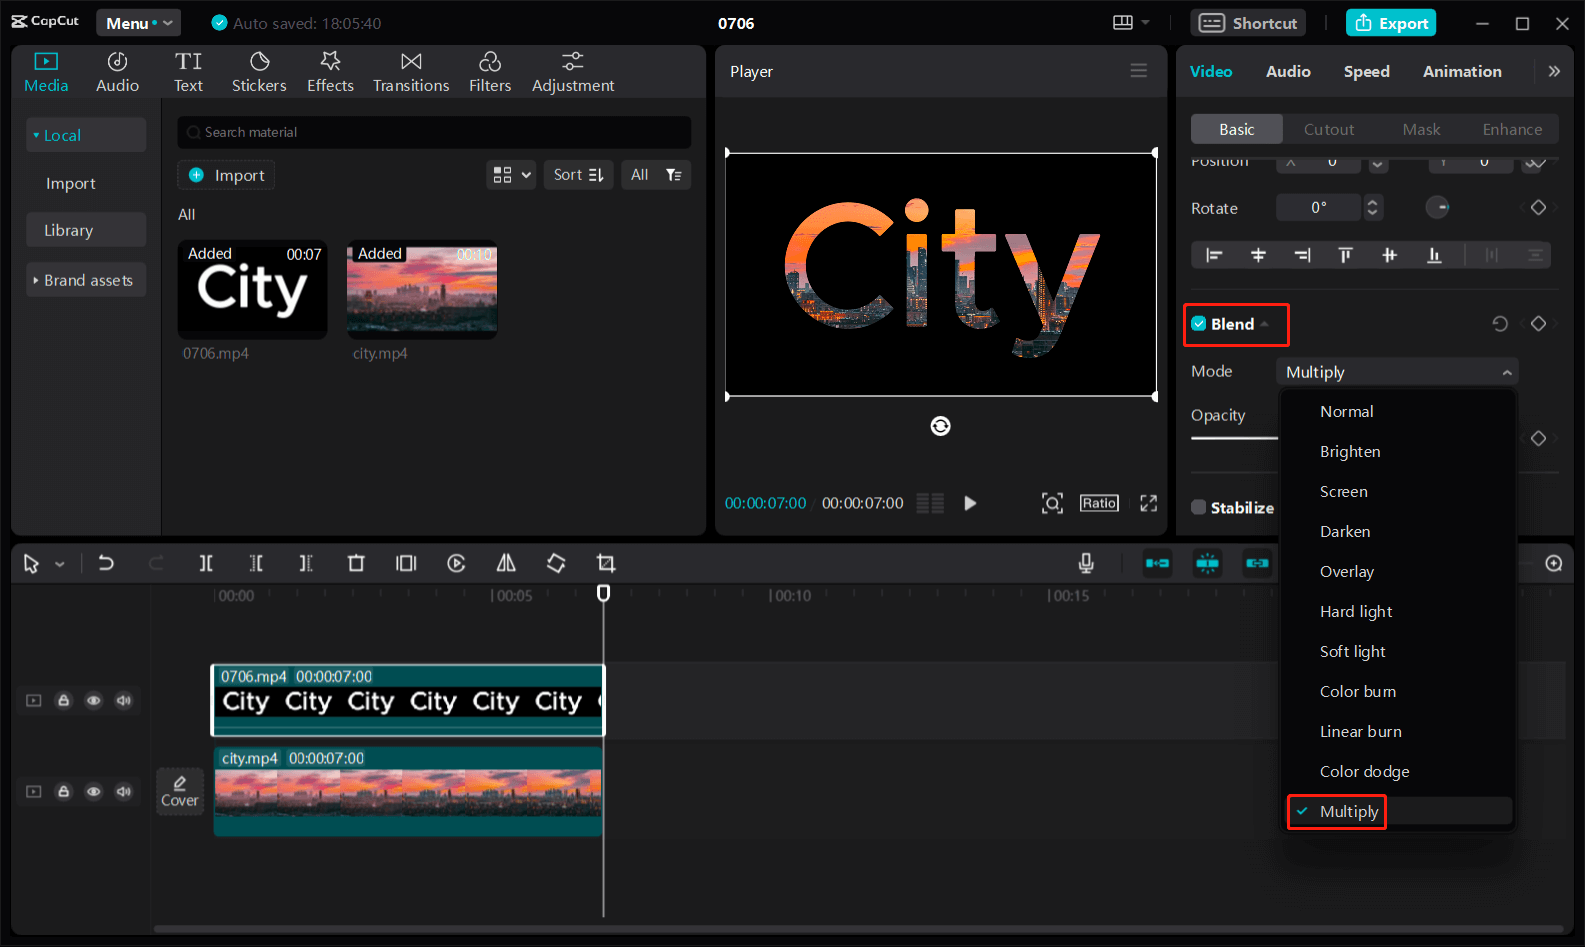
Step 6. Drag your footage to the timeline and set the text background as an overlay. Select the overlay and go to the Video section; under the Basic tab, scroll to the Blend option, open the Mode drop-down list, and select Multiply.
Step 7. Click the Export again, complete the output settings, and click Export to export your video.
How to Place Video Inside Text in Adobe Premiere Pro
As the industry-leading video editing software, Adobe Premiere Pro provides almost all the tools and features to turn your imagination into amazing videos. There’s no doubt that it’s perfectly capable of displaying your video in text. How to add video inside text in Adobe Premiere Pro? See follows:
Step 1. Open Adobe Premiere Pro and start a new project.
Step 2. Add your video to the timeline and edit it.
Step 3. Add text to your video.
- Select the Type Tool (letter T) icon at the bottom of the screen or press T on your keyboard.
- Hover over the Program Monitor and drag out a box to enter text.
- Type your text. Go to Windows and select the Essential Graphics panel or just highlight your text to open text settings. Edit your text by adjusting the fonts, colors, alignment, size, etc. Don’t forget to change the duration of the text.
Step 4. Put your video inside the text.
- Go to the Effects panel, type “track mattte key” in the search bar, and drag the Track Matte Key in the Keying folder to the video clip on the timeline, not the text layer.
- Select your video and switch to the Effect Controls panel; under the Track Matte Key effect, expand the Matte drop-down menu, and select Video 2.
Step 5. If you’re satisfied with the result, export the video from Premiere Pro.

How to Place Video Inside Text in DaVinci Resolve
DaVinci Resolve is a professional video editor that integrates color grading, color correction, visual effects, motion graphics, editing, and audio post-production. Its free version is powerful enough to complete various tasks and is the favorite video editor for many content creators. How to add video inside text in DaVinci Resolve? Follow the steps below.
Step 1. Launch DaVinci Resolve, create a new project, import your video, and drag it to the timeline.
Step 2. Drag your video to the Video 2 track on the timeline.
Step 3. Go to the Video 1 track, click Effects on the top, expand Toolbox, select Titles, choose a text style, and drag it to the Video 1 track.
Step 4. Select your video in the Video 2 track and click the Disable Video Track button.
Step 5. Select the text track, and edit your text in the Title settings. If you can’t access these settings, click Inspector > Video > Title.
Step 6. Go to the Video 2 track and click the Enable Video Track button; Select your video, go to the Composite section under the Video tab, open the Composite Mode drop-down list, and choose Darken. Your video will immediately be displayed in the text.
Step 7. Render video from DaVinci Resolve.
MiniTool MovieMakerClick to Download100%Clean & Safe
Conclusion
This post explains how to place video inside text using 3 excellent video creation applications. Now, choose your favorite tool and create your video inside text effect.
About The Author

Position: Columnist
Cora is a tech writer specializing in digital media workflows, with over six years of hands-on experience in video post-production, media transcoding, and screen capture. Her writing is always clear and practical. Cora also produces in-depth software reviews for users across skill levels to help them find the right tool and enjoy video editing.
User Comments :