How to Add Text to a Video in Sony Vegas
This part offers a step-by-step guide on how to add text to a video in Sony Vegas and you can refer to the below steps.
Step 1. You need to go to the official website to download its installation package and you can download its free version to have a try. Then you can install it on your desktop, run it, and create an account. Later, you can use its free trial to add text to your video.
Step 2. Click the File tab on the top menu bar and choose the New option. You can check all the settings of the new project like video aspect ratio, destination, audio sample rate, and more. Then click on OK.
Step 3. Click the File tab, move the cursor to the Import option, and click on the Media… option. You can choose the video from your computer and click Open to import it.
Step 4. Then directly drag and drop the video to the timeline.
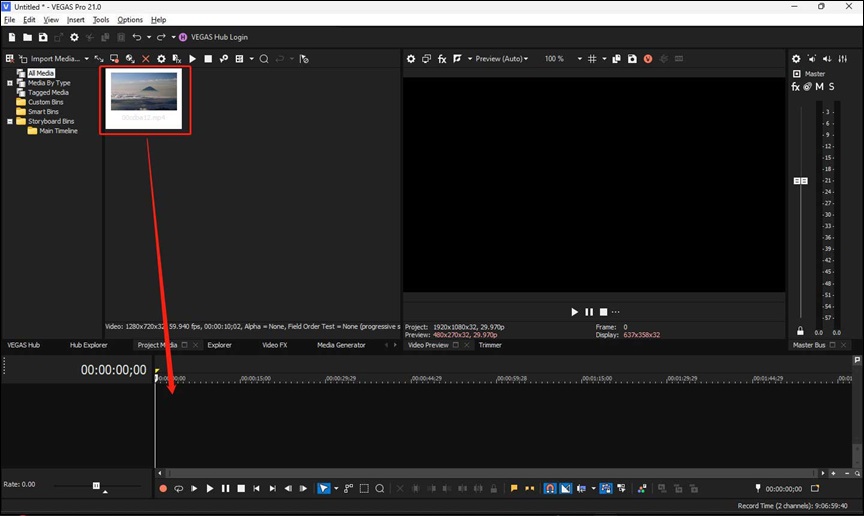
Step 5. Right-click on the timeline and click on the Insert Video Track option to add an empty video track. This empty track will appear at the top of the video.
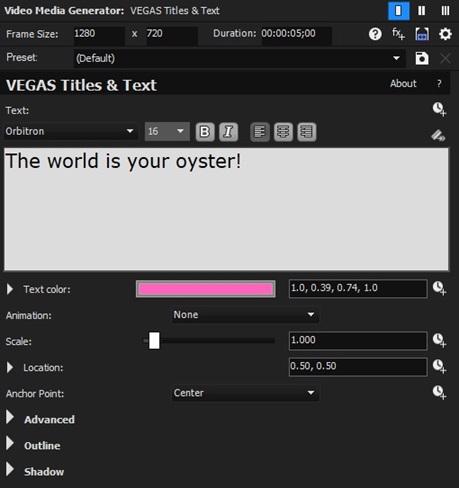
Step 6. Move the playhead to the place where you want to add text, right-click on the empty video track, and click on the Insert Text Media… tab. Or you can click the Media Generator tab on the top of the timeline, click on the Title & Text tab, choose one style you like, and directly drag it to the empty video track.
Step 7. You can set the font, choose the text color, and enter the words you want to add. Also, you can set the text duration, adjust its location, outline the text, highlight the text, and more. Later, just close the popup.
Step 8. Click on File, choose the Render As… option, adjust the output parameters like its format and destination, and click on the Render button.
Also read: How to Blur Things in Sony Vegas & Alternative Way (Full Guide)
Alternative Way to Add Text to a Video
You can only use the free trial of Sony Vegas for 30 days and its pricing plan is expensive. If you don’t want to use it and want to try a free video editor, MiniTool MovieMaker is the best choice. It provides you with 3 types of text including captions, credits, and titles. Moreover, it has various editing features like adding transitions, effects, and animated stickers, fading music, and more.
Step 1. Click the below download button to get the installation package of MiniTool MovieMaker and install it on your computer.
MiniTool MovieMakerClick to Download100%Clean & Safe
Step 2. Enable MiniTool MovieMaker, close the popup, click the Import Media Files area to upload your video from your computer.
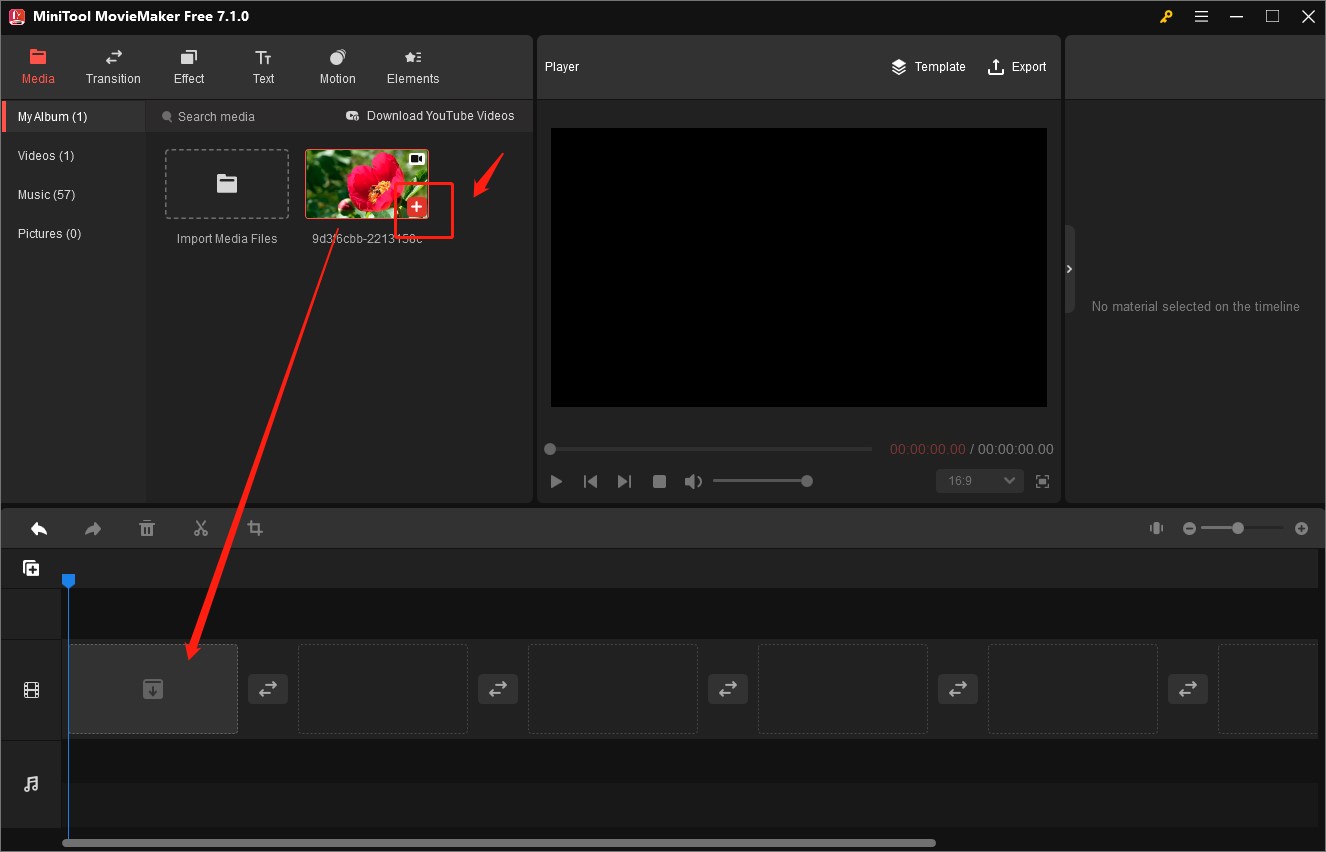
Step 2. Click the plus icon on the target video to add it to the timeline or directly drag and drop it to the timeline.
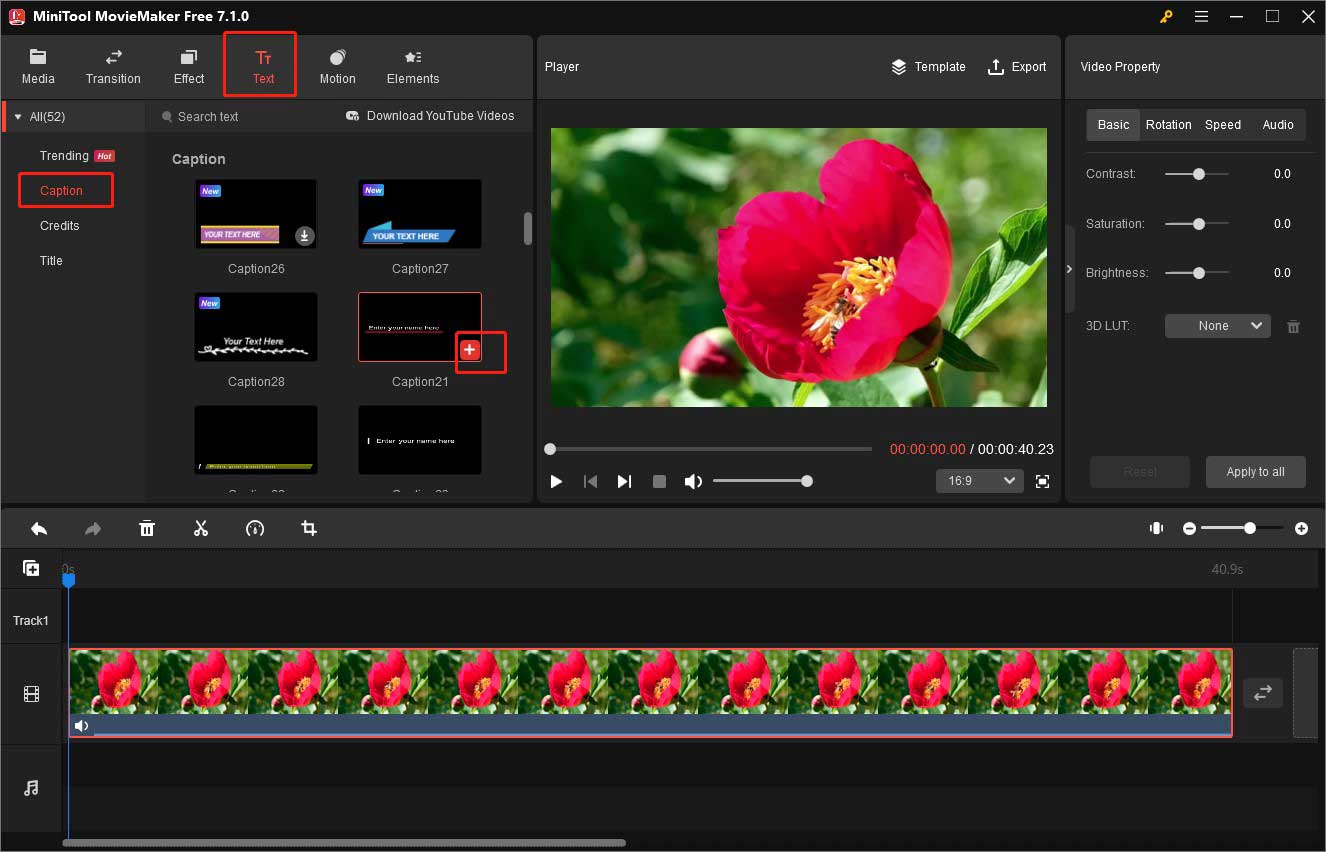
Step 3. Click on the Text tab and there are 3 types of text you can use. If you want to add captions, you can click the Caption tab on the left side, choose a style you like, and click the plus icon on it to add it or directly drag it to the location you want to add text.
Step 4. In the Text Property section, you can type words in the Text Editor box and make other text editions. If you want to adjust the duration of the text, you can move your cursor to the end of the text until it becomes a double-arrow and drag it toward the right to make the text duration longer.
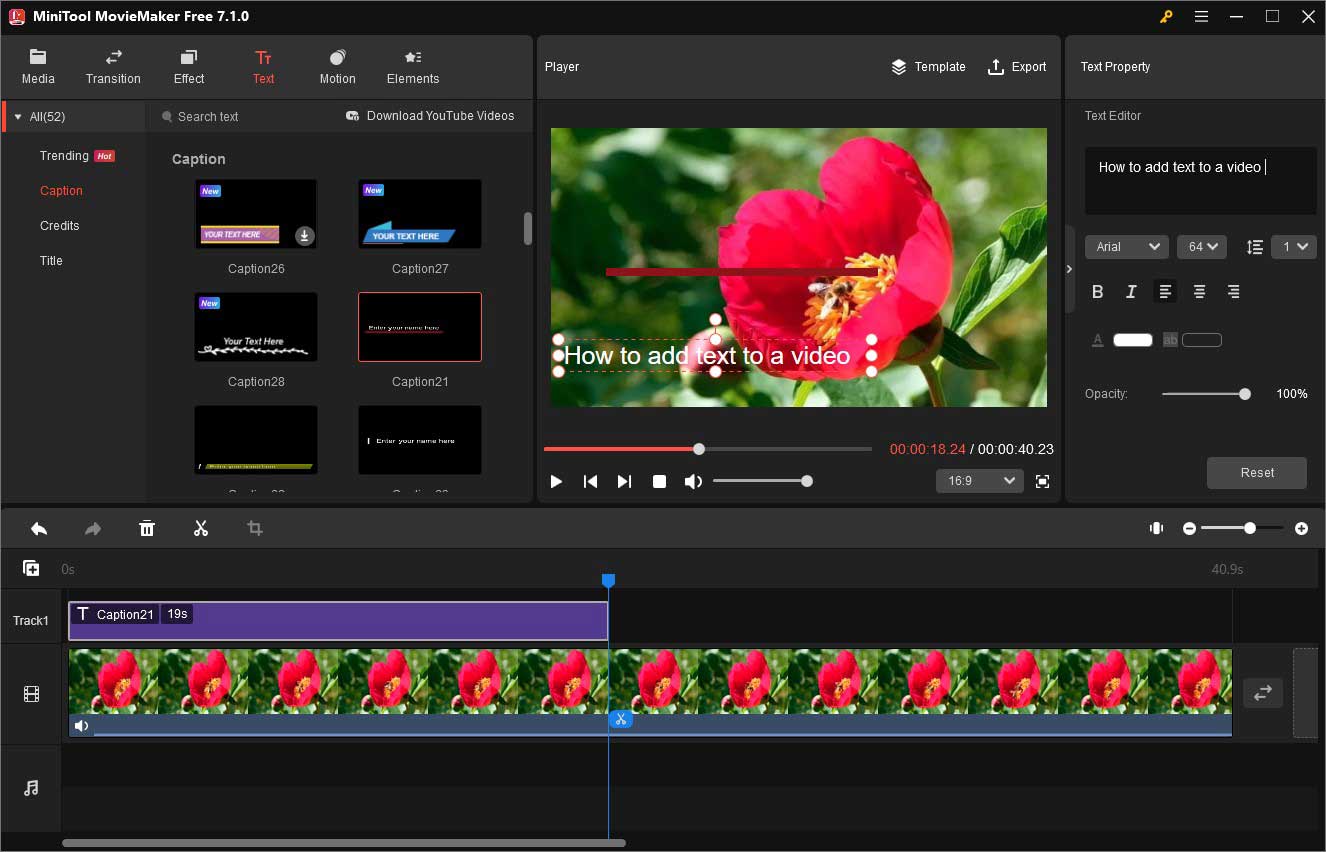
Step 5. You can also use its various editing features to make your video stunning.
Step 6. Click the Export icon in the Player section, choose its final destination, set its format, and personalize other output parameters. Finally, click on the Export button.
Also read:
A Guidance on How to Remove Audio from Video in VLC [Windows/Mac]
Can Camtasia Speed Up Video? Here’s a Step-by-Step Guidance
Conclusion
The above has shown you how to add text to a video in Sony Vegas. If you need a free and useful video editor, you can try MiniTool MovieMaker. Hope this post is helpful to you!


![How to Edit Webex Recording on PC [Step-by-Step Guidance]](https://images.minitool.com/moviemaker.minitool.com/images/uploads/2023/10/edit-webex-recording-thumbnail.jpg)
User Comments :