Do you know whether VLC can remove audio from video and how to remove audio from video in VLC? This MiniTool MovieMaker post will give you the answer and solution, just keep reading this post!
VLC Media Player is a versatile program that can play multiple media as a player, rotate and combine videos as a video editor, convert videos or rip DVDs as a video converter, and others. Also, VLC Media Player allows you to remove audio from video. The following content will show you how to remove audio from video VLC on Windows and Mac.
How to Remove Audio from Video in VLC on Windows
There are two different methods to remove audio from video in VLC. You can remove audio from video by directly getting rid of the audio track or disabling audio. If you want to remove audio from the video permanently, you should try the first method. Because the second method can only remove audio from video while playing.
#Get Rid of Audio from Video
Step 1. Download and install VLC on your computer and open it.
Step 2. Click the Media tab on the top menu bar and choose the Convert/Save… option to open the Open Media popup.
Step 3. Click the +Add… button to import a video from your computer and click on the Convert/Save button.
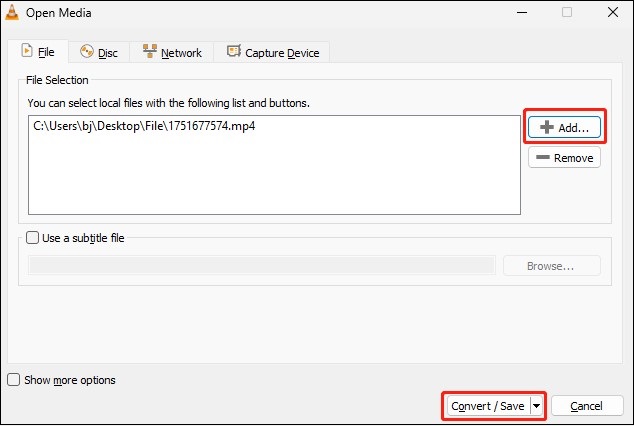
Step 4. Click the wrench icon behind Profile in the Convert window, click the Audio codec tab, and untick the Audio option.
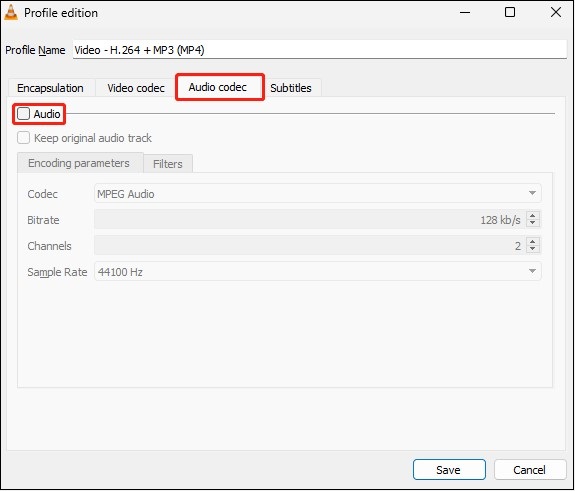
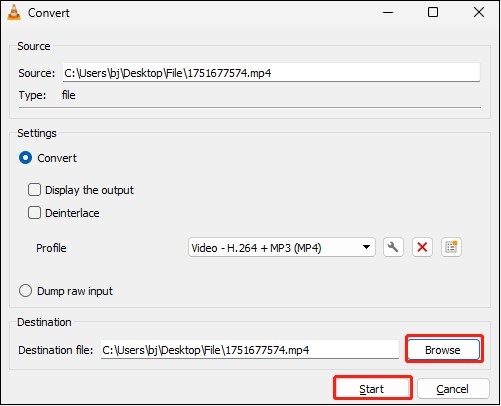
Step 5. Click on Save in the Profile edition window, click Browse to choose the final location for saving your video, and click the Start button in the Convert window to export your video.
#Disable Audio
Step 1. Launch VLC Media Player, click on Media, and choose the Open Files… option to upload your video.
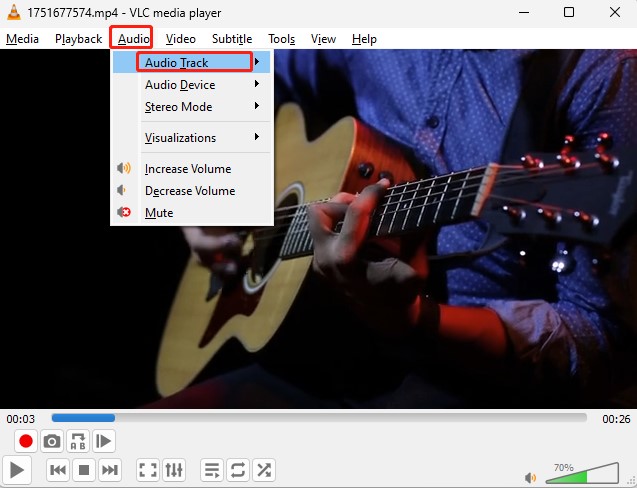
Step 2. Click the Audio tab on the top menu bar, select Audio Track, and choose the Disable option. You can also remove audio by clicking on Decrease Volume until there is no audio or choosing the Mute option.
Also read: How to Rotate a Video on Instagram Using Windows/iPhone Editors
How to Remove Audio from Video in VLC on Mac
This part shows detailed steps to remove audio from video VLC.
Step 1. Get VLC on your Mac and install it on your desktop.
Step 2. Enable VLC, go to Media, and click on the Convert Stream… option.
Step 3. To import your video, click on Open Media… or directly drag and drop your video in the area.
Step 4. Click on the Audio codec tab, deselect Audio, and click on Apply.
Step 5. Click on the Save as File button, choose its final destination, name it, and click on Save.
An Alternative Way to Remove Audio from Video
Sometimes, you may not only want to remove audio from video but also make other editions. VLC Media Player can’t meet your needs, you’d better try a more full-featured free video editor like MiniTool MovieMaker. It is a good alternative way to remove audio from video. Here’s how:
Step 1. Click the below download button to get MiniTool MovieMaker’s installation package and install it on your desktop.
MiniTool MovieMakerClick to Download100%Clean & Safe
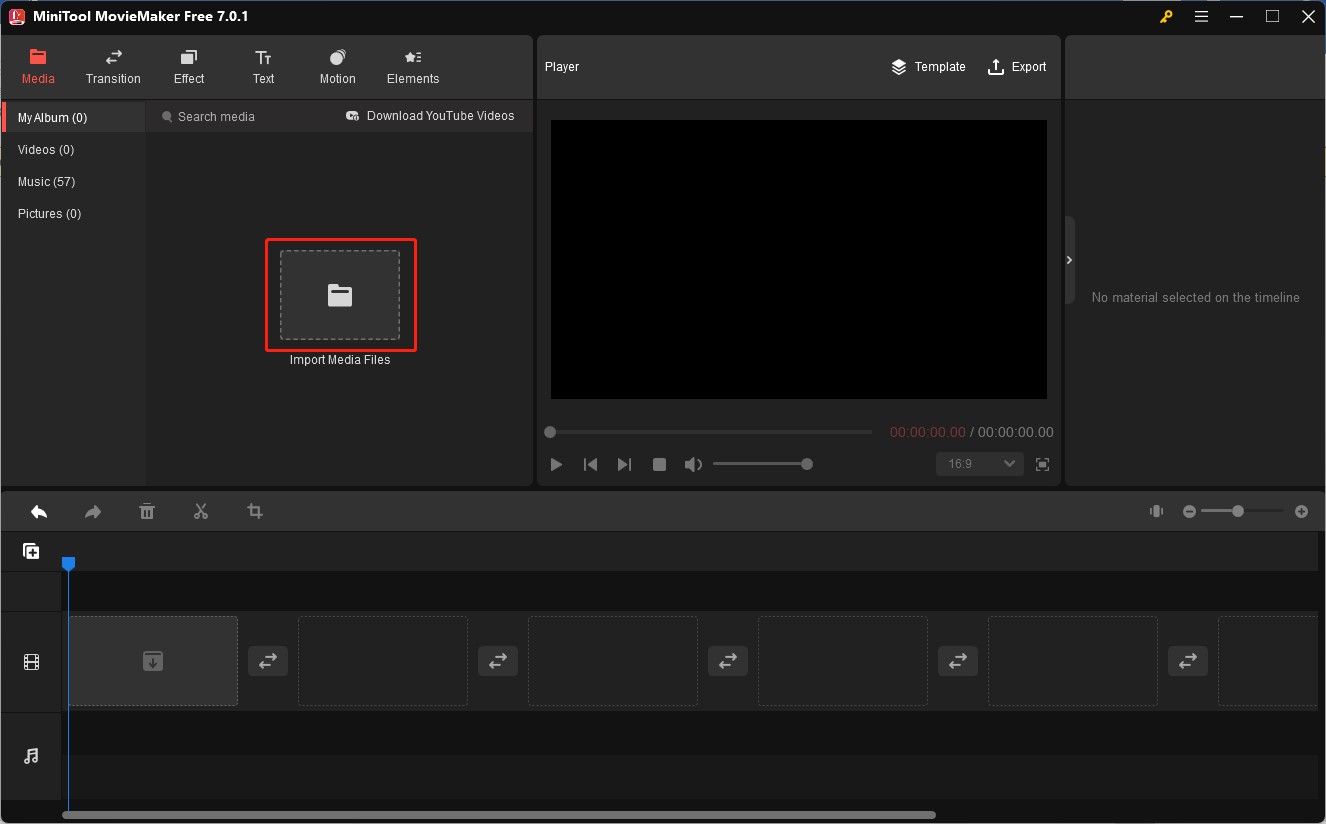
Step 2. Launch MiniTool MovieMaker and close the popup. Click Import Media Files to upload your video from your computer and directly drag and drop it to the timeline.
Step 3. Click the target video clip on the timeline to highlight it and click the speaker icon framed in the below screenshot to mute the audio.
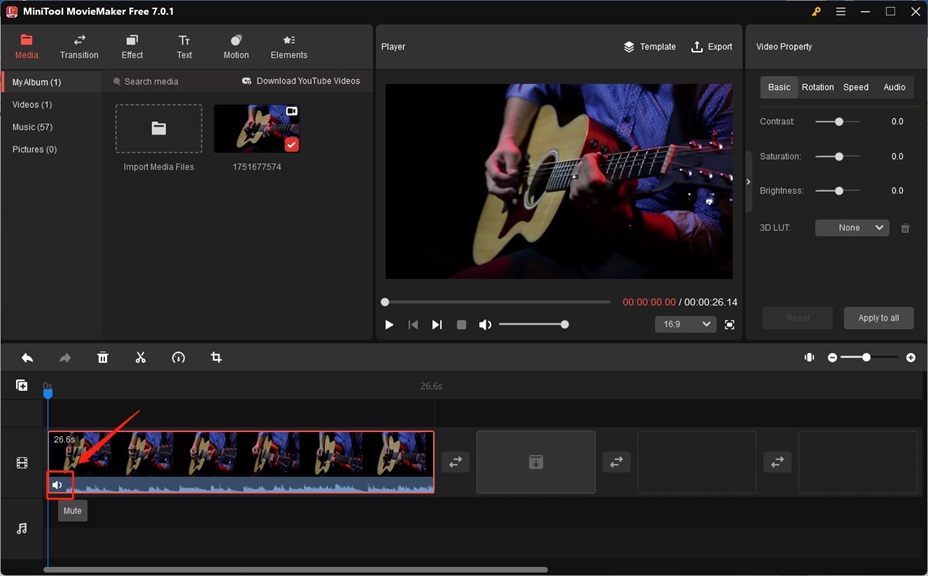
Or go to the Video Property window, click the Audio tab, and drag the Volume slider to mute the audio.
Step 4. You can make other editions like adding filters, applying motion effects, adding text, reversing a video, and more.
Step 5. If you are satisfied with this video, you can click the Export icon in the Player section, adjust the output parameters, and click on the Export button to save it.
Conclusion
Through the above content, we learn how to remove audio from video in VLC on Windows and Mac. Also, you can try MiniTool MovieMaker to mute audio and make other editions to fine-tune your video.



![How to Resize YouTube Video [Windows/Mac/Phone/Online]](https://images.minitool.com/moviemaker.minitool.com/images/uploads/2023/10/resize-youtube-video-thumbnail.jpg)
User Comments :