How to Add Speech Bubbles to Videos in CapCut PC
CapCut desktop app provides a variety of editing tools and possibilities for creating high-quality and professional videos, such as the text behind the person effect, adding frames, video stabilization, smart split, and more. In this section, let’s see how to add speech bubbles to videos in CapCut.
Step 1. Download and install the CapCut desktop app on your PC. Launch this application and sign in with your account.
Step 2. Click the + Create project button to enter the app’s main interface. Click + Import to open your video.
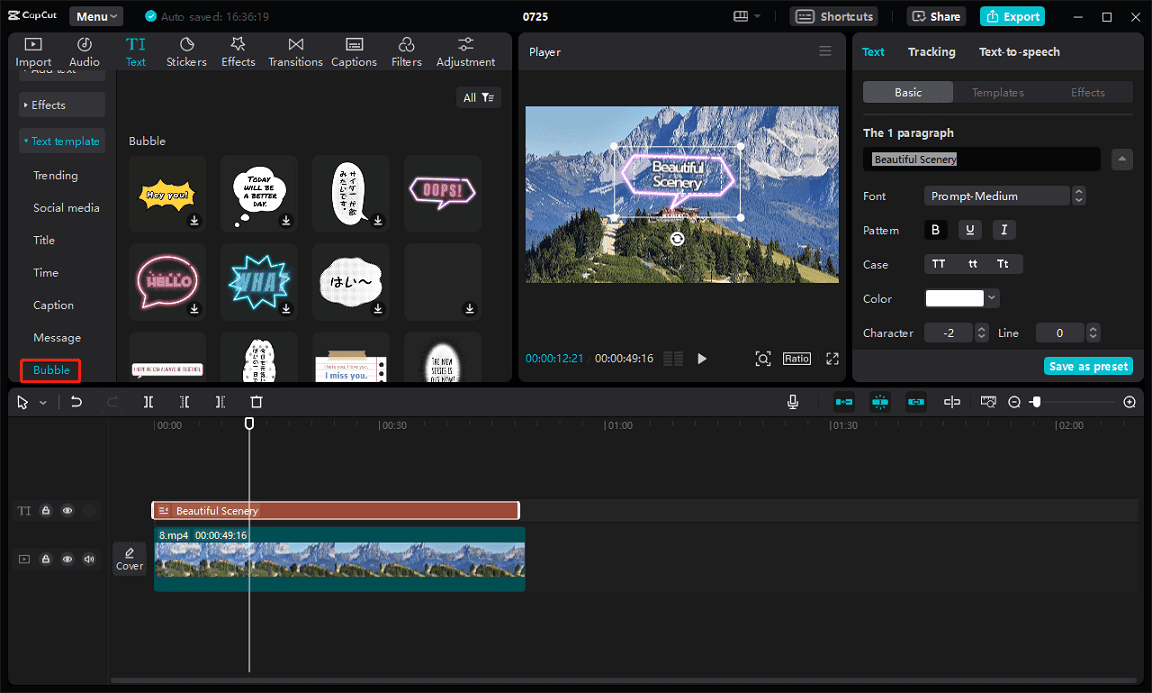
Step 3. Add the video to the timeline. Move the white playhead to where you want the speech bubble to appear, go to Text on the top toolbar, open the Text template drop-down list, and choose Bubble.
Browse these speech bubbles and download your favorite one. Click the + at the bottom of the bubble to add it to the timeline and you can edit your text on the right Text section. You can drag the edges of the text track to change its duration.

Step 4. If you’re satisfied with the result, click Export to export the video.
How to Add Speech Bubbles to Videos in Canva
Canva is an online video editor that offers multiple features for creating videos, social media posts, and more. It allows you to draw on the video, add text, crop videos, change video speed, apply filters, etc. In addition, it provides various graphics and frames to decorate your videos and photos including diverse bubbles.
Here’s how to put speech bubbles in a video in Canva.
Step 1. Go to the Canva website and log in with your account. Click the Create a design button in the upper right corner, and select Video from the list.
Step 2. Click Uploads > Upload files to import your video and then add it to the timeline.
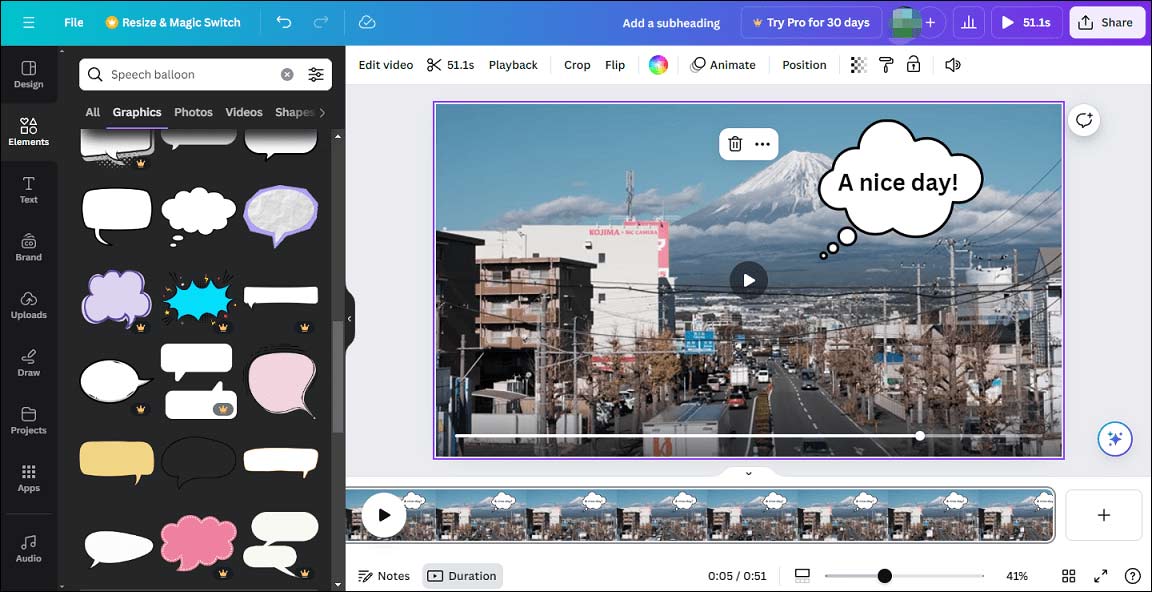
Step 3. Go to Text, choose a text style, and edit your text. Next, click Elements, type “speech bubbles” in the search bar, click a bubble to add it to the video frame, and drag your text into this bubble.

Step 4. Click Share and Download to export the video as an MP4 file.
How to Add Speech Bubbles to Videos in FlexClip
FlexClip is also a web-based video editing tool that you can use to create videos with text, music, animations, and other effects. It also lets you add text bubbles to videos.
Step 1. Navigate to the FlexClip website and log in.
Step 2. Click the Create a Video button in the upper left corner and select an aspect ratio for your video.
Step 3. Import your video and drag it to the timeline.
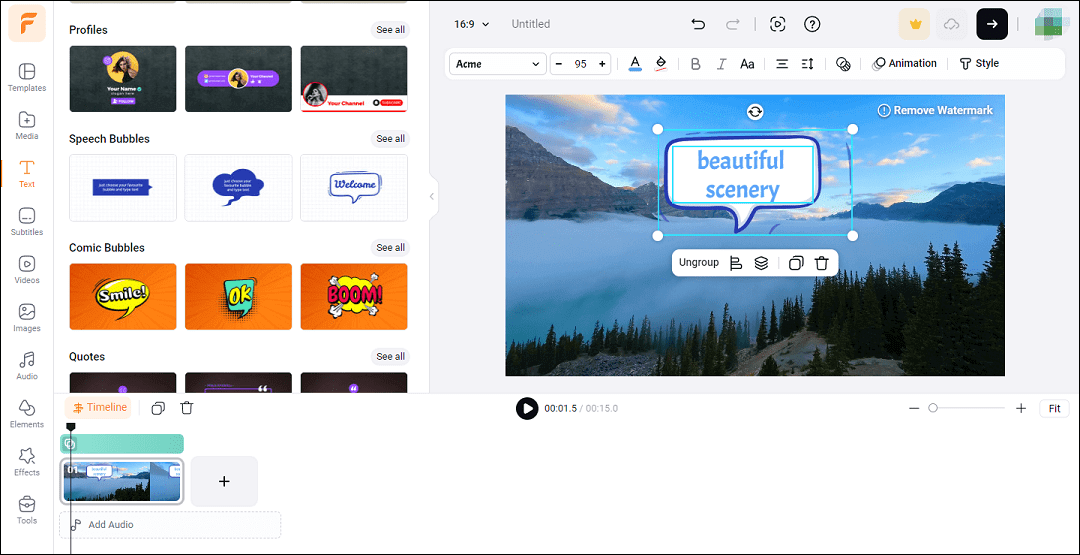
Step 4. Click the T icon on the left sidebar, scroll down to the Speech Bubbles section, and click See all to open all the speech bubbles. Click a bubble to add it to the video preview window. Then, edit your text and resize the speech bubble.

Step 5. Click the arrow icon to export the video.
MiniTool MovieMakerClick to Download100%Clean & Safe
Conclusion
It’s easy to add speech bubbles to videos. Now, it’s your turn. Follow the steps above to decorate your video with a text bubble.


![[Solved] How to Fix Canva Something Went Wrong Errors: 8 Ways](https://images.minitool.com/moviemaker.minitool.com/images/uploads/2022/12/canva-something-went-wrong-500-thumbnail.jpg)

User Comments :