Premiere Pro is a professional video editor that can add different shapes like rectangles, ellipses, polygons, arrows, and other shapes. How to add shapes in Premiere Pro? Is there any free and easy video editor to add shapes and edit videos? This post offered by the free video editor – MiniTool MovieMaker will give you detailed guidance and recommend an alternative to Premiere Pro for editing videos easily.
How to Add Shapes in Premiere Pro
Premiere Pro is a non-linear video editor developed by Adobe and has various basic and advanced editing features. You can use it to add graphics and shapes easily, make color corrections, add attractive effects and transitions, mix audio, and more. To help you add shapes to a video in Premiere Pro, this part will show you a detailed guide on How to add shapes in Premiere Pro.
Step 1. After launching Premiere Pro, you need to click the File tab, move to New, and select Project to create a new project. Next, you need to upload the video clip in which you want to add shapes. Just click File again, click Import to upload your video, and then the video will appear in the Project panel. Later, directly drag and drop the video onto the timeline.
Step 2. Go to the Graphics workspace. You can directly click Graphics on the top menu bar. Or you can go to Window > Workspace > Graphics Panel.
Step 3. Then select the shape, such as rectangle, ellipse, or polygon tools, move your cursor to the Program Monitor, and drag the cursor to draw the shape you choose. Once you are satisfied, you can press Enter to hold the new shape in place. You can see a new graphic space on the timeline.
Step 4. To transform the shape, you can hold the rectangle tool. There will appear the option for ellipse and polygon and you can select the desired shape.
Step 5. Edit and customize the shape. You can go to Window > Essential Graphics. Alternatively, you can use the editing bar in the Fx control panel.
Step 6. After making other editions, you can click File and select Export to save the video clip with shapes.
An Easy Alternative to Add Shapes and Edit Videos
As we all know, Premiere Pro is a paid program and not suitable for beginners. If you need a free and easy-to-use video editor, MiniTool MovieMaker is a good choice. With the intuitive and user-friendly interface of MiniTool MovieMaker, you can master how to use it quickly. It enables you to add shapes like arrows and circles and provides you with various editing features to fine-tune your videos. Here’s how to add shapes with MiniTool MovieMaker.
Step 1. Download and install MiniTool MovieMaker on your Windows PC and then launch it.
MiniTool MovieMakerClick to Download100%Clean & Safe
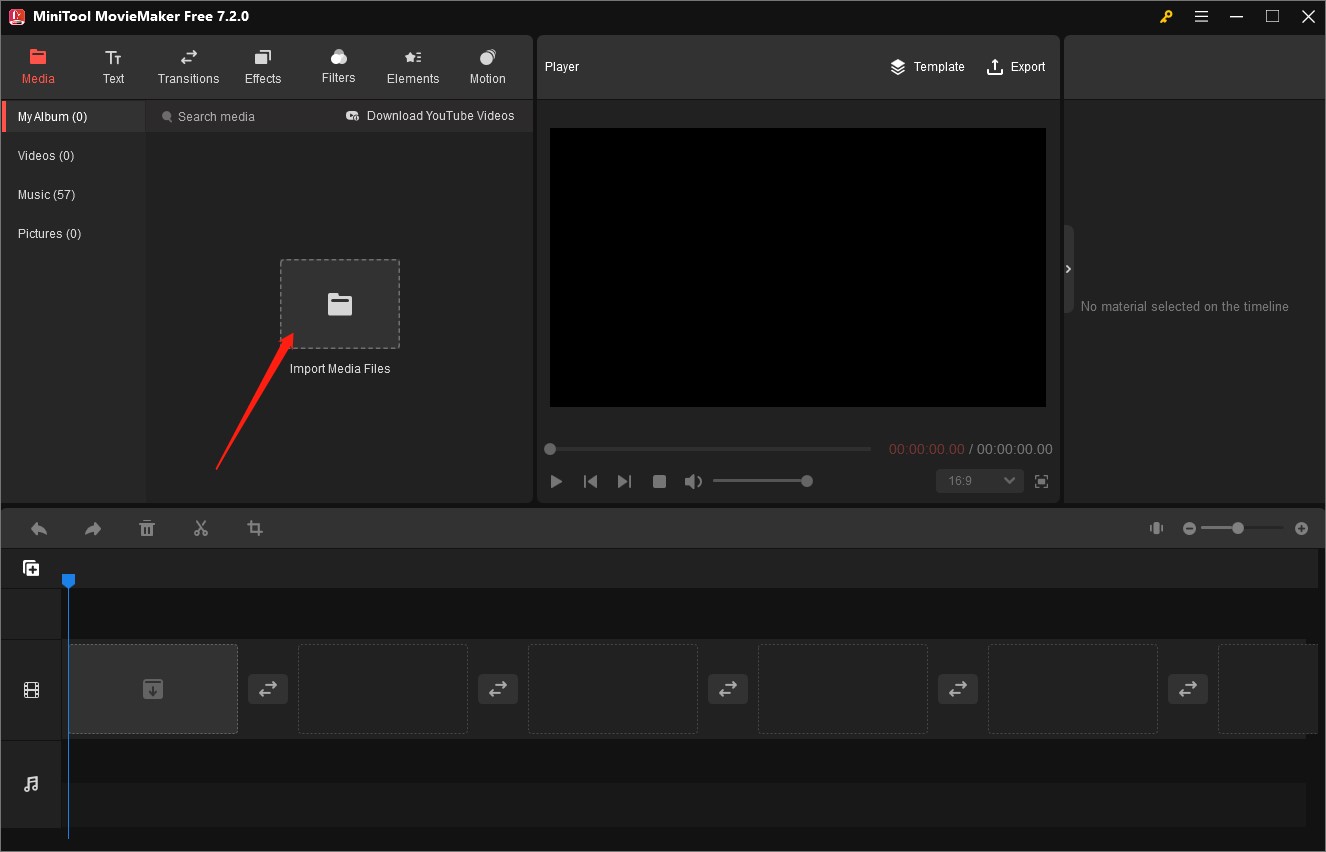
Step 2. Click on New Project to enter its main editing interface, click Import Media Files to choose a video from your computer, and click Open to import it. Then click the plus icon on it to add it to the timeline.

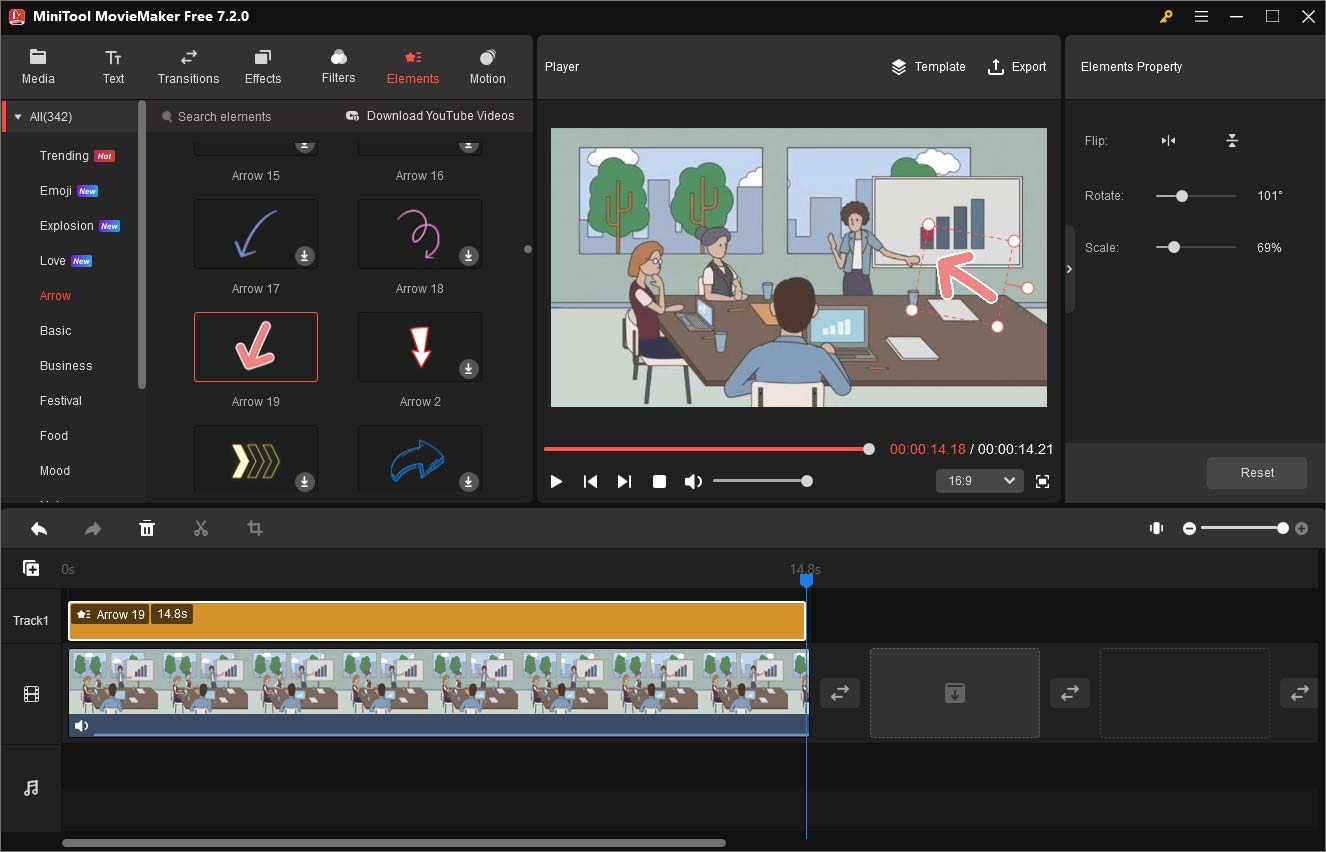
Step 3. Click the Elements tab, select the Arrow option, choose your preferred arrow, and directly drag and drop it onto the timeline. Next, you can directly adjust the position and size of the shape in the Player section and extend its duration on the timeline. Also, you can go to the Elements Property section for the edition.

Step 4. You can also make other editions like adding text, adding background music, rotating a video, making color corrections, and others,
Step 5. Later, you can click the Export option in the Player section to open the Export window. You can rename the video, change its saving path, set its format, and others. Finally, click the Export button.
Conclusion
The above has shown you how to add shapes in Premiere Pro. You can follow the above guidance to add shapes in Premiere Pro or use an easy video editor to add shapes. Now, it’s your turn.


![How to Add and Delete Keyframes in Premiere Pro [Detailed Guide]](https://images.minitool.com/moviemaker.minitool.com/images/uploads/2024/02/how-to-add-keyframes-in-premiere-pro-thumbnail.jpg)
![How to Add a Logo or Watermark in Premiere Pro [Detailed Guide]](https://images.minitool.com/moviemaker.minitool.com/images/uploads/2024/02/how-to-add-a-logo-in-premiere-pro-thumbnail.jpg)
User Comments :