After Effects is a motion graphics program developed by Adobe. How to use After Effects to reverse a video clip? How many ways can you reverse a video in After Effects? This post offered by the free movie maker from MiniTool will show you detailed guidance to reverse videos using After Effects.
After Effects is widely used in the post-production process of filmmaking, video games as well as television production. Its basic and advanced editing features can meet your different needs. It can help you reverse a clip with Time-Reverse Layer and Time-Remapping. In the following content, you will learn the detailed steps. Since After Effects only offers a 7-day free trial, we will recommend a free video editor to reverse videos easily. Now, let’s dive into this post!
How to Reverse a Clip in After Effects with Time-Reverse Layer
As its name suggests, Time-Reverse Layer can play a video backward. Here’s how:
Step 1. Open After Effects on your computer, click the File tab, and click Import to upload the video clip you want to reverse. Then directly drag and drop it onto the timeline.
Step 2. Right-click on the video layer on the timeline to activate the menu list, move to Time, and select the Time-Reverse Layer option. Alternatively, you can use the shortcut. Press Ctrl + Alt + R if you are a Windows user. Press Command + Option + R if you are a Mac user.
Step 3. Then the video will be reversed and you can choose to customize the video speed, contrast, and more. You can check the video in the Preview panel.
Step 4. If you are satisfied with the video, you can click the File tab and select Export to save the reversed video.
Reverse a Video in After Effects with Time-Remapping
Time-Remapping is usually used to speed up or slow down a video. Also, it enables you to reverse a video more accurately. Here’s how to reverse a video in After Effects using Time-Remapping.
Step 1. After adding the video to the timeline of After Effects, you also need to right-click on the video layer, select Time, and choose the Enable Time Remapping option. Or press Ctrl + Alt + T for Windows and Command + Option + T for Mac. Then you can see two keyframes are added at the start or end of the video.
Step 2. Take the first keyframe at the beginning of the clip to the end of the video clip.
Step 3. Take and drag the second keyframe to the beginning of the video clip.
Step 4. Preview it and you can find the video is reversed. If you want to edit the video speed, you can adjust the keyframes. The closer the keyframes, the faster the speed. Later, you can export your video.
A Good Alternative to After Effects for Reversing Videos Easily
After Effects is a professional tool with a complex interface, which is not suitable for beginners. Furthermore, it only has a 7-day free trial. MiniTool MovieMaker is a good video editor you can try. With its intuitive interface, you can master how to reverse a video quickly. In addition to reversing a video, it can also make other basic and advanced editions. For instance, you can make color corrections, fade audio, create slow motion, make a GIF from videos, make a moving picture, and more.
Below is how to reverse a video with the help of MiniTool MovieMaker.
Step 1. Download and install MiniTool MovieMaker. Next, launch it and close the promotion window.
MiniTool MovieMakerClick to Download100%Clean & Safe
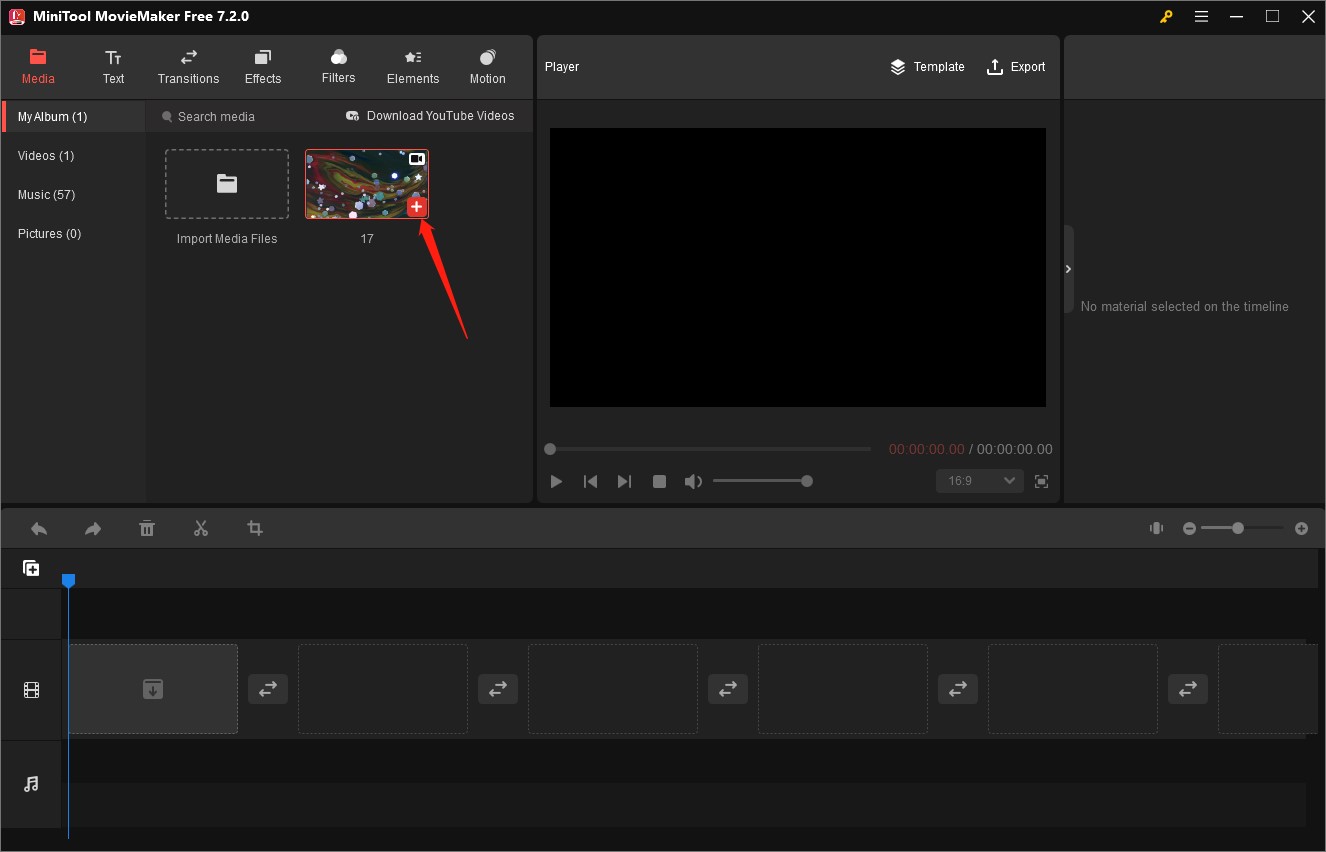
Step 2. Click Import Media Files to upload your video and then click the Plus (+) icon to add it to the timeline.

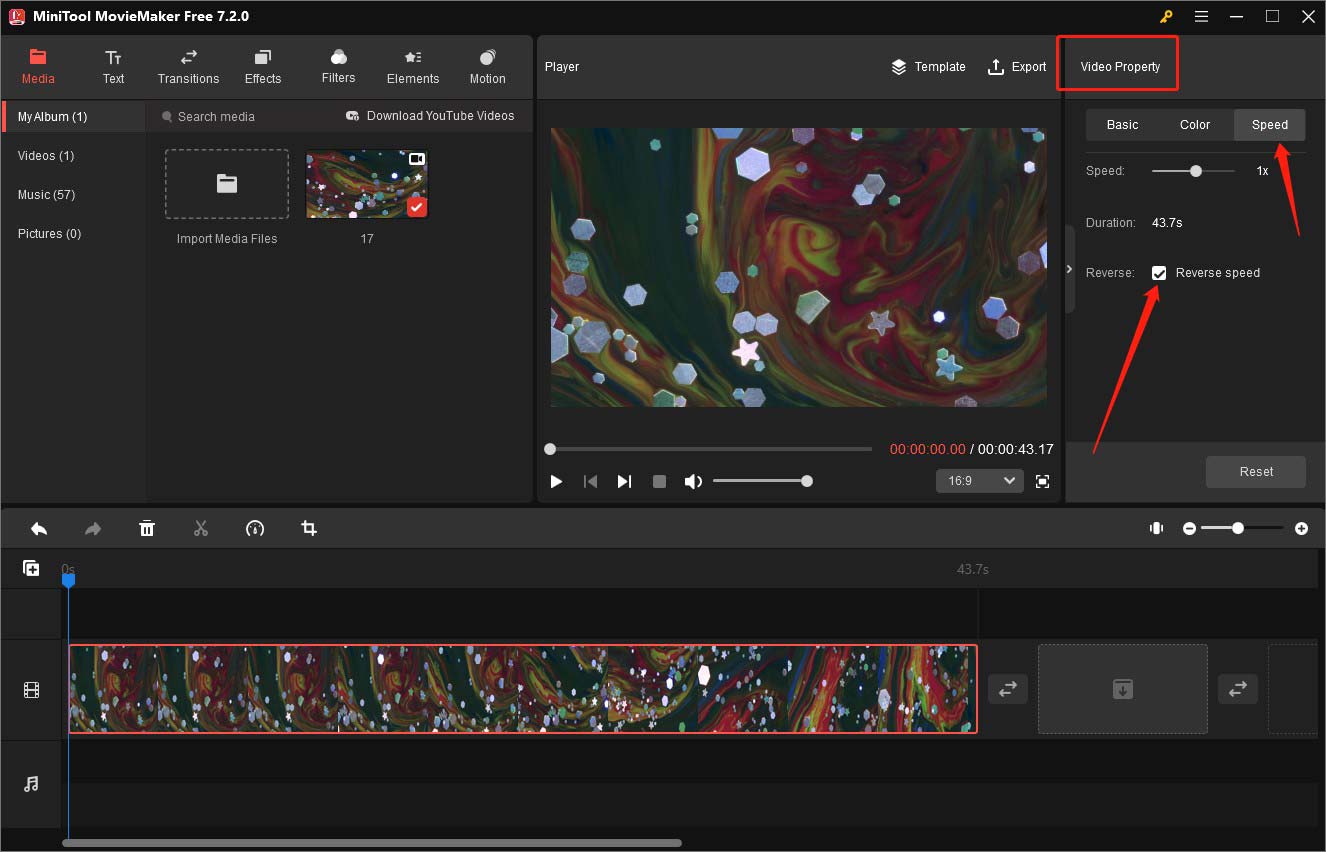
Step 3. Go to the Video Property section, click the Speed tab, and check the Reverse speed box.

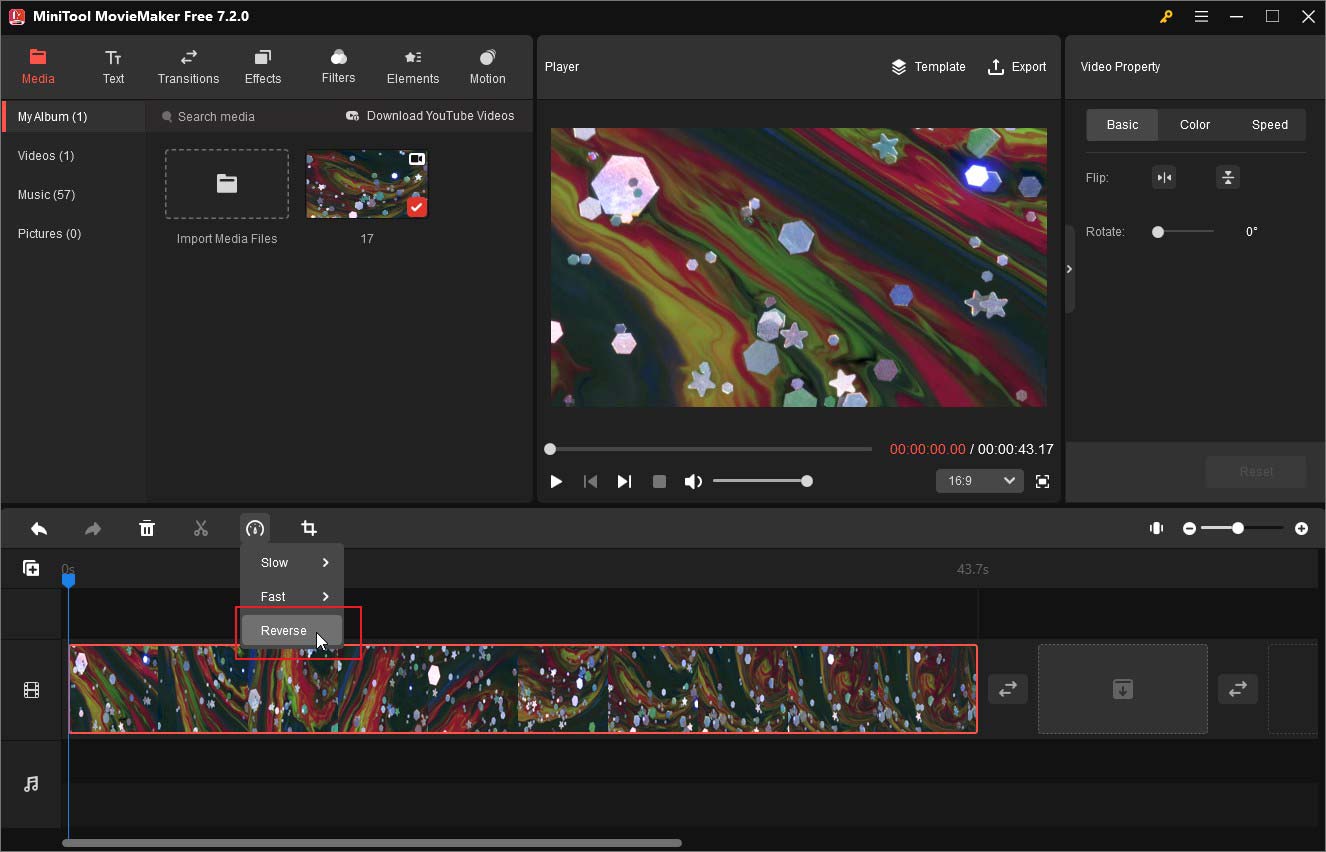
Or click the Speed icon on the timeline toolbar and click the Reverse option. You can go to the Player section to preview the video.

Step 4. You can also make other editions like editing video speed, adding text, applying filters, and others. Finally, you can click the Export option in the Player section to save the video.
Conclusion
You can use Time-Reverse Layer and Time-Remapping to reverse a video in After Effects. If you want to try a simple way, you can also use MiniTool MovieMaker.


User Comments :