There is no denying that music plays an important role in video and affects videos in many aspects. It can enhance the emotional expression of the video, create a specific atmosphere, evoke the audience’s resonance, and improve the video’s overall quality.
If you have some MOV videos on hand and want to add background music or replace the original music, you are in the right place. This post will explain two easy ways to add music to MOV file.
How to Add Music to MOV File in MiniTool MovieMaker
MiniTool MovieMaker is one of the best apps to add music to videos on Windows computers. You can explore its built-in music clips and sound effects or import audio from your PC and add it to the video. This app is simple to use and lets you export video in 1080P or 4K for free without watermarks.
Follow the steps below to add background music to MOV file in MiniTool MovieMaker.
Step 1. Click the button below to download and install MiniTool MovieMaker on your computer.
MiniTool MovieMakerClick to Download100%Clean & Safe
Step 2. Open the software and close the project library window to enter the main user interface and click the Import Media Files area to upload your MOV file. Then, drag and drop it to the timeline.
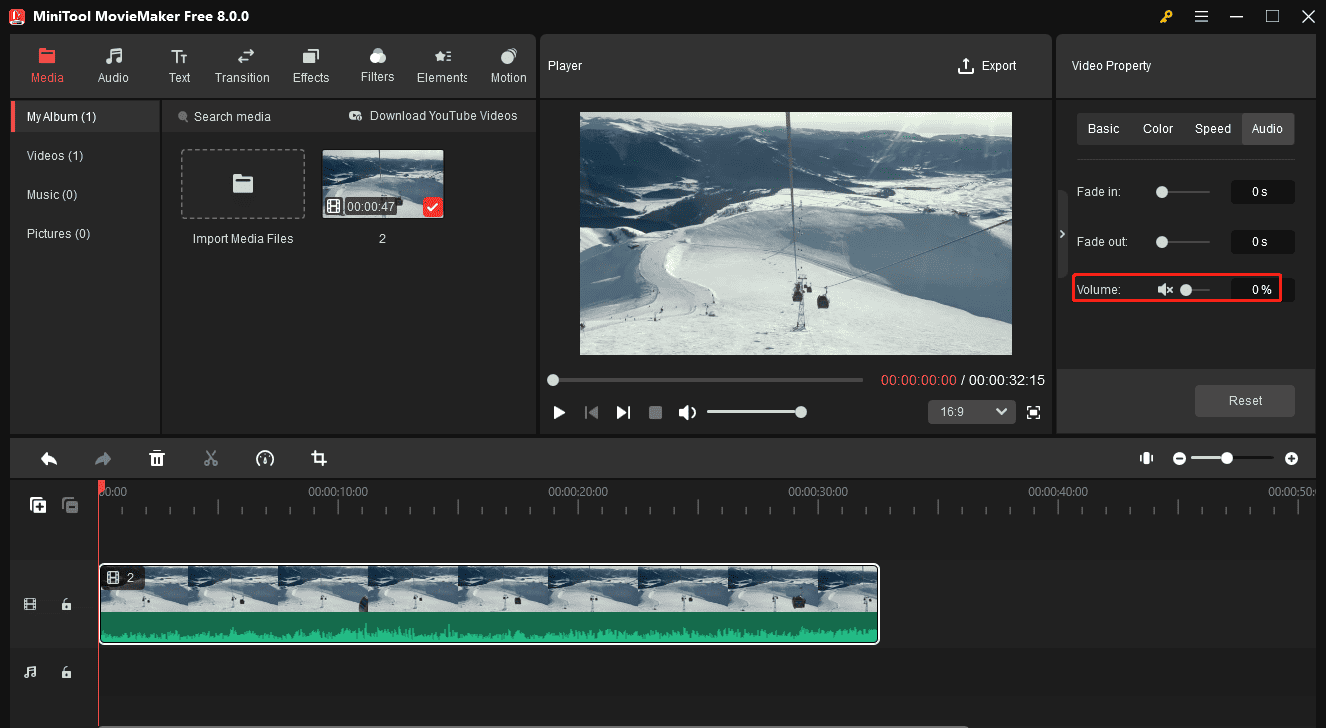
Step 3. If you want to mute the video before adding the background music, select it on the timeline, go to the Audio tab under Video Property, and set the Volume to 0%.
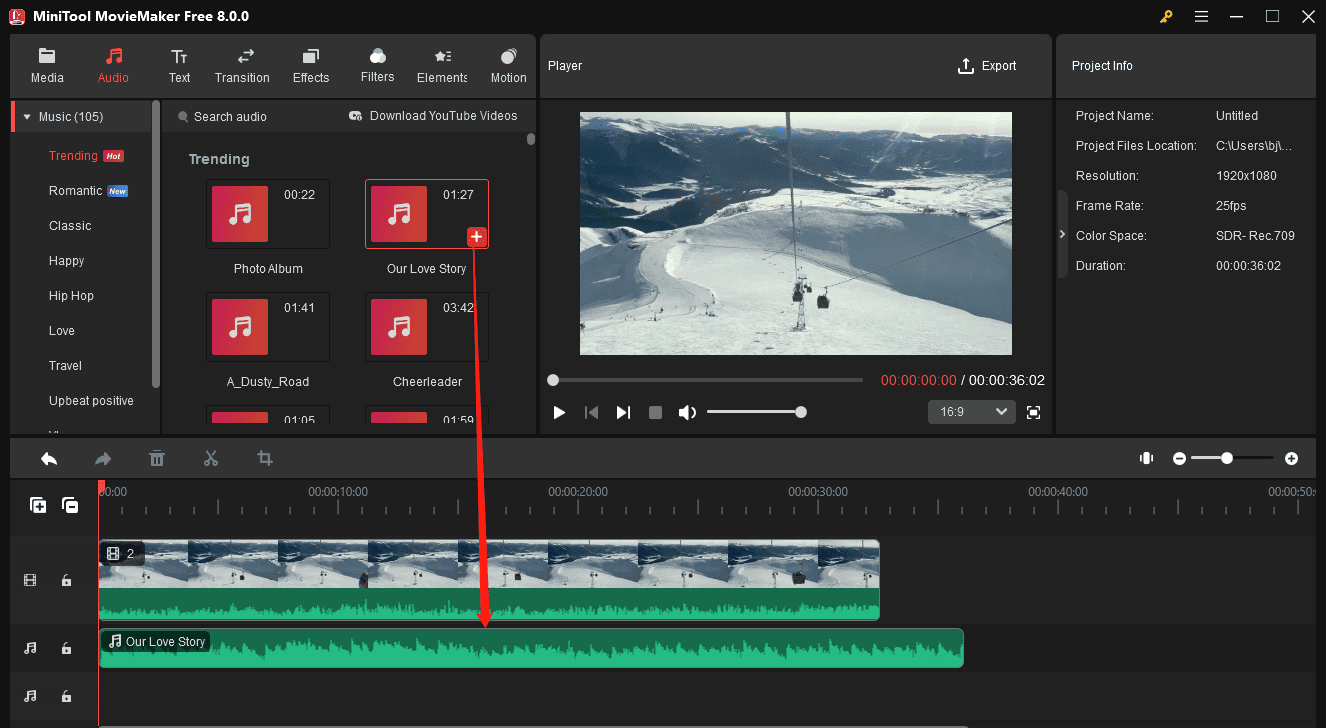
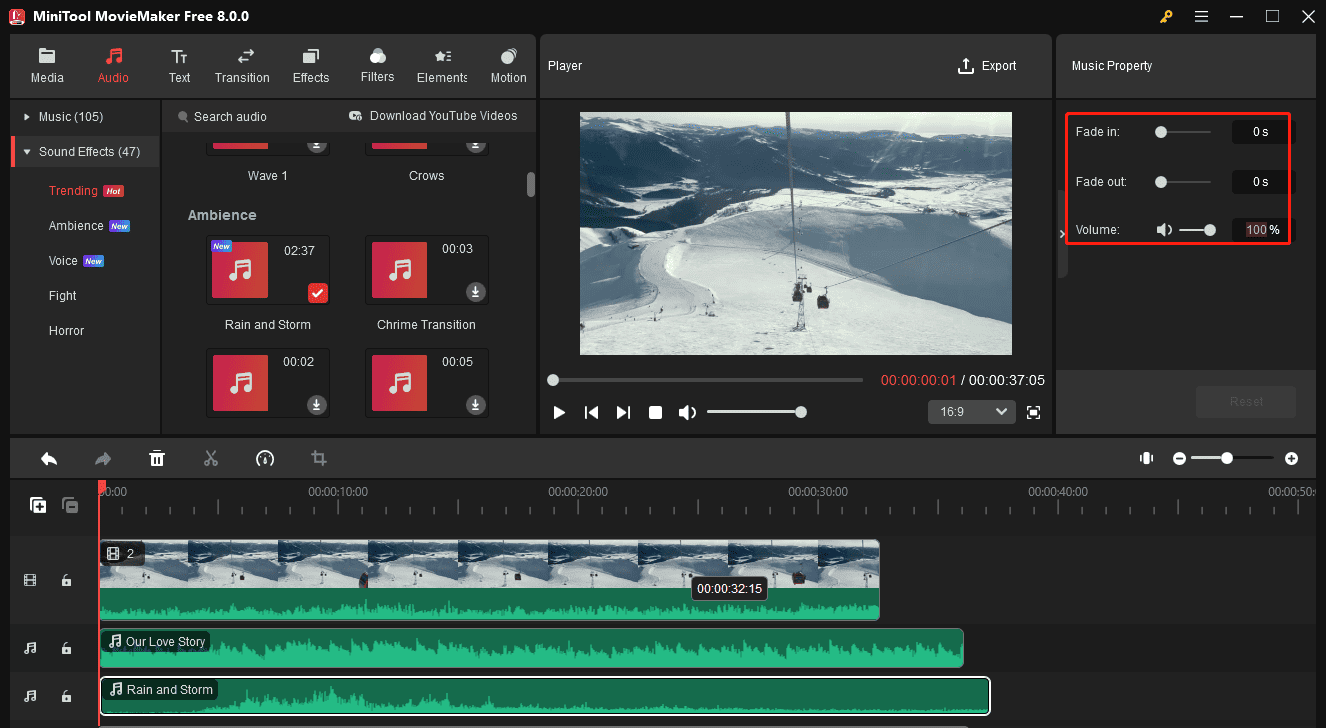
Step 4. Go to Audio at the top, expand the Music subtab, download a song, and click the + icon to add it to the timeline. Of course, you can go to Media > Import Media Files to import music saved on your PC. You can also add the second music or sound effect to the video. Just place it below the first audio track.
Step 5. It’s time to edit the music. Select the audio clip you want to edit to open Music Property. Then, you can apply the fade in/out effect and adjust the volume by dragging the slider or entering a number in the corresponding box.
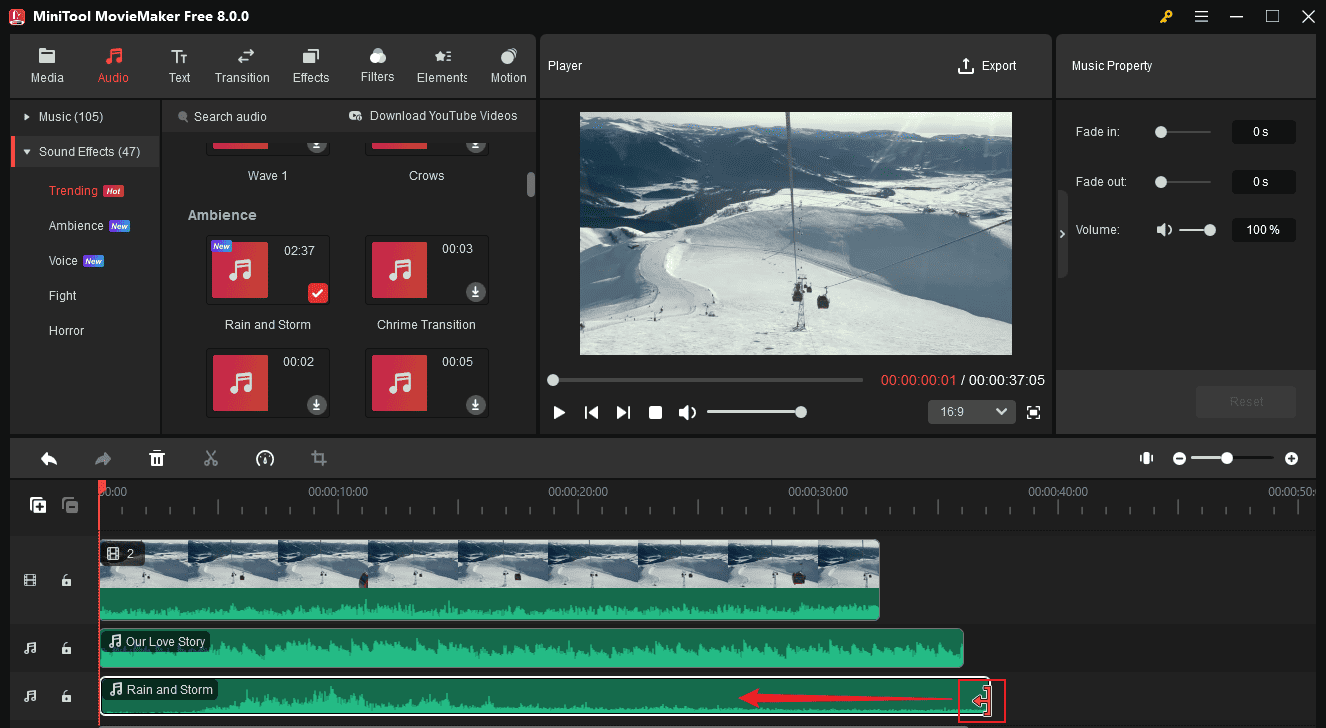
You may need to trim the music if it is longer than the video. To do this, select the audio clip, hover over the clip’s start and end until the Trim icon appears, and drag the Trim icon to trim the music.
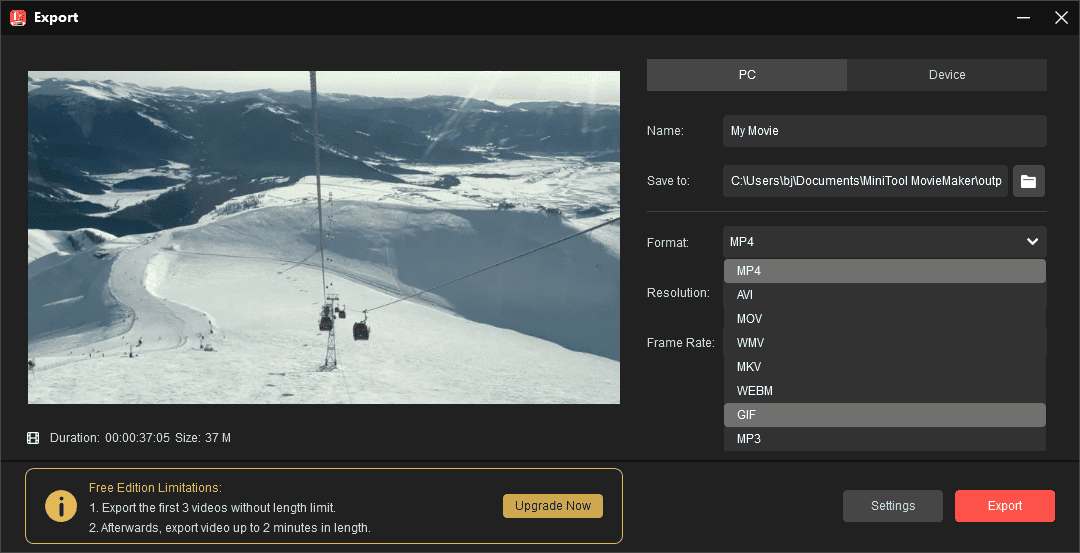
Step 6. Click the Export option to export the video. By default, MiniTool MovieMaker exports videos in MP4 format, but you can change it to MOV or other video formats in the Format drop-down list. Configure other settings and click the Export button to render the video.
Additionally, MiniTool MovieMaker allows you to crop videos, adjust video speed, change the aspect ratio, add text, apply filters, transitions, and more to create high-quality videos.
How to Add Music to MOV File in Microsoft Clipchamp
Microsoft Clipchamp is also a great way to add music to MOV file. This Windows 11’s built-in video editor offers a set of tools to help you edit videos. Here’s how to add music to a MOV file in Clipchamp.
Step 1. Open Microsoft Clipchamp and click the Create a new video button to start a new project.
Step 2. Click the Import media button in the upper left corner to open your MOV file and add it to the timeline.
Step 3. Click the + Add audio icon on the timeline to navigate to the Audio library in Clipchamp. Browse these audio tracks and find the target one. Click the + icon on the audio clip to add it to the timeline. Then, you can change the volume or use the noise suppression feature to reduce noise. This feature can be useful if your audio contains some noise.
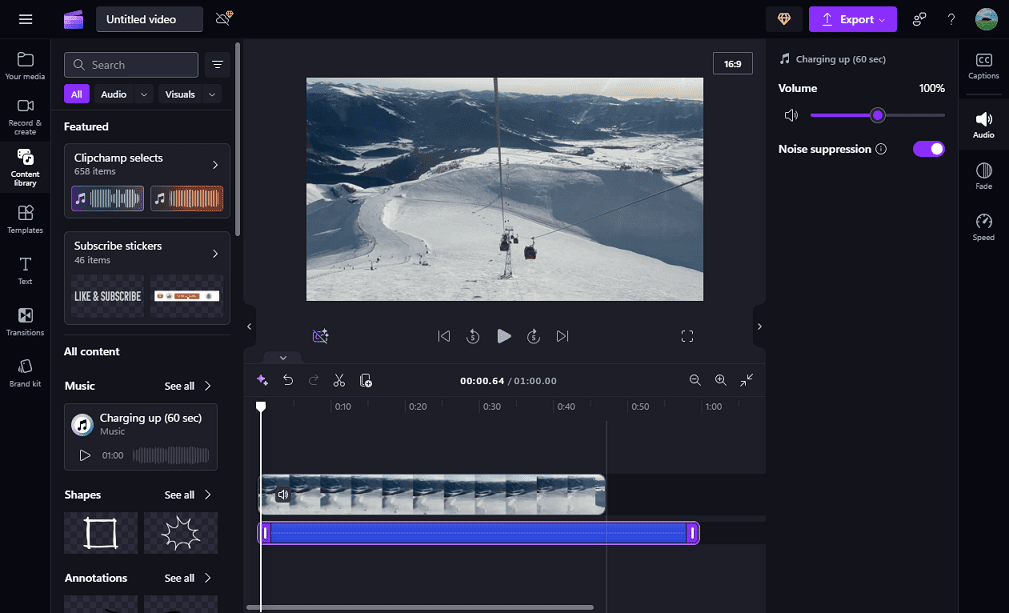
Step 4. Click the arrow next to the Export option and select a resolution, 480p, 720p, 1080p, or 4K (requiring Clipchamp Premium), to export the video.
Conclusion
Music is an indispensable part of a good video. Now, it’s your turn. Select an appropriate music clip and follow the steps above to add it to your MOV file.


User Comments :