Adding audio to your website can make it more engaging and interactive for your users. With HTML audio, you can easily embed audio files directly into your web pages. In this article offered by MiniTool movie editor, we'll cover everything you need to know about HTML audio, including the HTML audio tag, HTML audio player, and how to add audio to your website using HTML.
HTML Audio Tag
The HTML audio tag is used to embed audio files directly into your web pages. The tag has a number of attributes that can be used to customize the behavior of the audio player, including autoplay, loop, preload, and controls.
Here’s an example of the HTML audio tag in action:
<audio src=”audiofile.mp3″ controls></audio>
In this example, the audio file “audiofile.mp3” is embedded in the web page, and the controls attribute is used to display the audio player controls (play, pause, volume, etc.) to the user.
HTML Audio Attributes
The HTML audio element has several attributes that you can use to customize its behavior:
- src: The URL of the audio file to play.
- autoplay: Specifies whether the audio should start playing automatically when the page loads.
- controls: Specifies whether the default audio controls should be displayed.
- loop: Specifies whether the audio should repeat when it reaches the end.
- preload: Specifies whether the audio should be preloaded. Possible values are “none”, “metadata”, and “auto”.
HTML Audio Player
The HTML audio player is the graphical interface that allows users to control playback of the audio file embedded in your web page. By default, the HTML audio player will display basic controls such as play, pause, and volume. However, you can customize the appearance and functionality of the audio player using CSS and JavaScript.
HTML Play Audio
To play audio in HTML, you can use the audio tag and specify the audio file to play using the src attribute. For example:
<audio src=”audiofile.mp3″ controls></audio>
This will embed the audio file “audiofile.mp3” in your web page and display the audio player controls to the user.
HTML Audio Autoplay
The HTML audio autoplay attribute can be used to automatically start playing an audio file when the web page loads. For instance:
<audio src=”audiofile.mp3″ autoplay></audio>
Note that some web browsers may block autoplay for security reasons, so this feature may not work in all cases.
HTML Audio Autoplay False
Some browsers block autoplay of audio and video to prevent unwanted playback. To ensure that your audio player works in these browsers, you should set the autoplay attribute to false. For example:
<audio controls autoplay=”false”> <source src=”audiofile.mp3″ type=”audio/mp3″ /> </audio>
HTML Audio Element
The HTML audio element is the core element used to embed audio files in your web pages. It supports a wide range of audio formats, including MP3, Ogg, and WAV.
What is the Correct HTML Element for Playing Audio Files?
The correct HTML element for playing audio files is the audio element. This element can be customized using a range of attributes to control the behavior and appearance of the audio player.
HTML Audio Controls
The HTML audio controls attribute can be used to display standard audio player controls (play, pause, volume, etc.) to the user. For example:
<audio src=”audiofile.mp3″ controls></audio>
This will embed the audio file “audiofile.mp3” in your web page and display the audio player controls to the user.
Embed Audio HTML
To embed audio in HTML, you can use the audio tag and specify the audio file to embed using the src attribute. For instance:
<audio src=”audiofile.mp3″></audio>
HTML Audio Volume
The HTML audio volume attribute can be used to set the volume of the audio player. This attribute accepts values between 0 (silent) and 1 (maximum volume). This is an example:
<audio src=”audiofile.mp3″ volume=”0.5″></audio>
This will embed the audio file “audiofile.mp3” in your web page and set the volume to 50%.
HTML Audio Preload
The HTML audio preload attribute can be used to specify whether the audio file should be preloaded (downloaded) when the web page loads. The preload attribute accepts three values: “none”, “metadata”, and “auto”. For example:
<audio src=”audiofile.mp3″ preload=”none”></audio>
This will embed the audio file “audiofile.mp3” in your web page and prevent it from being preloaded.
HTML Audio Autoplay Not Working
If the HTML audio autoplay feature is not working, it may be blocked by the user’s web browser for security reasons. To work around this, you can add a play button or other user-triggered event to start the audio playback.
HTML Audio Loop
The HTML audio loop attribute can be used to automatically loop the audio file playback. For example:
<audio src=”audiofile.mp3″ loop></audio>
This will embed the audio file “audiofile.mp3” in your web page and automatically loop the playback.
HTML Audio Player Code
Here’s an example of HTML audio player code that demonstrates how to customize the appearance and functionality of the audio player using CSS and JavaScript:
<audio id=”myAudio” src=”audiofile.mp3″ controls></audio> <script> var audio = document.getElementById(“myAudio”); audio.volume = 0.5; // Set volume to 50% audio.addEventListener(“ended”, function() { // Loop playback when audio file ends this.currentTime = 0; this.play(); }); </script> <style> /* Customize appearance of audio player */ #myAudio { width: 100%; background-color: #f2f2f2; padding: 16px; } </style>
YouTube Audio Player HTML
YouTube provides an audio player that can be embedded in your web pages using HTML. To embed a YouTube audio player, you can use the following code:
<iframe width=”560″ height=”315″ src=”https://www.youtube.com/embed/{VIDEO_ID}?” title=”xxx” frameborder=”0″ allow=”accelerometer; autoplay; clipboard-write; encrypted-media; gyroscope; picture-in-picture; web-share” allowfullscreen></iframe>
Replace {VIDEO_ID} with the ID of the YouTube video you want to embed.
HTML 5 Record Audio
HTML5 provides a built-in API for recording audio in web pages using the MediaRecorder interface. Here’s an example of how to use the MediaRecorder API to record audio in HTML5:
navigator.mediaDevices.getUserMedia({ audio: true }) .then(stream => { const recorder = new MediaRecorder(stream); recorder.start(); setTimeout(() => { recorder.stop(); }, 5000); recorder.ondataavailable = (e) => { const audioURL = URL.createObjectURL(e.data); const audio = document.createElement(“audio”); audio.src = audioURL; document.body.appendChild(audio); };
Audio Player for Website HTML Code
There are many free and paid HTML audio player libraries available that you can use to add an audio player to your website. Some popular options include:
- Plyr
- jPlayer
- AudioJS
- MediaElement.js
- Wavesurfer.js
Here’s an example of how to use Plyr to add an audio player to your website:
<link rel=”stylesheet” href=”https://cdn.plyr.io/3.6.8/plyr.css” /> <script src=”https://cdn.plyr.io/3.6.8/plyr.js”></script> <audio controls> <source src=”audiofile.mp3″ type=”audio/mp3″ /> </audio> <script> const player = new Plyr(“audio”); </script>
This code uses the Plyr library to customize the appearance and functionality of the audio player.
Free HTML Audio Player with Playlist
Some of the HTML audio player libraries, such as jPlayer and MediaElement.js, provide built-in support for playlists. Here’s an example of how to use jPlayer to add a free HTML audio player with playlist to your website:
<link href=”https://cdnjs.cloudflare.com/ajax/libs/jplayer/2.9.2/skin/blue.monday/css/jplayer.blue.monday.min.css” rel=”stylesheet” type=”text/css” /> <script src=”https://cdnjs.cloudflare.com/ajax/libs/jquery/3.6.0/jquery.min.js”></script> <script src=”https://cdnjs.cloudflare.com/ajax/libs/jplayer/2.9.2/jplayer/jquery.jplayer.min.js”></script> <div id=”jp_container_1″ class=”jp-audio”> <div class=”jp-type-playlist”> <div class=”jp-playlist”> <ul> <li><a href=”audiofile1.mp3″>Audio File 1</a></li> <li><a href=”audiofile2.mp3″>Audio File 2</a></li> <li><a href=”audiofile3.mp3″>Audio File 3</a></li> </ul> </div> <div class=”jp-controls”> <button class=”jp-previous” title=”Previous”></button> <button class=”jp-play” title=”Play”></button> <button class=”jp-next” title=”Next”></button> <button class=”jp-stop” title=”Stop”></button> </div> <div class=”jp-progress”> <div class=”jp-seek-bar”> <div class=”jp-play-bar”></div> </div> </div> <div class=”jp-volume-controls”> <button class=”jp-mute” title=”Mute”></button> <div class=”jp-volume-bar”> <div class=”jp-volume-bar-value”></div> </div> </div> </div> </div> <script> $(“#jp_container_1”).jPlayer({ cssSelectorAncestor: “#jp_container_1”, playlistOptions: { enableRemoveControls: true, }, ready: function() { $(this).jPlayer(“setMedia”, { mp3: “audiofile1.mp3”, }); }, play: function() { $(this).jPlayer(“pauseOthers”); }, swfPath: “https://cdnjs.cloudflare.com/ajax/libs/jplayer/2.9.2/jplayer/Jplayer.swf”, supplied: “mp3”, useStateClassSkin: true, volume: 0.8, }); </script>
HTML Audio Player for All Browsers
To ensure that your audio player works in all browsers, you should provide alternative file formats that are supported by different browsers. For example:
<audio controls> <source src=”audiofile.mp3″ type=”audio/mp3″ /> <source src=”audiofile.ogg” type=”audio/ogg” /> <source src=”audiofile.wav” type=”audio/wav” /> </audio>
By providing multiple sources, you can ensure that the browser will use the first supported format that it encounters.
HTML Hidden Audio Player
If you want to embed an audio player on your website but hide it from view, you can use CSS to set the player’s display property to none. For example:
<audio controls id=”audio” style=”display: none;”> <source src=”audiofile.mp3″ type=”audio/mp3″ /> </audio>
You can then use JavaScript to control the playback of the audio player.
WMA in HTML Audio
WMA (Windows Media Audio) is a proprietary audio format developed by Microsoft. While it’s not as widely used as MP3 or WAV, some users may still have WMA files that they want to play on their website.
Unfortunately, WMA is not supported by all web browsers. According to CanIUse, only Internet Explorer and Microsoft Edge support WMA playback.
If you want to add WMA files to your website, you can use the HTML audio element and provide alternative file formats that are supported by more browsers. For example:
<audio controls> <source src=”audiofile.mp3″ type=”audio/mp3″ /> <source src=”audiofile.ogg” type=”audio/ogg” /> <source src=”audiofile.wav” type=”audio/wav” /> <source src=”audiofile.wma” type=”audio/x-ms-wma” /> </audio>
Custom Audio Player HTML CSS
If you want more control over the appearance of your audio player, you can use HTML and CSS to create a custom audio player. Here’s an example:
<audio id=”audio” src=”audiofile.mp3″></audio> <div id=”audio-player”> <div id=”play-pause” class=”play”> <i class=”fa fa-play”></i> </div> <div id=”progress-container”> <div id=”progress”></div> </div> <div id=”volume-container”> <i class=”fa fa-volume-up”></i> <input type=”range” min=”0″ max=”1″ step=”0.1″ value=”1″ id=”volume-slider” /> </div> </div> <style> #audio-player { display: flex; align-items: center; justify-content: center; } #play-pause { cursor: pointer; margin-right: 10px; padding: 5px; border-radius: 50%; background-color: #333; } #play-pause i { color: #fff; } #progress-container { width: 50%; height: 5px; background-color: #ccc; margin-right: 10px; border-radius: 10px; position: relative; } #progress { position: absolute; top: 0; left: 0; height: 100%; background-color: #333; border-radius: 10px; } #volume-container { display: flex; align-items: center; } #volume-slider { margin-left: 10px; } </style> <script> const audio = document.getElementById(“audio”); const playPause = document.getElementById(“play-pause”); const progress = document.getElementById(“progress”); const volumeSlider = document.getElementById(“volume-slider”); let isPlaying = false; function togglePlayPause() { if (isPlaying) { audio.pause(); playPause.innerHTML = ‘<i class=”fa fa-play”></i>’; } else { audio.play(); playPause.innerHTML = ‘<i class=”fa fa-pause”></i>’; } isPlaying = !isPlaying; } function updateProgress() { const duration = audio.duration; const currentTime = audio.currentTime; const progressPercent = (currentTime / duration) * 100; progress.style.width = `${progressPercent}%`; } function setVolume() { audio.volume = volumeSlider.value; } playPause.addEventListener(“click”, togglePlayPause); audio.addEventListener (“timeupdate”, updateProgress); volumeSlider.addEventListener(“input”, setVolume); </script>
In this example, we’re using Font Awesome icons to display the play and pause buttons. We’re also using flexbox to center the audio player and align the volume slider and icon.
HTML Code Streaming Audio
If you want to stream audio on your website, you can use the HTML audio element and provide a link to your audio file. For example:
<audio controls> <source src=”https://example.com/audiofile.mp3″ type=”audio/mp3″ /> </audio>
Make sure that your server is configured to support streaming of audio files.
HTML Audio Controls Style
You can use CSS to style the default HTML audio controls. Here’s an example:
audio::-webkit-media-controls { display: none !important; } audio::-webkit-media-controls-play-button { background-image: url(“play.png”); width: 50px; height: 50px; } audio::-webkit-media-controls-volume-slider { height: 10px; background-color: #ccc; border-radius: 10px; } audio::-webkit-media-controls-timeline-container { height: 5px; background-color: #ccc; border-radius: 10px; } audio::-webkit-media-controls-timeline { height: 100%; background-color: #333; border-radius: 10px; }
This CSS code hides the default controls on WebKit browsers (such as Safari and Chrome) and replaces them with custom images for the play button. It also styles the volume slider and timeline.
HTML Code for Audio and Video
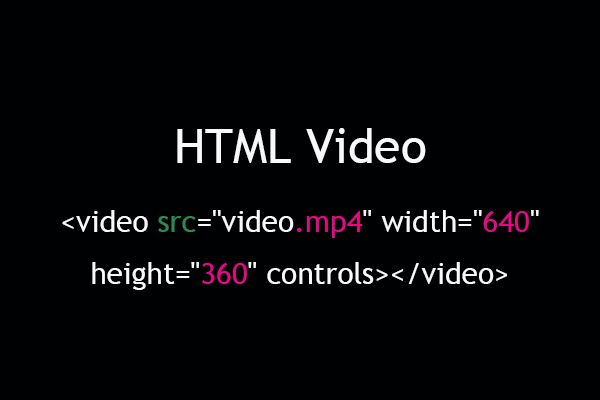
You can use the HTML video element to embed video on your website. Here’s an example:
<video controls> <source src=”https://example.com/videofile.mp4″ type=”video/mp4″ /> </video>
The video element works in a similar way to the audio element, but with additional attributes and child elements for displaying captions, subtitles, and alternative video formats.
HTML Audio Book
If you want to provide an audio version of a book on your website, you can use the HTML audio element and provide separate audio files for each chapter. You can also use JavaScript to control the playback and display the current chapter.
Here’s an example:
<audio id=”audio”> <source src=”chapter1.mp3″ type=”audio/mp3″ /> </audio> <div id=”chapter-list”> <ul> <li><a href=”#” data-source=”chapter1.mp3″>Chapter 1</a><li><a href=”#” data-source=”chapter2.mp3″>Chapter 2</a></li> <li><a href=”#” data-source=”chapter3.mp3″>Chapter 3</a></li>
</ul> </div> <script> const audio = document.getElementById(“audio”); const chapterList = document.getElementById(“chapter-list”); chapterList.addEventListener(“click”, (event) => { event.preventDefault(); const source = event.target.getAttribute(“data-source”); audio.src = source; audio.play(); }); </script>
In this example, we’re using JavaScript to listen for clicks on the chapter links and change the audio source to the corresponding file. We’re also using the “data-source” attribute to store the URL of each audio file. Display Live Audio and Video on HTML Page. If you want to display live audio or video on your website, you can use the HTML audio and video elements with a streaming protocol such as HLS (HTTP Live Streaming) or DASH (Dynamic Adaptive Streaming over HTTP). These protocols enable the browser to receive audio or video in small chunks, which reduces buffering and provides a smoother playback experience. To use HLS or DASH, you’ll need to use a media server that supports these protocols, such as Wowza or Amazon CloudFront.
HTML Audio Android
The HTML audio element is supported on most Android devices, but some older devices may not support all audio formats. To ensure maximum compatibility, you should provide multiple audio formats and test your audio player on a variety of Android devices.
HTML Audio Source
The “src” attribute of the HTML audio element specifies the URL of the audio file to play. You can provide multiple sources by using the “source” element inside the audio element. For example:
<audio controls> <source src=”audiofile.mp3″ type=”audio/mp3″ /> <source src=”audiofile.ogg” type=”audio/ogg” /> </audio> “`
This code specifies two sources for the audio file, in MP3 and Ogg Vorbis formats.
How to Add Audio Link in HTML
To add a link to an audio file in your HTML code, use the element with the href attribute set to the URL of the audio file. For instance:
<a href=”audiofile.mp3″>Listen to audio file</a>
HTML Audio Events
The HTML audio element emits several events that you can use to trigger actions in your JavaScript code.
- canplay: Fires when the browser can start playing the audio.
- play: Fires when the audio starts playing.
- pause: Fires when the audio is paused.
- ended: Fires when the audio has finished playing.
You can listen for these events using JavaScript. For example:
const audio = document.getElementById(“audio”); audio.addEventListener(“play”, () => { console.log(“Audio started playing”); });
WordPress HTML Audio Player
If you’re using WordPress, there are several plugins available that add an HTML audio player to your website. Some popular options include AudioIgniter, Compact WP Audio Player, and Seriously Simple Podcasting.
Conclusion
The HTML audio element provides an easy way to add audio files to your website. By using JavaScript, you can control the playback of the audio and add custom functionality, such as a playlist or live streaming. With support for multiple audio formats and a wide range of events, the HTML audio element is a powerful tool for creating engaging audio experiences on the web.
Related Articles:
- High Resolution Audio Streaming: Unlocking the Sonic Potential
- Spotify High-Resolution Audio: Exploring Sound Quality and Future Possibilities
- High Fidelity Audio vs HD Stereo Sound: Unraveling the Differences
- Hi-Fi Audio Stream: Unleashing the Power of High-Fidelity Sound
- Exploring the World of Hollywood Dual Audio HD Movies


![[Review] A Full Introduction to Web Browser Video Editors](https://images.minitool.com/moviemaker.minitool.com/images/uploads/2023/03/web-browser-video-editor-thumbnail.png)
User Comments :