Slowing down a video is almost available on all video editors. As one of the leading video editors, Adobe Premiere Pro almost offers all the editing tools including speed adjustment. But it’s not easy for new users to operate it on the complicated interface. How to slow down a video in Premiere? Check this post.
If you want to make slow-motion effects in Premiere, slowing down the video speed is a great way. How to slow down a video in Premiere Pro? How to do slow motion in Premiere Pro? Adobe Premiere Pro offers 3 ways to slow down a video. Look at the following steps.
If you want to slow down a video with an easier video editor than Premiere, MiniTool MovieMaker is recommended here.
MiniTool MovieMakerClick to Download100%Clean & Safe
How to Slow Down a Video in Premiere
This part will show you how to how to slow down a clip in Premiere with 3 methods: using the Speed/Duration command, using the Rate Stretch tool, use Time Remapping.
Method 1. Using the Speed/Duration Command
If you want to directly do slow motion in Premiere by reducing the video playback speed, the Speed/Duration command meets your needs.
Step 1. Open Adobe Premiere Pro on your computer. Then click the File > Import to select and open a video, and then drag it to the timeline.
Step 2. Select the clip in the timeline, and choose the Clip > Speed/Duration or right-click the chosen clip and select the Speed/Duration.
Step 3. Based on your needs, change the speed percentage value to less than 100, and tap on OK.
Step 4. Click the File > Export >Media, then choose H.264 from the Format, select the destination folder, then click the Export to export your video.
To create smoother slow-motion effects, you can change the speed percentage value to 50% and choose the Time Interpolation > Optical Flow. For a better result, you can click the Effect Controls > Time Remapping > Add Keyframes, then choose the speed for the slow motion, and tap on Time Interpolation > Optical Flow.
Also read: Solved – How to Add Text in Premiere Quickly
Method 2. Using the Rate Stretch Tool
Compared with the Speed/Duration command, the Tate Stretch tool is a quick way to adjust the duration of a video in the timeline by changing the speed of a clip to fit the duration.
How to slow down a video in Premiere Pro? Just select the Rate Stretch tool, then drag the end of the video to the right and make it longer.
Method 3. Using the Time Remapping
Time Remapping tool allows you to change the speed of a portion of the video, and it’s an ideal way to create slow motion and fast motion effects in a single clip.
Look at the following steps to learn how to slow down a video in Premiere Pro using the Time Remapping tool.
Step 1. Follow step 1 in method 1 to add a video in Premiere Pro.
Step 2. On the timeline, right-click the video, choose the Show Clip Keyframes > Time Remapping > Speed. Then you’ll see a white speed-control track in the upper portion of the selected video and a horizontal rubber band.
Step 3. Drag the horizontal rubber band downward to slow down the video. Then save and export the video.
If you want to slow down a portion of the video, right-click the video, and choose Show Clip Keyframes > Time Remapping > Speed. Then Ctrl-click (Windows) or Command-click (Mac OS) one point on the rubber band to set a keyframe for where you want to slow down the clip. Then move the rubber band on either side of the speed keyframe down to decrease the speed of the select portion.

How to Slow Down a Video in MiniTool MovieMaker
Compared with Premiere Pro, MiniTool MovieMaker is an easier video editor. It’s one of the best video editors for beginners and completely free. This video editor enables you to trim, split, rotate, flip, reverse videos, slow down or speed up videos, do color correction by adjusting the contrast, saturation, brightness, add video filters and transitions, add text to the video, remove audio from video, etc.
How to slow down a video in MiniTool MovieMaker?
Step 1. Download and install MiniTool MovieMaker, then open it, close the pop-up window.
MiniTool MovieMakerClick to Download100%Clean & Safe
Step 2. Click on Import Media Files to upload your video and drag it to the timeline.
Step 3. Select the video on the timeline, click the Speed icon, then choose Slow, and choose one from 0.5X, 0.25X, 0.1X, 0.05X, 0.01X. Alternatively, double-click the video on the timeline, go to the Speed tab under Video Property, drag the speed controller to the left to decrease its speed.
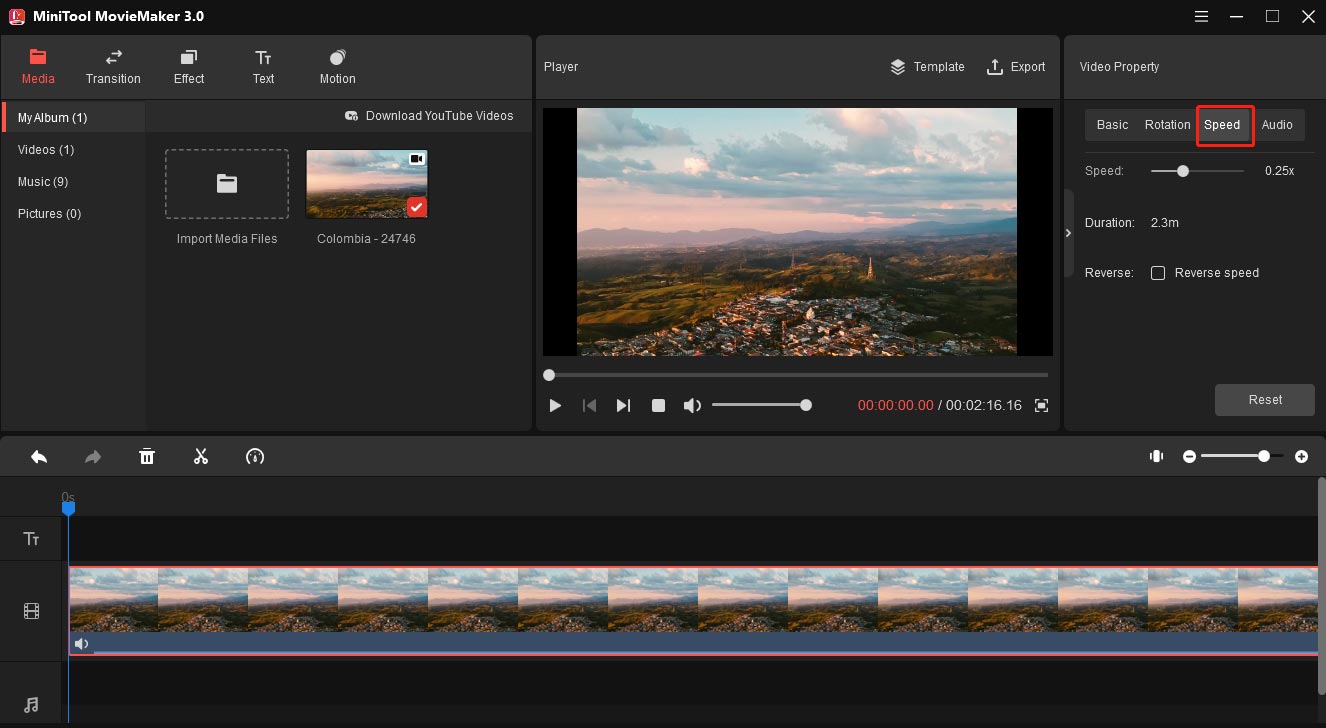
Step 4. To export your video, tap on Export. Then choose an output folder and rename this file, click the Export to export the edited video.
Conclusion
This post tells you how to slow down a video in Premiere Pro with 3 methods. If you want a simple way to decrease the video speed, you can try MiniTool MovieMaker.
About The Author

Position: Columnist
Cora is a tech writer specializing in digital media workflows, with over six years of hands-on experience in video post-production, media transcoding, and screen capture. Her writing is always clear and practical. Cora also produces in-depth software reviews for users across skill levels to help them find the right tool and enjoy video editing.
User Comments :