When sharing audio files, have you ever been blocked by file size limits? Whether you’re a podcaster, musician, content creator, or a casual user who wants to share high-quality audio, knowing how to send a large audio file is an essential skill that ensures smooth audio transfer without sound quality loss.
This post will cover five effective ways to send large audio files and explain how to choose the right one for your needs. With the right tools and tips, you can quickly share audio files with large file sizes.
Why Are Audio Files So Large
Generally speaking, if an audio file includes complex soundwaves, has excellent sound quality, or has a long duration, it will result in a large file size. Now, let’s understand the key factors that decide the audio file size.
Sample Rate
An audio sample rate refers to the number of times an audio signal is taken per second during the process of converting a musical source to a digital file. It’s also referred to as the sampling frequency, measured in kilohertz (kHz).
A higher sample rate means recording more high-frequency detail, providing better sound quality, and resulting in a larger file size.
Bit Depth
In digital audio, bit depth is the number of bits used to record each sample. An audio file with more bits means a greater dynamic range of an audio signal and detail, thus significantly boosting file size.
Number of Channels
An audio channel refers to a single path or location for an audio signal. The number of audio channels directly affects the size of an audio file: the more channels, the larger the file. For instance, a stereo (two-channel) file will be roughly twice the size of a mono (one-channel) file with the same other settings.
Length
There’s no doubt that a longer audio file will be larger than a shorter one with the same other settings. So, trimming the length is the most straightforward way to downsize a large audio file.
Bitrate
Bitrate is another factor that directly controls the audio file size. It’s the measurement of digital data used to represent every second of audio, measured in kilobits per second (kbps). A higher bitrate means more data, resulting in better sound quality and larger file sizes.
File Format
Audio formats also determine the audio file size through compression. For instance, uncompressed WAV and AIFF formats create large file sizes but perfect quality. Lossless formats like FLAC and ALAC offer smaller file sizes than uncompressed ones, and lossy MP3, AAC, and Ogg are typically the smallest.
How to Send a Large Audio File
After learning the core factors determining the audio file size, let’s see how to send large audio files in different cases.
In daily life, you often need to send an audio file as an email attachment or via messaging apps. However, these services always impose strict file size limits. For instance, most email services have a 25MB limit for attachments, and Messenger has a 100MB file limit. So, how to send large audio files via email or other platforms?
If your audio file exceeds the platform’s maximum file size, you will need to reduce its size to send it successfully. For this purpose, try methods 1 and 2 to make your large audio file smaller.
Method 1: Shorten Audio Length to Reduce File Size
As mentioned above, duration is an important factor that influences the audio file size. If you want to send a single audio file that’s slightly larger than the file size restrictions of an email provider or a messaging platform, removing unnecessary sections is a quick solution for a smaller file size. Then, MiniTool MovieMaker is recommended to achieve this goal.
As the name suggests, MiniTool MovieMaker is primarily designed as a video editor to help everyone make video from images with ease. It also functions as a simple audio editing application, enabling you to trim, split, reverse, merge files, adjust playback speed, lower volume, apply fade-in/out effects, and extract audio from video files.
So, if you’re seeking a quick way to delete parts of your audio to shrink the file size, MiniTool MovieMaker is a reliable choice. This program has a user-friendly and intuitive interface and easy-to-use tools, making it a perfect choice for beginners without any experience.
Step 1: Download MiniTool MovieMaker
Click the button below to get the installer for the audio editor, open the file, and complete the installation.
MiniTool MovieMakerClick to Download100%Clean & Safe
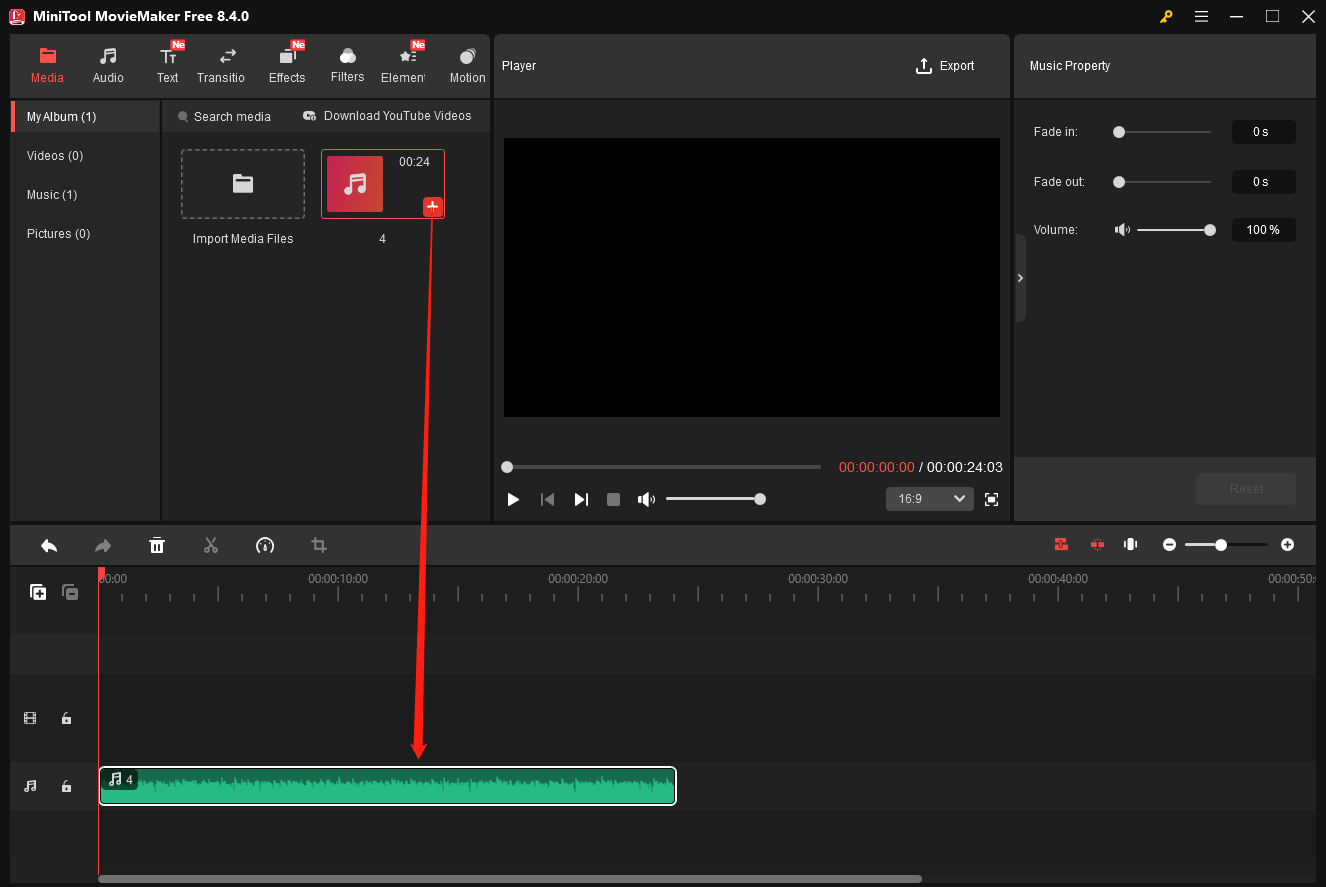
Step 2: Upload Your Audio
After running the software, close the pop-up window to access the main user interface, then click the Import Media Files option in the left panel to add your audio file. MiniTool MovieMaker can handle popular audio formats, including MP3, M4A, M4R, WAV, FLAC, AAC, AMR, APE, MMF, and WV. Then, click the Plus icon on the audio clip to add it to the timeline.
Step 3: Shorten the Audio Length
Option 1: Trim the audio
If you want to remove unwanted parts at the beginning or end of the audio, put the mouse cursor over the start or end of the clip until you see the Trim icon, then drag the icon inward.

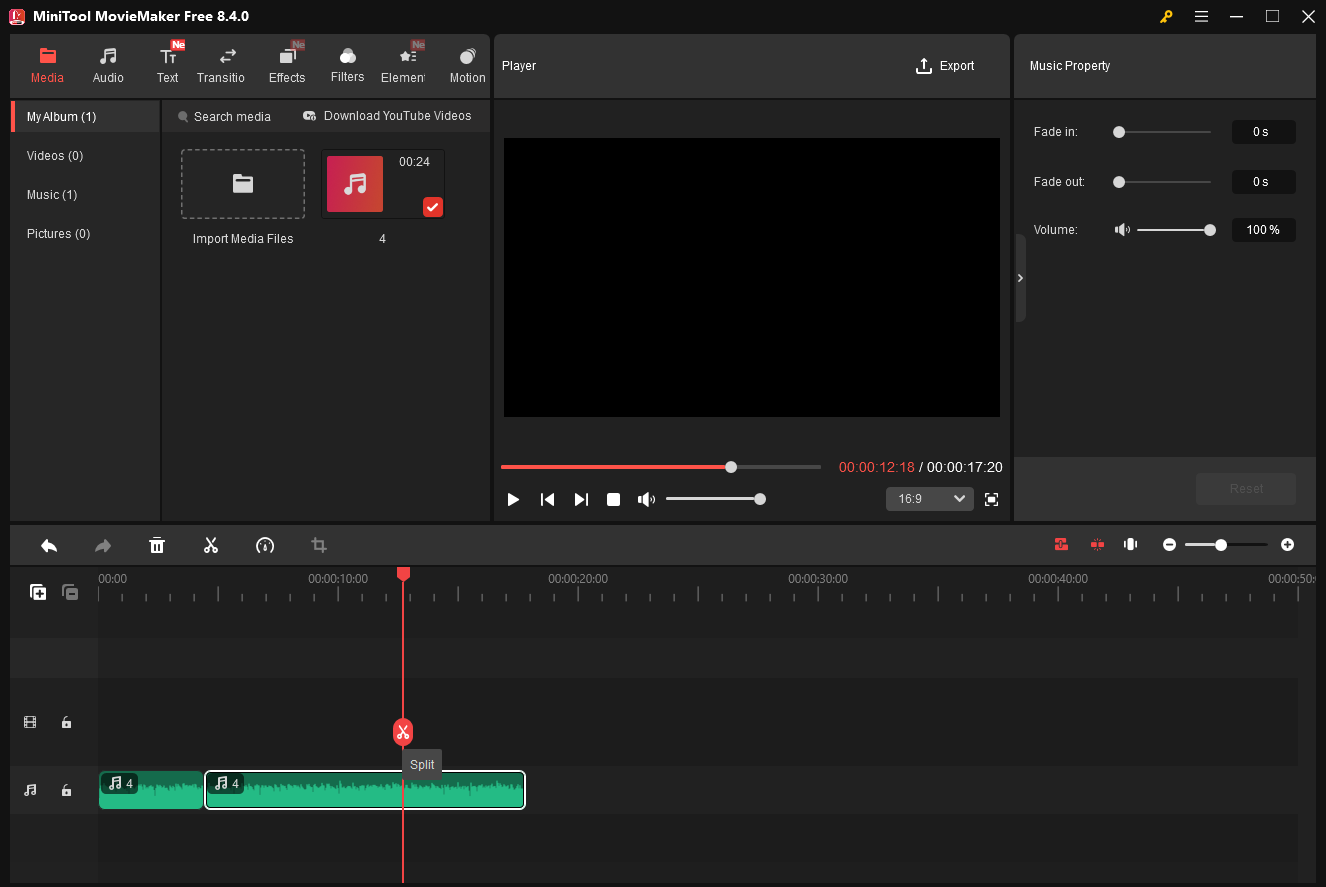
Option 2: Delete the middle part
Drag the playhead to the start point of the clip you want to remove, and click the Split icon. Continue moving the playhead to the end of the clip you want to delete, and click the Split icon again to separate the target clip. Then, right-click the clip and select Delete.
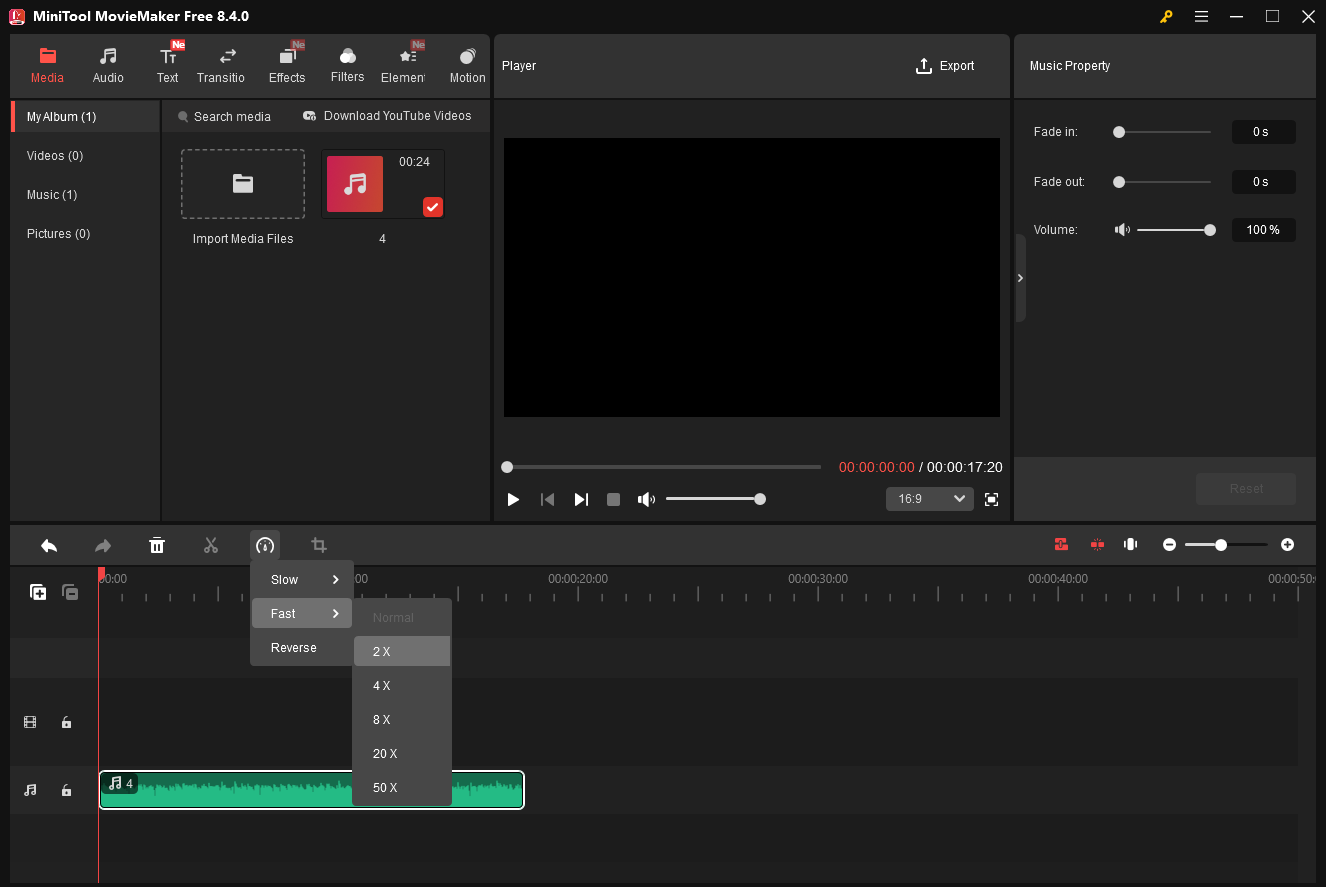
Option 3: Speed up the audio
Alternatively, you can increase the playback speed to shorten the audio clip. Select the audio on the timeline, click the Speed icon on the timeline toolbar, choose Fast, and click a speed like 2X.
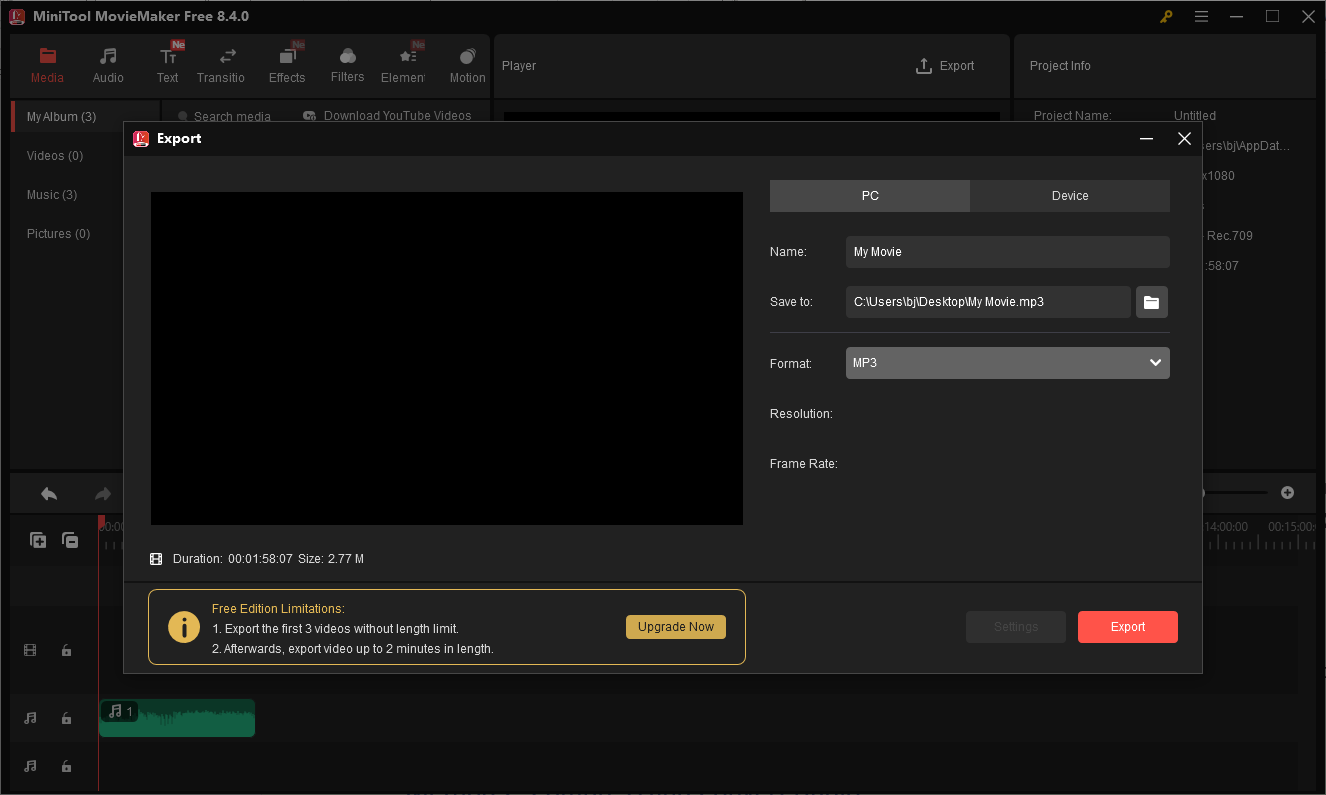
Step 4: Export Audio
Click Export in the upper-right corner, then expand the Format menu in the Export window, and choose MP3 from the Format dropdown. Then, give the audio file a name and specify the save path. Finally, click the Export button.
MiniTool MovieMaker is a great tool that can reduce the size of large audio files by adjusting the duration. It can be used for free permanently, but it only allows 3 audio outputs without length restrictions.
Other Features of MiniTool MovieMaker:
- Add music and sound effects to set the mood for the video.
- Edit GIFs with various tools and effects, and convert video to GIF and vice versa.
- Enhance videos with filters, effects, transitions, frames, overlays, and stickers.
- Change video playback speed and reverse clips effortlessly.
- Crop videos and change the aspect ratio to make the content perfect for social media.
- Easily edit 4K footage without lagging.
- Create picture-in-picture videos, video collages, split-screen effects, etc.
- Precisely trim and cut video files.
- Add titles, captions, and end credits to videos.
- …
Method 2: Compress and Convert Audio
In addition to shortening the audio length, you can also compress and convert your large audio file to bypass the size limit for smooth sharing. Then, try the professional yet free audio converter – MiniTool Video Converter. It allows you to change the audio format and adjust several parameters to control the final file size.
Best of all, MiniTool Video Converter can process up to 5 files at once, effectively saving you time and improving efficiency. Furthermore, it also has no file size or length limit on the audio files you can import and export.
If you want to send a bulk of heavy audio files through email or messaging services, downsize them using the excellent audio converter and compressor, MiniTool Video Converter.
Step 1: Install the Application
Click the button below to download the free audio converter and compressor, then install the application on your computer.
MiniTool Video ConverterClick to Download100%Clean & Safe
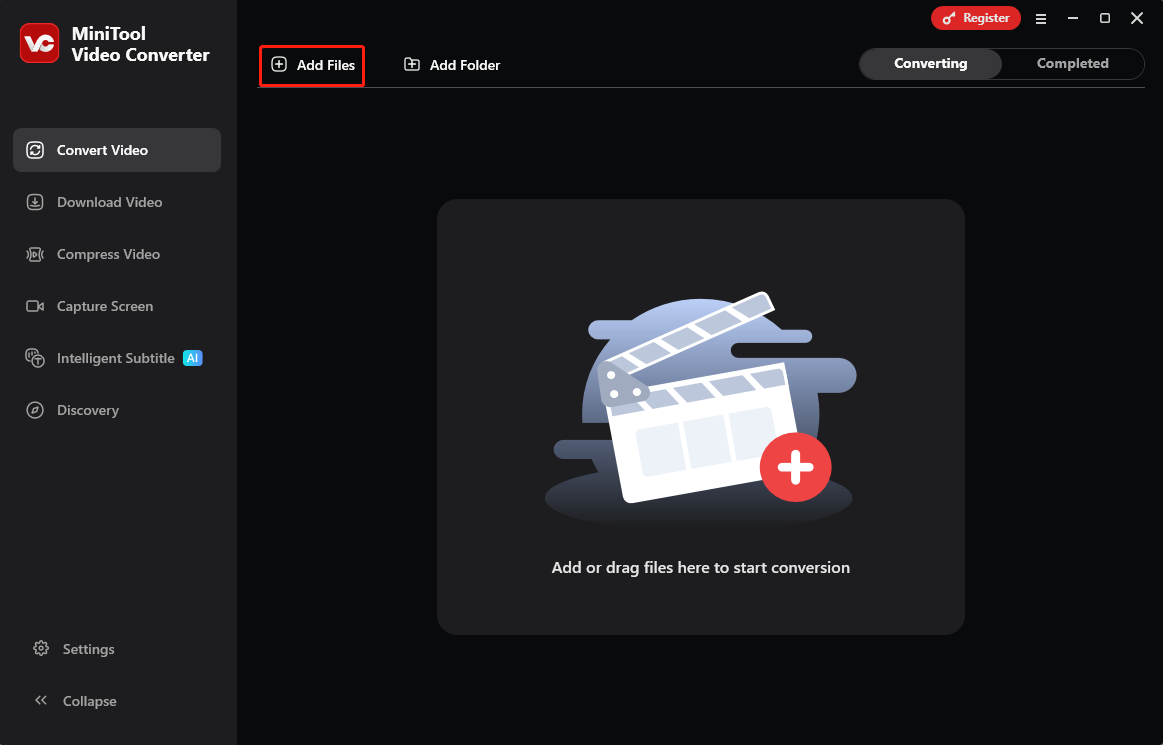
Step 2: Import Your Audio
Launch the program, and you’ll be directed to the Convert Video tab by default. Click the Add Files option in the upper-left corner to upload your audio file. MiniTool Video Converter supports common audio formats, including MP3, WAV, WMA, AAC, AIFF, OGG, M4A, AC3, M4B, and M4R.
Step 3: Specify Output Settings
Click the Settings icon and go to the Audio option in the pop-up window. Then, you’ll see all the available output formats on the left sidebar. Select a format like MP3 and click the profile with your desired quality. You can then preview the estimated output file size; the exported file size is usually smaller than the estimation.
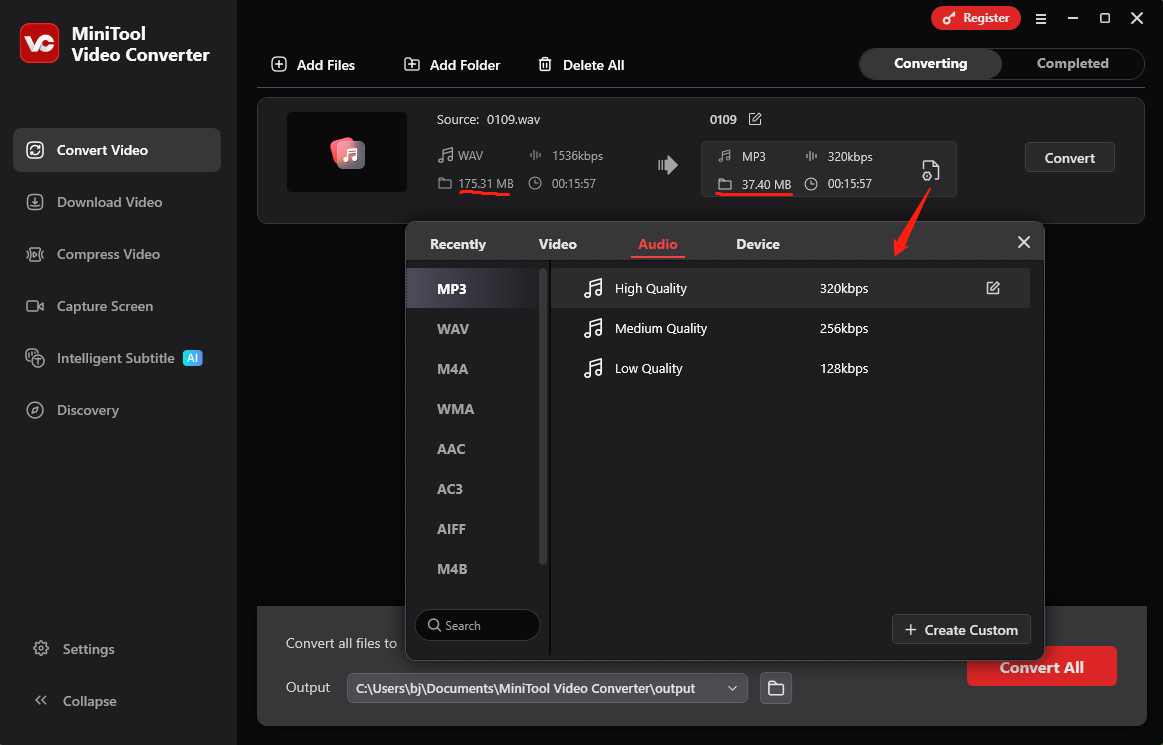
You can experiment with different audio formats with different qualities (high, medium, or low) until the file size meets your specific needs.
Alternatively, you can click Create Custom after choosing the output format to adjust channel, sample rate, and bitrate to control the final file size. Select a small channel number, sample rate, and bitrate for a smaller file size.

Once done, click Create to apply your changes. Then, find and click the format you just created to set it as the output format. You’ll then immediately return to the main interface.
Step 4: Compress and Convert Your Audio
Click the Convert button to start the compression process. Once finished, you’ll be directed to the Completed tab, and click the folder icon to locate the audio.
You can easily optimize large audio files for sharing by shortening the durations or compressing them. However, not every heavy audio file contains sections that can be removed, and compression often leads to a loss of quality.
If you’re a professional audio engineer or content creator who needs to send large audio files without data or quality loss, methods one and two are not suitable for you. Try the following three methods instead.
Method 3: Share a Large Audio File via a Link
How to send a large audio recording via a link? It’s super easy! Upload your sizable audio file to a cloud storage service and create a shareable link. You can then send the link via email and chat to anyone you want.
This does not mean you can send large audio files via links without restrictions. Cloud storage services also have their own upload file size limits, but they are powerful enough for most audio sending tasks. The following are the maximum file size limits offered by major cloud storage services.
Google Drive
If you have a free Google account, you can get 15 GB of shared storage across Drive, Gmail, and Photos. To get more storage, upgrade to a paid plan. The service has a 5 TB (terabyte) maximum size for individual file uploads. The supported audio formats include MP3, WAV, OGG, and OPUS.
Dropbox
Dropbox provides 2 GB of storage for users with a free account. Similarly, you need to purchase a plan to unlock more storage. It supports MP3, WAV, AAC, M4A, FLAC, AIF, OGG (OGA), and WMA formats.
The file size limit for individual uploads depends on the platform you’re uploading from.
- Dropbox website: up to 375GB each.
- Dropbox desktop app: up to 2TB each.
- Dropbox mobile app: up to 375GB each.
OneDrive
OneDrive offers 5 GB of cloud storage for free accounts and has a file size limit of 250GB per upload. This platform supports common audio formats for upload, such asMP3, WAV, M4A, WMA, AAC, and FLAC.
Method 4: Send Audio via File Transfer Services
If you need to share large audio files or collaborate with others for a long time, converting them to shareable links is a perfect solution. If you want a one-off large file delivery, file transfer services, such as WeTransfer, Smash, and Filemail, are reliable options. They allow you to directly send the files via email within the platform. Of course, they have their own file size limits for each upload and total storage.
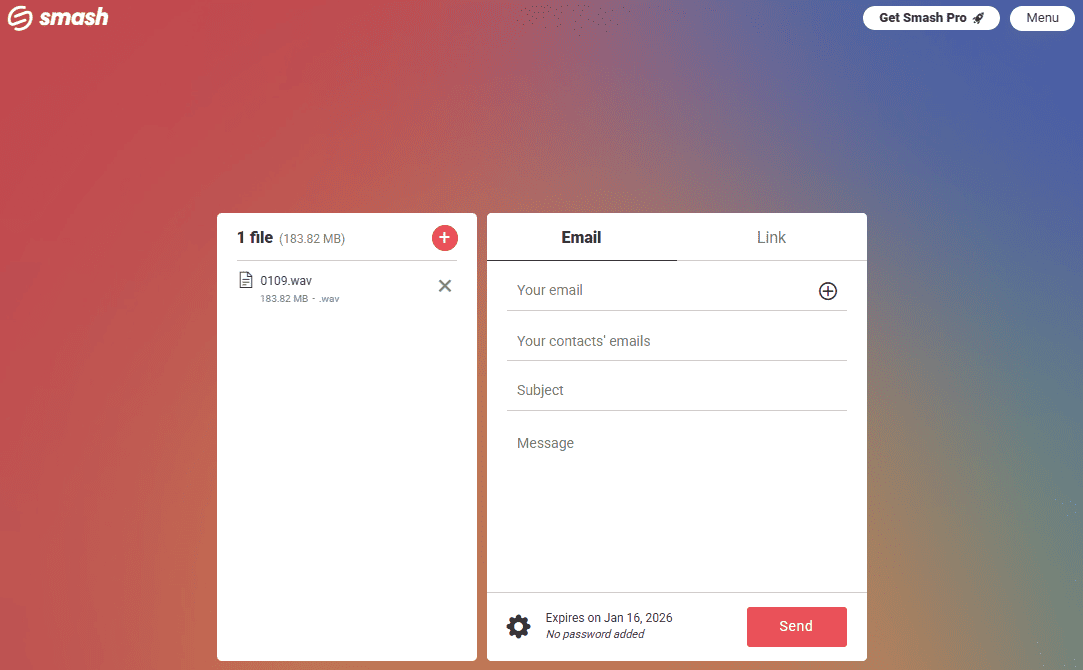
Then, I’ll take Smash as an example and show you how to send a large audio file.
- Go to Smash.com in your browser.
- Click on the screen to select your audio file from your computer.
- Enter your and the recipient’s email addresses, as well as other messages.
- Click Send.
Method 5: Switch to Physical Transfer
When you need to send large audio files while ensuring maximum security, consider physical transfer via a USB drive or hard drive. You can then send extremely large audio files or folders at the same time, and meanwhile, avoid a long sending or loading time caused by a slow internet connection.
Conclusion
How to send a large audio file? This post outlines five tips to help you get rid of the size restriction of specific platforms and share audio without a size limit. Choose the right method according to your needs!
Finally, if you encounter problems while using MiniTool MovieMaker or MiniTool Video Converter, please contact us via [email protected] for help.
About The Author

Position: Columnist
Cora is a tech writer specializing in digital media workflows, with over six years of hands-on experience in video post-production, media transcoding, and screen capture. Her writing is always clear and practical. Cora also produces in-depth software reviews for users across skill levels to help them find the right tool and enjoy video editing.
User Comments :