How to make a video? Whether you’re an amateur in making a video, or for some reasons you need to make a video, you will be able to make a satisfactory video after reading this article even if you don’t have the related knowledge and experiences.
Preparations
How to make a video? The first thing you need to do is to prepare for it – specify video type, collect appropriate video materials and collect background music.
Specify Video Type
Before you start to make a video, it’s important to specify the type of video you want to create. Different video types have different requirements. In other words, think about what the purpose of the video is.
- Share on platform.
- Send to others as a gift.
- Give a speech for study or work.
Collect Appropriate Materials
Take videos or images
After choosing the video type, you should collect corresponding materials, no matter you are going to make a video with pictures or videos. Here is a useful photo application, which helps you to take wonderful pictures and videos.
Cymera isn’t trying to compete with any powerful photography apps. It’s aimed solely at casual you who just want to jazz their photos up a little, with over 100 selfie filters, varied shooting modes, and auto retouching tools on offer. You’ve got seven different lens options to choose from, as well as some of the more basic editing features like red-eye removal.
For beginners or casual photographers, this is great, as there’s no need to get bogged down with lots of features you’re unlikely to use. You’ve also got sharing features built-in to quickly upload your photos to social media networks like Instagram, so it’s a good app for social media addicts.
Edit images
If your materials are videos, please skip this step. This step is designed for those people who want to make a video with pictures.
Adobe Photoshop is a powerful and popular image editor that helps you to apply various effects easily and get consistent results. Many people use this software to create a better-quality image, because it has many features that are hardly available in other photo editing software.
Functions:
- Manipulating the color of an image.
- Cropping images.
- Repairing flaws, such as dust on the lens or red eyes.
- Drawing on an image with a pen or pencil.
- Adding text to images.
- Removing people or objects within an image.
- Organizing photos for quick access.
- Publishing images online or send them via email.
Choose Background Music
Then you need to choose background music for videos. Suitable background music can create an immersive feeling for audience and improve their visual and auditory experience.
Pandora gives you a personalized listening experience that continually evolves with your tastes, but it is only available in the U.S. right now.
This solution only works when you are using Google Chrome browser as it provides Pandora extension in Chrome web store which will enable you to download songs when you are playing them in Pandora. The best part is this extension is completely free and free from malware and advertisements. You only need to install it in Chrome and you can start to download Pandora playlist right away. Here we go.
Step 1. Install Pandora Download Links extension.
The Pandora extension in Chrome web store is called Pandora Download Links. Visit the store and search the extension for free. Then add this extension to Chrome.
Step 2. Start to download Pandora music.
Now go to Pandora website, log into your account and begin to play any of Pandora radio. Next to the song, you can see a download button displayed. Simply click on it and save Pandora playlist on your computer. Then you can freely listen to the downloaded Pandora music offline at any time.
Choose the Best Free Video Maker
Now, a tough but significant task comes – choosing the right software for you and your video-making work. Almost all video-making software offer everything you need to perform standard video edits, but you may prefer one over others after comparing their usability, digital interface, and features. How to make a video? A good and free video maker will help you save much time and energy.
MiniTool Movie Maker, a free video maker, lets you make a video with pictures or videos for free, regardless of your skill level. How to make video with pictures and music? This software will show you the specific steps.
MiniTool MovieMakerClick to Download100%Clean & Safe
Features:
- Offer different types of templates.
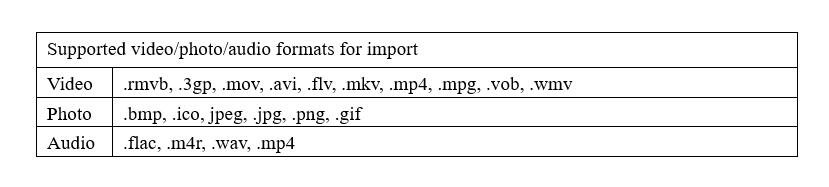
- Import video, photo, and audio in various formats.
- Support lots of transitions and effects.
- Split/trim videos.
- Edit titles, captions, and credits.
- Edit audio.
- Export video in common internet video formats.
Steps on How to Make a Video with Pictures
How to make a video? It is believed that editing the video must be the most complicated task in the whole process. Here I take MiniTool Movie Maker as the example to illustrate how to edit a video from many respects, such as applying templates, adding text, splitting video and so on.
Related article: Top 8 Best Video Editors without Watermark for PC
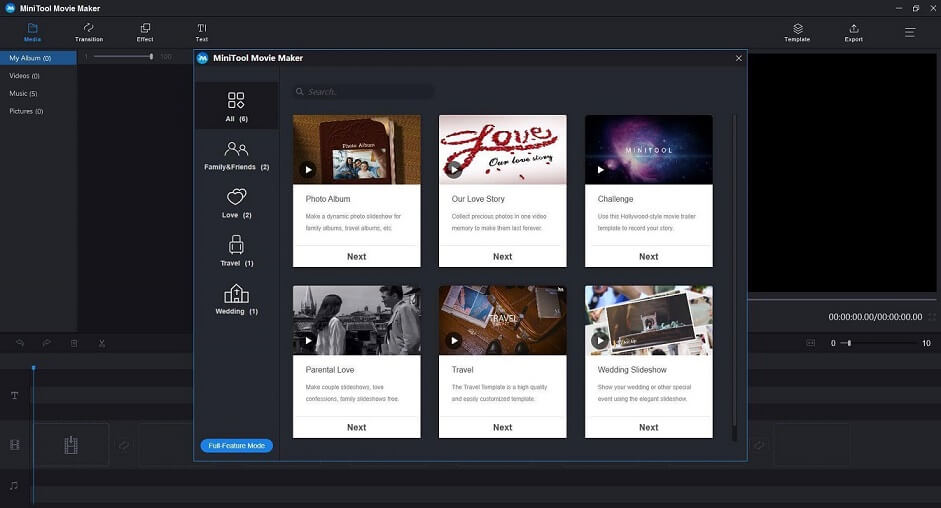
Step 1. Launch MiniTool Movie Maker, and choose a suitable video template if you want. It offers many cool movie templates for you. You can preview templates, select one you like, and then import your media files, and export the automatically generated video by the software. However, if you want to create a video by yourself, click Full-Feature Mode and move to the next step.
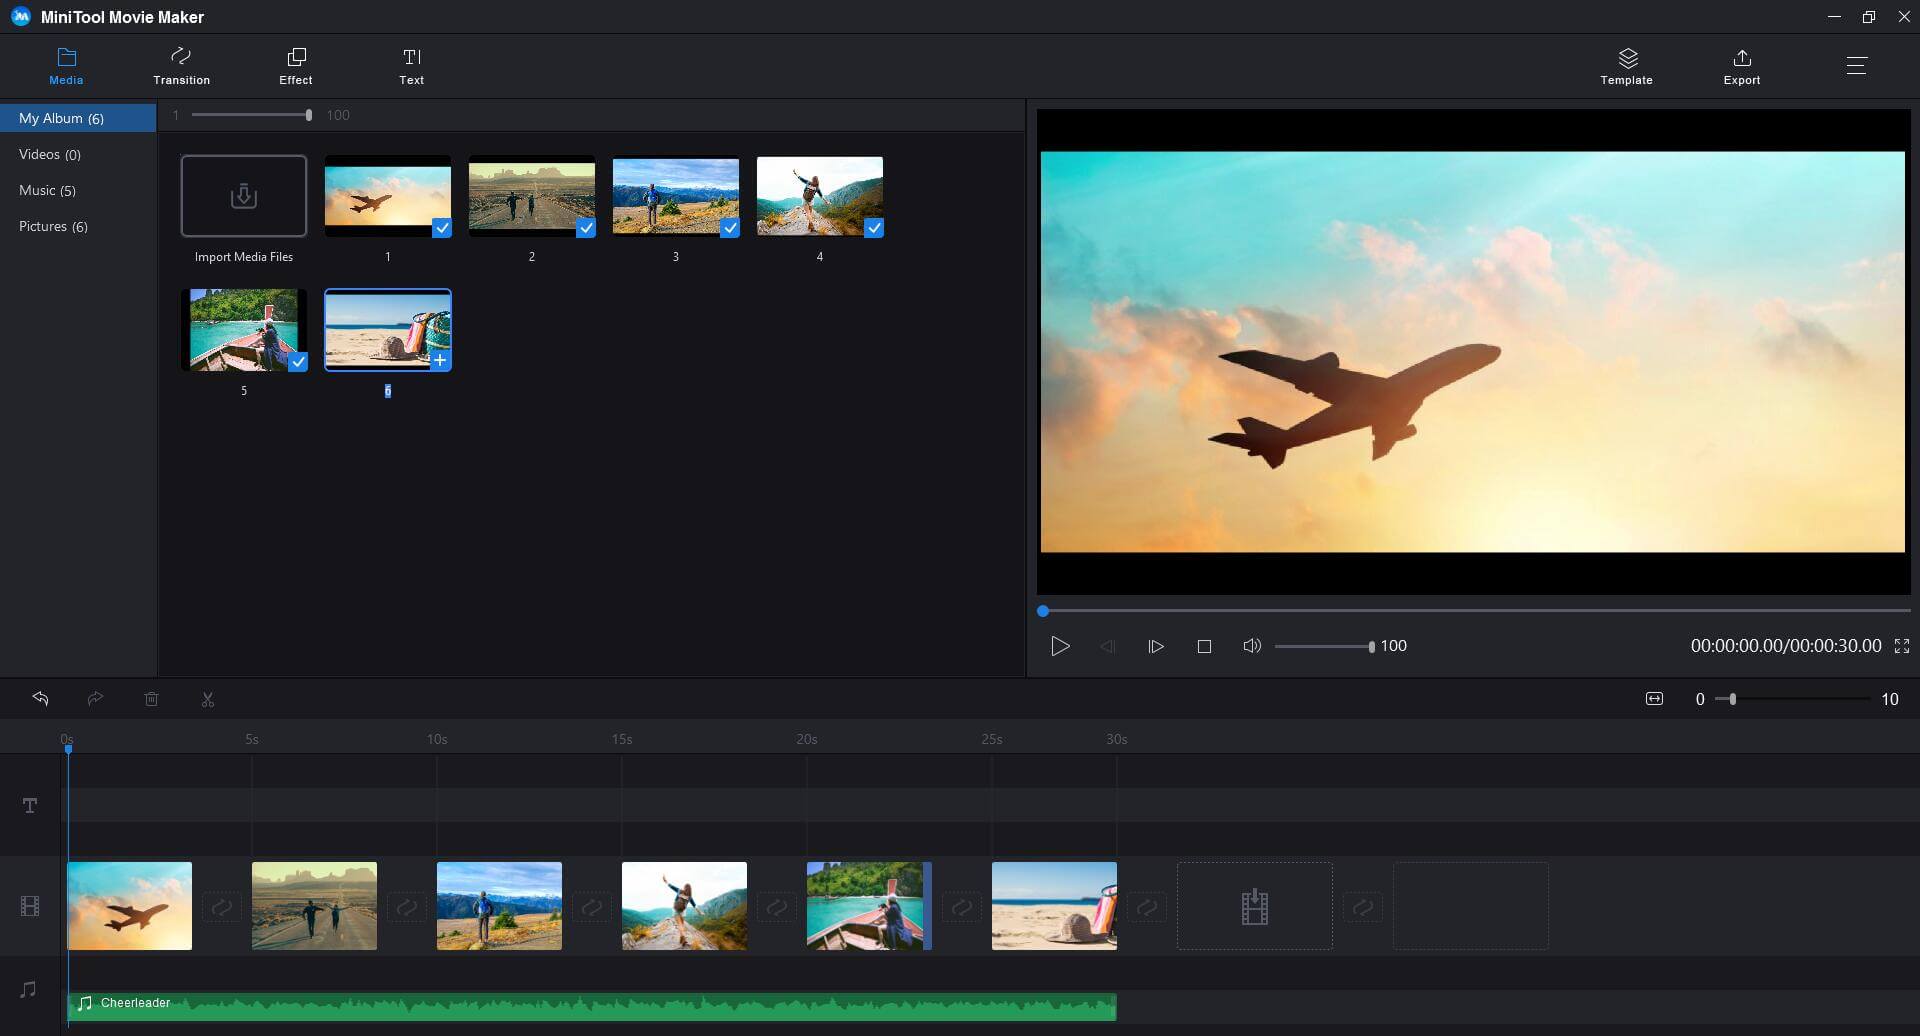
Step 2. After clicking Full-Feature Mode, you will enter the main interface. Click Import Media Files button to import your files including videos, photos and audios. Of course, you can select the built-in audio.
Step 3. In the Media library, drag the image to the timeline or click + to add it to the timeline. Compared with other video editing software, MiniTool Movie Maker is a wise choice for beginners. Because most of them offer a difficult timeline, while MiniTool Movie Maker offers a simple and straightforward timeline which helps you edit video easily.
Step 4. Double click the video clip on the timeline to open its editing window, and then drag the slider to adjust the contrast, saturation, and brightness. Press OK button to save the settings. If you want to rearrange the clips, drag the selected clip to a new location on the timeline.
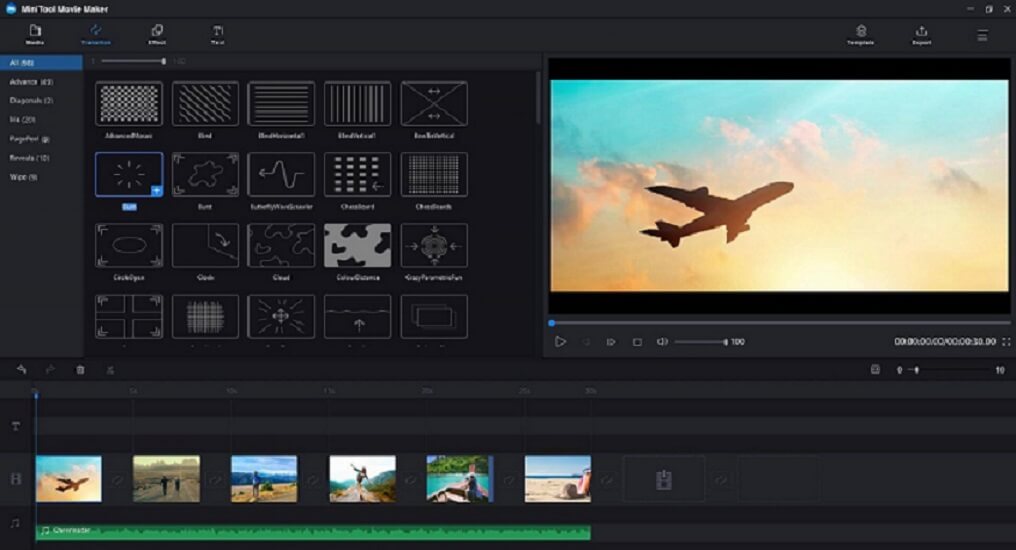
Step 5. Click Transition to enter the transition library. Drag and drop one transition style between two images or videos on the timeline.
It offers a lot of cool transitions for you to combine multiple videos and images seamlessly. The default duration is 1s. After applying a transition, you can change the duration of the transition in the edit window by double-clicking on the transition icon on the timeline.
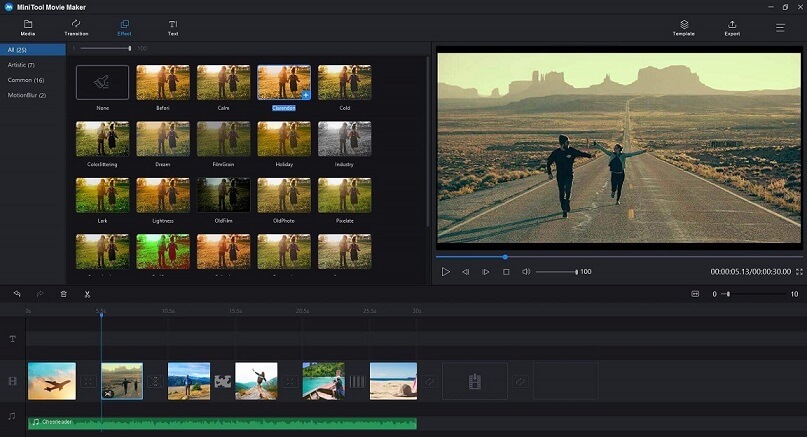
Step 6. Click Effect to enter the effect library, drag an effect’s thumbnail onto the clip on the timeline. Or select a clip, and then click + button of the effect you like.
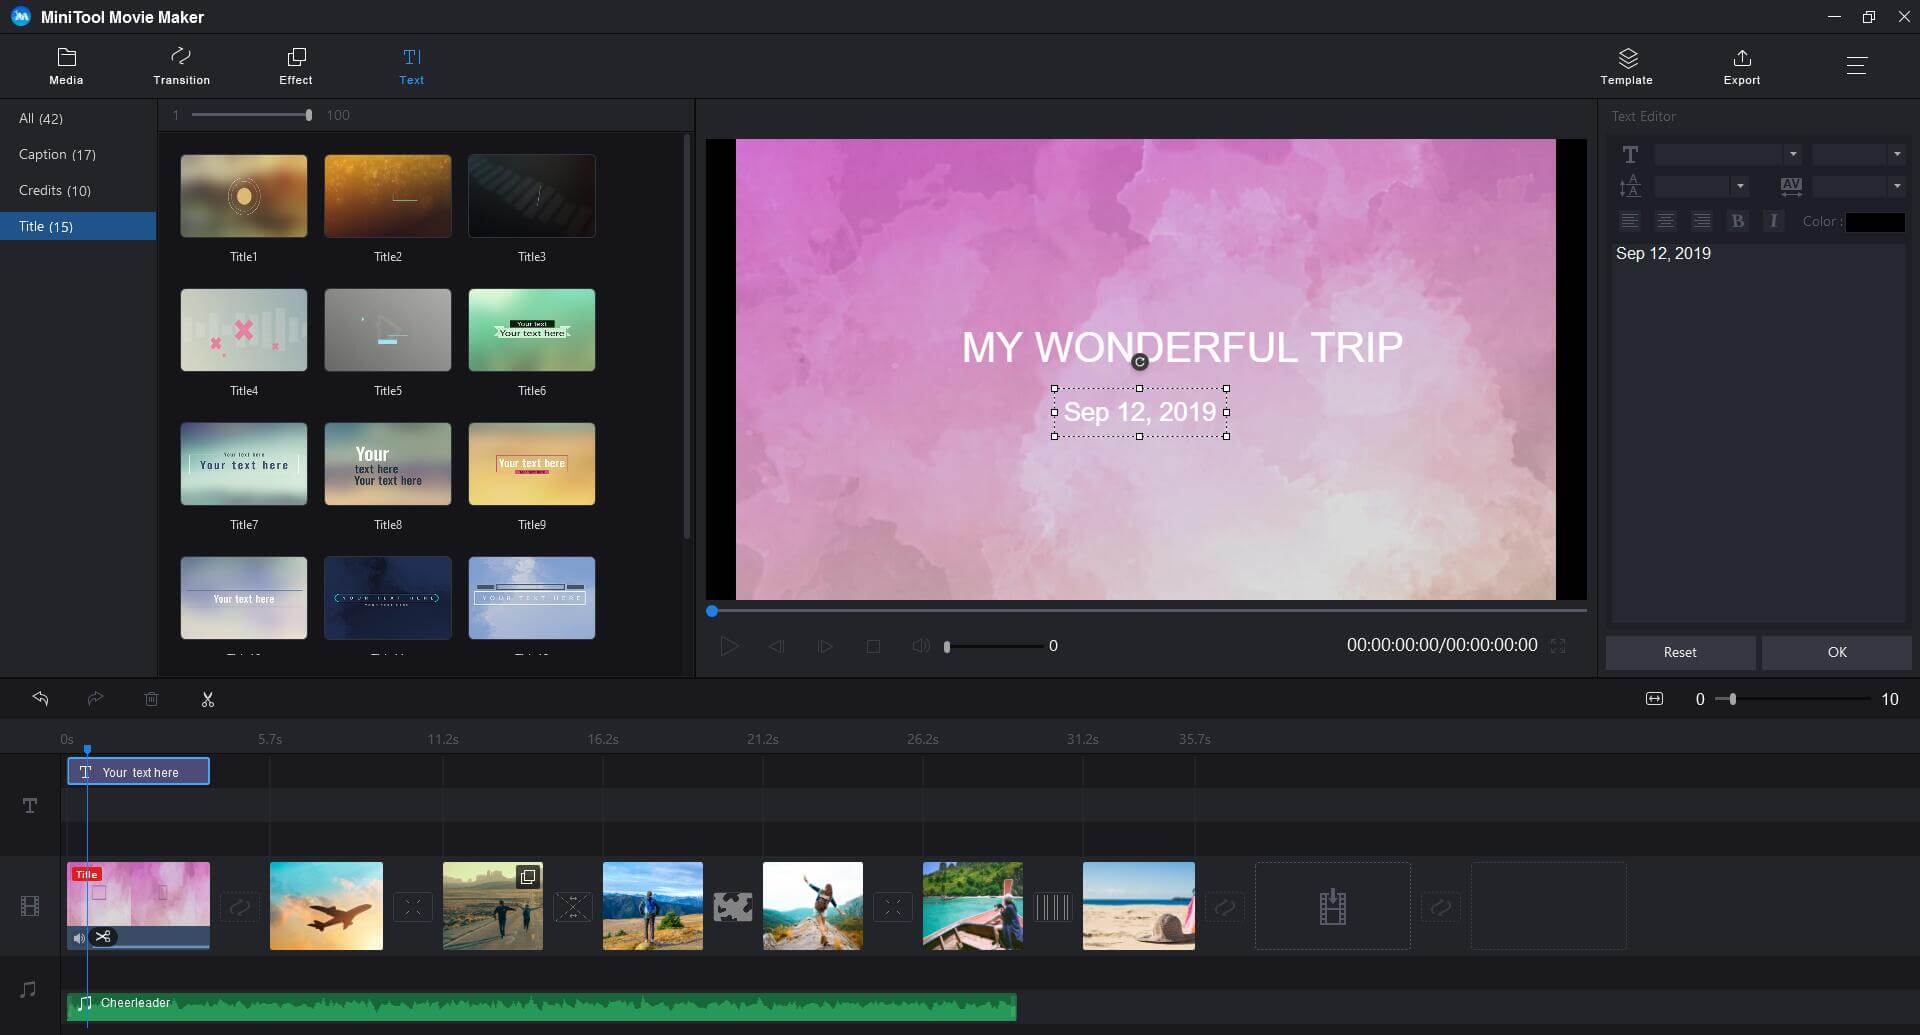
Step 7. Click Text to enter the text library. Drag caption/ credits/title from the text library to the timeline, and then edit it. After that, you can type in new words.
Check this post for more details: Add Subtitles to Video Free.
Step 8. If you want to split or trim the video, just choose the video and then click the Scissor icon in the toolbar and choose Full Split to open the Split/Trim window.
To split a video, you can drag the play head to the place you want the split to occur and then click the Scissor icon. Press OK to save the changes.
To trim a video, you can drag the playhead to locate the specific frame of the video that you want to make the starting point and click the scissor icon behind the Start, then drag the playhead to locate the specific frame of the video that you want to make the end point and click the scissor icon behind the End. Lastly, press OK to save changes.
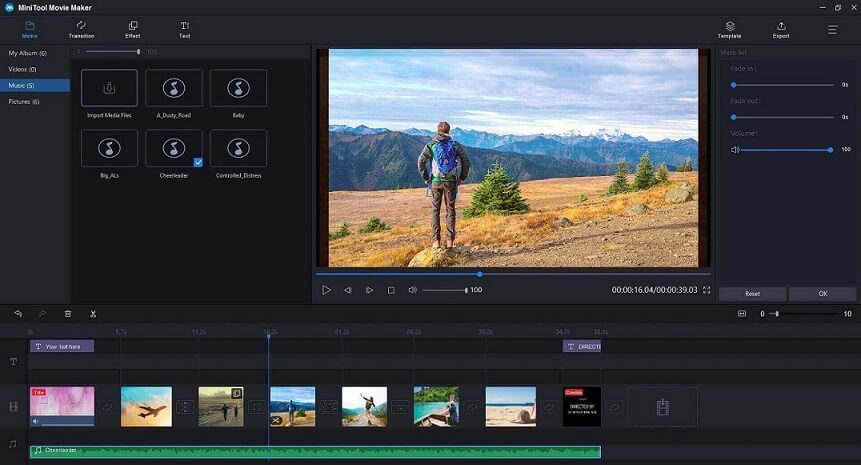
Step 9. Finally, it’s time to edit the audio. Right-click the audio and then click Edit button. Now, you can change the volume of audio and set up Fade in or Fade out. Lastly, press OK to save the changes.
Related article: How to Fade in and Fade out Music Easily (Windows/Mac).
After finishing all editing, you can export the video. And what you need to do is to click Export and make some advanced settings.
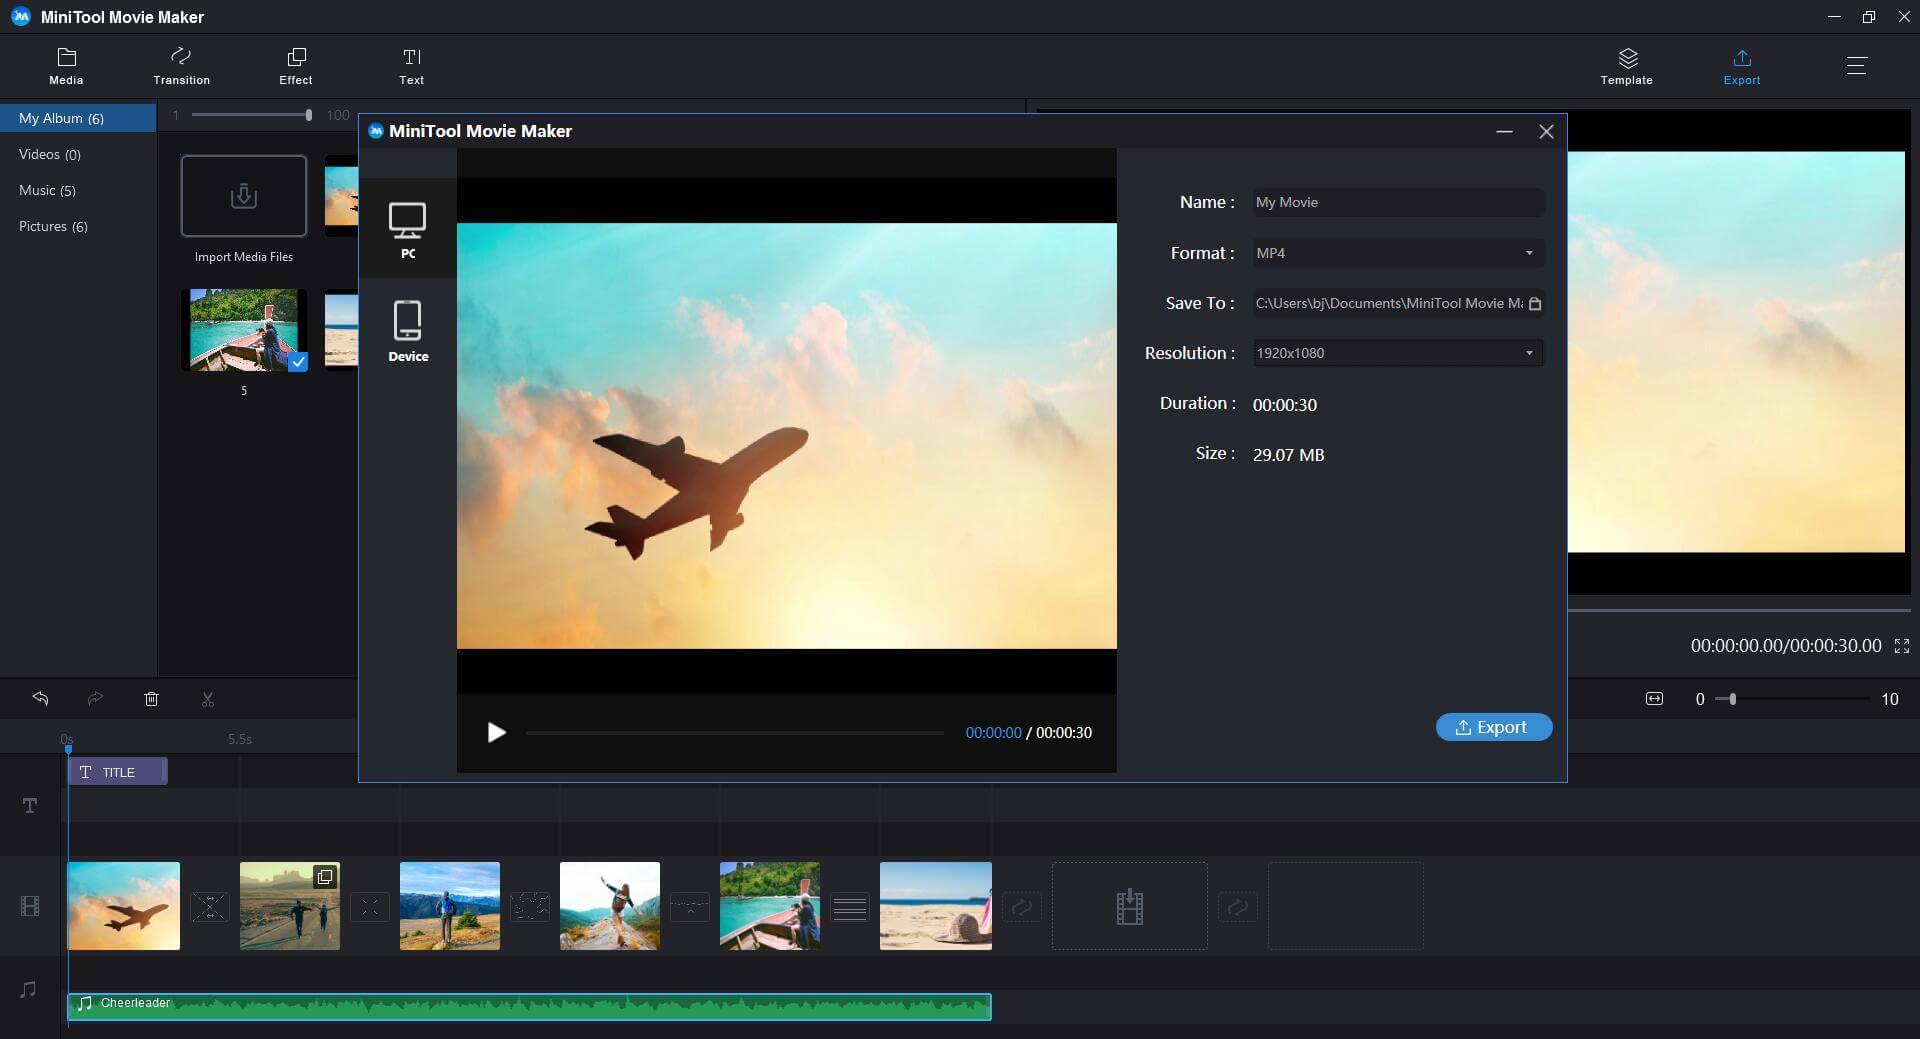
Features:
- Support to change the video name and select a suitable resolution.
- Support to save the video to PC, or mobile devices including iPhone, Apple TV, iPad, Smartphone, Nexus, Xboxone, Galaxy note 9, PS4, and Sony TV.
- Support to save video in different formats like WMV, MP4, AVI, MOV, F4V, MKV, TS, 3GP, MPEG-2, WEBM, GIF, and MP3 formats.
Share Video
YouTube is a website designed for sharing videos. Millions of people around the world have created accounts on the site to upload videos that anyone can watch. Every minute of every day, more than 35 hours of video is uploaded to YouTube.
Upload limits: 20GB/15 minutes (without verifying your account), 128 GB/12 hours (after verifying your account).
Recommended post: Compress Video File Sizes on Windows/Mac/Android/iOS
Supported video formats: MOV, MPEG4, MP4, AVI, WMV, MPEGPS, FLV, 3GPP, WebM, DNxHR, ProRes, CineForm, HEVC (h265).
The specific steps to upload videos to YouTube are introduced as follows:
Step 1. Log in to your account first. Click Upload button on the top of the homepage and then click Upload video in the menu that appears.
Step 2. Click Select files to upload button to open a file browser. Find the video that you want to add or drag the video into the square in the web browser window.
Step 3. Click Open button. If your account is unverified, you are limited to 15-minute uploads. You can upload longer videos by verifying your account via text message.
Related article: Useful Tips on How to Create, Verify or Delete YouTube Account.
Step 4. Enter the required information includes the title and the description of the video, and any tags that you want to add.
Step 5. Choose Privacy settings.
- Public videos can be searched for and viewed by anyone.
- Unlisted videos are only accessible to people who know the video link.
- Private videos are unlisted and can only be viewed by viewers that you designate.
Step 6. Click Monetization tab and check the Monetize box if you want YouTube to place ads on your video.
Step 7. Click Advanced tab and make some advanced settings as you like.
Step 8. Choose a thumbnail photo for the video.
Related article: The Best YouTube Thumbnail Size: 6 Things You Need to Know
Step 9. Hit Save button to upload the video.
Once your video has been uploaded, you can embed it on your website or share it online.
How to make a video online? Follow the steps I have mentioned above, and you would be a professional video maker.
Bottom Line
A complete video-making process has introduced above. Now it’s your turn. Try to make a cool video by yourself. It must be easier after reading this post. If you have any question about how to make a video, please let us know via [email protected] or share it in the comments section below.
User Comments :