This post explains how to make a fan edit video with three tools. Select MiniTool MovieMaker if you want a simple video editor with essential features for fan editing. Try Microsoft Clipchamp if it’s installed on Windows 11. Consider CapCut for extensive templates and various effects.
What Is a Fan Edit Video
Definition
A fan edit video is a creative remake of existing media (films, TV shows, etc.) made by passionate fans. It combines emotions, unique perspectives, and editing skills to tell a fresh story. With the rise of short video platforms like TikTok, fan edits have become the most popular form of fan content, even surpassing fanfiction and fan art.
Types
- Restored videos: enhance old footage using color correction, aspect ratio adjustments, etc.
- Re-created videos: merge clips from different sources into new productions. These are very popular in fandoms and can be themed (e.g., music-sync edits with transitions, or alternate storyline edits that change plot points or endings).
Key Factors for an Excellent Fan Edit
- Background Music: sets the tone, emotion, and rhythm for editing.
- Transitions: smooth clip connections; highlight changes in time, mood, or perspective.
- Overlay Effects & Filters: unify style, enhance mood, and add visual appeal.
- Text: helps explain the storyline or message; use proper fonts, placement, and animation for emphasis.
How to Make a Fan Edit Video on PC
A video editor is necessary to make fan edits. Here are three options: MiniTool MovieMaker, Microsoft Clipchamp, and CapCut.
| Tool | MiniTool MovieMaker | Microsoft Clipchamp | CapCut |
| Platform | Windows | Windows + Web | Win / Mac / Web/Mobile |
| Price | Free + Ultimate | Free + Premium | Free + Pro |
| No Watermark | Yes | Yes | Yes |
| Effects & Transitions | Rich | Basic | Very rich |
| AI Features | None | Auto captions, text to speech | Auto captions, automatic editing, auto reframe |
| Best for Fan Editing Scenarios | Simple editing, no watermark, stable | Need AI assistance to save time | Need various effects & pre-designed templates |
Method 1: Using MiniTool MovieMaker
Fast Track:
- Install MiniTool MovieMaker.
- Import your footage.
- Trim clips, add transitions, and apply effects.
- Add audio and text. Export the fan edit video.
MiniTool MovieMaker is an all-in-one and free video editor for Windows. With an intuitive and straightforward interface, it is easy for beginners to start video creation. The software supports multi-track editing and provides a wide variety of editing tools, such as adding transitions, applying fade-in/out effects, and more, making it an ideal choice for creating stunning videos with ease. Consequently, it is the most suitable fan edit video maker.
Let’s see how to make a fan edit video for free using MiniTool MovieMaker.
Step 1: Download and Install
Click the button below to begin downloading. Once the download is complete, follow the instructions to finish the installation.
MiniTool MovieMakerClick to Download100%Clean & Safe
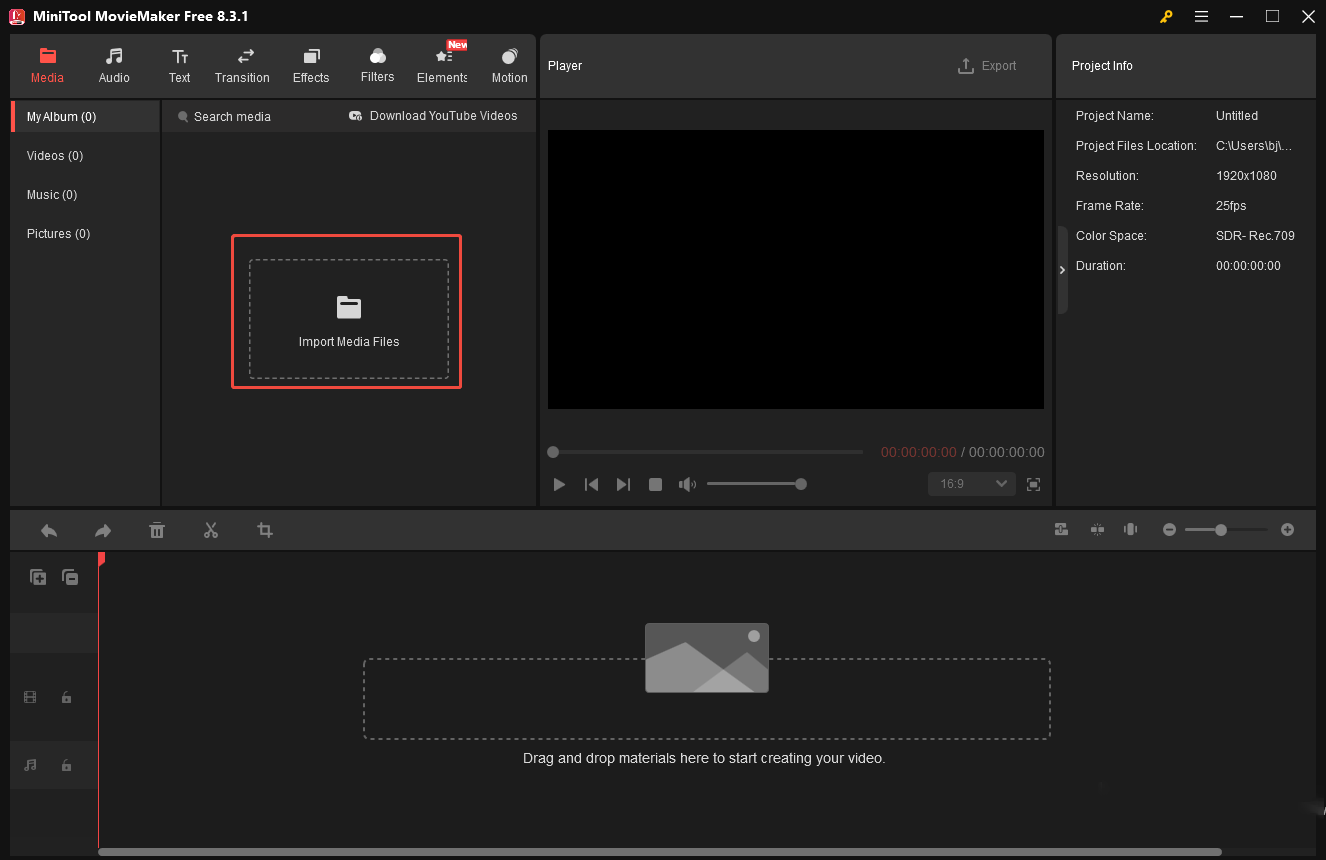
Step 2: Import Videos
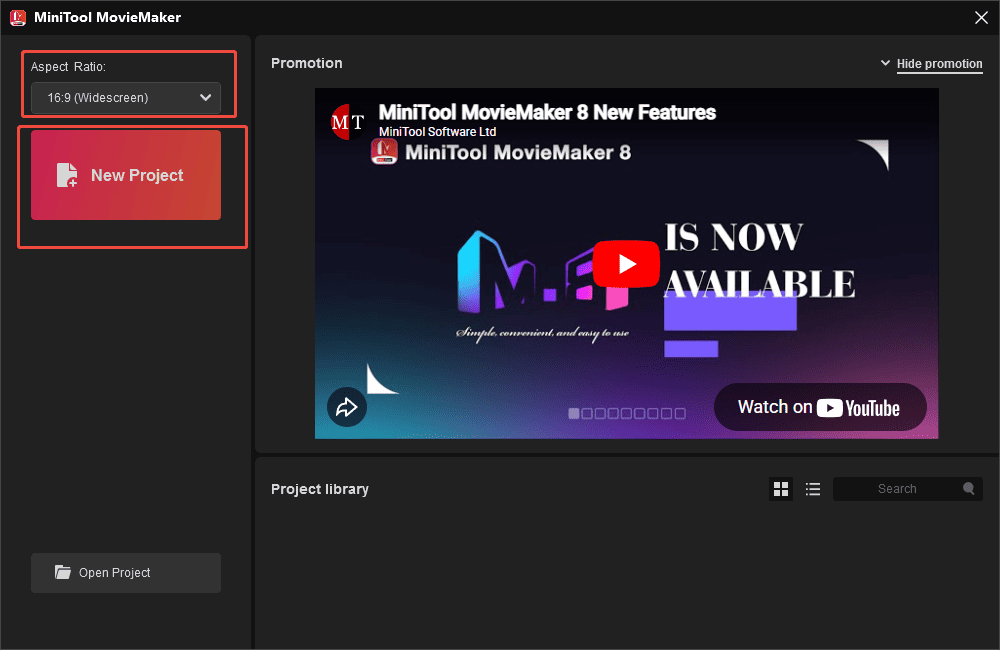
Open MiniTool MovieMaker and select the Aspect ratio in the pop-up Project Library window. If you want to post videos on TikTok, Instagram Reels/Stories, Facebook Reels/Stories, and so on, the 9:16 option is the best choice. Then, click New Project to enter the main interface.
Next, click Import Media Files to upload your videos from your local computer. Then, drag and drop your videos onto the timeline.
Step 3: Arrange and Organize videos
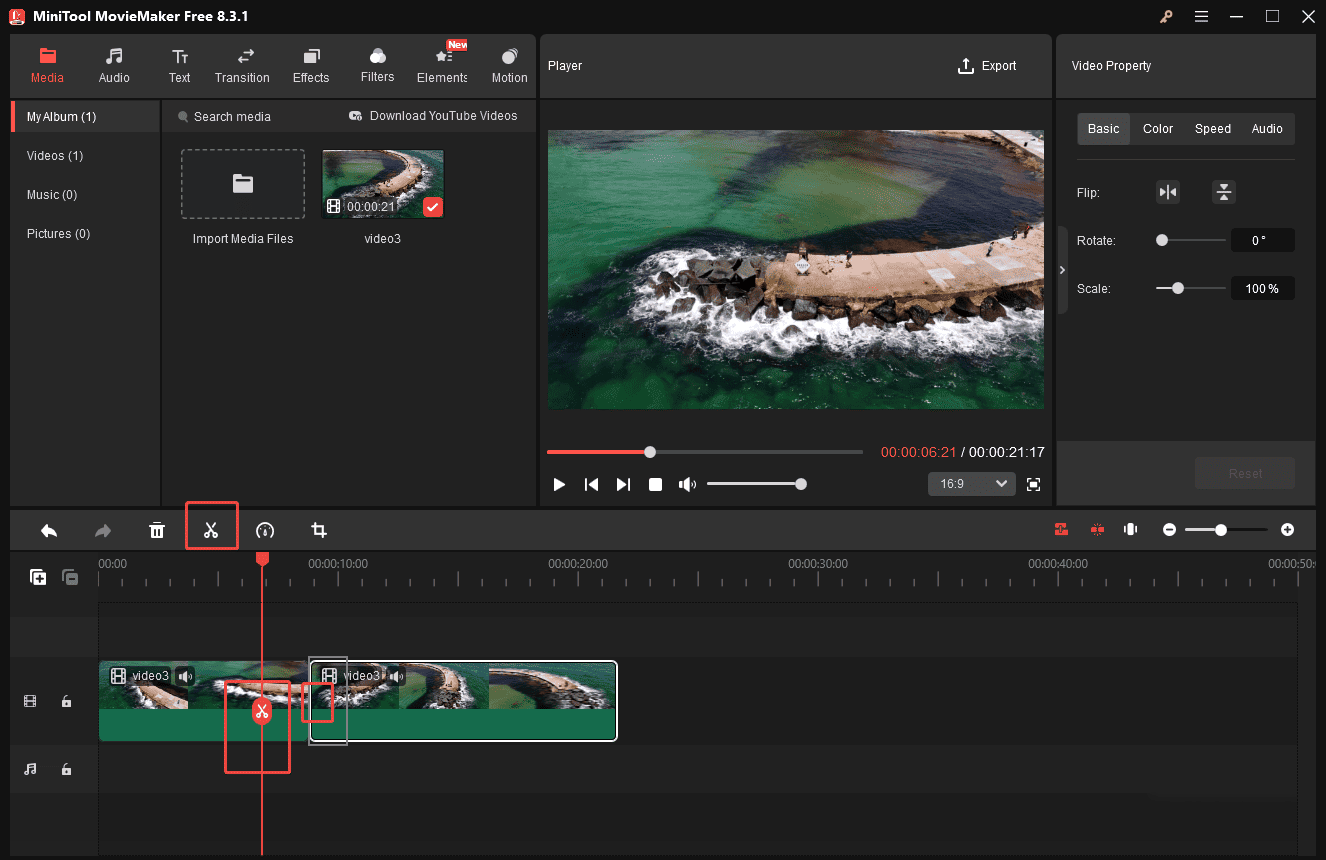
If you would like to change the order of clips, directly drag and drop them on the timeline. But if you want to refine specific sections, it is necessary to use the Split and Trim tools.
Move the playhead to the desired point on the clip and click the Scissors icon to split it. Next, you can rearrange the segments easily. To trim a clip, first select it to highlight. Then, hover your mouse cursor over the start or the end until the Trim icon appears. Drag the Trim icon inward to remove the unwanted part from the clip.
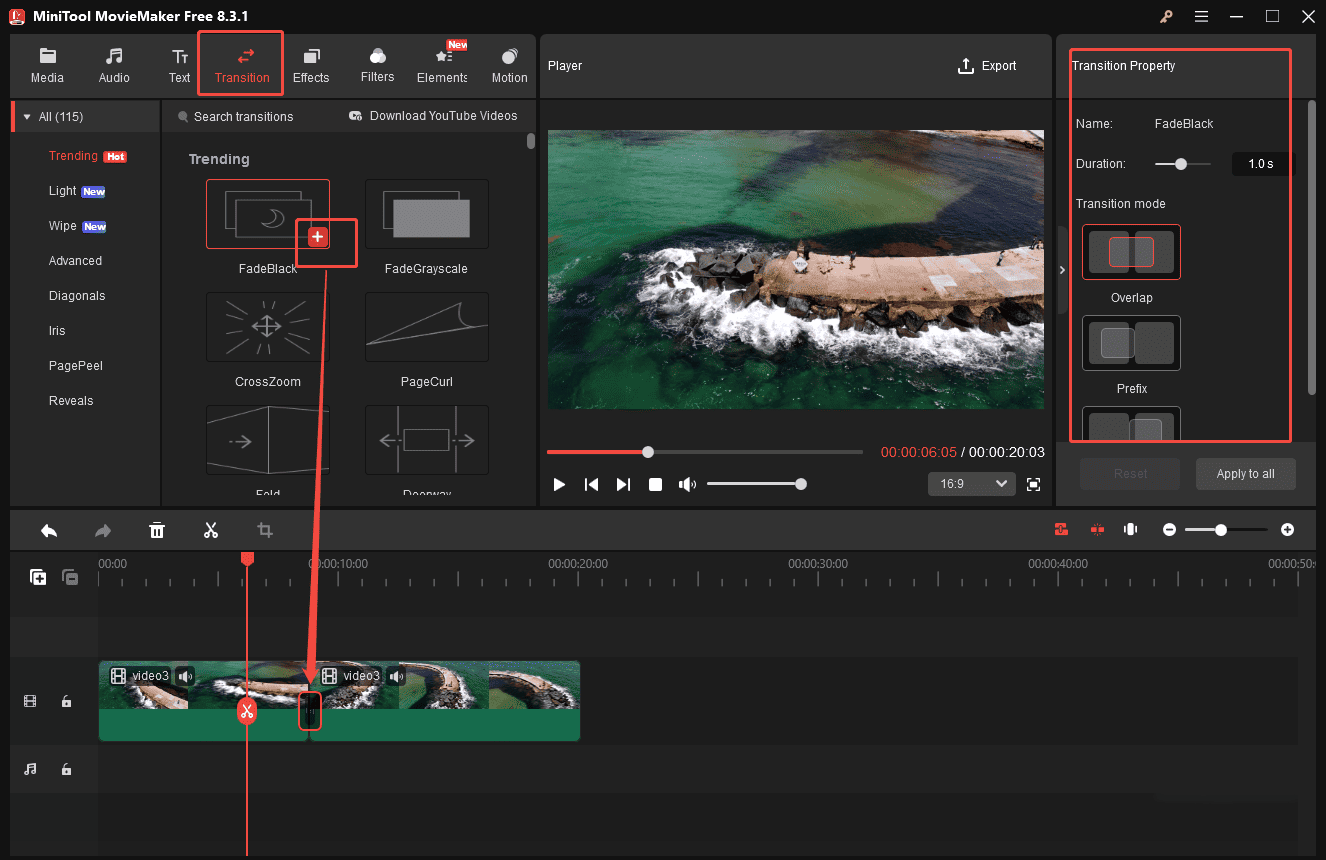
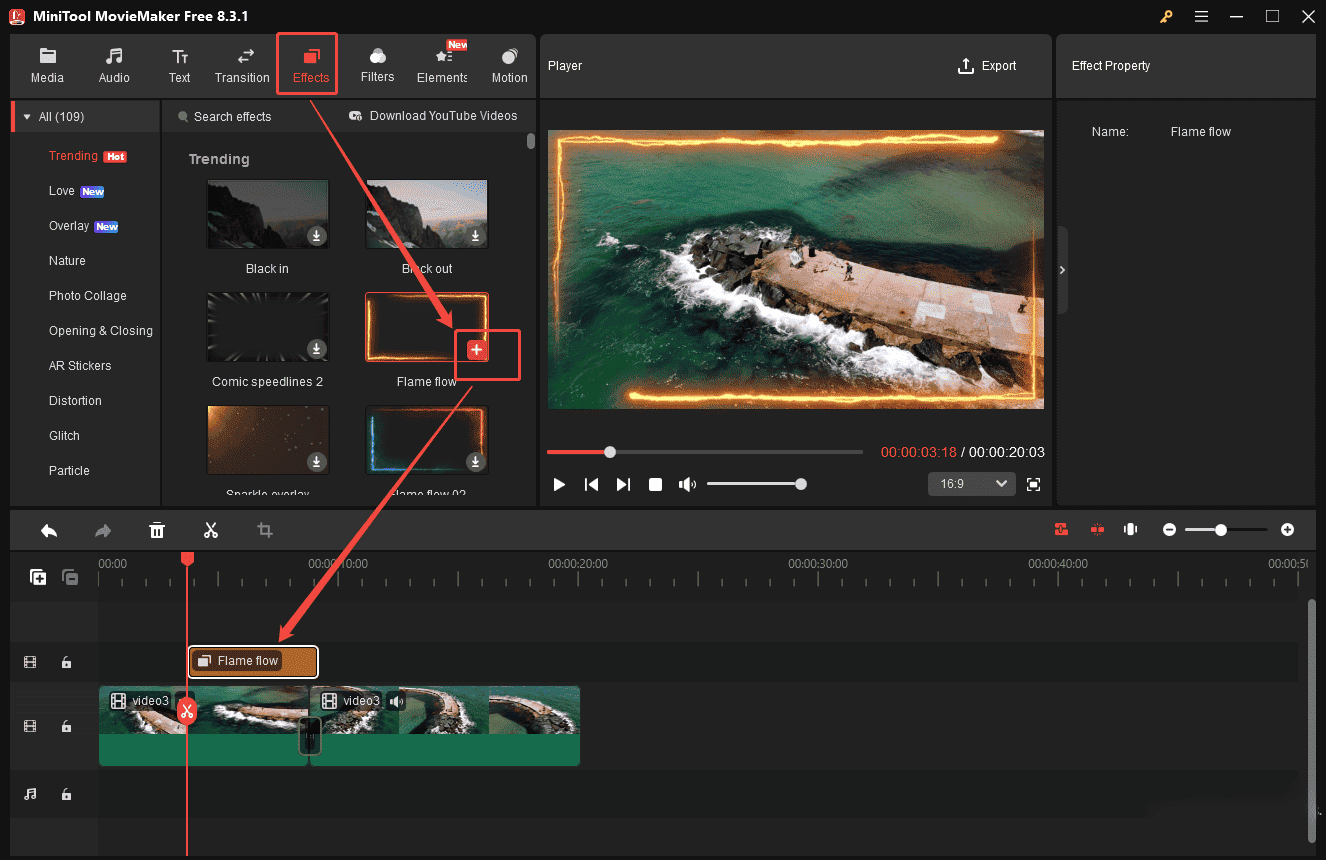
Step 4: Add Effects and Transitions
Click the Transition tab at the top menu to explore a range of transition styles. Select your desired transition and click the Plus icon or drag it directly onto your clip. You can adjust the duration and transition mode from the panel on the right.
Next, click the Effects tab beside Transition to browse various visual effects. Hover your mouse cursor over an effect to preview the animation. Then, click the Plus icon or drag the preferred effect above the target video clip to apply it.
Step 5: Add Audio
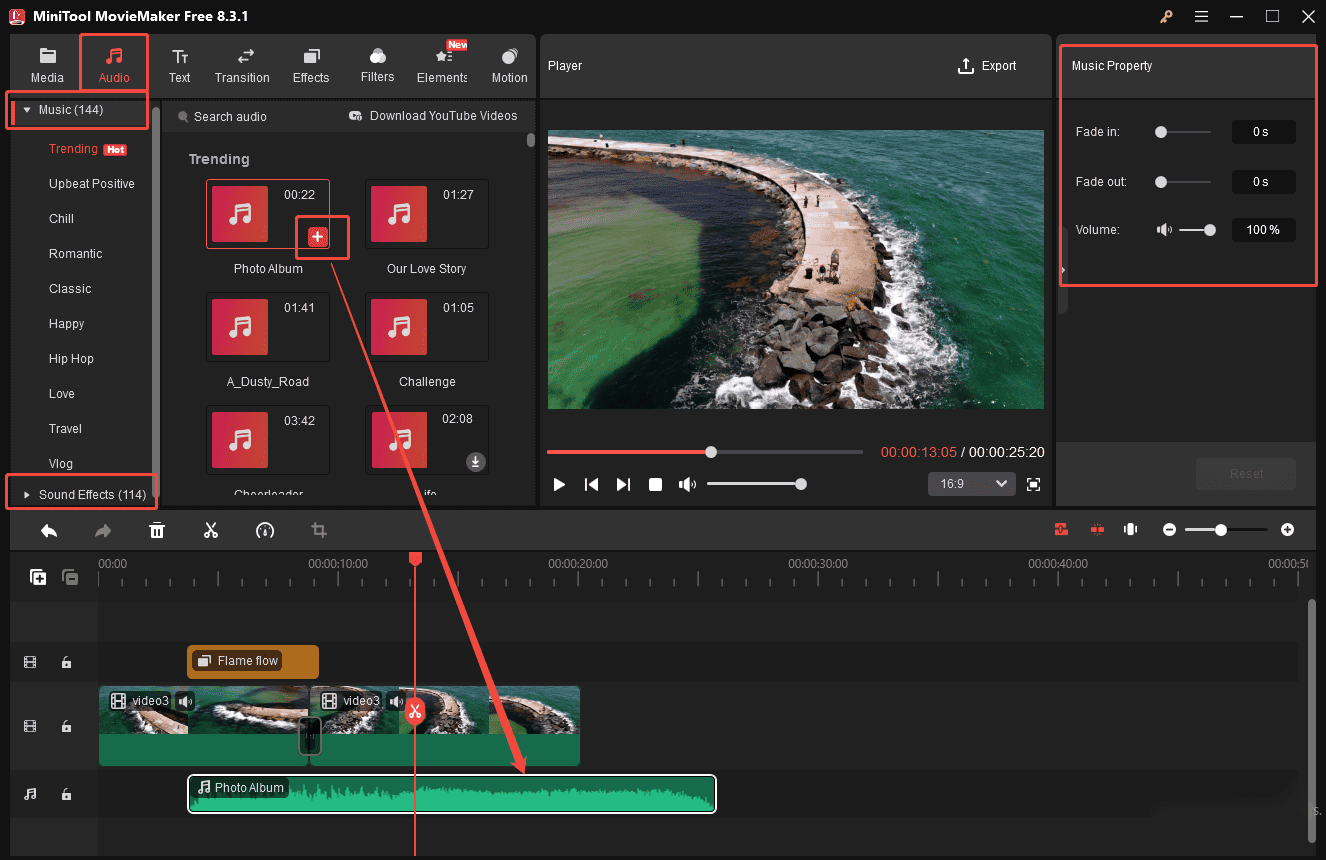
Click the Audio tab at the top of the menu. MiniTool MovieMaker provides both Music and Sound Effects options. Select the Plus icon to add the desired music to the timeline. You can also use the tool to trim or split the music. Then, click the audio track on the timeline, and you can see the music property panel on the right side, where you can adjust the Fade-in/out effects and Volume using the slider.
Step 6: Add Text
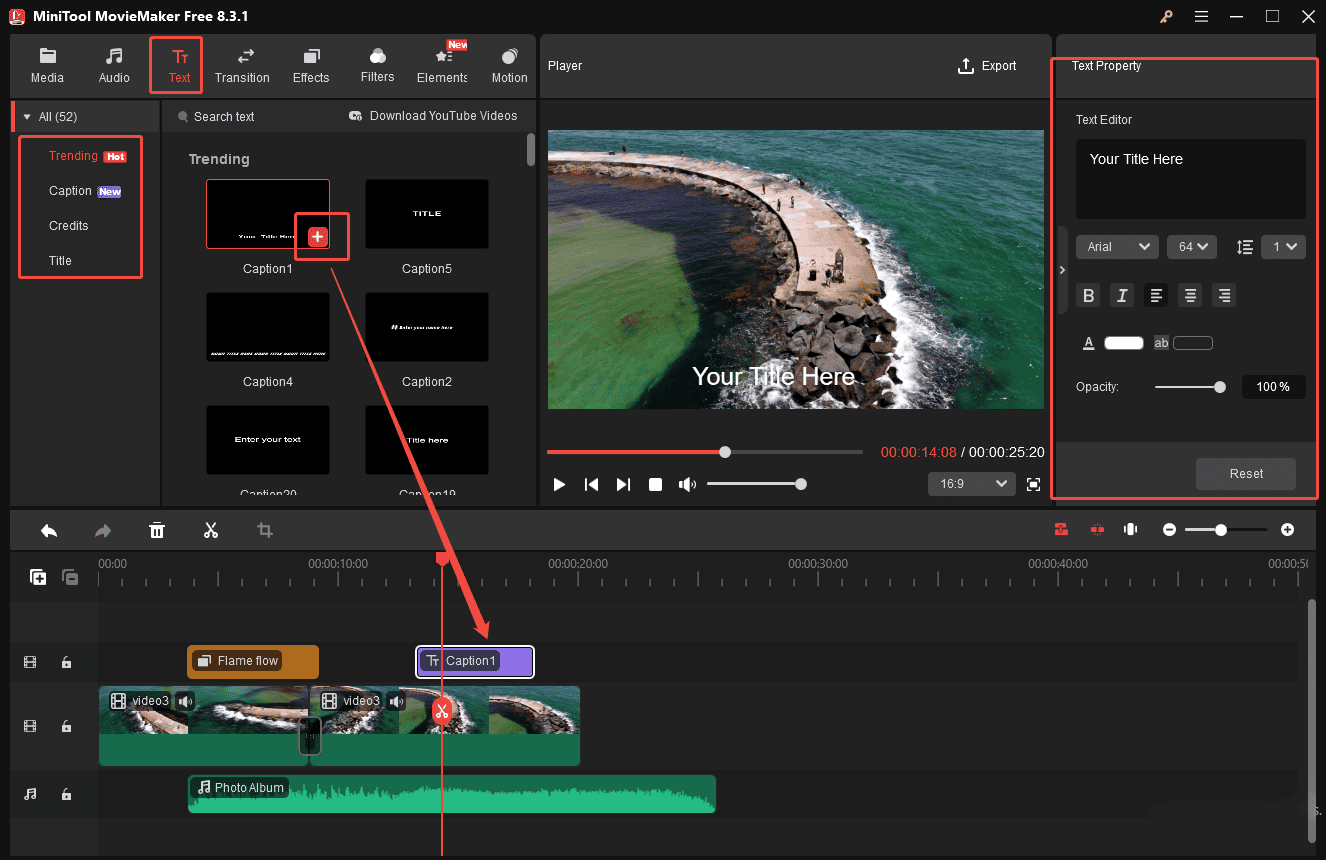
Click the Text tab to add captions or titles. Choose your desired text template and click the Plus icon to add it to the timeline. You can input the desired text and adjust the font, size, line space, text color, and more in the Text Property panel.
Step 6: Export the Video
Once the video is finished, click the Export icon to access the Export Settingswindow. Here, you can select your preferred video format, resolution, and frame rate. Then, select Export again to save it to your computer.

MovieMaker by MiniTool is an inexpensive, easy-to-use video editing program. It includes a fair number of effects and gives you easy ways to join your clips, add transitions, and overlay objects and text.https://www.pcmag.com/reviews/minitool-moviemaker
Method 2: Using Microsoft Clipchamp
Fast Track:
- Launch or install Microsoft Clipchamp.
- Add the target video clips.
- Set the aspect ratio.
- Tri, split, add text, and add music.
- Export the video.
Microsoft Clipchamp is a quick and easy-to-use video editor without watermark. As a fan edit video maker, it provides basic editing tools such as trimming, splitting, adding filters, and more to help users make excellent videos. What’s more, powered by advanced AI tools, it supports features such as AI-generated voiceovers, automatic transcriptions, and audio enhancement.
Here is a quick guide on how to make a fan edit video using Microsoft Clipchamp.
Step 1: Download and Install
Head to the Microsoft Store and search for Clipchamp. Then, install it according to the setup instructions.
Step 2: Import Videos
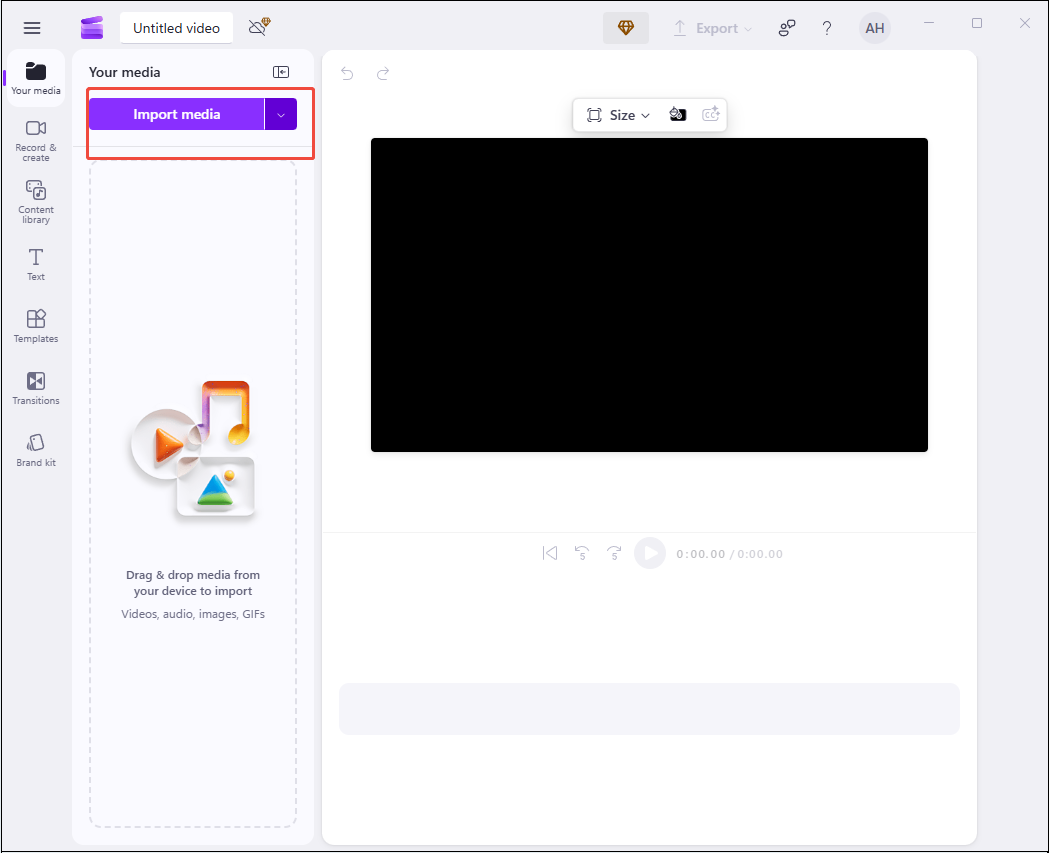
Open Clipchamp and click the Create a new video option to enter the editing page. Next, click Import media to upload your videos.
Step 3: Edit Videos
Drag the added videos to the timeline. There are various editing tools available to elevate your fan edit video.
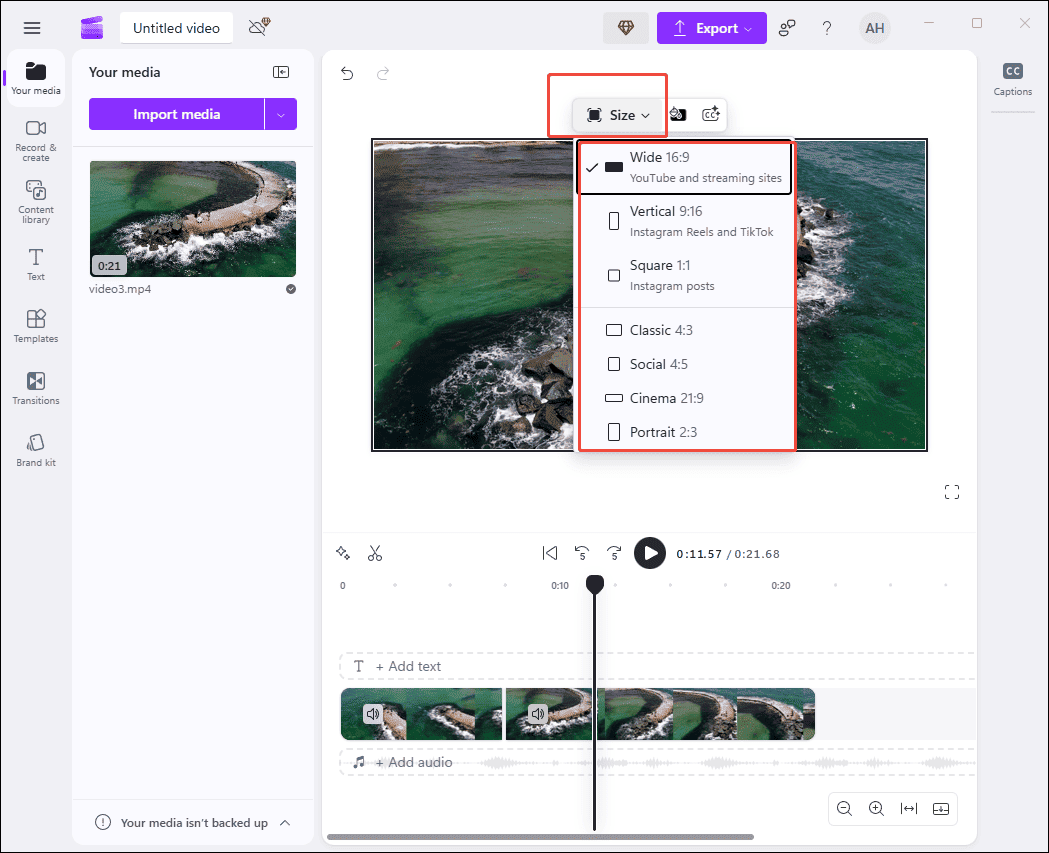
Change the aspect ratio: Click the Size icon in the toolbar over the player and select the aspect ratio that best fits your target platform.
Trim the video: Hover over the edges of the video clip on the timeline. Drag it inwards to remove the unwanted part when a double-arrow icon appears.
Split the video: Move the playhead to where you want to separate from the video and click the Scissors icon in the toolbar above.

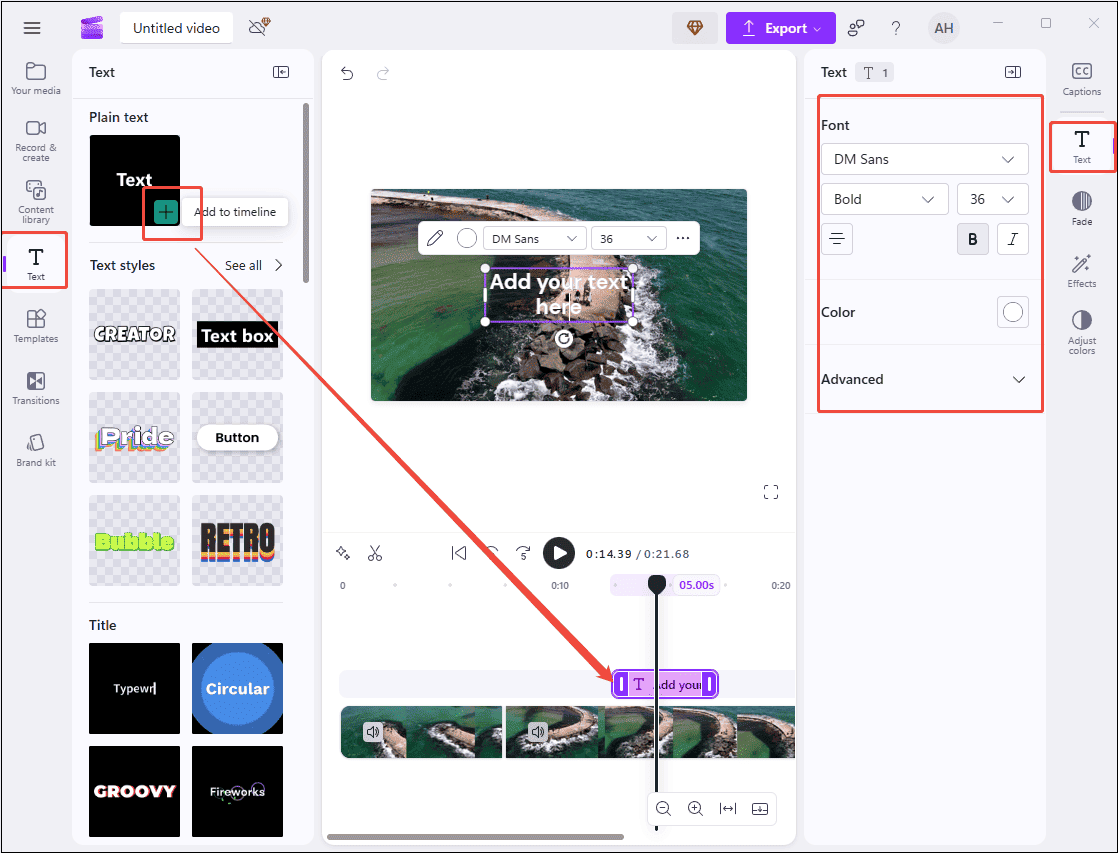
Add animated text: Click Text on the left panel and scroll through all types of text templates. Hover your mouse cursor over it to preview. Drag and drop your preferred text style onto the timeline. Click the Text icon on the right panel to adjust its font, size, color, and so on.
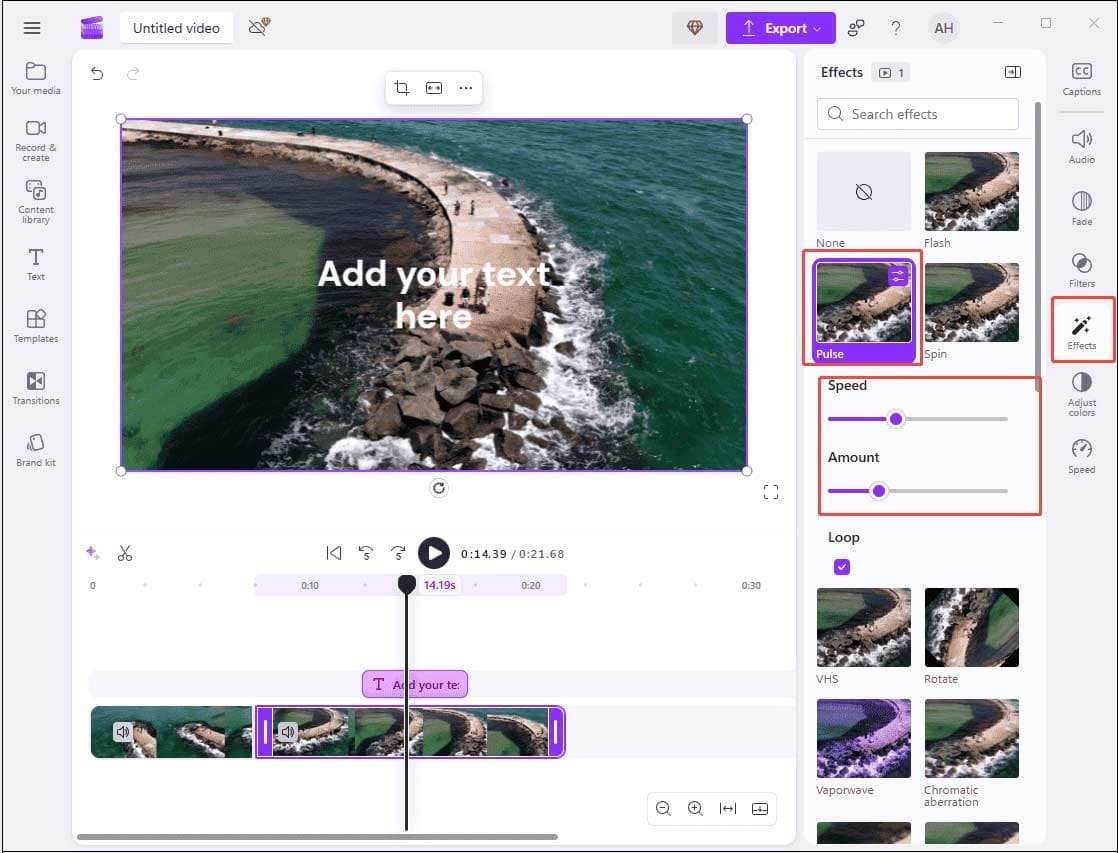
Apply filters and effects: Click the Filter tab on the right panel to explore available options. Simply click a filter to apply it to your video. Drag the slider below the selected filter to adjust the property. You can also add effects in the same way.
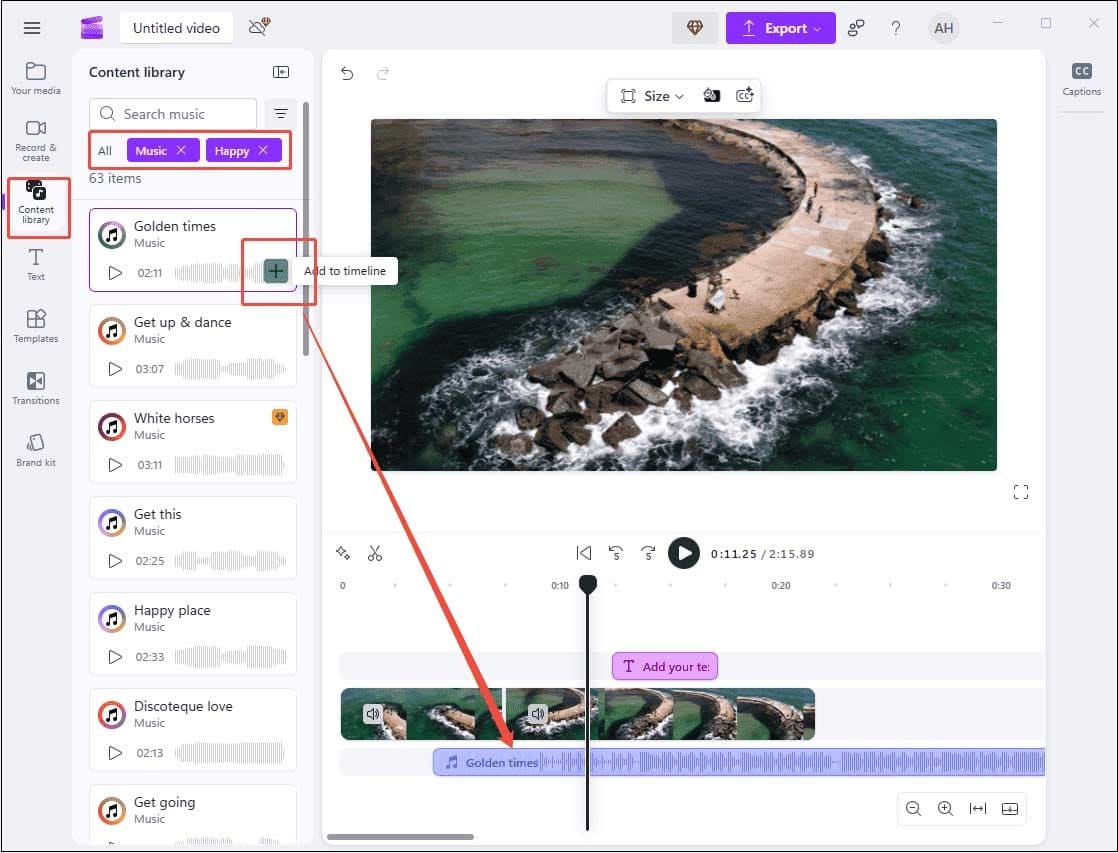
Add music: Click the Content Library tab on the left panel and scroll down to find the Music category. Hit it to see all types of music. Select the appropriate music and drag and drop it onto the timeline. You can also import your own MP3 files to match the video.
Step 4: Export the Video
Once the final video is complete, click Export in the top-right corner and choose your preferred resolution to save the video to your computer.

Clipchamp, the default video editing software for Windows 10 and Windows 11, is surprisingly capable for both personal and professional use. It includes all the basic tools you need to produce video projects, some fun effects, and helpful templates for social media posts.https://www.pcmag.com/reviews/clipchamp
Method 3: Using CapCut
Fast Track:
- Install CapCut and add footage.
- Trim and split videos.
- Enhance clips with effects, audio, and others.
- Save the result.
CapCut is one of the best video makers, thanks to its ease of use and comprehensive editing tools. The program features a clean, simple, and intuitive interface that is suitable for beginners to get started without a steep learning curve. It also offers a resource library that includes various transitions, filters, motions, music, and more. You can create video from images, edit videos, images, and audio effortlessly. It is a great video editor for fan edits.
You can follow the details below to make a fan edit video for free using CapCut.
Step 1: Download and Install
Visit the official CapCut website to download and follow the on-screen instructions to install it on your computer.
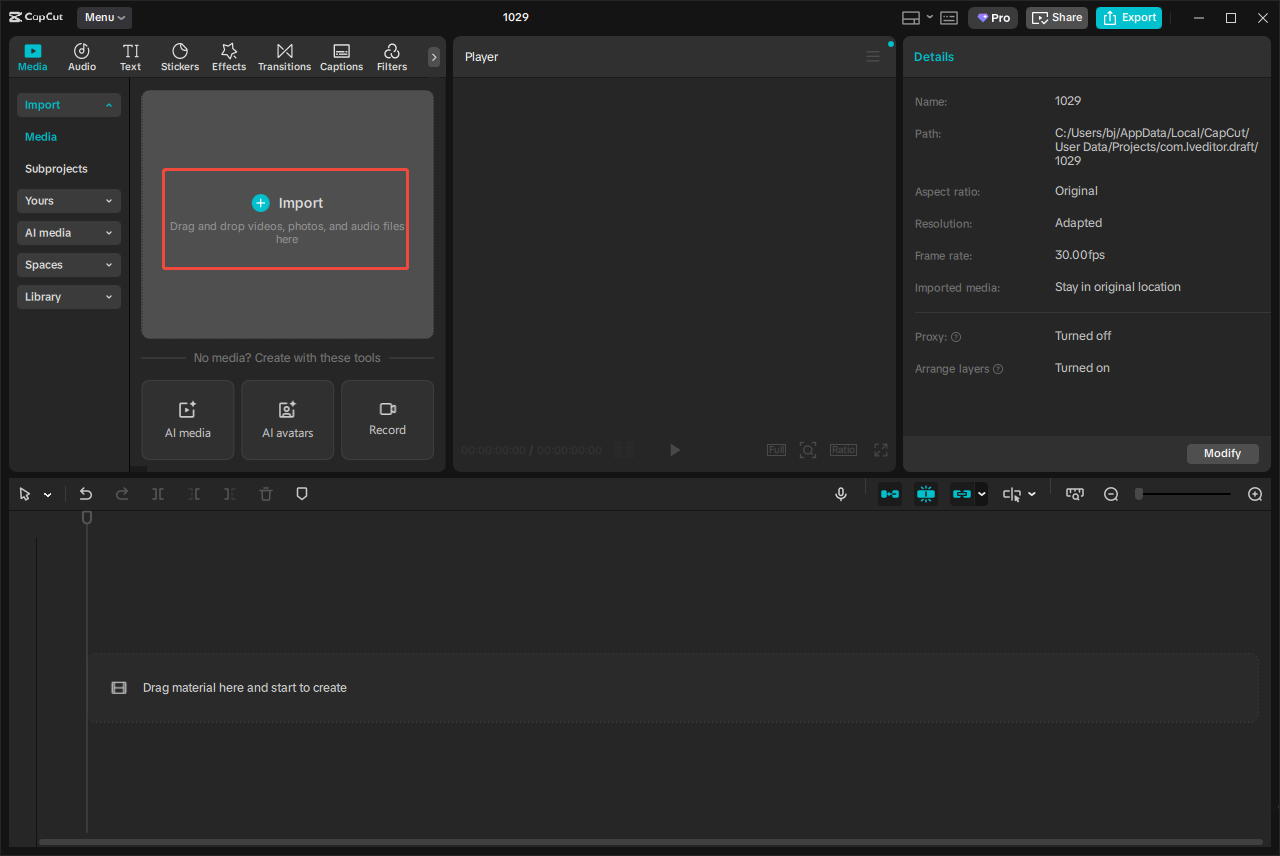
Step 2: Import Videos
Launch CapCut and click Create project on the home page. Then, select the Import option to upload your video from your computer.
Step 3: Edit Videos
Trim the video: Hover your mouse cursor over the two edges of the video clip on the timeline until the Trim icon appears. Drag it inwards to delete the unwanted section.
Split the video: Drag the playhead to the point needed to separate and click the Split icon on the toolbar to divide the clip.

Add more content to your video: In the toolbar below the menu, you will find options for Audio, Text, Stickers, Effects, Transitions, Filters, and other tools. Simply click any of these tabs to apply them to your video. For example, click the Audio tab to scroll through all the Music and Sounds effects. Then, click the Download icon and drag the desired music to the timeline. Next, adjust the Volume, Fade-in/out, Speed, and other settings from the audio property panel on the right.

Step 4: Export the Video
After finishing the final video, you can click the Export option at the top-right corner of the menu. Then, customize your export settings, including the video format, resolution, codec, frame rate, and bit rate. Next, click Export again to save the video to your computer.

CapCut allows you to edit videos with an intuitive interface while offering advanced capabilities like AI-enhanced effects, automated text-to-speech, multi-track editing, and one-click templates. It works across multiple devices with cloud synchronization, enabling seamless editing between mobile and desktop.https://www.zebracat.ai/post/i-tried-capcut
Conclusion
Fan edit videos have been an indispensable part of modern fandom culture. To better promote your creative work, the first step is to improve the video quality. With the 3 robust tools mentioned, you can easily explore how to make a fan edit video on PC. Select your favorite video editor for fan edits and create your video with ease.
You can contact us via [email protected] if you have any problems or suggestions when using MiniTool MovieMaker.
How to Make a Fan Edit Video FAQ
2. Open a video editor and import the source files.
3. Trim and split videos to delete unwanted sections.
4. Add transitions and effects, and insert text to enhance the video.
5. Export and share the fan edit video.
2. Select a video editing app, such as CapCut and VN.
3. Add the source files to a video editing app.
4. Edit and enhance the clips with effects, filters, text, and other tools.
About The Author

Position: Columnist
Cora is a tech writer specializing in digital media workflows, with over six years of hands-on experience in video post-production, media transcoding, and screen capture. Her writing is always clear and practical. Cora also produces in-depth software reviews for users across skill levels to help them find the right tool and enjoy video editing.
User Comments :