Packing order videos have become a popular trend with the rise of short videos. This post presents three powerful video editing software programs to make your packing order videos more engaging and explains how to edit packing order videos using MiniTool MovieMaker.
With satisfying visuals and sound, packing order videos have been growing in popularity as short-form videos like TikTok, YouTube Shorts, and Instagram Reels have gained traction. If you want to elevate your packing order videos with smoother cuts and an engaging look, choosing the right editing tool is essential. This post demonstrates how to edit packing order videos, helping you create a polished and eye-catching one with ease.
Before we delve into the detailed methods, let’s understand what a packing order video is.
What Is a Packing Order Video
Packing order videos are a fantastic way to record the overall packing process, including wrapping, labeling, and sealing the package, which aims to showcase the products and engage with the audience. Compared with unboxing videos, packing order videos are more effective for micro businesses to reach their target audience. The real order experience highlights consumers’ commitment and brand authenticity.
As a rising trend in short-form content, packing-order videos offer a strong ASMR experience that captures viewers’ attention and creates a uniquely engaging way for consumers to immerse themselves in the video.
To make your packing order videos more appealing, you need to necessary to prepare a tidy packing space, use overhead shots, capture high-quality audio, and apply polished editing. The next section will dive into the 3 best Windows video editing software programs to make the editing part perfect.
How to Edit Packing Order Videos on Windows: 3 Methods
How to edit packing order videos on Windows? To help you transform raw recording footage into a polished video, this section introduces three applications.
Method 1: MiniTool MovieMaker
MiniTool MovieMaker is an all-in-one video editor without watermark designed for Windows users. It comes with all the features you would need to edit your packing order videos. You can trim, split, and cut videos, and add interesting content such as text, music, and elements to videos. Besides, there are some extra features as well, such as adding motion, applying 3D LUT effects, extracting audio from video, and more advanced functionality.
Moreover, MiniTool MovieMaker strikes a balance between editing capabilities and simplicity, meaning users of all levels can enjoy the robust features with ease.
Method 2: Microsoft Clipchamp
Microsoft Clipchamp is another great option to edit packing order videos. It also offers a wide range of editing tools, making it convenient for you to trim video, enhance audio quality, and add interesting content to videos. Besides, with the built-in extensive resource library, it enables you to add plenty of music and text templates to videos. This software is also easy to navigate, empowering you to edit packing order videos with no hassle.
Method 3: CapCut
If you are looking for a more advanced video editor, CapCut can cover your needs. Besides basic editing features, CapCut provides more professional tools to add voice-over, reduce noise, and add animation to videos, enabling you to create professional-looking videos. Moreover, you can use its pre-designed templates to save time in video design. CapCut is suitable for both beginners and experienced users to create polished packing order videos.
As the saying goes, actions speak louder than words. To help you better understand how to edit packing-order videos, the following section will walk you through the detailed steps using a practical example.
Edit Packing Order Videos Using MiniTool MovieMaker
Here is how to edit packing order videos using MiniTool MovieMaker.
Step 1: Download and Install
Click the button below to start downloading MiniTool MovieMaker. Then, complete the installation according to the setup instructions.
MiniTool MovieMakerClick to Download100%Clean & Safe
Step 2: Import Your Recording Video
Launch MiniTool MovieMaker and click New Project to enter the editing interface. Then, click Import Media Files to upload your recorded video. Click the Plus icon on the video to add it to the timeline.

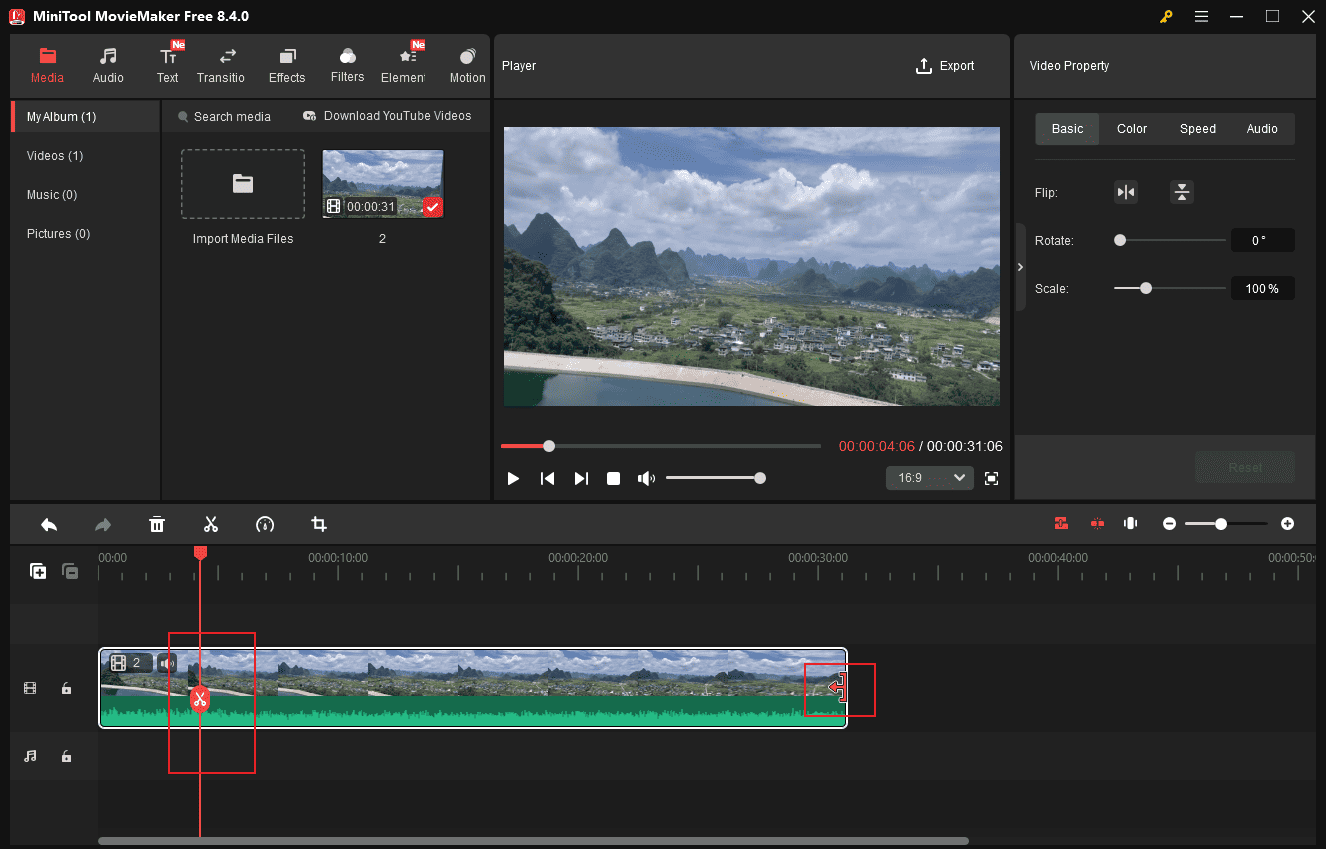
Step 3: Trim & Split Video
The trim and split tools play an important role in removing mistaken clips. Hover your mouse cursor over the edge of the video until the Trim icon appears. Drag it inwards to remove the unwanted part.
To split the video, move the playhead to the desired point and click Scissors to separate the clip from the video. Then, you can delete the undesired part precisely.
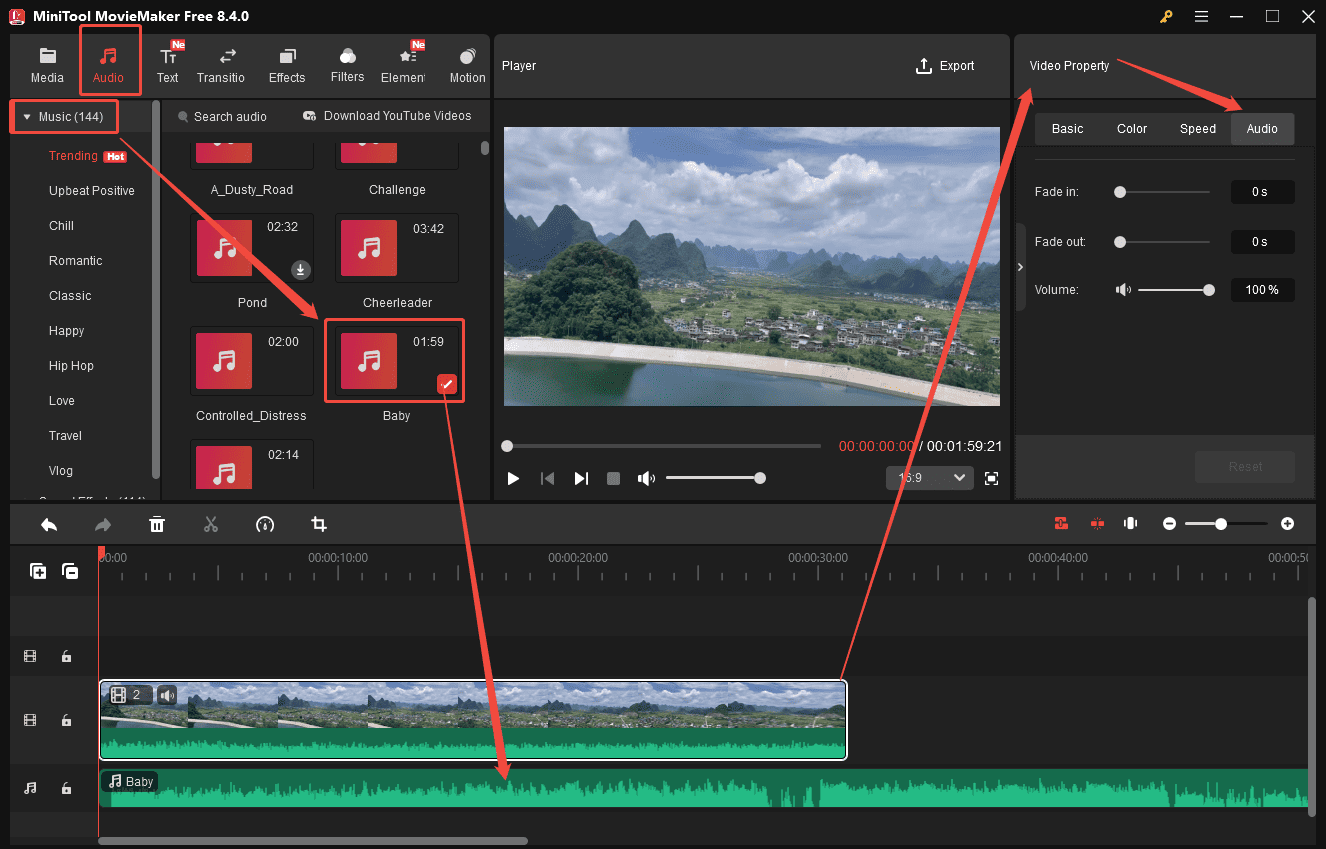
Step 4: Adjust the Audio in Video
Audio is integral in packing order videos. Select the clip and click the Audio tab in the right Video Property panel. You can move the Fade-in/out and Volume sliders or enter a precise value to adjust the audio.
Moreover, if you want to add background music to videos, MiniTool MovieMaker provides an audio library that includes various kinds of music. Choose the Audio tab at the top of the menu and click the Download icon of the preferred music. Then, drag your desired music to the timeline.
Step 5: Add Text to Video
Adding text is an effective way to introduce the basic information of the packing order. Click Text at the top of the menu and scroll down to select your preferred template. Then, click the Download icon and drag it to the timeline. Select the text to enter words and customize the text properties in the right Text editor panel.

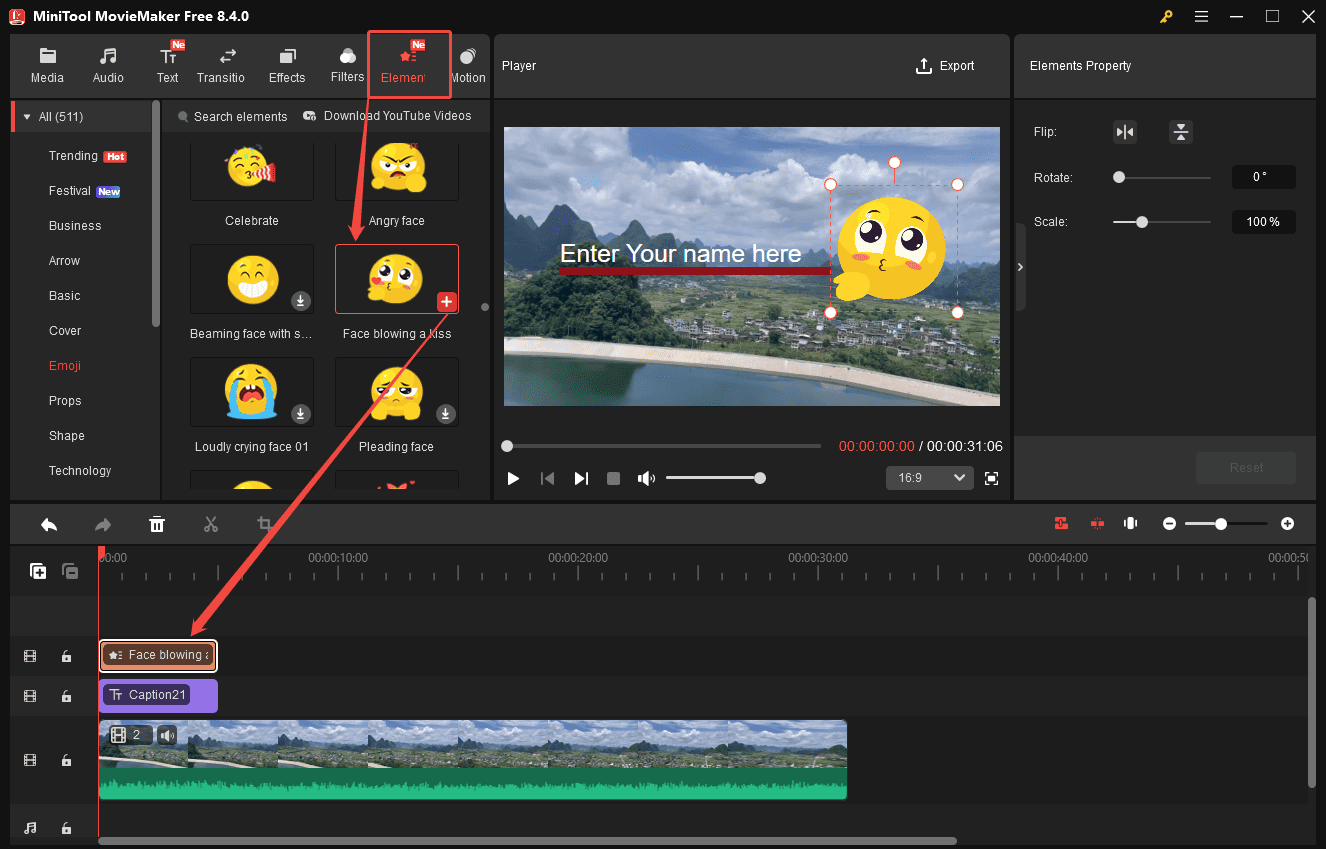
Step 6: Add Elements to Video
Adding elements like stickers and emojis can add a personal and engaging touch to your video. Click the Elements tab at the top of the menu and scroll down to find your desired sticker. Then, download the preferred sticker and click the Plus icon in the right corner to add it to the video.
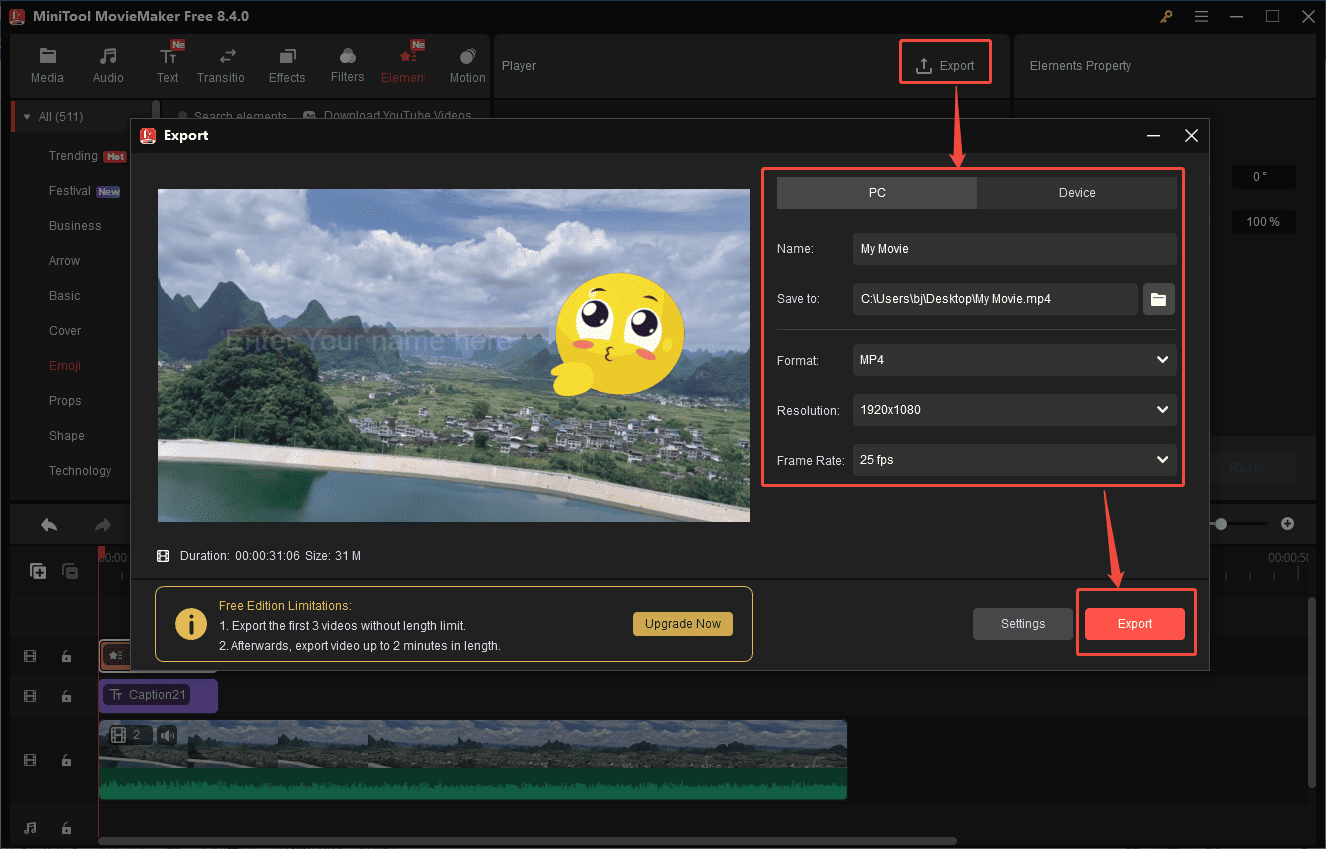
Step 7: Export the Final Video
Once everything is ready, click the Export icon at the top of the menu and customize the video name, format, resolution, and frame rate. Then, click the Export icon at the bottom of the export window to save the final video to your computer.
Now you know how to edit packing order videos with MiniTool MovieMaker.
Conclusion
This post illustrates how to edit packing order videos with 3 video editors. Select the one that best fits your preferences and needs, and make your polished and eye-catching packing order video in minutes.
Hope this article can be helpful. Besides, if you have any suggestions or problems when using MiniTool MovieMaker, please do not hesitate to contact us at [email protected].
About The Author

Position: Columnist
Alice is a tech writer at MiniTool, specializing in tutorials and guides on video editing and screen recording. She stays up to date with the latest tools and techniques to ensure her content is accurate and easy to follow. By combining hands-on testing with continuous learning, Alice aims to help readers solve tech problems efficiently.
User Comments :