Are you wondering how to edit a GoToMeeting recording? In this MiniTool MovieMaker guide, I’ll introduce you to some tools for this task. Check out this post for the best video editing app for your GoToMeeting recordings.
How to Download GoToMeeting Recording
GoToMeeting (now GoTo Meeting) is a professional online meeting service that also offers a desktop application for Windows and Mac. Like other conferencing platforms, GoToMeeting has a built-in recording feature that allows people to record meetings. However, it does not include any editing tools. So, if you need to edit a GoToMeeting recording, a third-party video editor is a must.
But before that, you should download and save the GoToMeeting recording on your computer. Where to download GoToMeeting recording?
To download an online GoToMeeting recording:
- Visit the GoTo web and sign in with your account.
- Choose Meetings > Past and enable the Recorded setting to filter recorded meetings.
- Find the recording you want to save and select the Download icon.
- Select a location on your computer to save the recording and click Save to start downloading the MP4 file.
To download a GoToMeeting recording on Windows and Mac:
By default, local recordings from GoToMeeting are stored in your computer’s Documents folder as WebM files. You can open File Explorer on Windows or Finder on Mac to find your GoToMeeting recording.
How to Edit a GoToMeeting Recording on Windows
How to edit a GoToMeeting recording on PC? Here are some tools you can try on your machine.
Microsoft Clipchamp
Microsoft Clipchamp is Windows 11’s built-in video editor that provides a suite of editing tools for creators at any skill level to edit and create stunning videos. Of course, you can use this tool to edit your GoToMeeting recording. Split, crop, and trim video clips and decorate footage with text, special effects, transitions, music, and more. After editing is complete, you can export the video from Clipchamp up to 1080P for free.
MiniTool MovieMaker
MiniTool MovieMaker is a video editor without watermark that allows you to edit videos in different formats, such as MP4, WebM, MOV, MKV, AVI, and more. It comes with various features to edit and enhance your videos with filters, transitions, frames, overlays, stickers, text, and more. It also lets you trim, split, crop, rotate, and flip videos, adjust the video playback speed, change the video aspect ratio, edit the clip’s color, etc.
MiniTool MovieMakerClick to Download100%Clean & Safe
Furthermore, MiniTool MovieMaker has a user-friendly interface and is simple to use, and it supports exporting videos up to 1080P or 4K for free without watermarks.
A Guide to Editing GoToMeeting Recordings with MiniTool MovieMaker
Step 1: Import your GoToMeeting recording
Click the button below to download and install MiniTool MovieMaker on your computer.
MiniTool MovieMakerClick to Download100%Clean & Safe
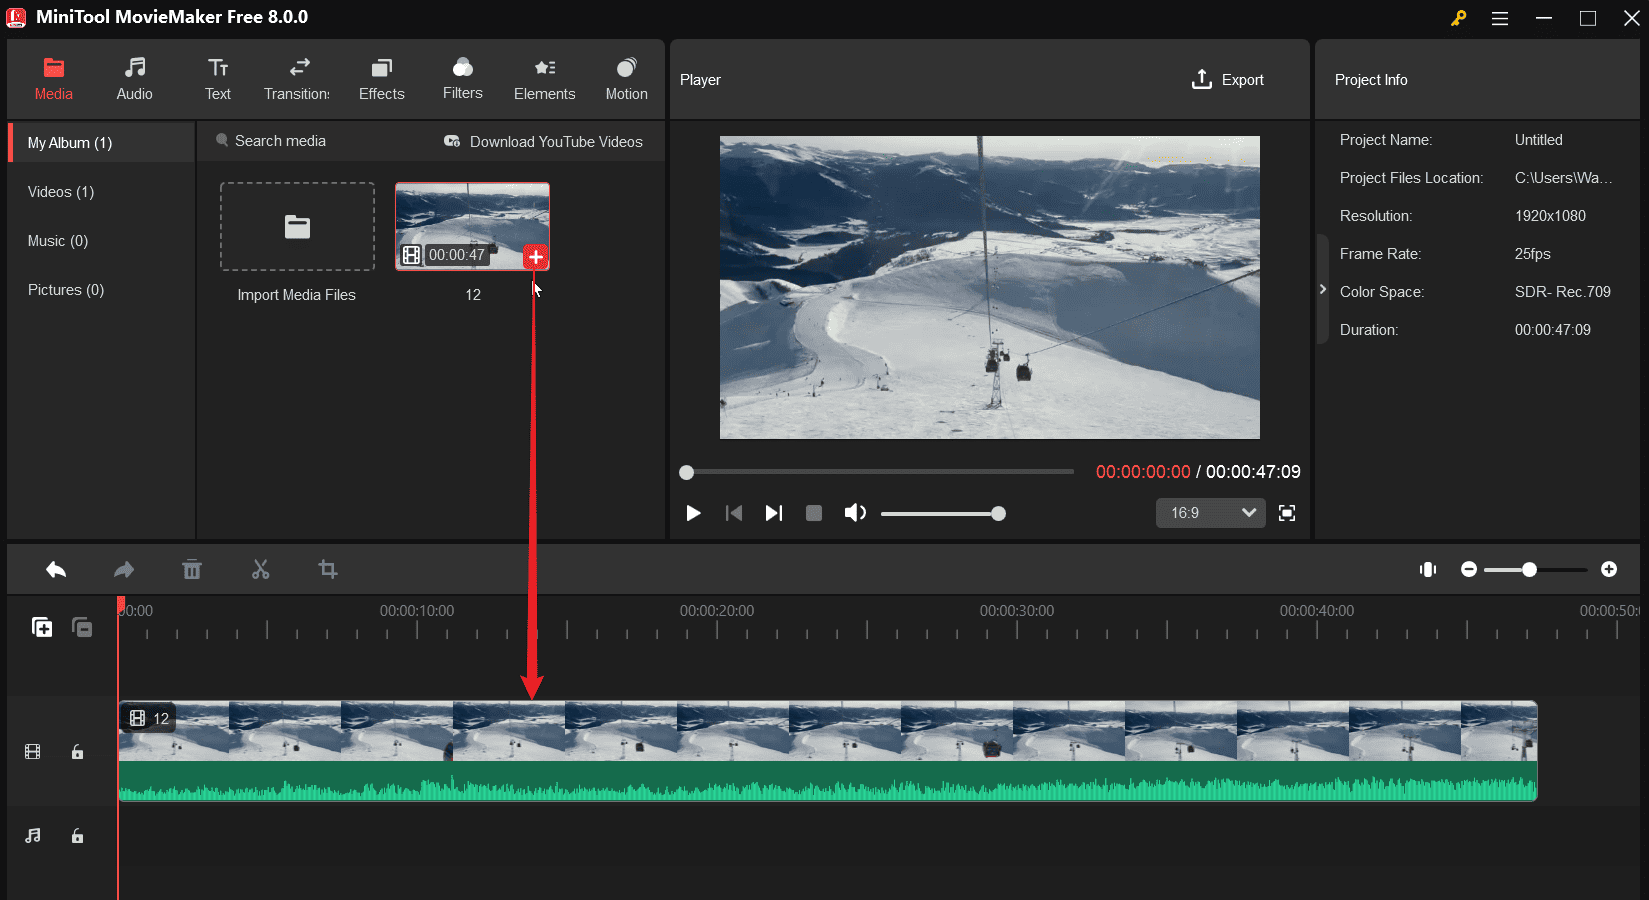
Launch the screen recording editor, close the project library window to enter the main user interface, and click the Import Media Files area under the Media tab to upload your GoToMeeting recording. Then, click the + icon on the clip or drag and drop it to the timeline.
Step 2. Trim the GoToMeeting recording
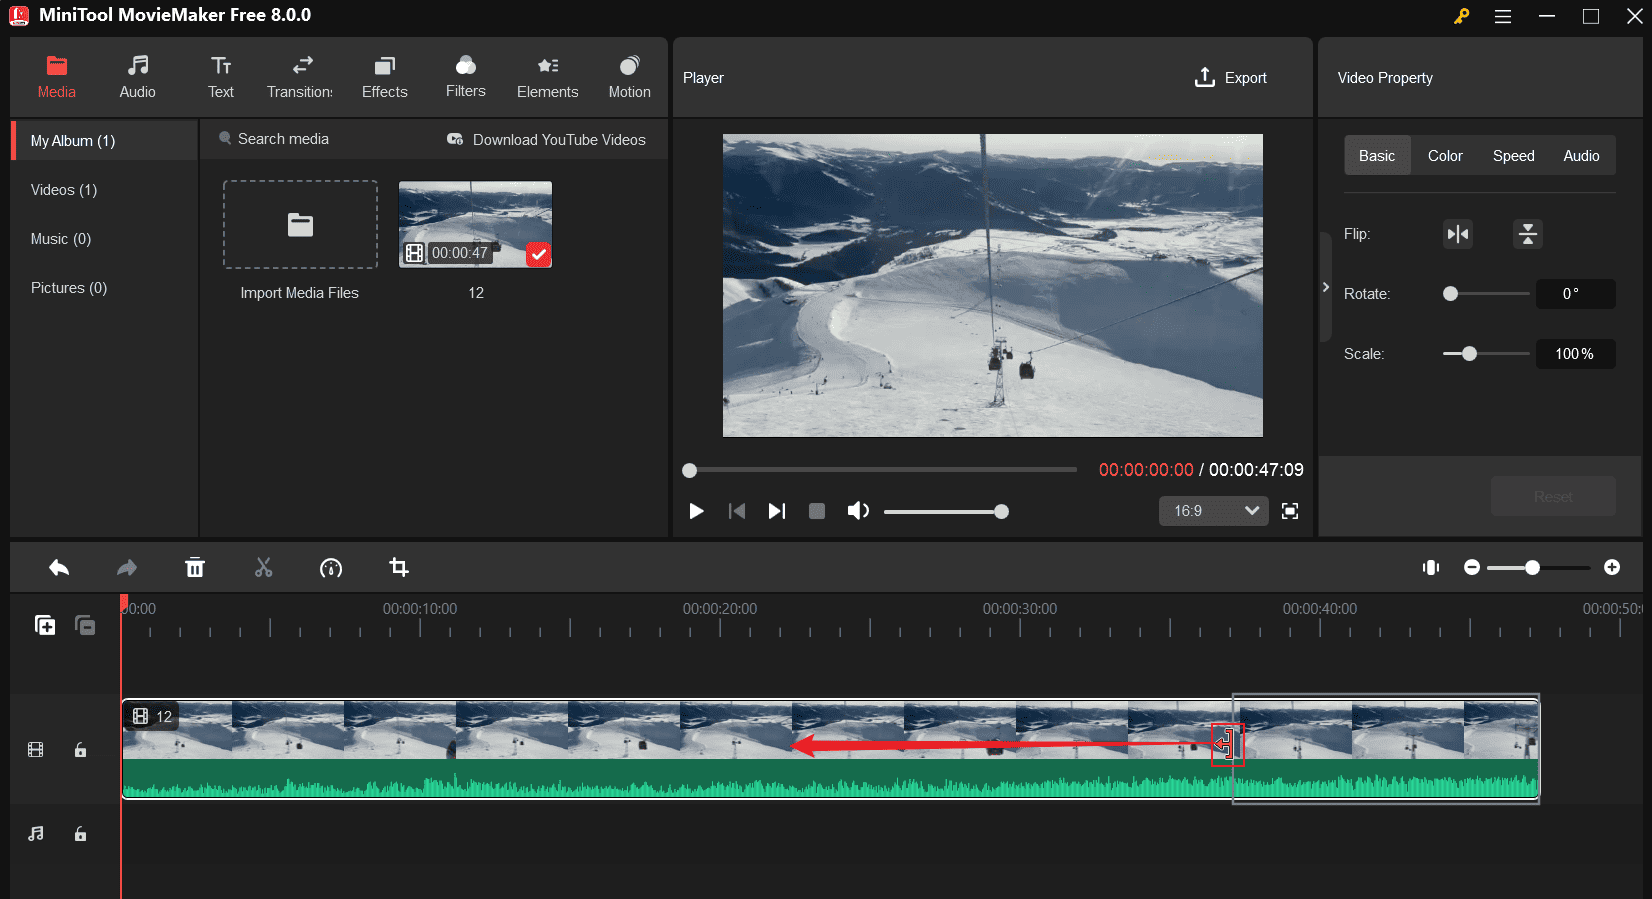
Trim your video to remove unwanted parts at the beginning or end of the clip. To do this, select the clip on the timeline and hover over the clip’s start point and end until the Trim icon appears. Then, drag the Trim icon inwards to trim the recording.
Step 3. Crop the GoToMeeting recording
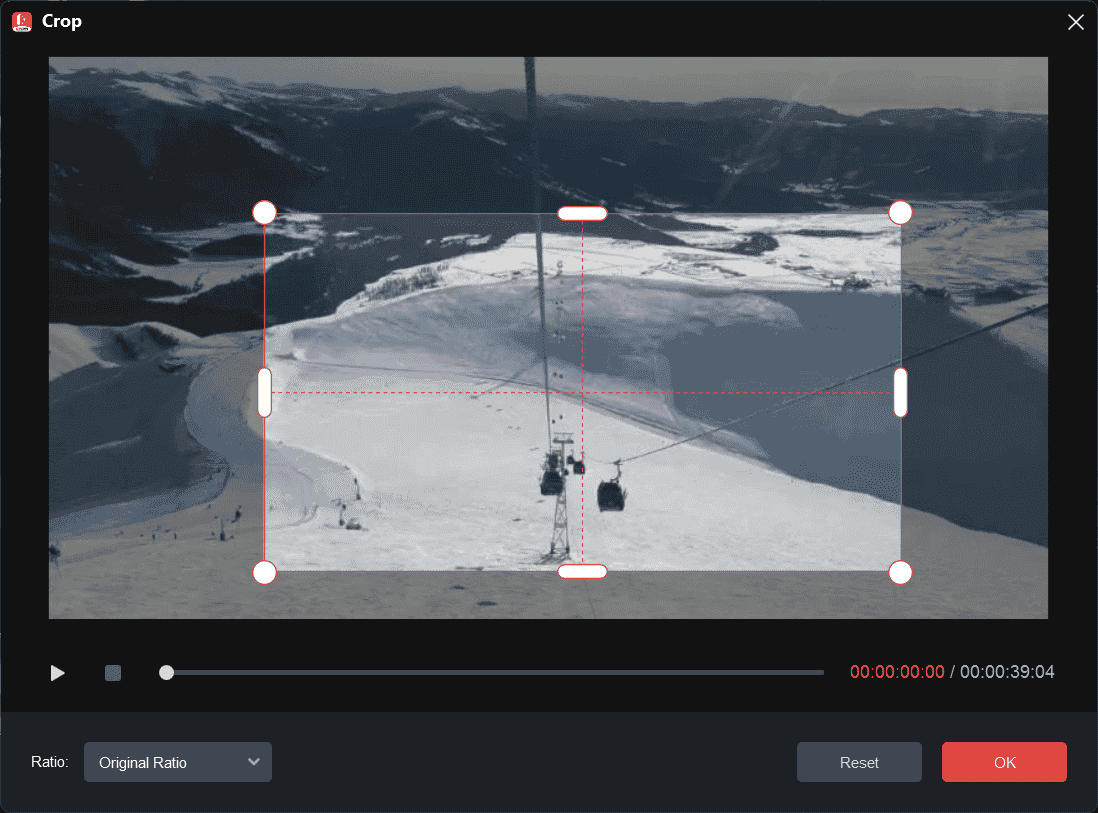
Choose the video on the timeline, and click the Crop icon to open the Crop window. Then, drag any handle on the red rectangle and move it to select the area you want to save. Then, click OK to save the changes.
Step 4. Speed up the GoToMeeting recording
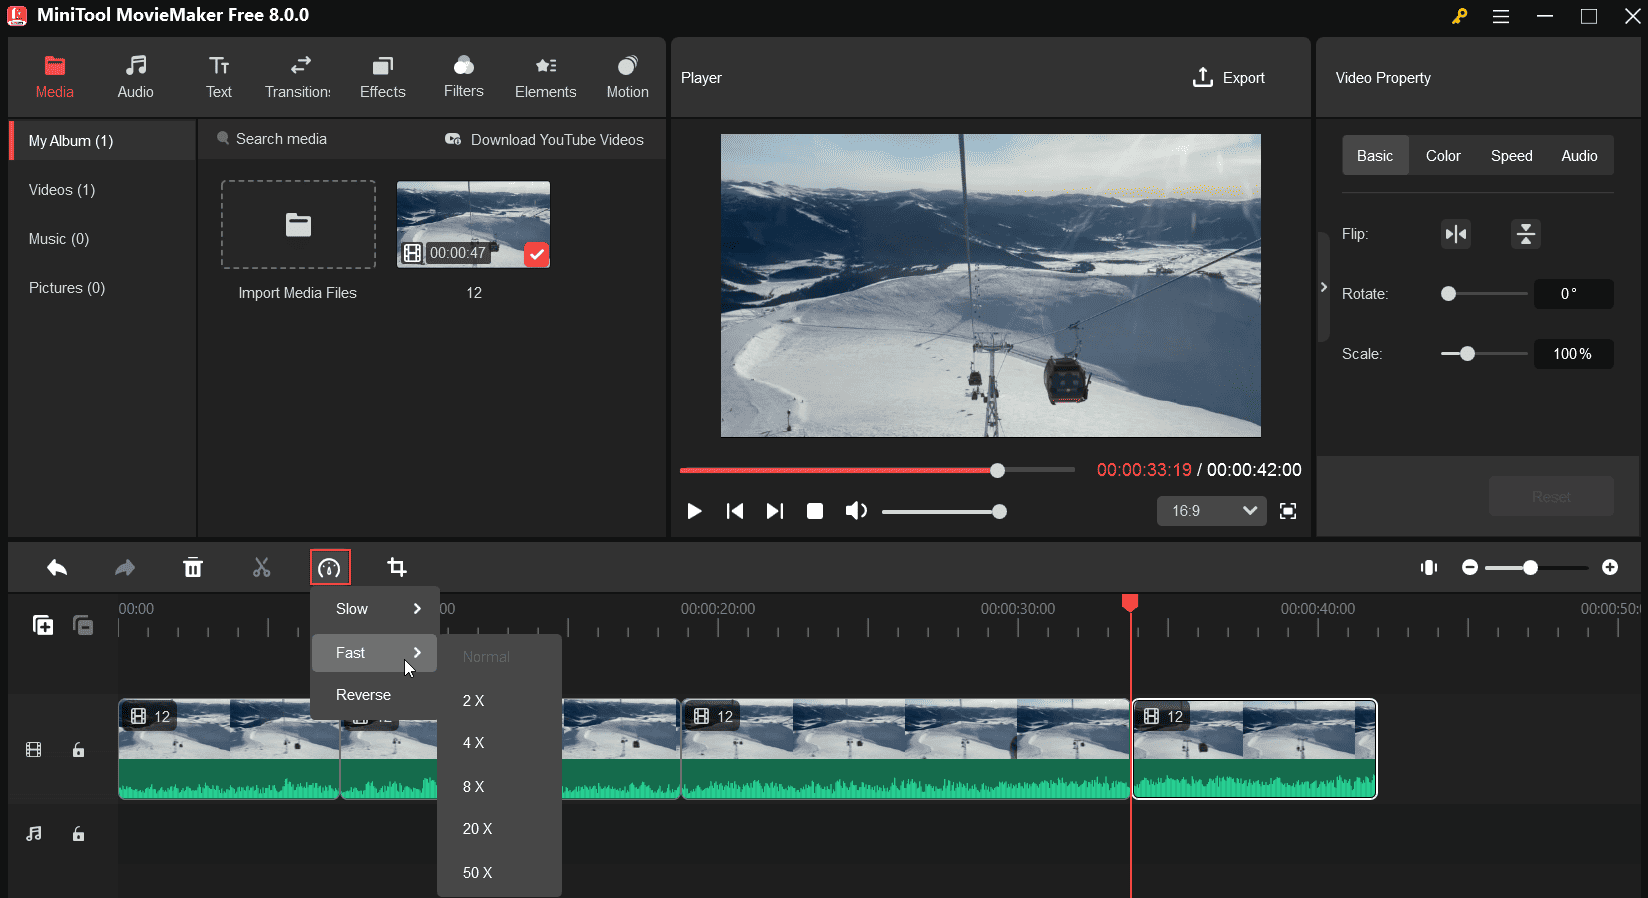
Speed up slow-loading portions of your recording to improve your viewing experience. First, separate the target clip from the original video using the Split tool. Then, click the Speed icon, choose Fast, and then pick a playback speed.
Step 5. Add text to your GoToMeeting recording
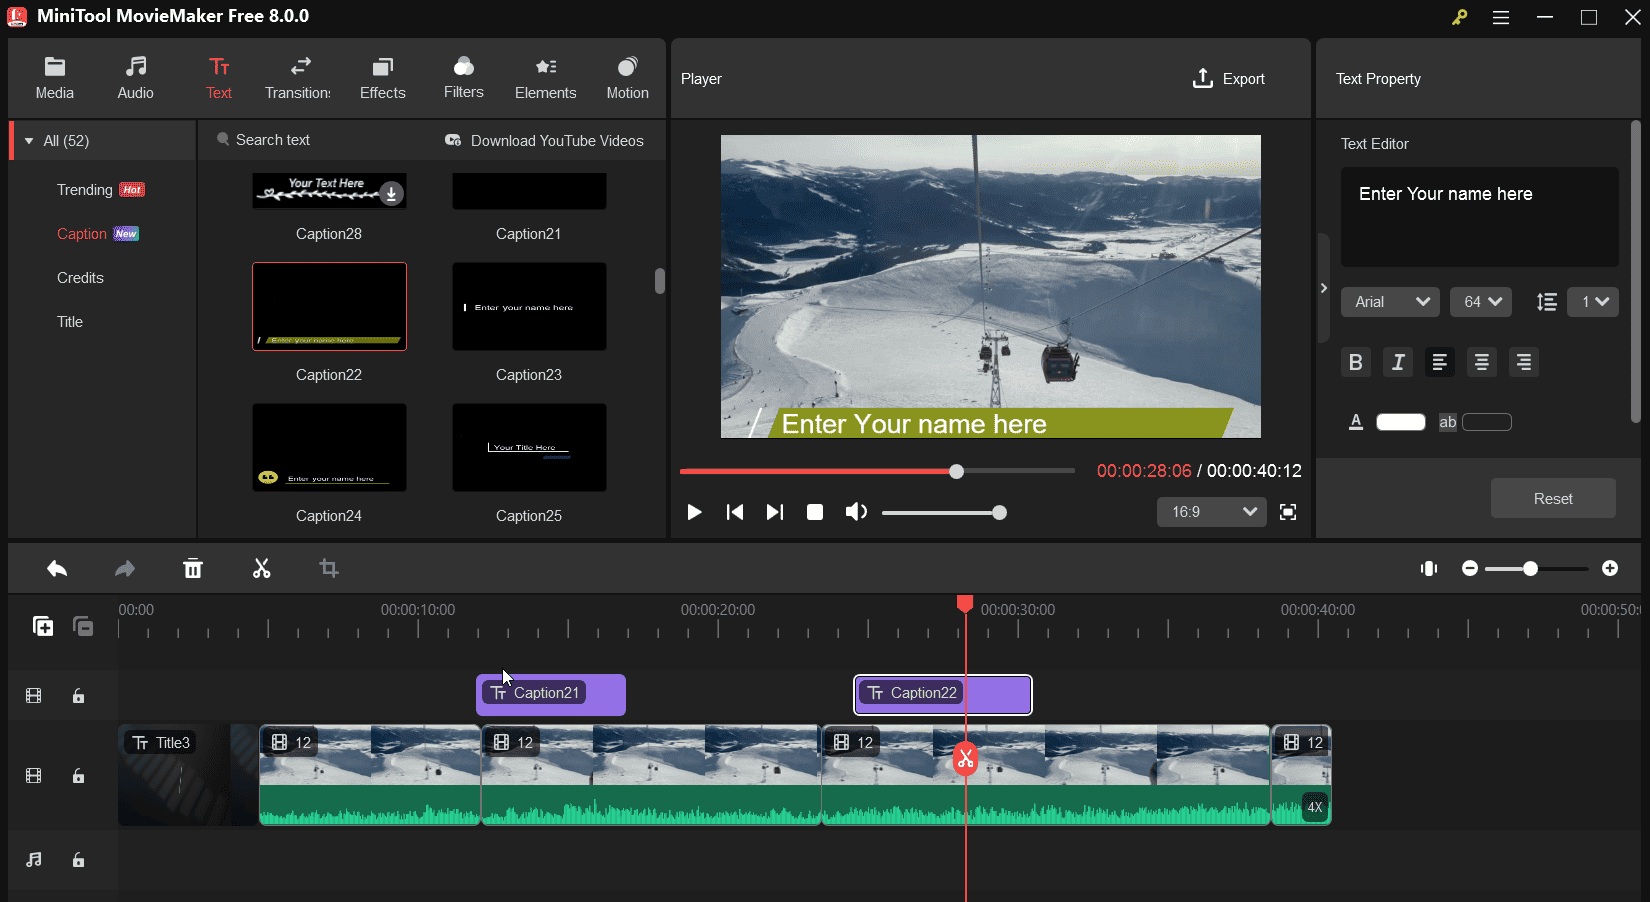
You can add a title card, caption overlay, and end credits to the recording. Go to Text and you’ll see 4 categories: Trending, Caption, Credits, and Title.
To add annotations with text overlays or put a watermark to protect your video copyright, select Caption and add the desired template to the timeline. Then, drag the edges of the text layer to adjust its duration and start and end time. You can also add an intro or outro to the recording. Next, go to the Text Editor to edit the text font, size, color, alignment, and more.
Step 6. Add elements to the recording
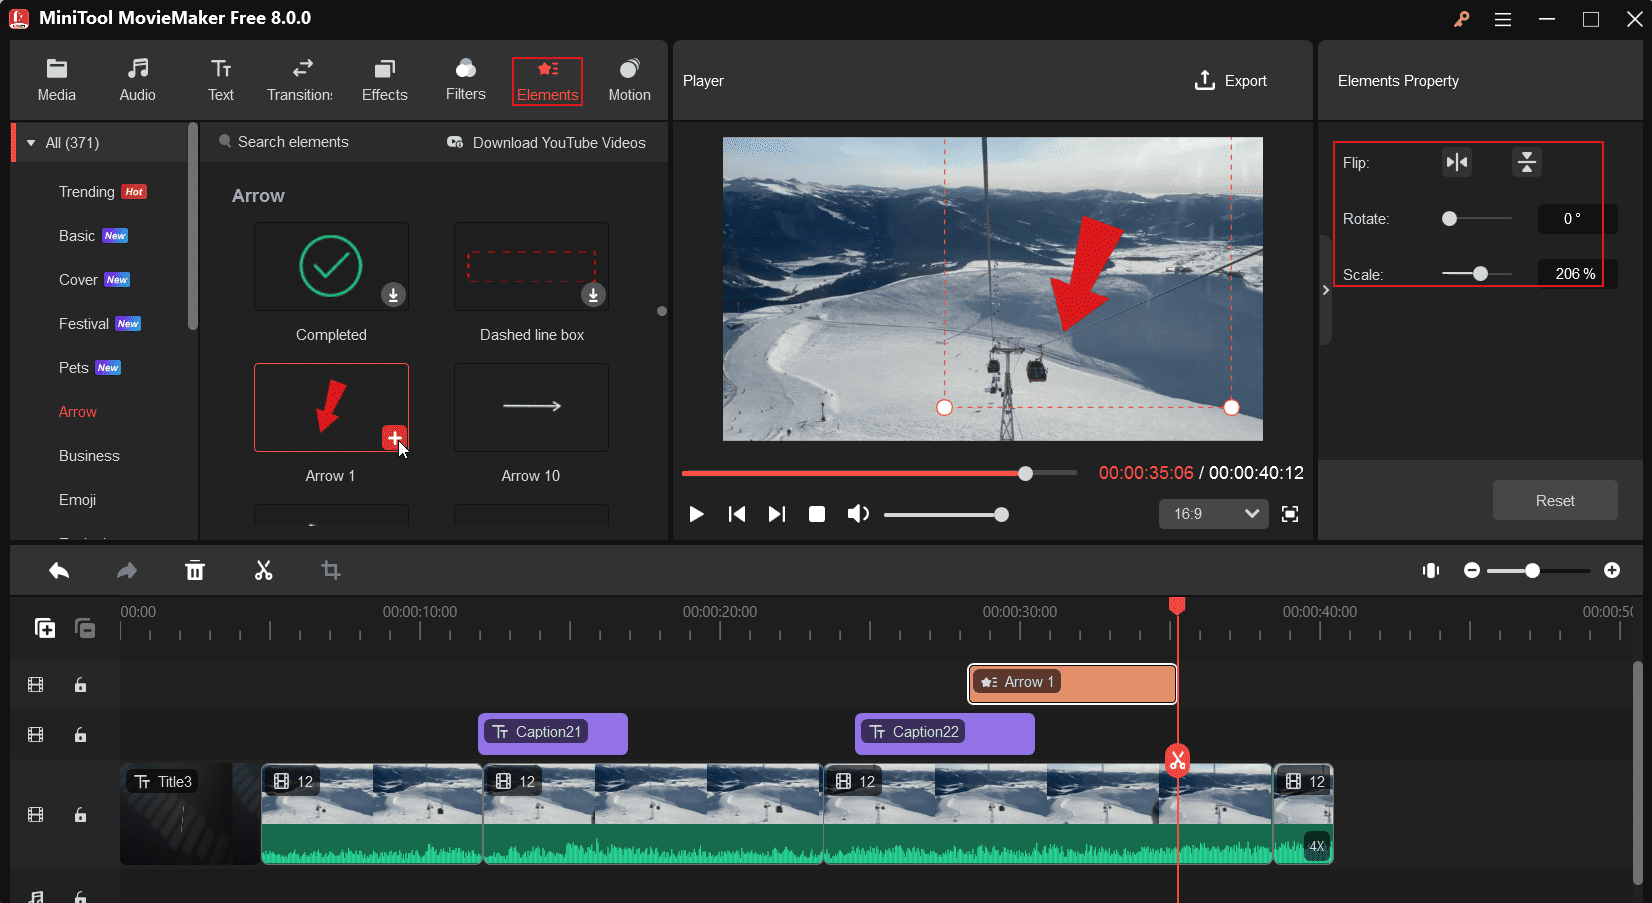
MiniTool MovieMaker has a huge library of animated stickers, including shapes, arrows, emoji stickers, festival symbols, and more. You can add funny stickers to make your videos more interesting or shapes to highlight important information.
Drag the playhead to where you want the element to appear, go to Elements, download the stickers you like, and click the + icon to add it to the top of the video. Next, you can rotate, flip, and scale it and change its position on the frame.
Step 7. Export your edited GoToMeeting recording
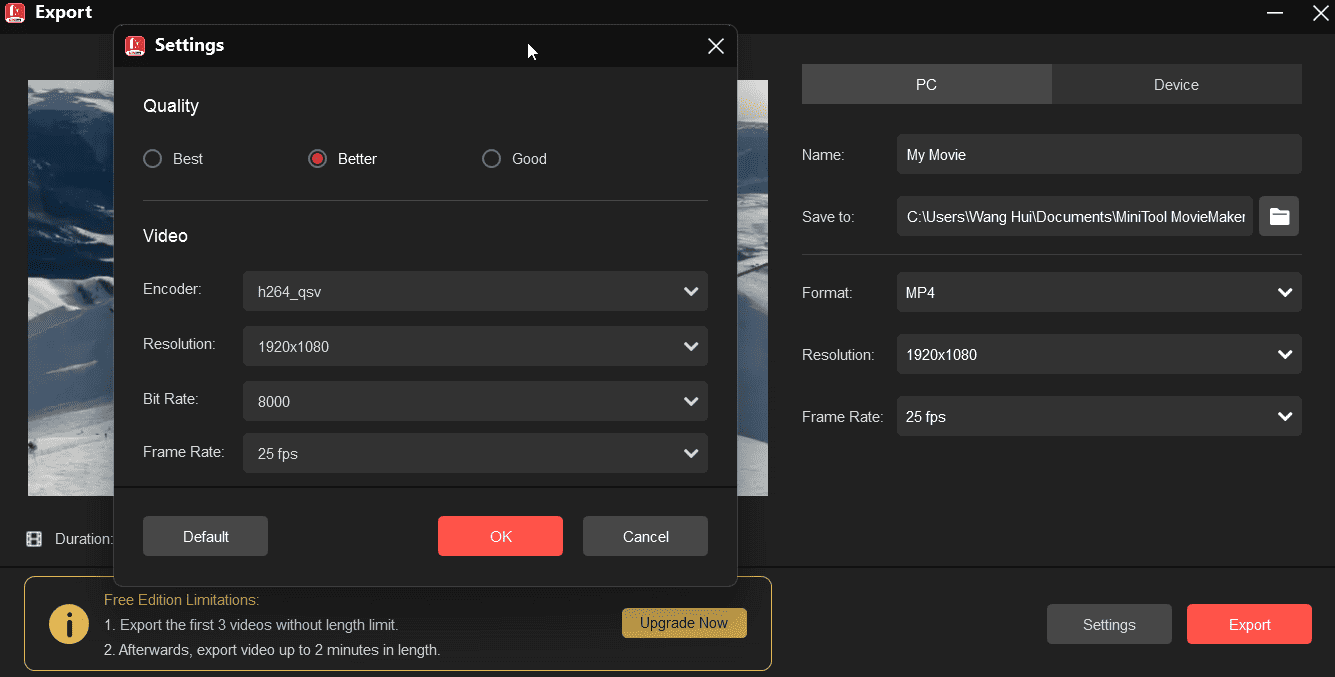
Click the Export button in the upper corner, then configure the output settings, such as format, resolution, bitrate, etc. Finally, click the Export button to render the video.
A Free GoToMeeting Recorder Without Limits
You can use MiniTool Video Converter to record GoToMeeting video conferences for free with no time limit and no watermark. MiniTool Video Converter includes a free screen recorder that allows you to capture your computer screen with audio.
Here’s how to record GoToMeeting with MiniTool Video Converter.
Step 1. Click the button below to download and install MiniTool Video Converter on your PC.
MiniTool Video ConverterClick to Download100%Clean & Safe
Step 2. Launch the free meeting recorder and go to the Screen Record tab on the top menu to open MiniTool Screen Recorder.
Step 3. Then, you can choose the recording area. By default, MiniTool Screen Recorder captures your entire screen. If you want to record parts of the screen, click the arrow next to Full screen, click the Select region option, and drag and drop your mouse to choose the recording zone. Then, choose whether you want to record system audio or the microphone.

Next, click the Settings icon to select the recording frame rate and quality.
Step 4. Click the red Record button or press F6 to start recording. Click F6 again to stop recording.
Conclusion
This post explains how to edit a GoToMeeting recording on PC using MiniTool MovieMaker, an easy-to-use and feature-rich video editor for screen recordings. Follow the steps above to take your GoToMeeting video to the next level. If you are an attendee and want to record a GoToMeeting meeting for later viewing, MiniTool Video Converter can help you do that.
Finally, if you have any questions about using MiniTool MovieMaker or Video Converter, please contact us at [email protected] for help.


User Comments :