Want to add filters to give your movies more creative possibilities? Try MiniTool MovieMaker.
MiniTool MovieMaker enables you to add free video filters to your videos, enhancing the likelihood of infusing creativity into your content. You can click the Filters option on the top menu to access the filter library and use the filters on the video or photo clips in your videos.
MiniTool MovieMakerClick to Download100%Clean & Safe
4 Solutions to Add a Filter
#1 Add a Filter to a Single Clip
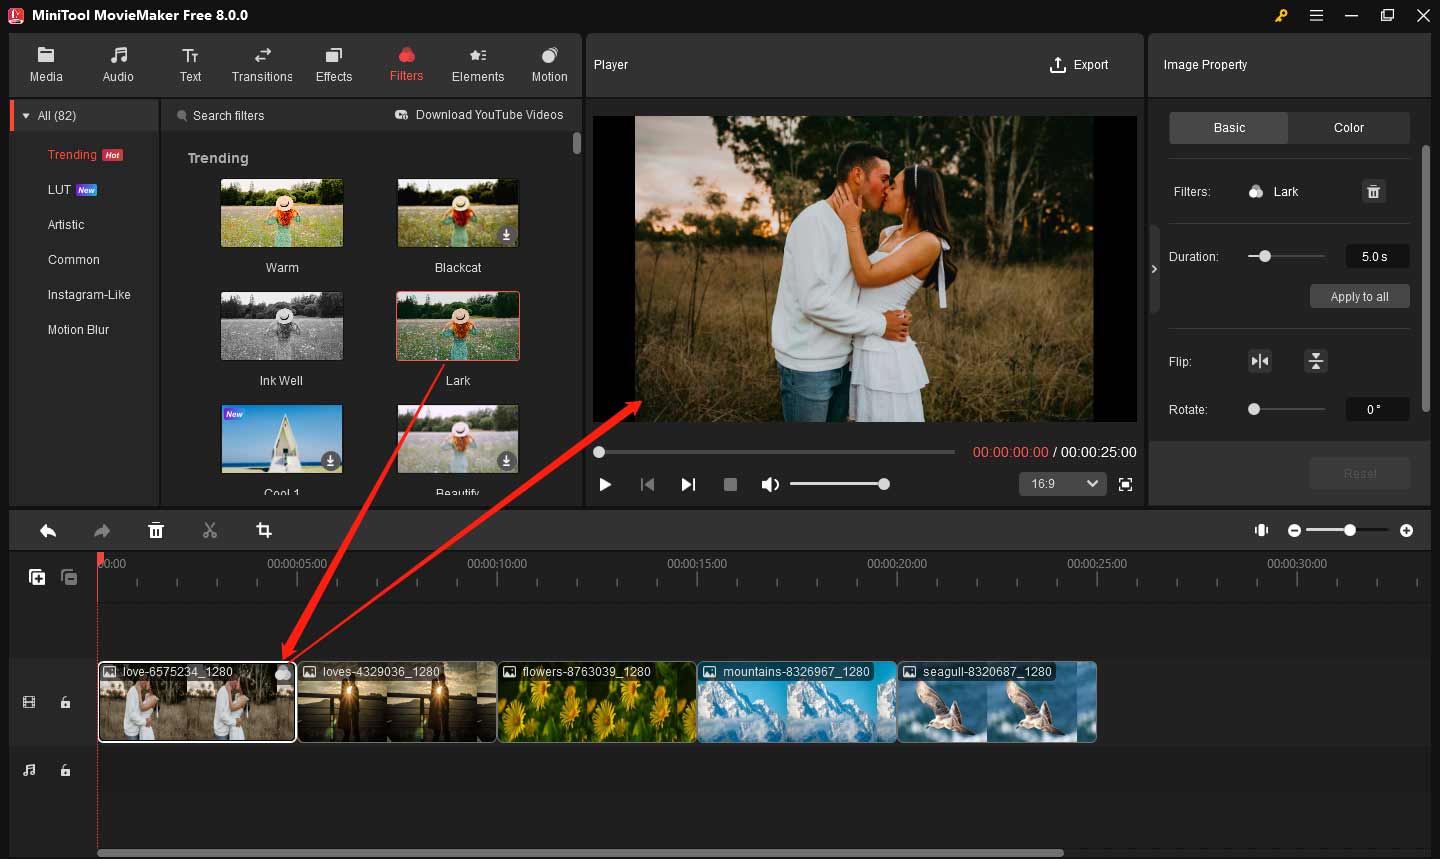
- On the timeline, choose the video or photo clip to which you want to apply a filter.
- Go to the Filters tab.
- Select the desired filter and click the download icon on its bottom right to download it first.
- Then, drag and drop the desired filter onto the target clip on the timeline.
Tip:
- You can preview the added filter in the Player section.
- Multiple filters can be added to one video or image clip.
#2 Add the Same Filter to Selected Clips
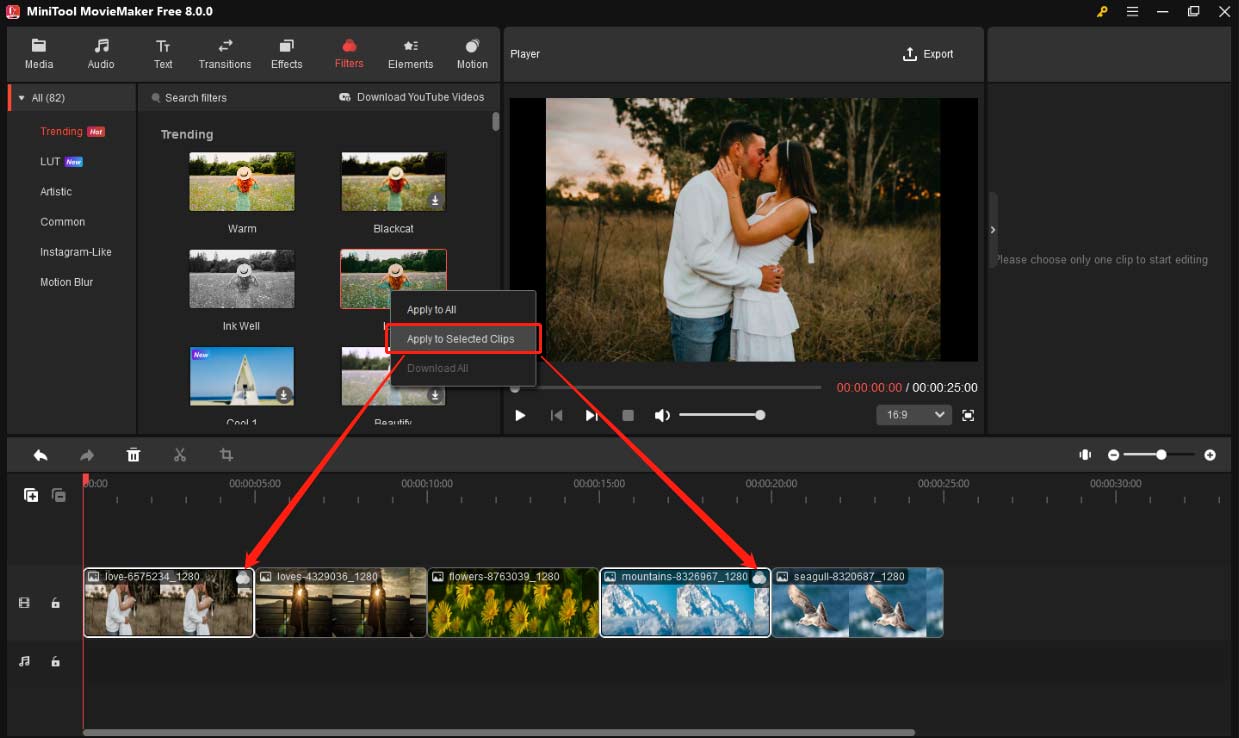
- Select the clips to which you want to add a filter on the timeline.
- Move to the Filters tab.
- Right-click on the desired filter and then select Apply to Selected Clips.
#3 Add the Same Filter to All Clips
- Move to the Filters tab without selecting any clip on the timeline.
- Right-click on the desired filter and then select Apply to All.
#4 Add a Filter on a New Track
- Double-click on the clip to which you want to add a filter on the timeline.
- Go to the Filters tab.
- Select the desired filter and download it.
- Then, click the plus icon (+) or drag and drop the desired filter above the target clip.
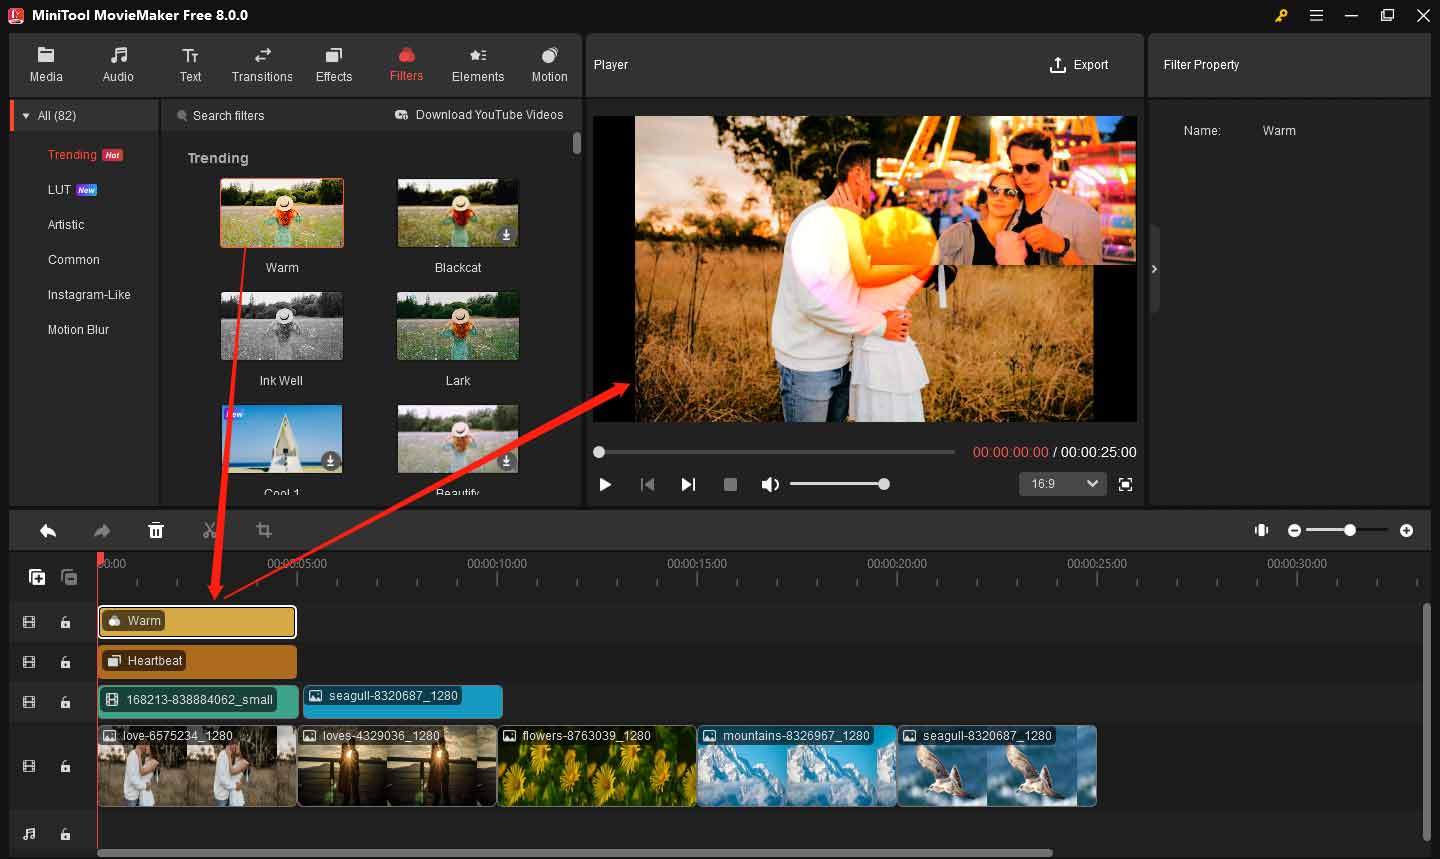
If the added filter is on a new track, it will be applied to all the video clips or photos on the below tracks.
5 Methods to Delete a Filter
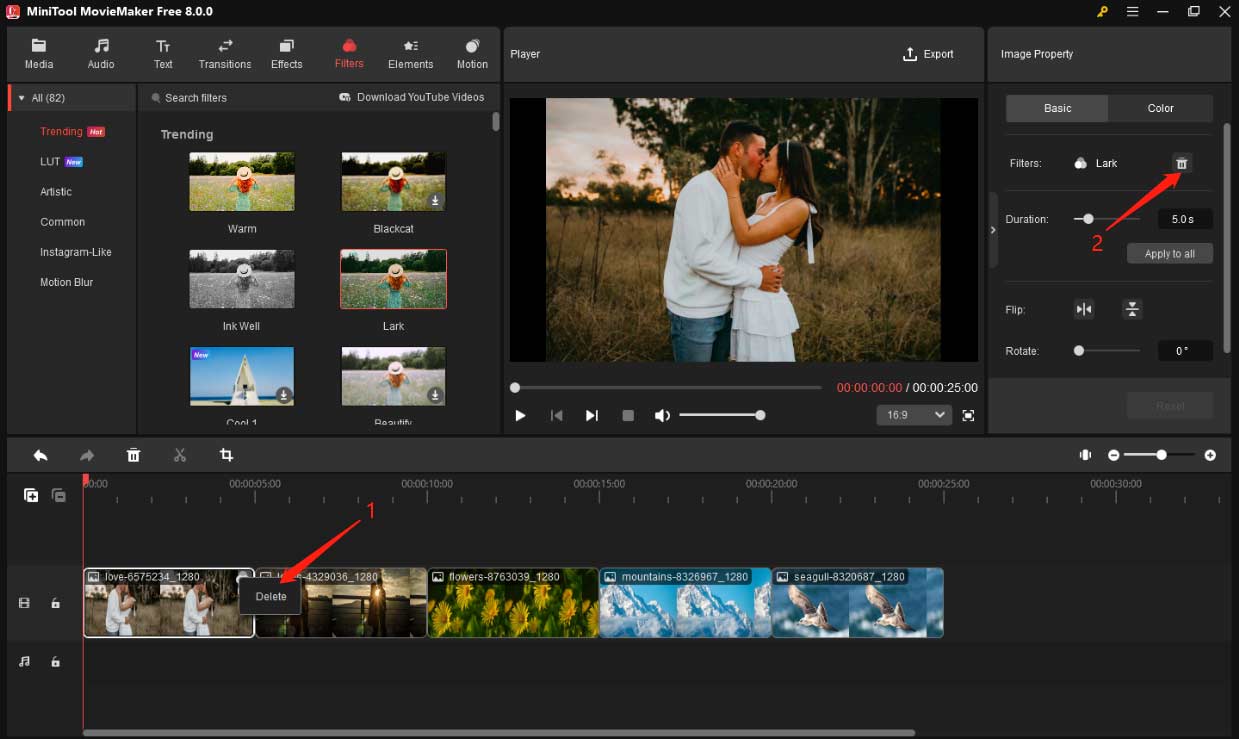
For the filter located on the video:
- Right-click the filter icon on the media file on the timeline and then choose Delete.
- Click on the media file that uses the target filter to trigger its property. Then, go to the property section on the upper right of the main window. There, click on the trash icon next to the target filter name.
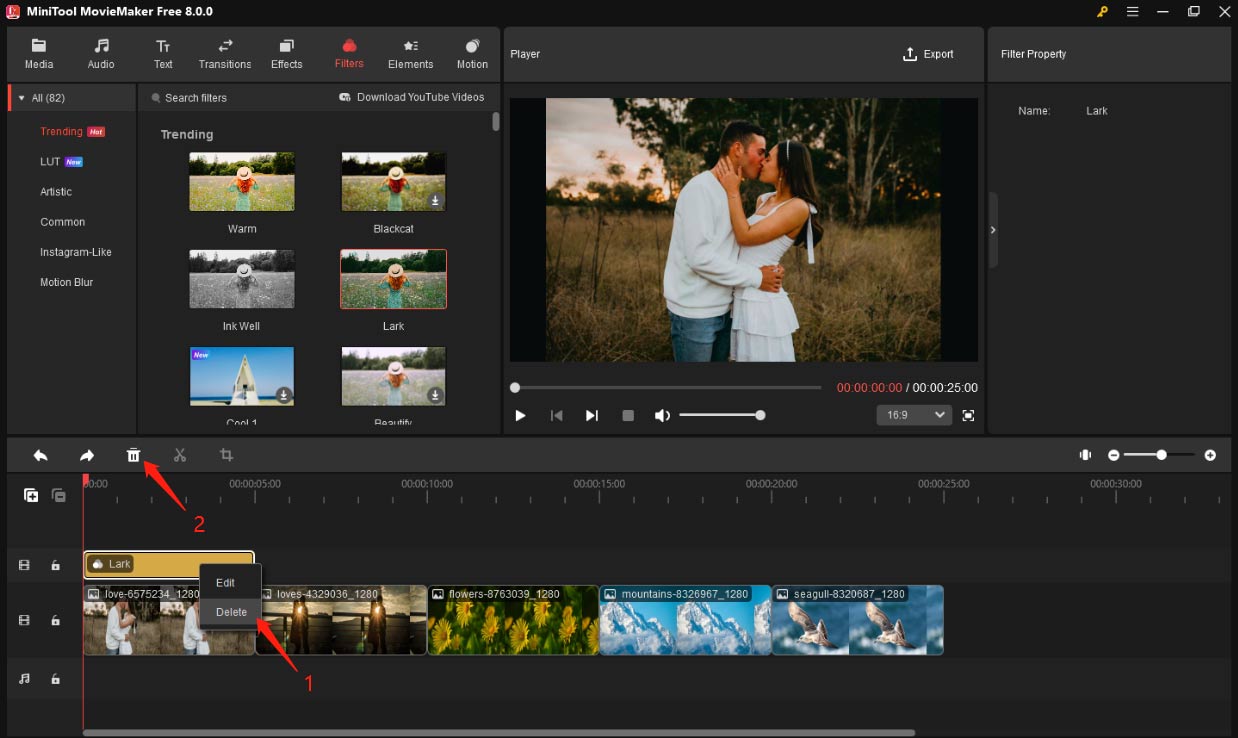
For the filter located on a new track:
- Right-click the filter on the corresponding track and then choose Delete.
- Select the filter and click the trash icon on the timeline toolbar.
- Select the filter and then press the Delete button on the keyboard.
In addition to adding movie filters, you can also add effects, transitions, texts, motions, and elements to your videos using MiniTool MovieMaker.


User Comments :