VLC supports extracting audio from video. How to use VLC to extract audio from video? This MiniTool MovieMaker post will give you a detailed guide and offer you more options for extracting audio.
VLC is a versatile application that can not only extract audio from video but also play multimedia, rip DVDs, convert videos, and do others. It is available for Windows, Mac, and mobile platforms. The following content will show you how to extract audio from video in VLC on Windows and Mac.
How to Use VLC to Extract Audio from Video on Windows
This part shows you how to extract audio from video using VLC on a Windows PC. You need to go to its official website to download and install it on your desktop. Then you can refer to the below detailed steps.
Step 1. Open VLC on your Windows PC, click the Media tab on the top menu bar, and choose the Convert/Save… option to open the Open Media window.
Step 2. Click on the + Add… button to upload the video file with the audio you want to extract.
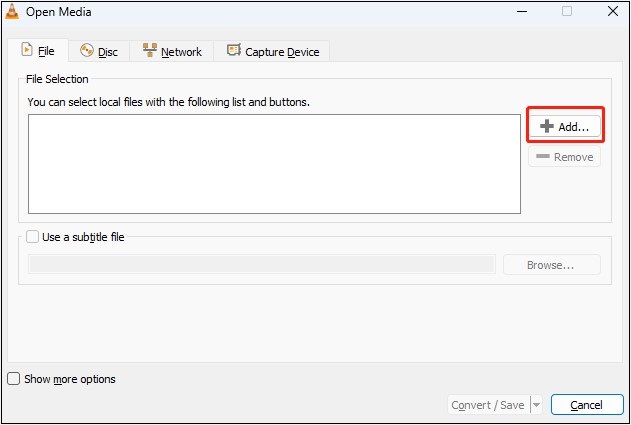
Step 3. Click on the Convert/Save button to open the Convert window.
Step 4. Click the inverted triangle next to Profile and choose an audio format like Audio – MP3.
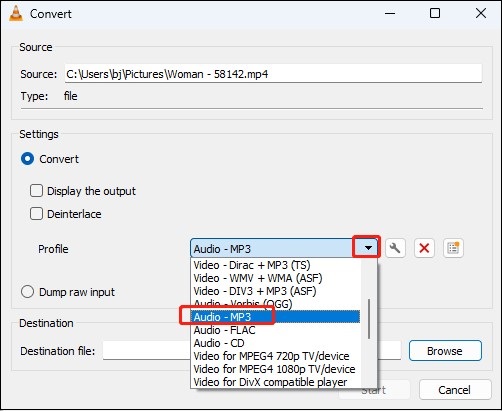
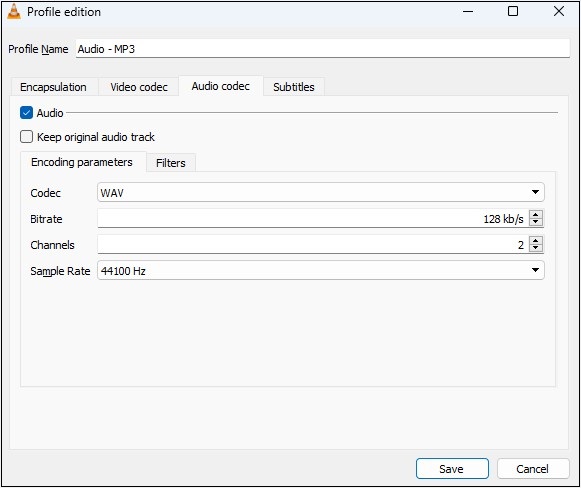
Step 5. Click the tool icon behind Profile, click the Audio codec tab, and change the parameters like codec, bitrate, channel, and sample rate. Then click Save.
Step 6. Click the Browse button to choose a folder for storing the extracted audio file.
Step 7. Click the Start button to begin the process of extracting audio from the video file.
How to Use VLC to Extract Audio from Video on Mac
If you are a Mac user, you can follow the below steps to use VLC to extract audio from video.
Step 1. Open VLC on your Mac, click the File tab at the top menu bar, and select the Convert/Stream… option.
Step 2. Click the Open Media button in the new popup to upload the video you intend to extract audio.
Step 3. In the Choose Profile section, select an audio format like Audio – FLAC from the dropdown.
Step 4. Click the Save as File button in the Choose Destination section, click Browse to choose its destination folder, and then click Save.
Alternative Ways to Extract Audio from Video Easily
If you are searching for an easy and quick way to extract audio from video, you can try MiniTool MovieMaker and MiniTool Video Converter.
#1. MiniTool MovieMaker
MiniTool MovieMaker allows you to extract audio from video files and save it in MP3 format. Moreover, it has some editing features that allow you to fade audio, change the audio speed, and adjust its volume. Here’s a guide on how to use MiniTool MovieMaker to convert video to MP3.
Step 1. Click the below download button to download and install MiniTool MovieMaker.
MiniTool MovieMakerClick to Download100%Clean & Safe
Step 2. Launch MiniTool MovieMaker and click the New Project button to enter the main interface. Then click the Import Media Files area to import the video file from which you want to extract audio and directly drag and drop the video onto the timeline.
Step 3. Click the Export option in the Player section, expand the Format dropdown, and choose MP3.
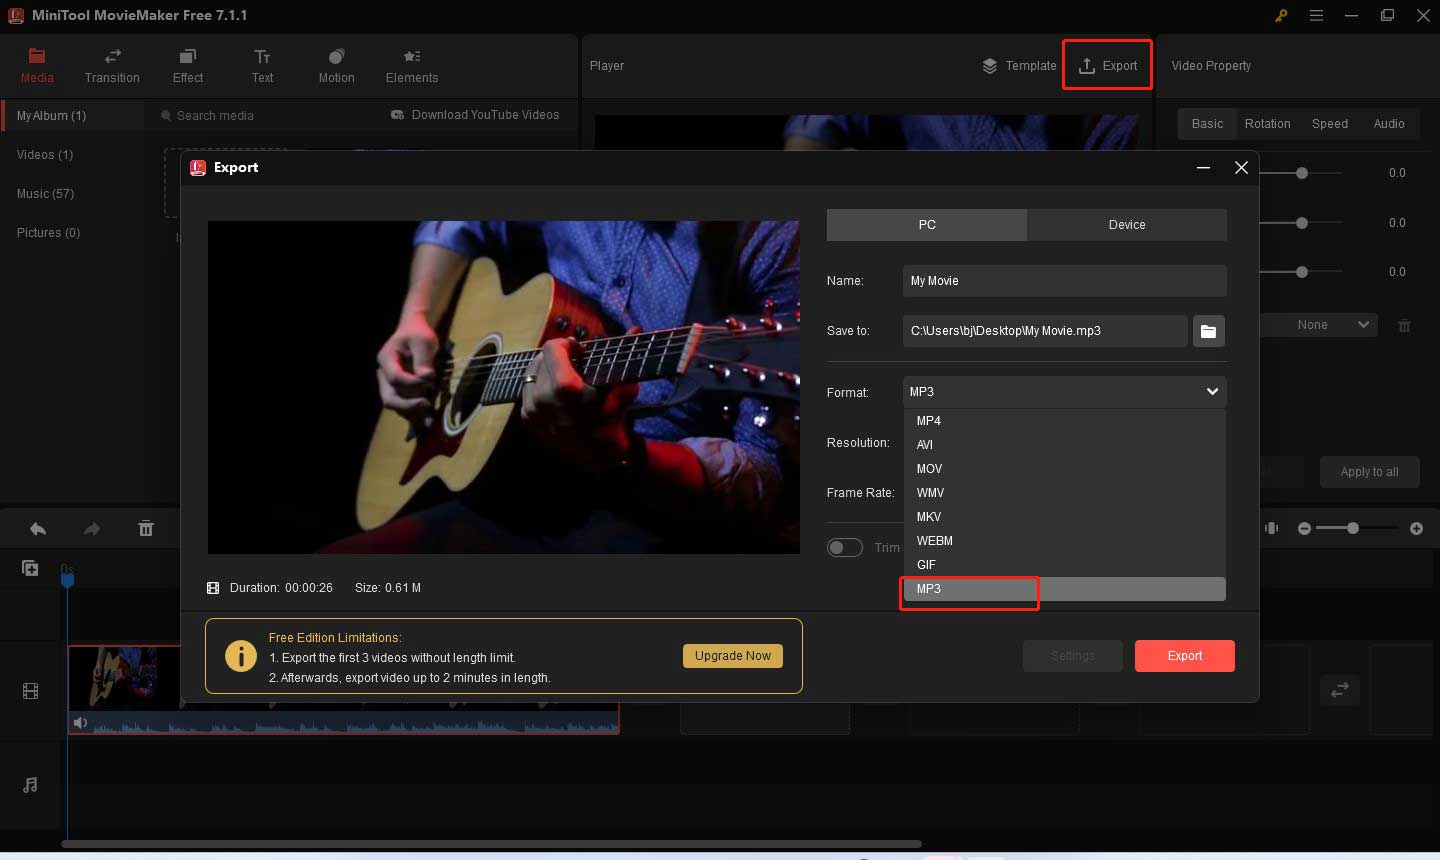
Step 4. Then you can change its name, choose the destination folder, and click the Export button to save it.
#2. MiniTool Video Converter
MiniTool Video Converter is an excellent tool that supports many video and audio formats. What’s more, it can convert audio to video and extract audio from video. Here’s how to extract audio from video with MiniTool Video Converter.
Step 1. Download and install MiniTool Video Converter on your PC and open it.
MiniTool Video ConverterClick to Download100%Clean & Safe
Step 2. Click the Add Files button to upload your video.
Step 3. Click the diagonal arrow framed in the below screenshot, click the Audio tab, and choose one audio format you need like MP3, WAV, M4A, etc. You can choose the bitrate you need.
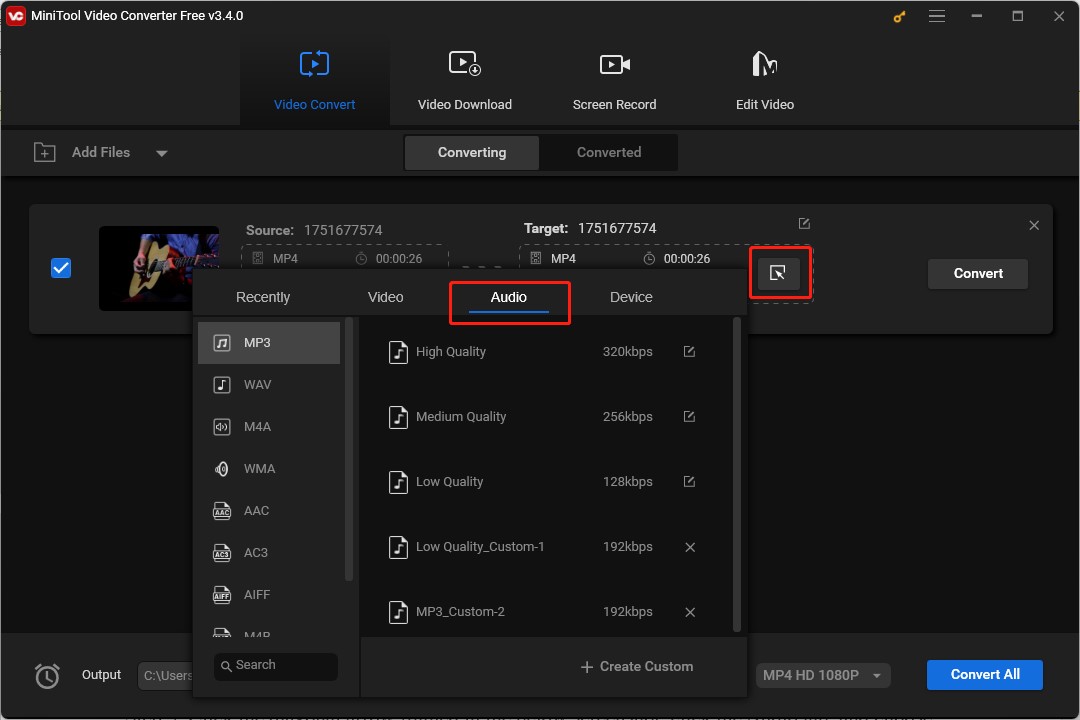
Step 4. Click the Convert button to turn the video file into an audio file. Once the process is finished, you can click the Converted tab and click the Show in folder to locate the audio file.
Conclusion
Hopefully, you have learned how to use VLC to extract audio from video on Windows and Mac after reading this post.


![A Guidance on How to Remove Audio from Video in VLC [Windows/Mac]](https://images.minitool.com/moviemaker.minitool.com/images/uploads/2023/10/remove-audio-from-video-vlc-thumbnail.jpg)

User Comments :