This post from MiniTool MovieMaker (a free Windows movie maker) will explain how to trim and split video in CapCut on your PC. Read this post and learn how to delete unnecessary parts at the beginning or end of the video and divide a video into small clips for precise control using this popular video editor app for social media videos.
Trimming is the process of removing the beginning or end of a video clip while splitting means breaking a video into small chunks. Trimming and splitting are essential tools in almost all video editing software applications, including CapCut, MiniTool MovieMaker, Adobe Premiere Pro, and more. In this post, let’s learn how to trim and split video in CapCut on your computer.
How to Trim and Split Video in CpuCut PC
Follow the steps below to trim and split a video in CapCut.
Step 1. Download CapCut and install it on your computer.
Step 2. After the installation is done, open this program and log in with your account. Click the + Create project button at the top to open the app’s editing page.
Step 3. Under the Import tab on the top menu bar, click on the area saying + Import to locate the target video and open it in CapCut. Then, click the + icon on the clip to add it to the timeline.
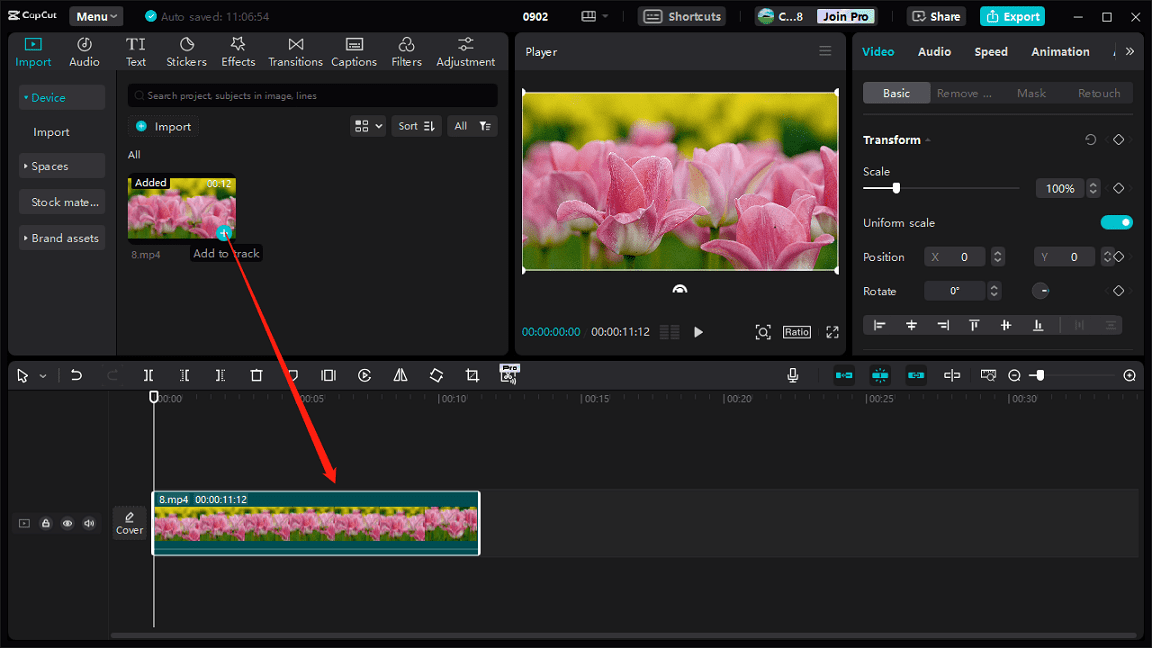
Step 4. There are two ways to trim a video in CapCut.
Option 1: Place your mouse cursor over the start or end point of the video until you see the arrow shown in the screenshot below. Then, drag the arrow inwards to cut out unwanted frames at the beginning and end of the video.
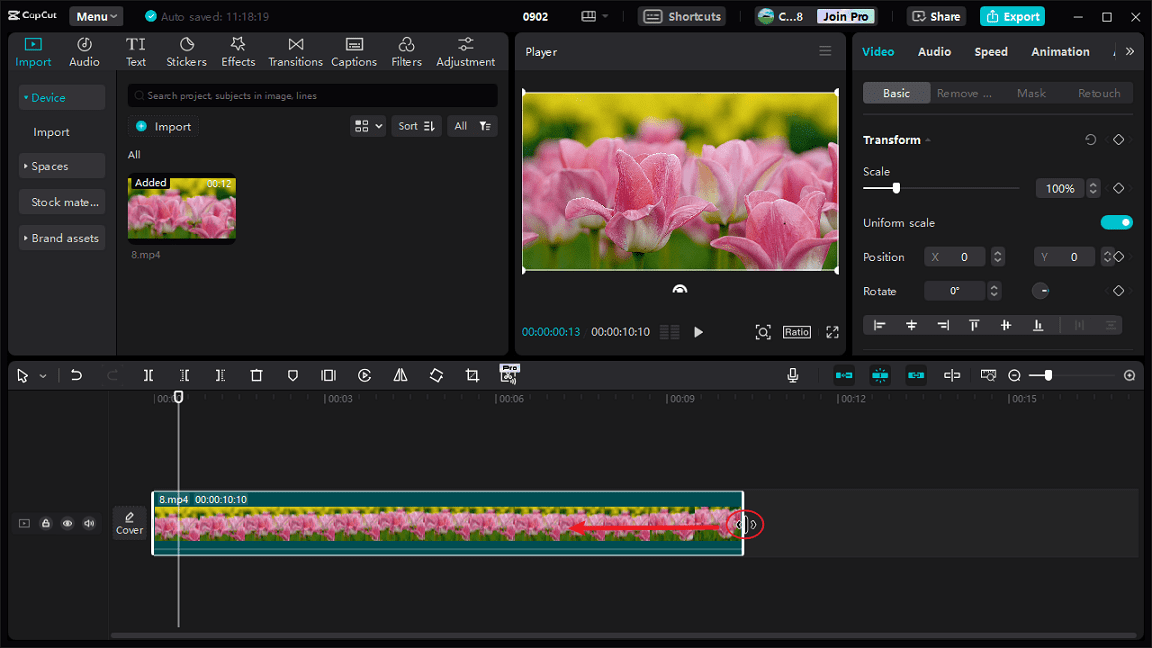
You can click the Zoom in button or use the timecodes that indicates the duration of the video in seconds to guide you and ensure you trim the video accurately.
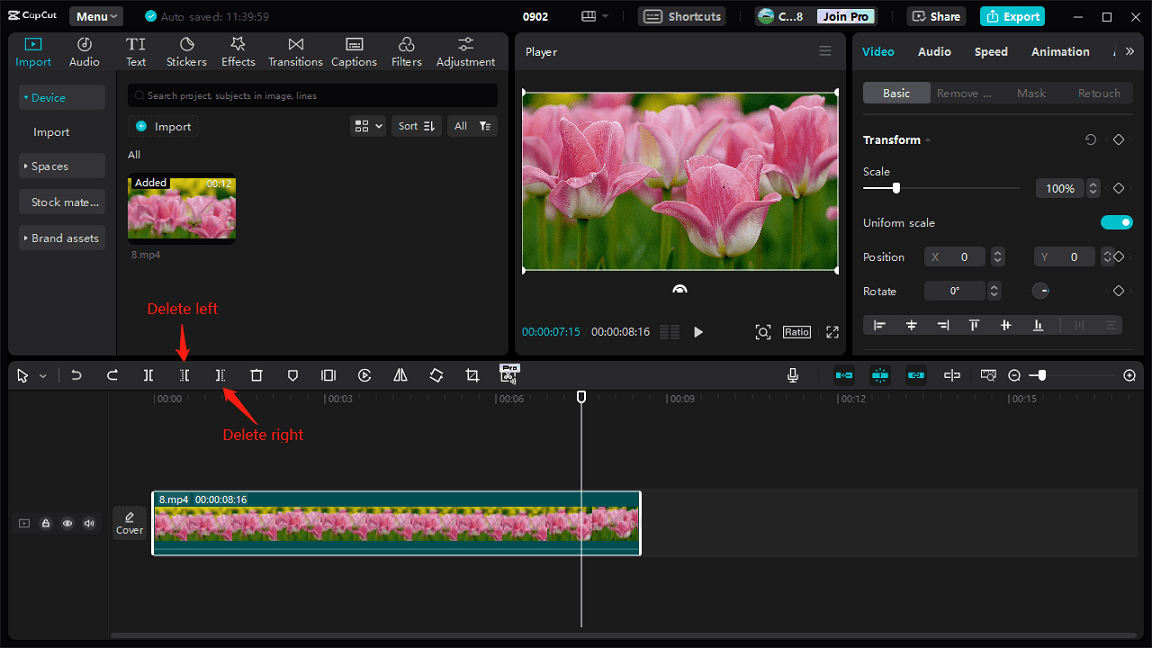
Option 2: Alternatively, you can select the video on the timeline and drag the playhead to the desired location to trim, click the Delete left button to quickly cut out the left parts of the video, and click the Delete right button to remove the right parts of the clip.
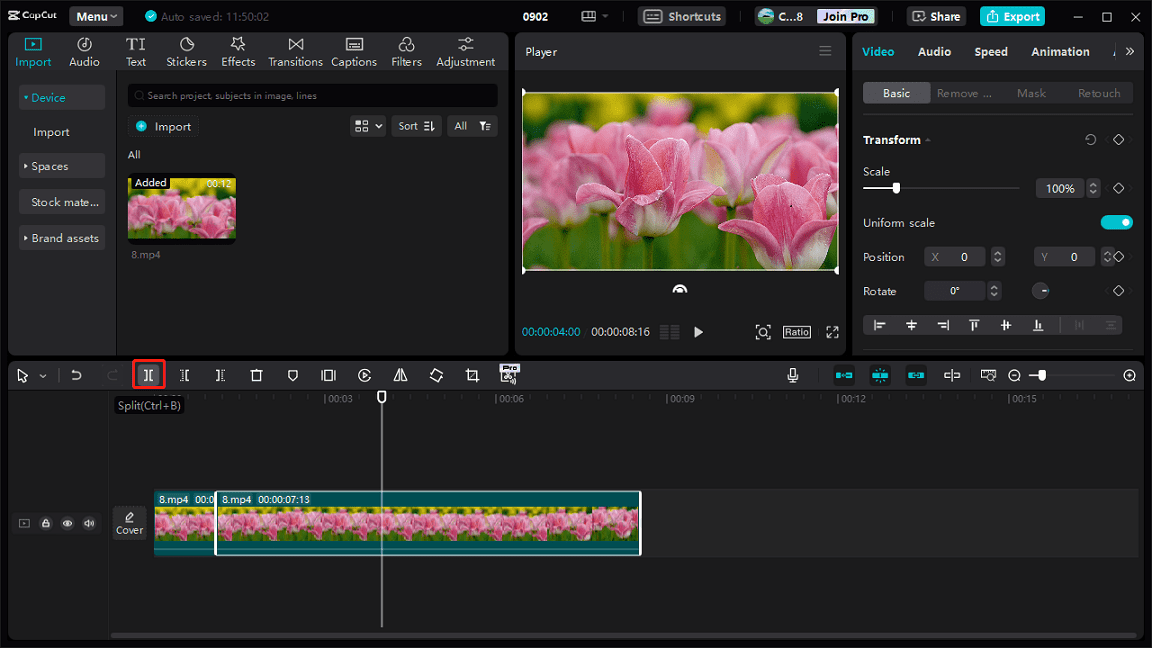
Step 5. To split a video, highlight the video on the timeline, move the playhead to the desired location where you want to split the video, then click the Split icon. You can repeat this step to divide the video into multiple segments.
Step 6. You can continue to enhance your footage with more tools and effects. After that, click the Export button to export the edited video.
How to Trim and Split Video in MiniTool MovieMaker
MiniTool MovieMaker, an easy-to-use and feature-rich video editor without watermarks, is one of the best CapCut alternatives for creating high-quality videos. It provides a variety of editing tools and effects and supports exporting MP4 videos up to 4K resolution for free.
Here’s how to trim and split a video using MiniTool MovieMaker.
Step 1. Download and install MiniTool MovieMaker on your PC.
MiniTool MovieMakerClick to Download100%Clean & Safe
Step 2. Open this video editor and close the promotion window. Next, click the Import Media Files button to import your video. Then, drag and drop the video to the timeline.
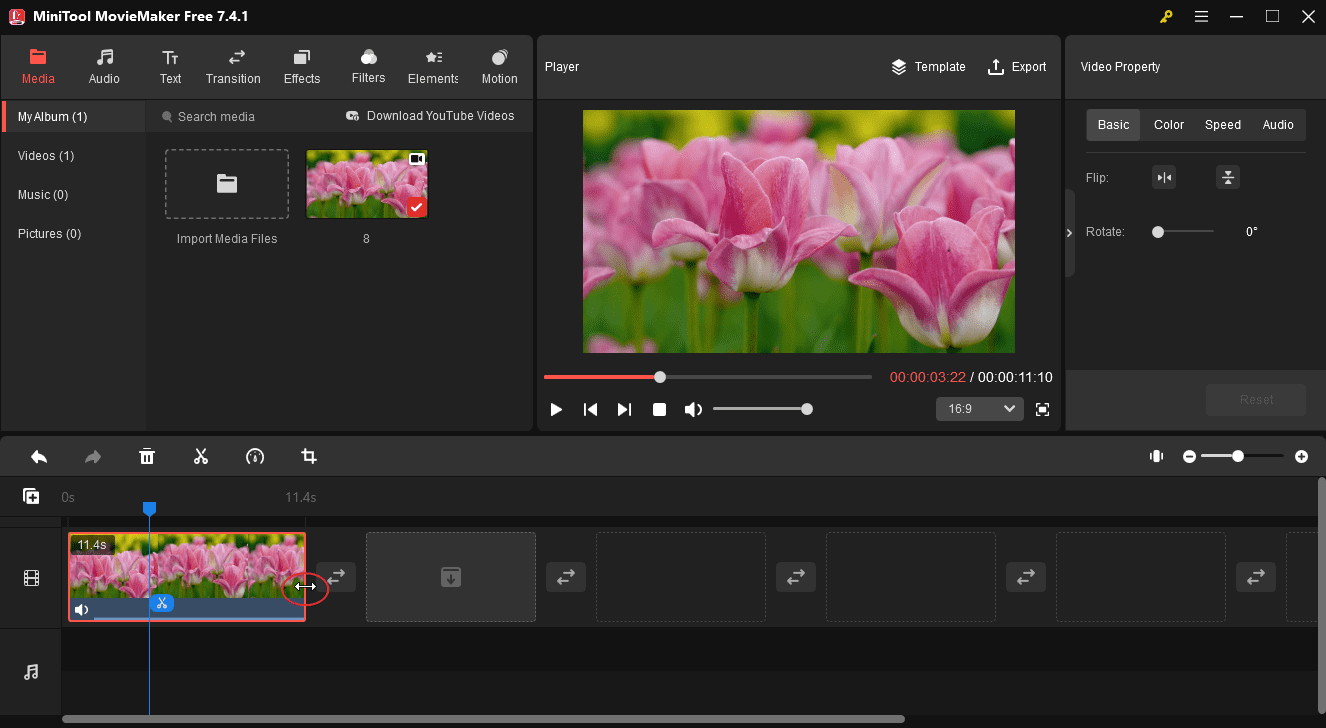
Step 3. Trim video: click the clip on the timeline, hover your mouse cursor over the start or end point of the clip, and you will see a double-headed arrow appear; drag the arrow inwards to remove the unwanted parts.
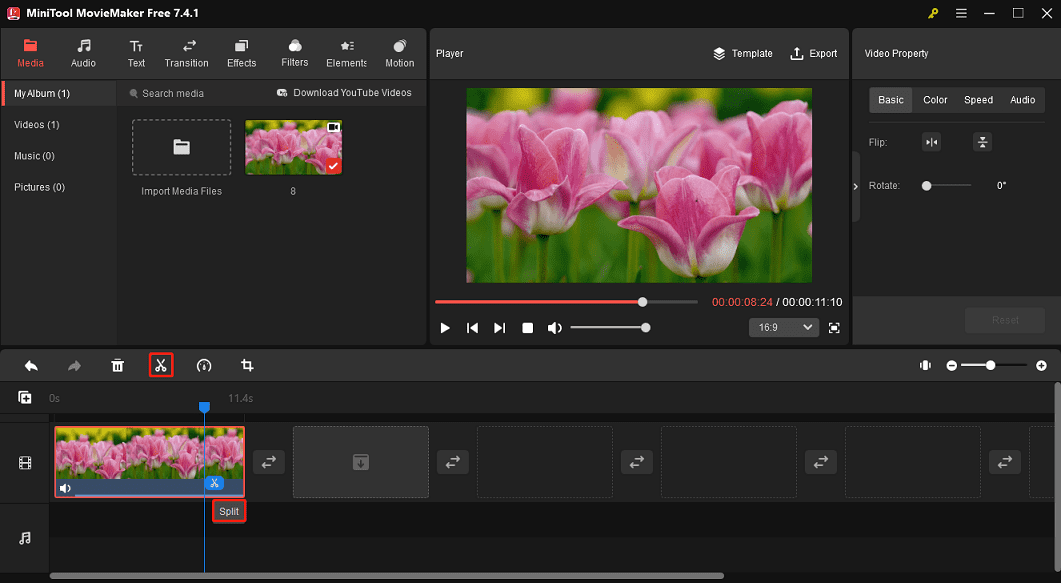
Step 4. Split video: click the clip on the timeline, move the playhead to the desired position where you want to split, and click the Split icon on the playhead or the Split icon on the timeline toolbar.
Step 5. You can continue to edit these clips by adding transitions, filters, text, and more. Once done, click Export to save the video to your computer.
Conclusion
That’s all about how to trim and split video in CapCut. Now, it’s your turn. Try CapCut or MiniTool MovieMaker to explore more editing features.


User Comments :