Windows Movie Maker is a simple video editor, and you can easily speed up or slow down your videos. This article from MiniTool MovieMaker (a free video editor) will introduce how to speed up video in Windows Movie Maker to help you finish your video editing.
Adjusting video speed is a common requirement in video editing, especially when you want to emphasize some fast movements or add a sense of rhythm. Windows Movie Maker is an easy-to-use video editing application. Although the function is relatively basic, it still provides the function to adjust the video playback speed. In this article, we will take you step by step to learn how to speed up video in Windows Movie Maker.
How to Speed Up Video in Windows Movie Maker
Here are the detailed steps on how to speed up video in Windows Movie Maker. Please follow the steps below to learn this skill.
Step 1: Launch Windows Movie Maker on your PC, and click Add videos and photos to import the media files you want to speed up. Then, drag your videos to the timeline.
Step 2: Select the target video clip, and click the Edit button under Video Tools. You can see a Speed option. Click the speed dropdown box and you’ll see a series of speed options. If you want to speed up this video clip, you can choose a value higher than 1. If you want to slow down this video clip, you can choose a value lower than 1.
Step 3: After changing the video speed, you can click the play icon to preview this effect. If necessary, you can also make some adjustments to get a better effect. Finally, go to Home > Save Movie to save your video.
You can also read how to use Windows Movie Maker.
Best alternative to Windows Movie Maker
With the gradual discontinuation of Windows Movie Maker, many users are looking for alternatives with similar experiences. If you are looking for a simple and powerful video editing application, MiniTool MovieMaker is an excellent option. It inherits the intuitive interface of Windows Movie Maker and adds more modern editing features, including video speed adjustment, special effects addition, audio processing, and more.
If you want to quickly adjust the speed and add interesting effects to videos, MiniTool MovieMaker can meet your creative needs easily. In this section, we will give you a detailed introduction to speed up videos using MiniTool MovieMaker.
Step 1: Click the button below to download MiniTool MovieMaker and install it on your computer.
MiniTool MovieMakerClick to Download100%Clean & Safe
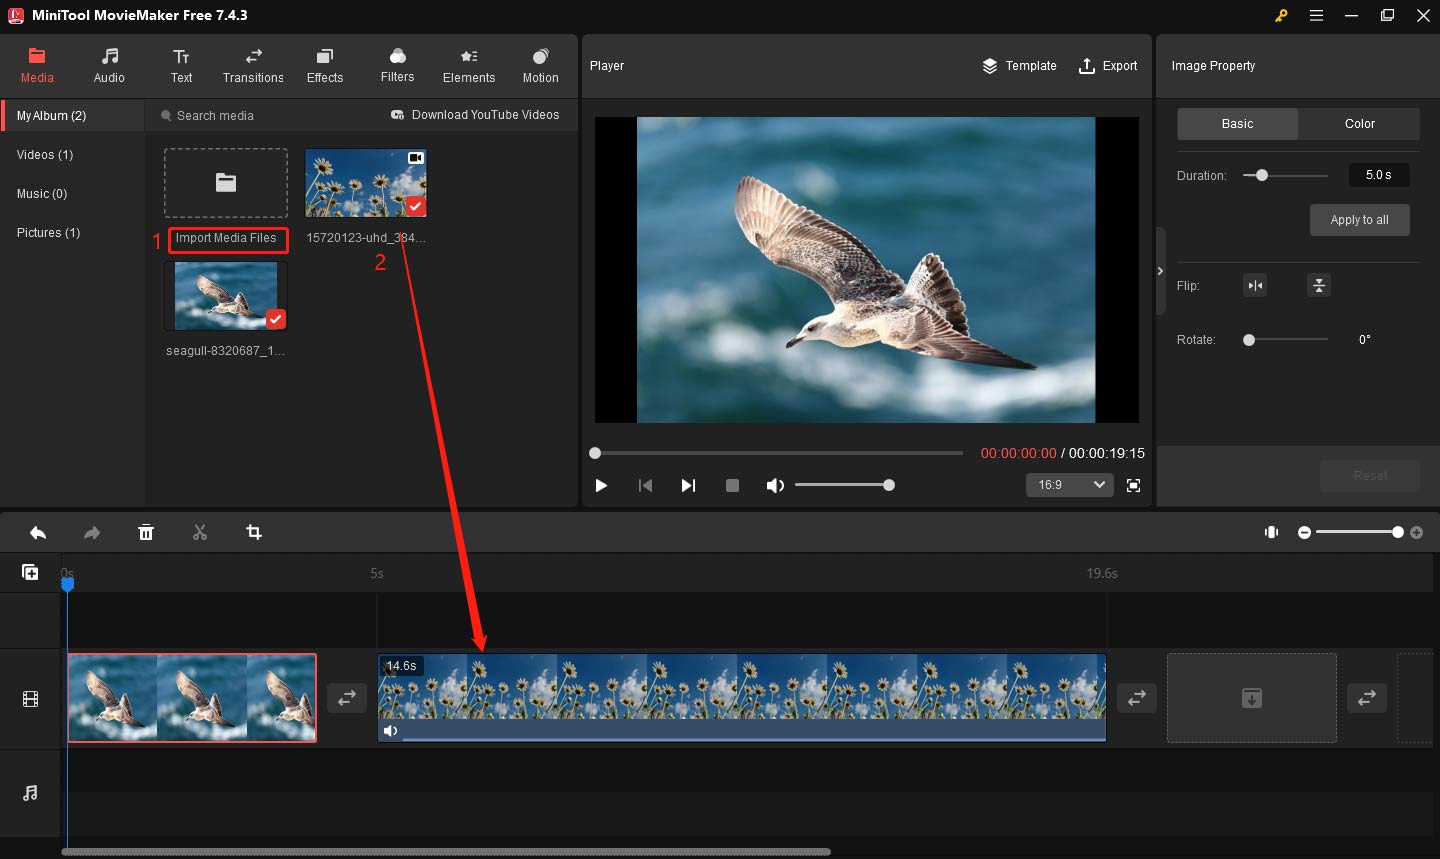
Step 2: Launch this app and close the promotion window. Click Import Media Files to import your video. Then drag your video clips to the timeline.

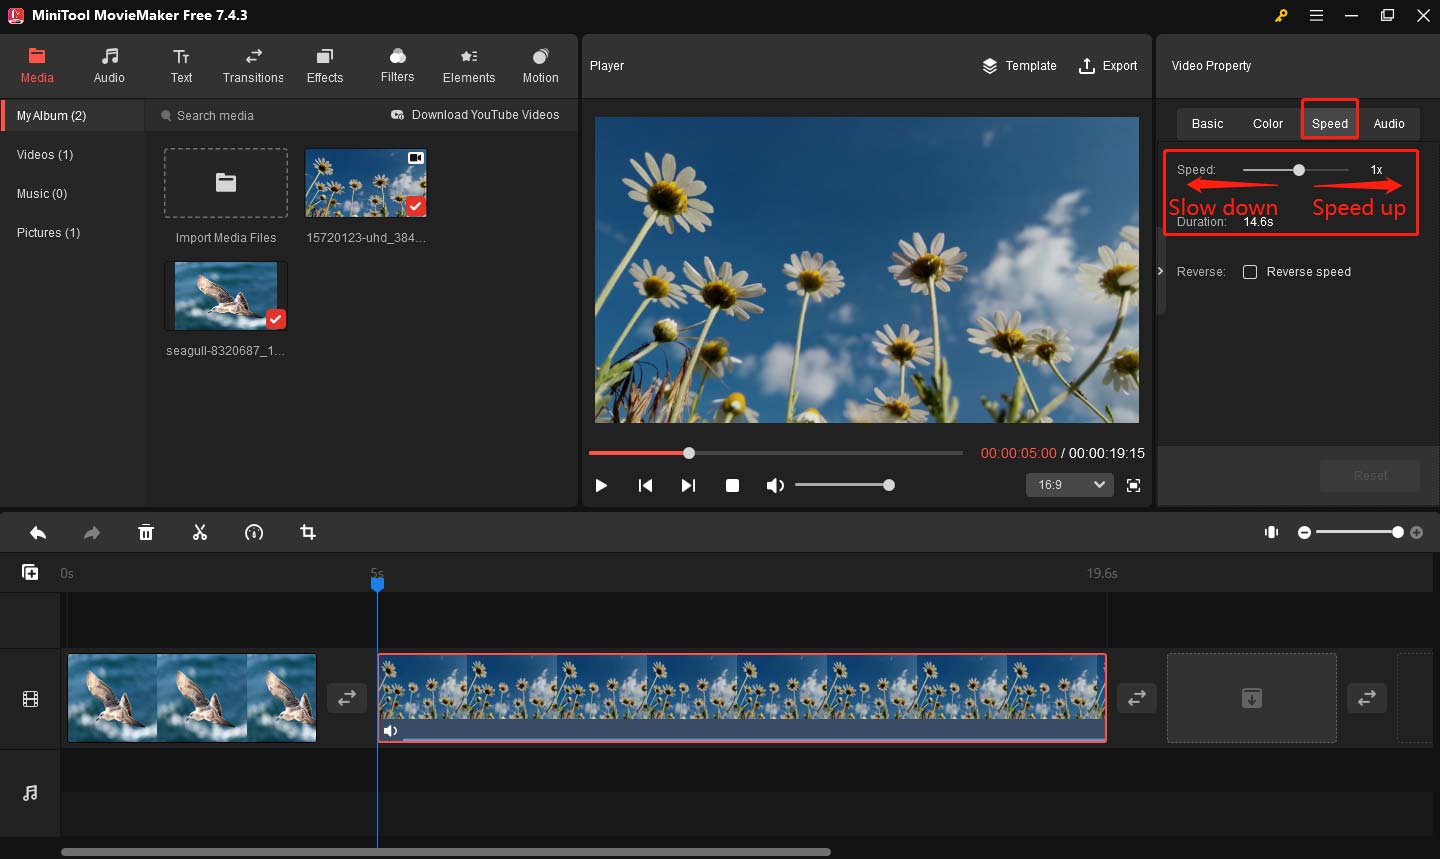
Step 3: Click your video clip to highlight it. Go to the Video Property window, and click the Speed button. You can drag the Speed slider to the right to speed up the video, and you can also drag the Speed slider to the left to slow down the video.

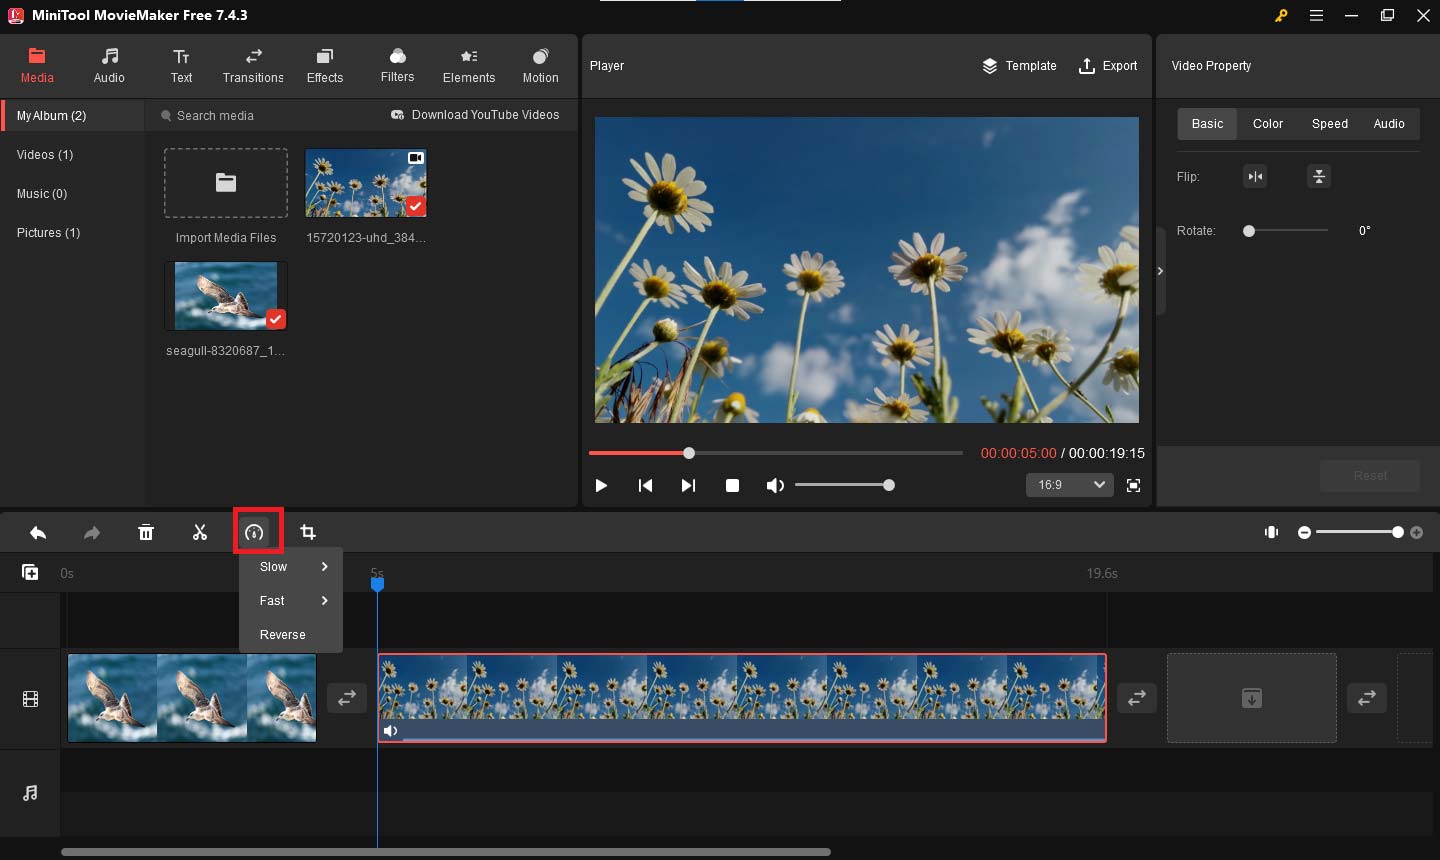
Here’s another way to change speed. Click your video clip on the timeline, and click the Speed icon above the timeline. You can see three options including Slow, Fast, and Reverse. Then you can choose the corresponding option according to your needs.

Step 4: You can see Text, Transitions, Filters, Elements, and Motion in the top toolbar. Therefore, you can add them to your video appropriately to make it more attractive
Step 5: After completing all editing, click the Export button in the upper right. You can set the video name, location, format, and resolution in the output window. Finally, click Export to save the video.
Bottom Line
This is all about how to speed up video in Windows Movie Maker. I’m sure you’ve mastered this method. However, Windows Movie Maker is no longer updated and does not support many modern video editing features. If you want to have more options in your creations, you can try MiniTool MovieMaker.


User Comments :