How to Reverse Video in Sony Vegas
Vegas Pro is one of the most full-featured video editing applications available. It is a typical option for pros looking for a powerful video editor. This video editing application has built-in effects and generates high-quality videos to share on other platforms.
Moreover, Sony Vegas offers lots of advanced editing tools that you can access to improve your videos, like adding stunning transitions, scene detection, Multi-cam editing, and applying special filters and effects. You can also make use of its storyboard and timeline synchronization to edit your clip. In addition, it works with the most common audio and video formats that Windows devices can handle.
Now, let’s see the easy guide to the Sony Vegas reverse clip presented below.
Step 1: Download, install, and run Sony Vegas or Vegas Pro on your device. On the main user interface, click the File menu and choose Import > Media. The Import Media window appears.
Step 2: Open the folder containing your video. Choose the video clip you wish to reverse and hit Open. Your video will show up in the Project Media window.
Step 3: Then, drag and drop the video file onto the timeline from the Project Media window.
Step 4: Choose both the audio event and the video event. Right-click on the video event and select Reverse. A small arrow icon will show up on the left side of the video event to indicate that it is reversed.
A sub-clip appears in the Project Media window when you reverse a video event. The new clip file will have the same name as the original one. However, a -sub-clip X (reversed) will be added. X represents the number of the sub-clip. You can incorporate the new sub-clip into the timeline.
Step 5: Next, double-click the event to create a loop area. Click on the Render As button on the toolbar to save your output. Select your desired video format from the Format list when the Render As window appears. From the Template list, select the template that you would like to use for your video.
Step 6: Choose Browse and go to the file location where you wish to store your reversed video. Hit Save and you will be taken back to the Render As window. When you click the Render button, Vegas Pro will render the video and save a permanent duplicate of the reversed output.

Bonus Tip: Another Good Way to Reverse Clip on Windows
After learning how to reverse videos with Sony Vegas on your device, we also want to introduce you to another great video editing program – MiniTool MovieMaker – that can do just that. Its easy-to-use interface and rich features make the video editor a favorite among professionals. MiniTool MovieMaker is also compatible with Windows devices.
Apart from reversing video, you can also use it for other editing operations, such as splitting video, trimming video, cropping video, adding amazing filters, transitions, motions, flipping video, rotating video, etc.
If you want to reverse your clip with MiniTool MovieMaker, take the actions listed below.
Step 1: Download, install, and start MiniTool MovieMaker on your computer. Close the promotion window to get to the main user interface.
MiniTool MovieMakerClick to Download100%Clean & Safe
Step 2: Click Import Media Files to import your video file. Then, hit the + icon to add the imported video to the timeline.
Step 3: Keep the video clip on the timeline selected. In the Video Property area, click the Speed tab and check the Reverse speed option.
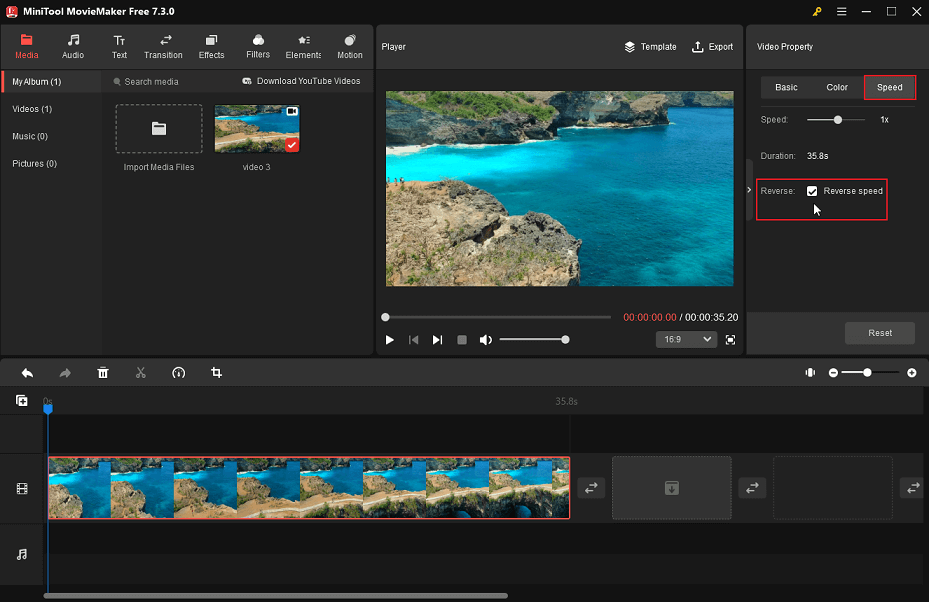
Alternatively, click on the Speed icon on the toolbar and select the Reverse option.

Step 4: In the Player section, you can click on the Play icon in the bottom left corner to preview your video.
Step 5: Once done, click Export at the top right to bring up the export settings window. After you specify the target folder, output format, resolution, frame rate, etc., click the Export button to save the reversed video to your computer.

Conclusion
The Sony Vegas reverse clips step-by-step tutorial is explained above. The process is not as difficult as you think, right? Plus, you can also try MiniTool MovieMaker to easily reverse videos.
User Comments :