When do you need to speed up the video? Sometimes, you may need to speed up the video when there are some boring but necessary parts or you need to shorten the duration of the video. Final Cut Pro is a professional non-linear video editing application. It can help you change video speed in video post-production. How to speed up a clip in Final Cut Pro? Just keep reading the following content.
How to Speed up a Clip in Final Cut Pro
There are two ways to speed up video in Final Cut Pro and this this part gives you detailed guidance on how to speed up a clip in Final Cut Pro. Now, let’s get started!
Step 1. Download and Install Final Cut Pro
You need to go to the official website of Final Cut Pro or Apple Store to download it and follow the instructions to install it on your Mac computer.
Step 2. Create a New Project
After installing Final Cut Pro on your computer, you need to launch Final Cut Pro first. Then click the File tab on the top menu bar, move to New, and click the Project tab.
Step 3. Import a Video Clip
Click the File again, go to Import, and select the Media option. You can choose the video clip that you want to speed up from your computer and import it. Later, you need to drag and drop the video clip onto the timeline.
Step 4. Speed up a Video Clip
Click on the Speedometer icon, go to Fast, and choose 2X, 4X, 8X, or 20X to speed up a video. Or you can go to Custom and enter your desired percentage speed.
Alternatively, you can go to the Retime menu and choose Show Retime Editor. Then you can see the retiming handle at the end of the video. You can speed up the video by dragging the handle to the left.
Step 5. Export the Video
After editing that video, you can click on File, move to Share, and choose the Export File option to save to the local folder, the YouTube option to share on YouTube, or other options according to your needs.
Tips for Speed up a Clip in Final Cut Pro
Here are two tips for you when you speed up a video clip in Final Cut Pro.
- Make the Speed-Up Video Smooth: Final Cut Pro will remove some frames while speeding up a video and add some frames when slowing down a video. It is necessary to smooth out a video whether you speed up or slow down it. You need to use frame blending or optical flow to smooth out a video.
- Adjust the Pitch of Speed-Up Video: By default, Final Cut Pro will retain the pitch of the audio even if you change the video speed. If you need to change the pitch based on the video speed, you’ll need to go to the Retime menu and then turn off the Preserve Pitch option.
A Good Alternative Way to Change Video Speed on Windows
Final Cut Pro is only compatible with Mac which means you can not use it to speed up a video clip if you are a Windows user. But don’t worry, you can also use MiniTool MovieMaker, an excellent Final Cut Pro for Windows, to change video speed on Windows. MiniTool MovieMaker is a free video editor that has both basic and advanced editing tools. Below is how to change video speed with MiniTool MovieMaker.
Step 1. Click the below download button to download and install MiniTool MovieMaker on your computer.
MiniTool MovieMakerClick to Download100%Clean & Safe
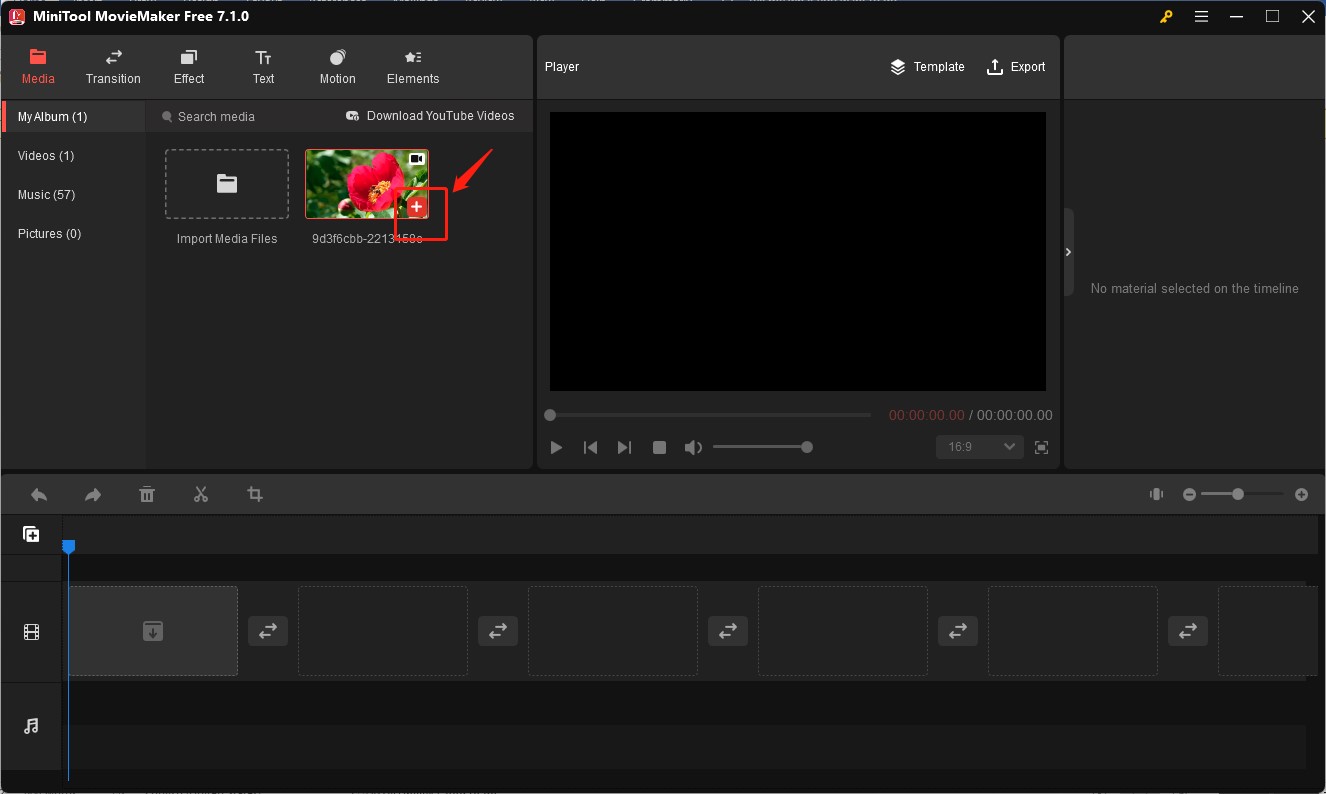
Step 2. Open MiniTool MovieMaker and click on New Project to create a new project. Click the Import Media Files to upload a video from your PC and click the plus (+) icon on it to add it to the timeline.

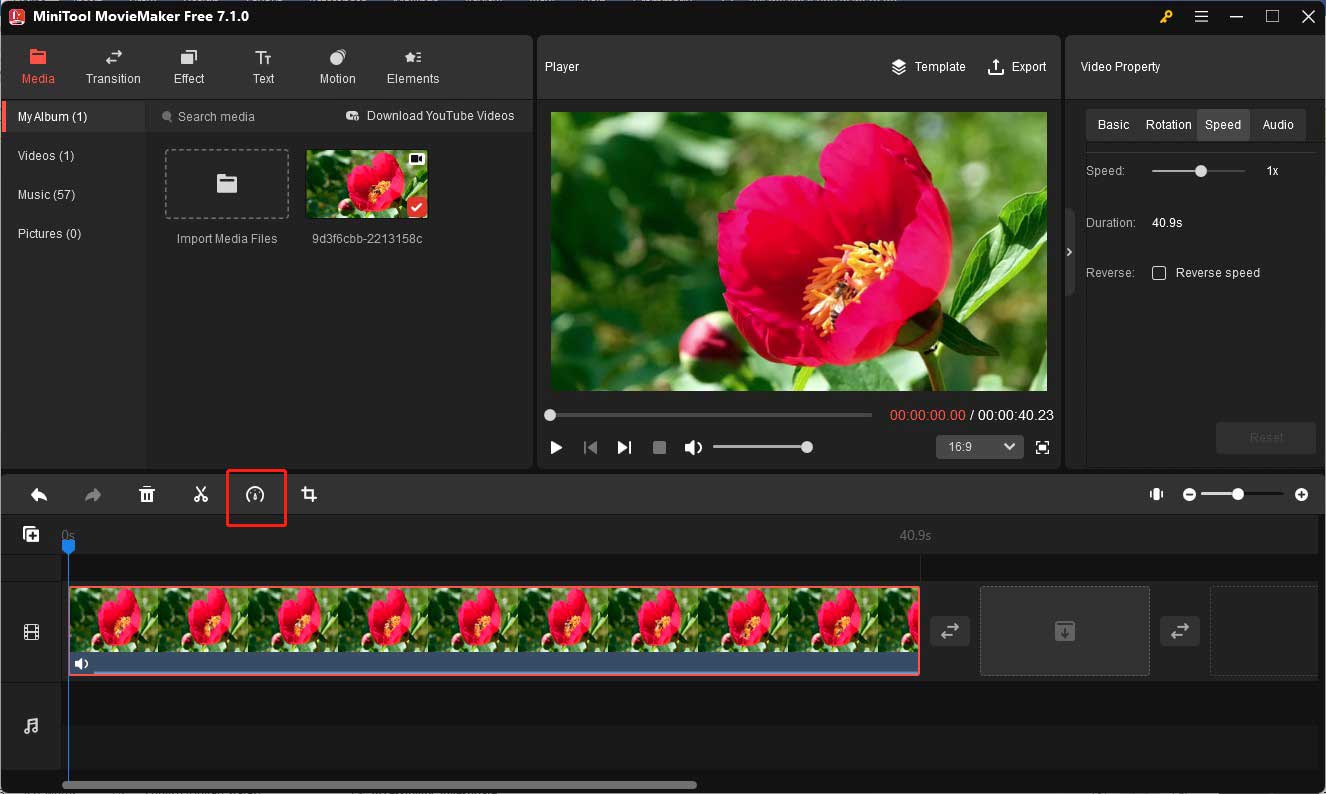
Step 3. Click the Speed icon on the timeline toolbar and move to Fast or Slow to change the video speed.

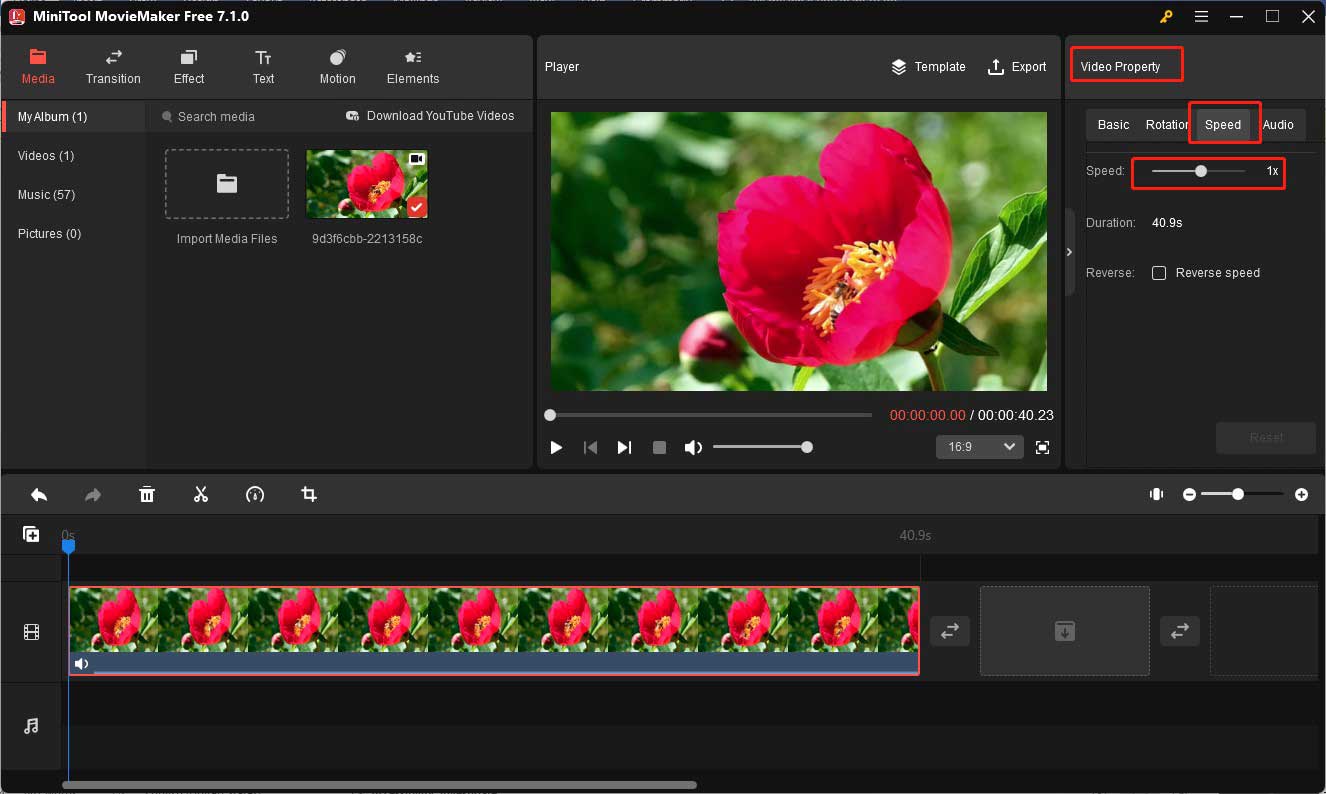
Or go to the Video Property section, click the Speed tab, and drag the Speed slider to the right to speed up the video or to the left to slow down the video.

Step 4. After making other editions, click the Export icon in the Player section to export the video.
Wrapping Up
The above has shown you a detailed guide on how to speed up a clip in Final Cut Pro and an alternative way to Final Cut Pro to change video speed on Windows. Hope this post is helpful to you!


User Comments :