In this post, you’ll learn how to remove silence from a video with three video editing software applications. With these video silence removers, you can easily say goodbye to silence or pauses from the audio in your video.
In most cases, silence or pauses are inevitable during screen recording. However, these moments can lower the attraction of the video. Therefore, you need a video silence remover that can detect and delete these parts automatically to make the video professional. How to remove silence from a video? Please continue reading.
How to Remove Silence from a Video in Adobe Premiere Pro
In the past, you had to pay for a plug-in to remove silence from videos in Premiere Pro. You can now delete silence or pauses in this application without any plugin. How to automatically remove silence from videos in Premiere Pro? Follow the steps below:
Step 1. Launch Premiere Pro, create a project, import your video, and add it to the timeline.
Step 2. Go to Edit > Preferences > Transcription, the Preferences window opens, select the Automatically transcribe clips option, and click OK.
Step 3. Drag a clip on the timeline and switch to the Text panel under Edit on the left side. You will find that there are three little dots behind your speaking. Actually, these dots are silences.
Step 4. To remove these silence points, click the filter icon (hourglass) and choose Pause to select all pauses automatically. Then, click the Delete button, select the Extract option, and click Delete all.
Step 5. Continue editing the video and then export it from Premiere Pro.
![[10 Ways] How to Fix Adobe Premiere Pro Playback Lagging Issue](https://images.minitool.com/moviemaker.minitool.com/images/uploads/2023/03/premiere-pro-playback-lag-thumbnail.jpg)
How to Remove Silence from a Video in Microsoft Clipchamp
Microsoft Clipchamp is the video editor recommended for Windows 11/10, providing a variety of tools and effects to empower creators. Additionally, it’s an AI video silence remover to cut out silences from audio in the video.
Here’s how to remove silence from a video in Clipchamp.
Step 1. Open Clipchamp. On Windows 11 devices, this video editor is included in the OS, so you can search for it in the taskbar to launch. On Windows 10 devices, you need to get the app from the Microsoft Store.
Step 2. Login to Clipchamp and click the Create a new video button to open the app’s main interface.
Step 3. Click Import media to import your video and add it to the timeline.
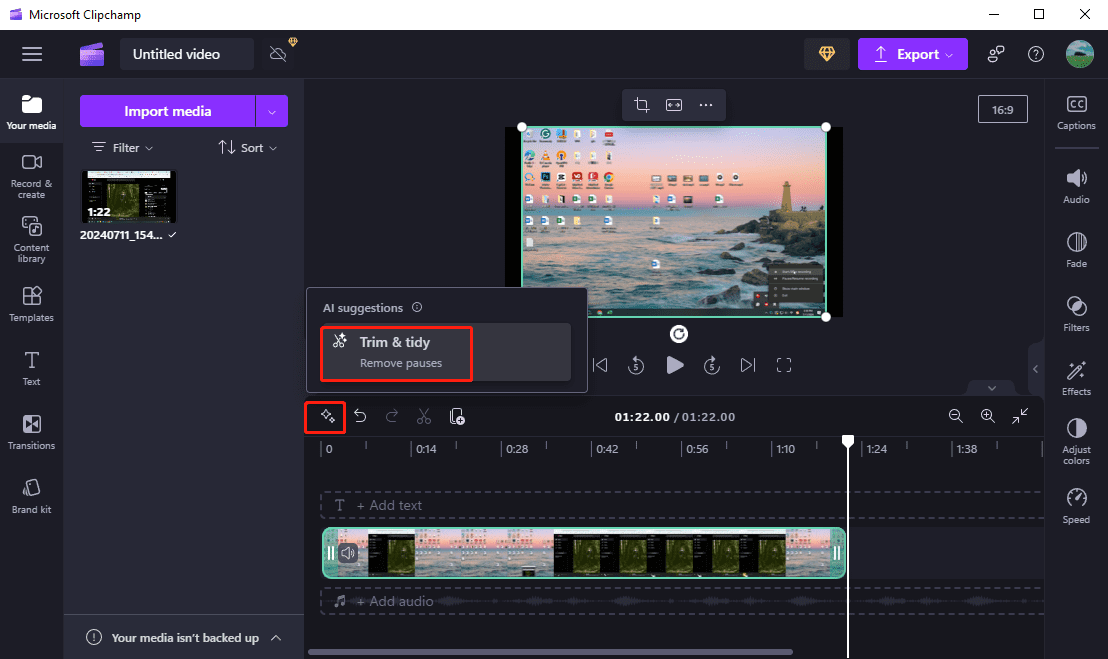
Step 4. Click the AI suggestions button on the timeline toolbar and select the Trim & tidy option.
Step 5. From the next AI suggestion window, select a language and click Transcribe to convert the video’s audio to text to find pauses. Clipchamp’s AI video silence remover will start filtering through the entire video to find pauses or silence longer than 3 seconds.
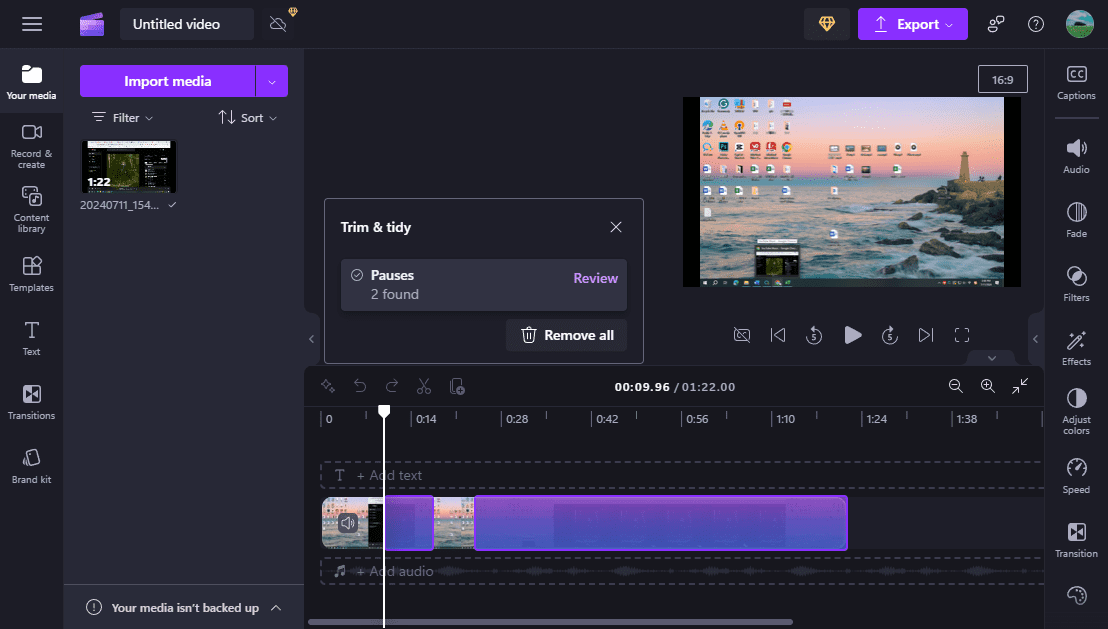
Step 6. Silence or pauses will be highlighted in purple on the timeline. Click the Remove all button to delete all silences from the video simultaneously. Your video will then be split into multiple clips on the timeline.
Step 7. Preview and save your video.

How to Remove Silence from a Video in DaVinci Resolve
DaVinci Resolve is another video silence remover. The steps to remove silence from videos in this application are similar to how to delete silence in Premiere. This feature is available in DaVinci Resolve Studio, but not in the free version. Let’s see how to remove silent parts from videos in DaVinci Resolve.
Step 1. Open DaVinci Resolve and import your video.
Step 2. Go to Media Pool, right-click on the video, and select Audio Transcription > Transcribe. DaVinci Resolve will immediately analyze your video and transcribe audio.
Step 3. Once completed, you can find some three-dot symbols in the text transcript. These symbols are silent parts of the video.
Step 4. To remove these silences, click the three dots icon in the upper right corner of the Transcript window, and select Remove Silent Portions.
Step 5. Press Ctrl + A (Windows) or CMD + A (Mac) and click the Append icon to drag everything to the timeline without silent sections.
Step 6. Edit the video and then render it from DaVinci Resolve.

MiniTool MovieMakerClick to Download100%Clean & Safe
Conclusion
You can easily remove silence from videos with the right video silence remover. This post explains how to remove silence from a video using 3 excellent video editing apps, and I hope this post is helpful to you.
About The Author

Position: Columnist
Cora is a tech writer specializing in digital media workflows, with over six years of hands-on experience in video post-production, media transcoding, and screen capture. Her writing is always clear and practical. Cora also produces in-depth software reviews for users across skill levels to help them find the right tool and enjoy video editing.
User Comments :