Are you annoyed with the echo in your audio recording? An echo is a delayed repeat of a sound, created when its waves bounce off a hard surface like a wall or mountain and travel back to your ear. However, unwanted or excessive echo negatively affects sound quality because it reduces clarity and makes content harder to understand. So, how to remove echo from audio to enhance sound quality? This post explains three effective methods to eliminate echo from your audio files with ease.
How to Remove Echo from Audio on Windows
This section gives two simple ways to remove echo from audio on a Windows PC.
Method 1: Use DaVinci Resolve
As a professional-grade video editing application, DaVinci Resolve provides almost all the tools for most editing tasks. Whether you desire to stabilize shaky videos, crop videos, or adjust the clip’s color with advanced tools, this application has you covered.
If you want to remove the echo from your audio or video in this application, you need to upgrade to the paid DaVinci Resolve Studio. This version offers more features than the free version, like voice isolation. It’s an AI-powered tool for removing background noise from audio, isolating and enhancing dialogue.
Here’s how to remove echo from audio in DaVinci Resolve Studio.
Step 1: Download and Install
First, go to the DaVinci Resolve website and buy the Studio version. Then, download and install the application on your computer. When you first open the application, enter your activation key
Step 2: Import Your Audio
Click the New Project button in the lower right corner, enter the project name, and click Create. You’ll then be directed to DaVinci Resolve’s Cut page. Go to the next Edit page, right-click on the Media Pool, and select Import Media to open your audio. Then, add it to the timeline.
Step 3: Remove the Echo
Click Inspector in the top right corner, switch to the Audio tab, and you’ll see the Voice isolation option. Click the toggle on the left of Voice isolation to enable this setting
Step 4: Export the Audio
Go to the Deliver page, select Audio in Render Settings, set Codec to MP3, choose the location to save the file, and click the Add to Render Queue button. In the render queue, click Render All to export your audio file.
Method 2: Use CapCut
CapCut is one of the most popular video editing applications. In addition to powerful video editing tools and effects, this program also provides various tools for editing and enhancing professional sound quality, such as voice enhancement, vocal isolation, audio translator, noise reduction, etc.
Here’s how to remove echo from audio using CapCut.
Step 1: Download and Install
Get the video editor from the official website or the Microsoft Store.
Step 2: Add Your Audio File
Click the Create project button at the top to enter the main interface. Click the Import icon to open your audio and add it to the timeline.
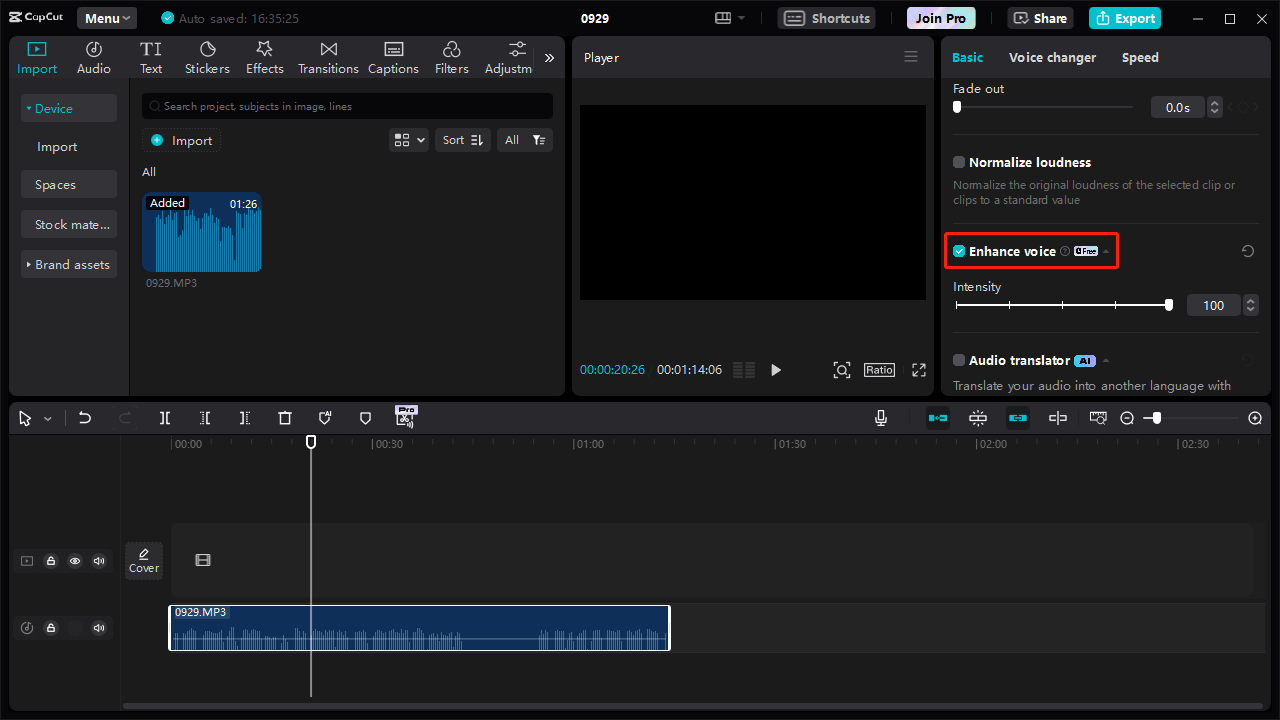
Step 3: Remove the Echo
Select the audio clip on the timeline to enable the editing panel on the right. Click the Enhance voice option to remove echoes, popping sounds, mouth clicks, and other noise to improve the voice quality and clarity.
Step 4: Save Your Audio
Click the Export button in the top right corner. In the Export window, check the Audio option only, choose an audio format, and click Export.

How to Remove Echo from Audio Online
If you want to remove echo from audio online, Voice.ai’s echo remover is a fantastic choice. It can be quickly accessed on your browser and requires no registration. Additionally, this platform supports text-to-speech conversion, noise removal, voice changes, vocal removal, etc.
Step 1: Open Voice.ai Echo Remover
Navigate to the Voice.ai (https://voice.ai/) website, select Audio Tools at the top, and click Echo Remover on the left sidebar.
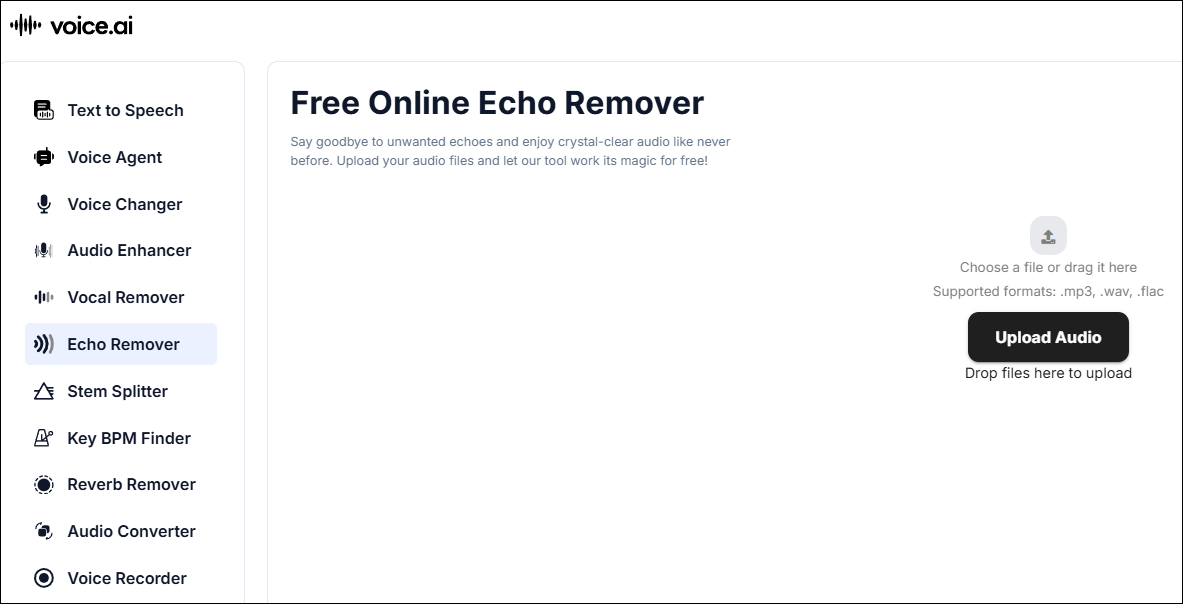
Step 2: Upload Your Audio File
Click the Upload Audio button in the middle to open your audio file, MP3, FLAC, or WAV.
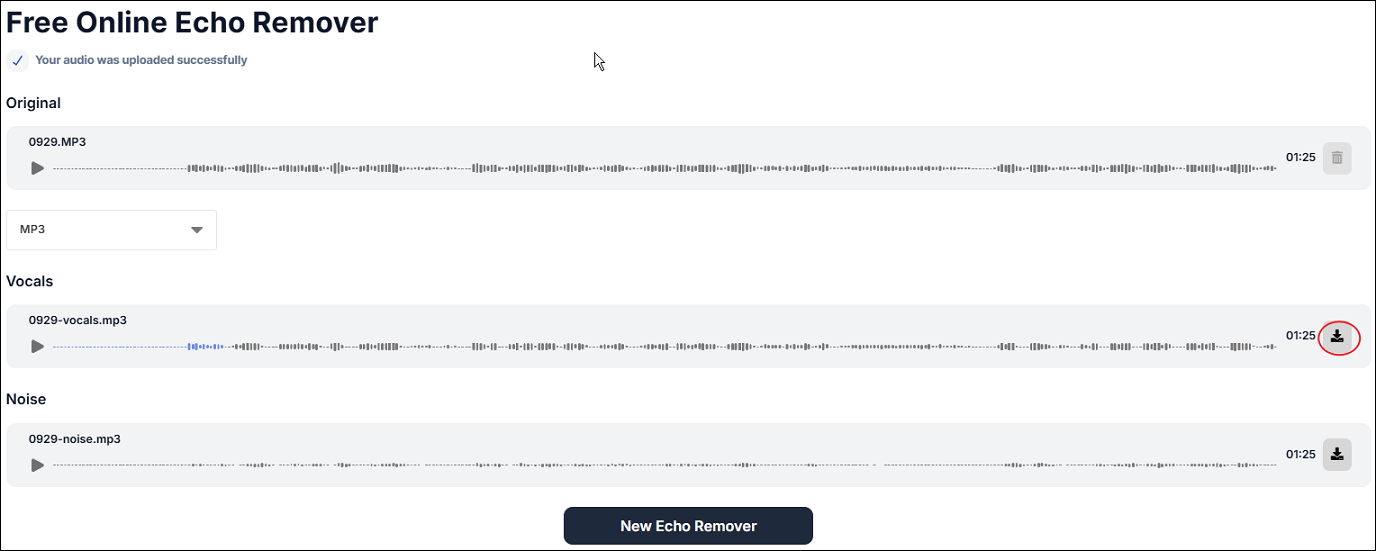
Step 3: Remove the Echo
Choose the output format and click the Convert Audio button to start the audio processing.
Step 4: Save the Audio
Once done, the original audio, vocals (the audio without echo), and noise files will display individually. Click the download icon next to the Vocals audio to save the vocals on your PC.

Conclusion
After you’ve seen these steps, you won’t worry about how to remove echo from audio. This is a straightforward process and requires no skills. With a few clicks, you’ll enjoy high-quality audio content.
About The Author

Position: Columnist
Cora is a tech writer specializing in digital media workflows, with over six years of hands-on experience in video post-production, media transcoding, and screen capture. Her writing is always clear and practical. Cora also produces in-depth software reviews for users across skill levels to help them find the right tool and enjoy video editing.
User Comments :