Gradient text is a popular design element that can add color layers and depth to your work and make text more compelling. This article from MiniTool MovieMaker – one of the best free video editing software will introduce how to make gradient text in Canva.
The Benefits of Making Gradient Text
Gradient text is becoming more and more popular in design, and its unique visual effect can effectively enhance the appeal of your work. Here are some main benefits of using gradient text:
Enhance visual appeal: Gradient colors can add layers to the text, making it more visually appealing. This effect can effectively attract the audience’s attention and enhance the communication of the message.
Create a modern feel: Gradient text often gives a stylish and modern feel that is in keeping with today’s design trends. This style is particularly suitable for social media and branding, helping to enhance brand image.
Enrich design expression: Through different color combinations and gradient styles, you can express diverse emotions and themes.
Personalize the design: Gradient text makes design work more personal and can better reflect your style and creativity.
MiniTool MovieMakerClick to Download100%Clean & Safe
How to Make Gradient Text in Canva
Canva is a user-friendly online design tool. It offers a rich resource of templates, graphics, and images, so you can easily create all kinds of visual works, including social media graphics, posters, presentations, etc. Canva’s interface is intuitive and easy to use, and you can personalize your designs by simply dragging and dropping elements.
If you’re looking for a tool that can create gradient text, then Canva is a great choice. When using the text feature, you can easily adjust the position and spacing of the text. It also allows you to add gradient effects to create layers that further enhance the visual appeal of the text.
In the following, let’s see how to easily realize this gradient text effect and make your work more attractive.
Step 1: Go to the Canva official site, click Upload your image to import your image or video from your computer, and drag the media file to the timeline.
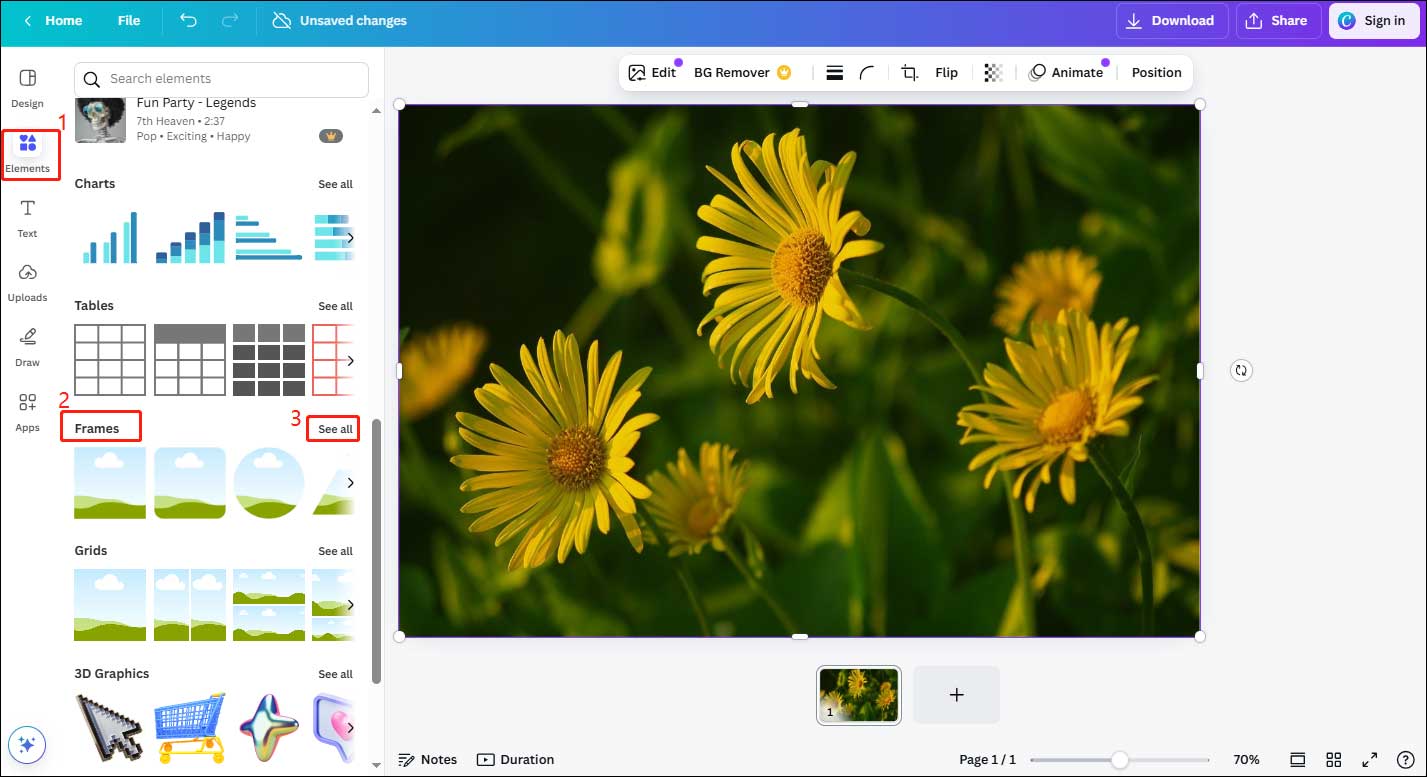
Step 2: Click the Elements button at the left toolbar, scroll down in the Elements window to find the Frames option, and click See all to show all frames option.

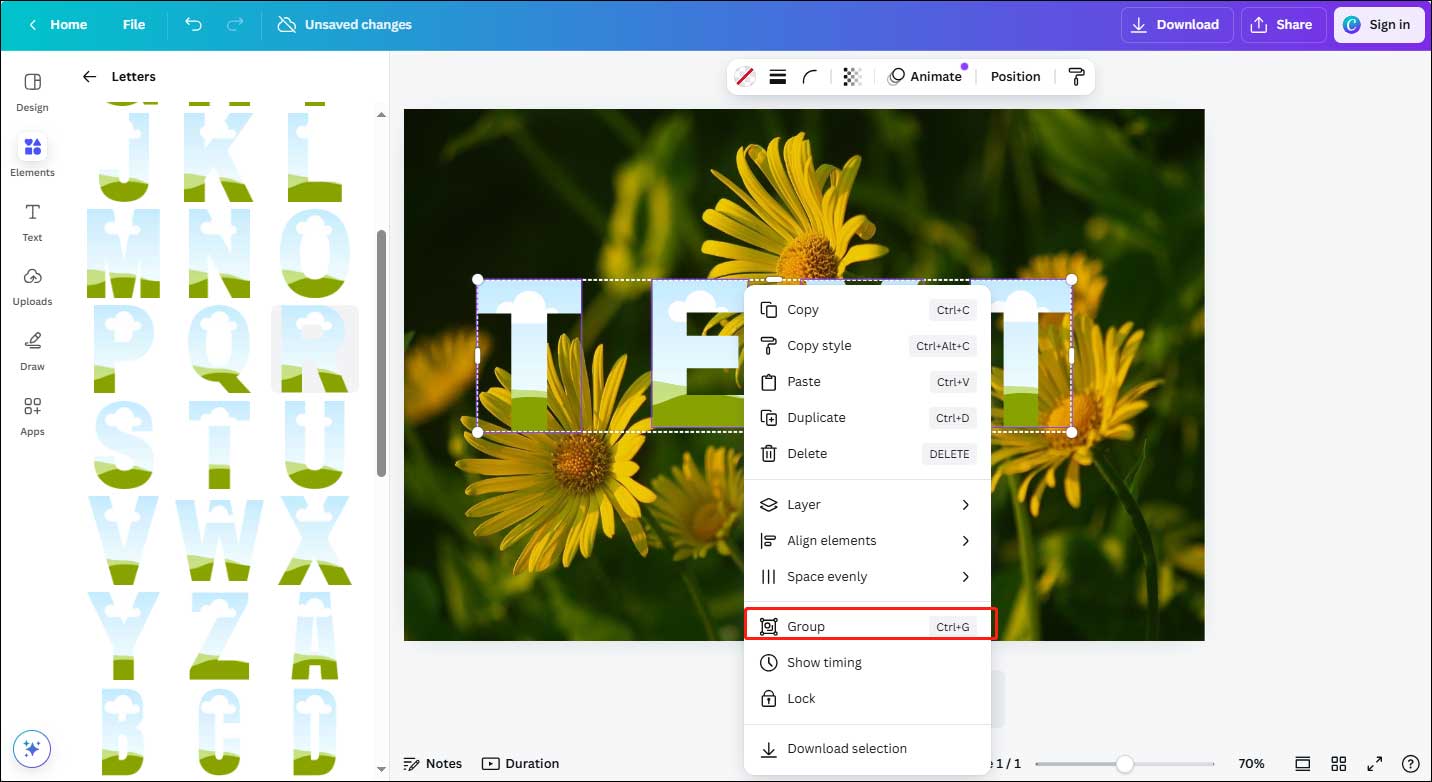
Step 3: Find Letters in Frames and click See all to show all letters, select the frames for the letters your text contains and add these frames to your image.
Step 4: Drag your cursor to select all the letters, right-click on them, and choose Group in the drop-down menu. After you group these letters, you’ll be able to reposition and resize them together, avoiding the hassle of adjusting them one by one.

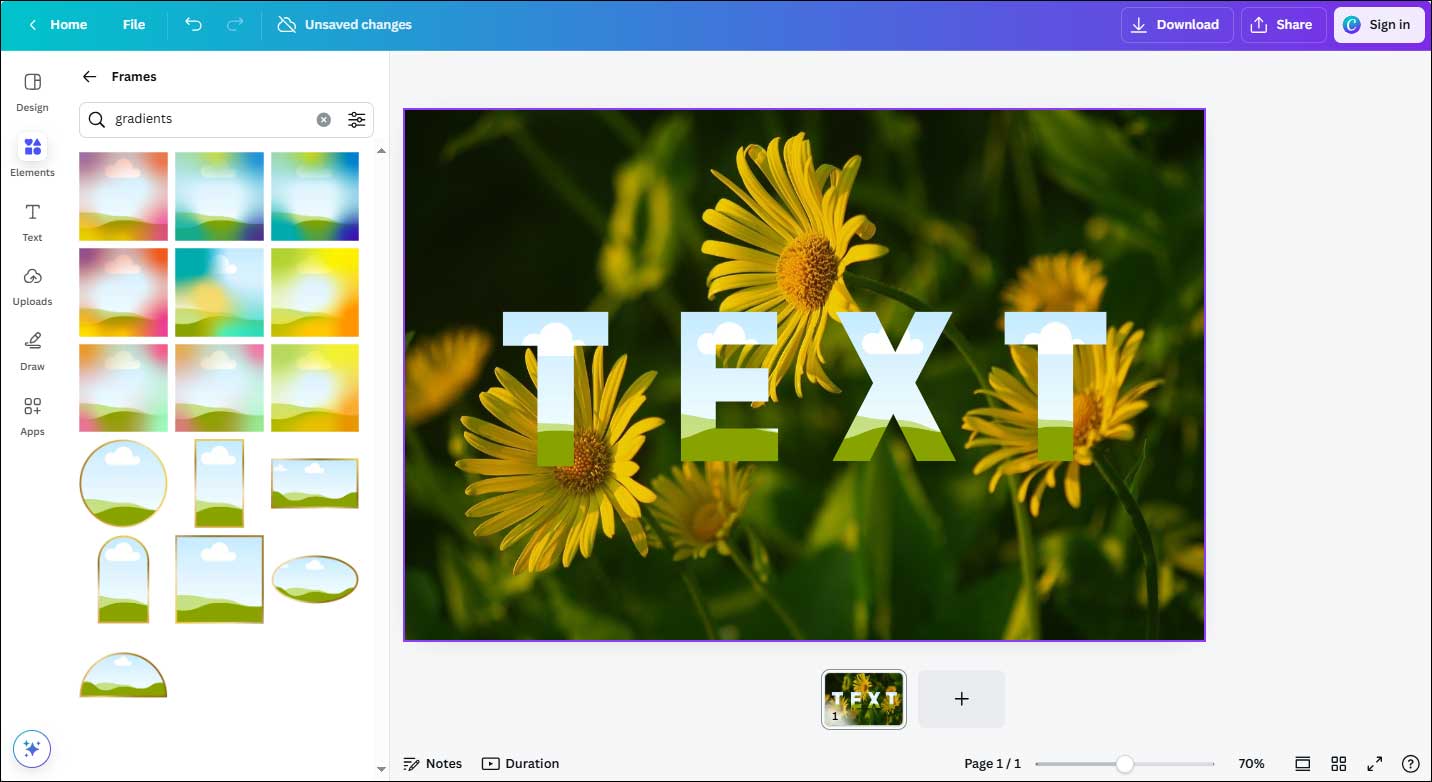
Step 5: Go to Elements on the left toolbar and input Gradients in the search box to find all available gradients.

Step 6: Drop the gradient you want onto each letter frame. However, you still can’t see the gradient effect in the text. Therefore, you need to select the first letter and double-click it. You can adjust the gradient at this time. Drag the gradient to make the left part of the gradient on the first letter. After completing the adjustment, click Done to save this effect.
Step 7: Move from the left part of the gradient to the right in each subsequent letter. After finishing the adjustment to the last letter, the gradient effect is visible.
Step 8: After getting a satisfactory gradient effect, click Download to save your work.
Bottom Line
Whether you use it for social media images, posters, or other design projects, gradient text adds a unique style to your work. Canva’s flexibility allows you to experiment with a variety of gradient effects to find the style that best suits your project. This is all about how to make gradient text in Canva. I hope this guide will help you better utilize Canva to create a unique gradient text effect, making your designs stand out.


User Comments :