It is inevitable to take videos or photos that are overexposed or oversaturated. Videos with excessive brightness or exposure have bad effects on the details of photos. How to fix overexposed video? Premiere Pro is a good choice. This MiniTool MovieMaker post will introduce how to fix overexposed video in Premiere Pro.
Overexposure in video is when the brightness level in the video exceeds what is considered the optimal brightness level, which results in loss of detail in the video, resulting in lower video quality, and affecting the viewing experience. Overexposure is often caused by harsh sunlight and abundant natural light. In addition to setting up the shooting parameters while shooting, you can also fix overexposed videos later in the post-production. To solve this problem, the following content shows you how to fix overexposed video in Premiere Pro.
How to Fix Overexposed Video in Premiere Pro
Adobe Premiere Pro is a professional video editor that is available for both Windows and Mac. To make your video stunning, it provides various advanced editing features and AI features like Color Match, Audio Ducking, and Enhance Speech. Those features can save your time and activate your creativity.
More importantly, it has powerful video color correction and grading tools that can help you fix overexposed video in Premiere Pro. You can use its professional color wheels and curve controls to adjust all or part of a frame. There are many features waiting for you to explore. The following content offers you detailed steps to fix overexposed video in Premiere Pro. You can master the method even if you are a beginner. Now, let’s get started!
Step 1. Create a New Project
Run Premiere Pro on your computer, then click the File tab on the top menu bar, and choose New to create a new project.
Step 2. Import Overexposed Video
To upload the overexposed video, you need to click File again and click Import to upload it. Later, directly drag and drop it onto the timeline.
Step 3. Open the Lumetri Scopes
Click the Lumetri Scopes at the high-left corner to open it and then go to Window > Workspaces > Color to open the Color workspace. You can find there are many different Lumetri scopes on the left side. Then select the overexposed video you want to fix and expand the Basic Correction dropdown.
Step 4. Adjust Brightness and Tonal Values with the Waveform Monitor
You can use the waveform monitor to find the bright and dark areas in the video and the white line on the waveform monitor will reach around 100 and the overexposed parts will appear as dot clusters. Then you can click the numeric value and drag it to the left to dark your video.
Step 5. Adjust the Color Exposure
You can adjust the Exposure and Saturation value to fix the oversaturated video. Also, you can go to the Creative section to choose a preset that can achieve the natural color effect.
Step 6. Export the Fixed Video
You need to click the File tab, move to Export, and choose Media. Then you can adjust the output parameters in the Export Settings window and click Export to save the fixed video.
Recommended Way to Fix Overexposed Video
If the video is not heavily exposed, you can use a simple video editor to lower its brightness or make other color corrections. Since Premiere Pro is not friendly to beginners and has a long learning curve, you’d better try a video editor that is suitable for beginners. MiniTool MovieMaker is a good choice to fix the overexposed video easily. Here’s how:
Step 1. Download and install MiniTool MovieMaker and open it.
MiniTool MovieMakerClick to Download100%Clean & Safe
Step 2. Click the Import Media Files area to upload the overexposed video from your PC and click the plus (+) icon on it to add it to the timeline.
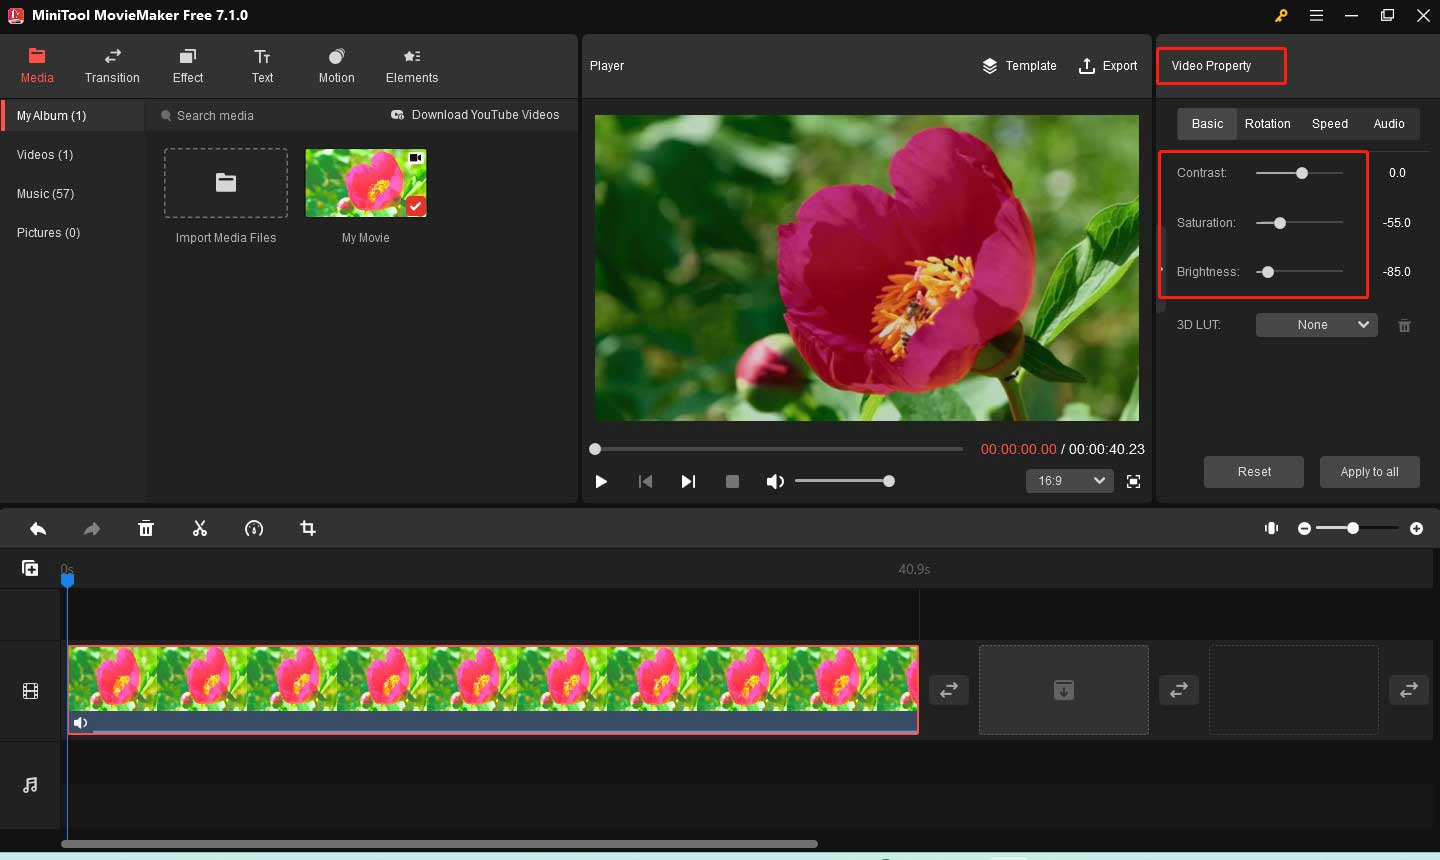
Step 3. Go to the Video Property section and drag the Brightness slider to dark your video. Moreover, you can adjust the saturation and contrast or apply a 3D LUT.

Step 4. After finishing the video editing, you can click the Export icon in the player section, personalize the output parameters, and click the Export button to save the fixed video.
Conclusion
For a better viewing experience and to recover the details of the video, you’d better fix the overexposed video. Premiere Pro is a professional video editor that can help you fix overexposed videos. The above has shown you how to fix overexposed video in Premiere Pro. Alternatively, you can also use MiniTool MovieMaker.


User Comments :