This post from MiniTool MovieMaker will explain how to crop a Zoom recording using two simple methods and why you might need to do so. Follow this guide to easily improve the quality of your Zoom video and make it more professional.
With the rise of remote work and virtual meetings, Zoom has become an essential communication tool. Even more conveniently, Zoom comes with a built-in recording feature to allow the meeting host and co-hosts to capture video and audio from meetings for later review, sharing, or documentation. However, sometimes you may need to remove portions of a recording. How to crop a Zoom recording? This post will guide you through two quick methods.
Why Do You Crop a Zoom Recording
Crop a Zoom recording means removing unwanted areas from the edges of the frame, thus focusing on the main subject or other highlights in the meeting and eliminating distractions on the screen. If you need to share a Zoom meeting recording with colleagues or superiors, a cropped and refined video can demonstrate your professionalism and positive attitude.
How to Crop a Zoom Recording on Windows
MiniTool MovieMaker is one of the easiest free video editing software programs designed for beginners to edit and create videos in minutes. It includes all the essential editing techniques- crop, trim, split, rotate, speed, and provides a huge collection of transitions, filters, effects, and stickers to enhance your content further. Therefore, if you want a video cropper to crop your Zoom video, MiniTool MovieMaker is a fantastic choice.
Here’s how to crop a Zoom recording with MiniTool MovieMaker.
Step 1. Find the Zoom recording and make a copy for backup.
Step 2. Download and install the excellent video editor on your PC.
MiniTool MovieMakerClick to Download100%Clean & Safe
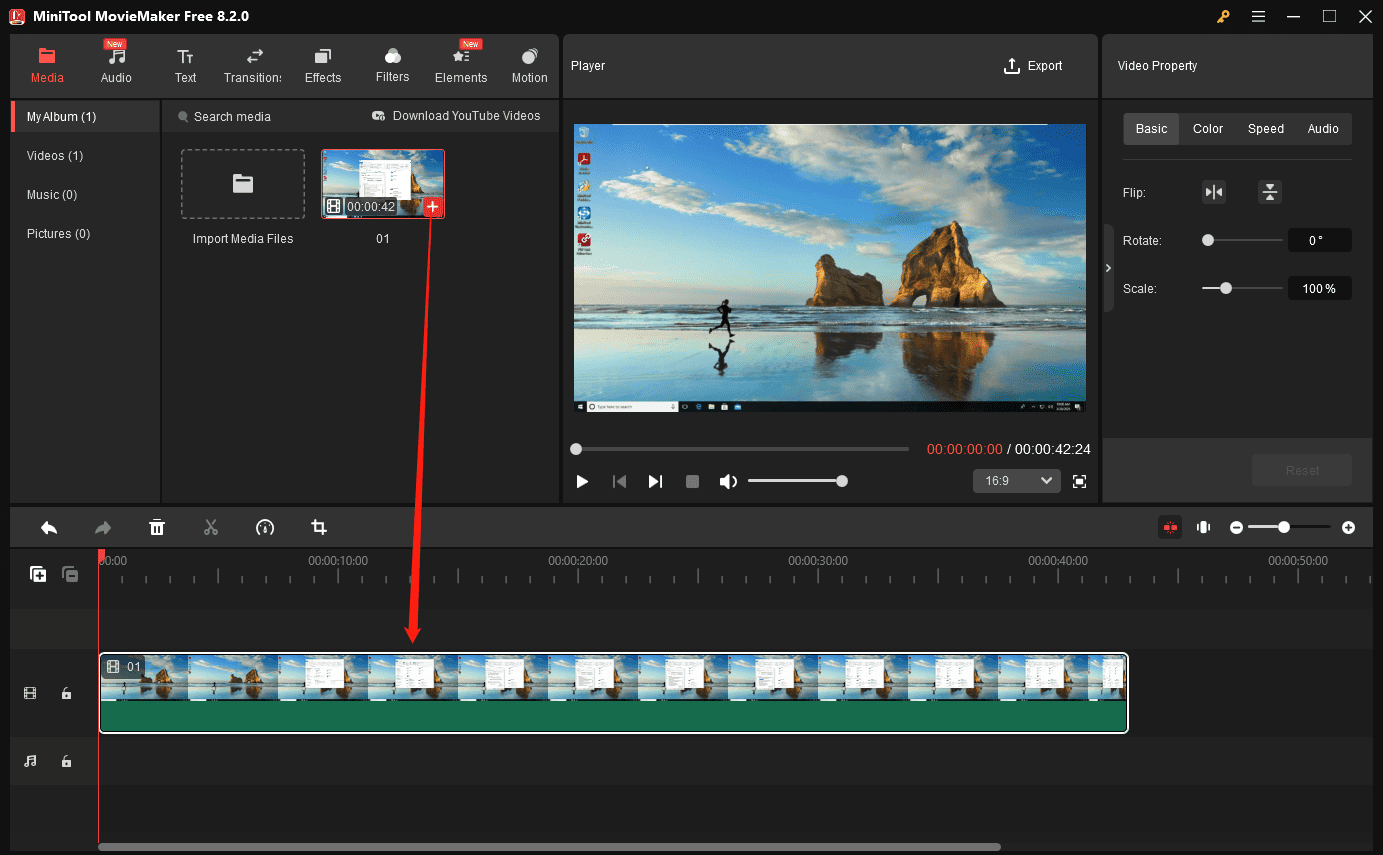
Step 3. Run the software and click the New Project button in the pop-up window to enter the main UI. Then, click the Import Media Files button to add your Zoom video, and click the + icon on the video to add it to the timeline.
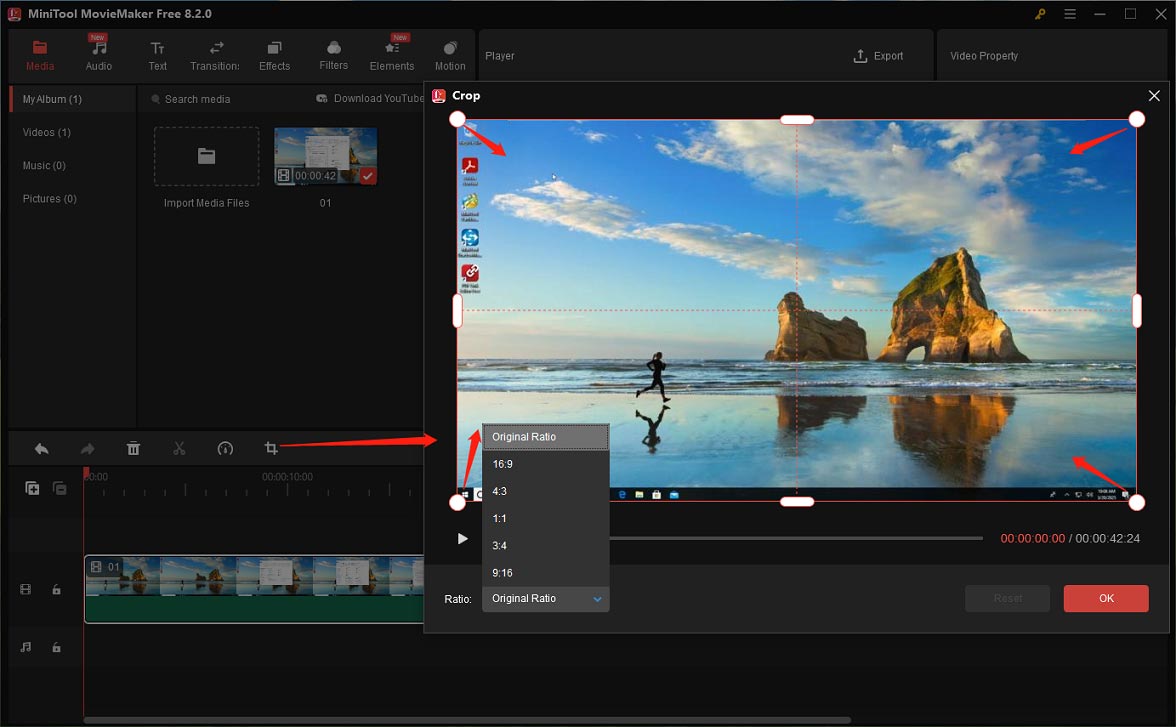
Step 4. Click the Crop icon on the timeline toolbar to open the Crop window. Select a preset aspect ratio or crop the video to its original ratio. Drag any vertex of the rectangle inwards and change its position to choose the area you need to keep, and click OK to save changes.
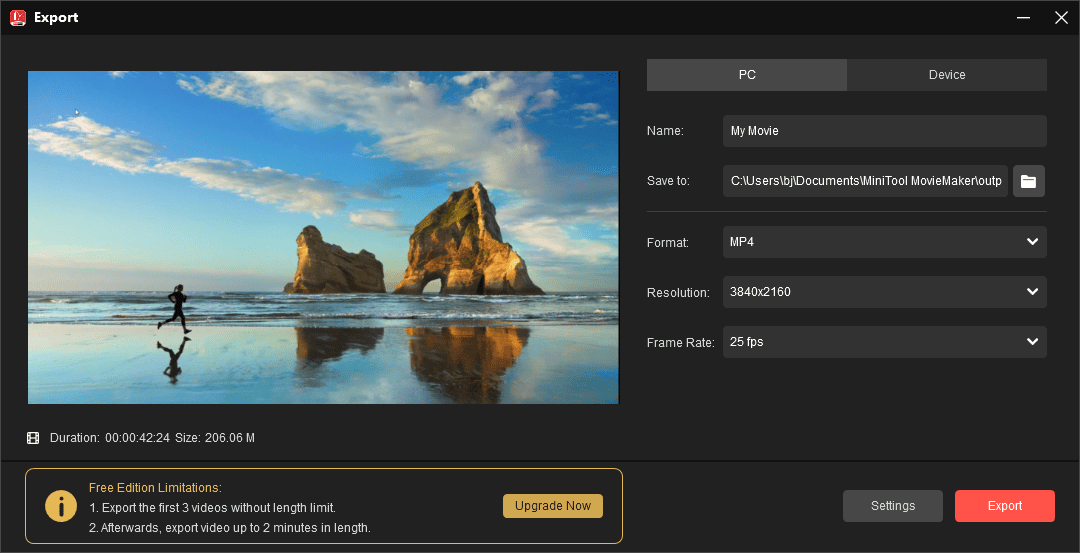
Step 5. If you’re happy with the result, click Export in the upper right corner to prepare for output. Choose the save path, set the output format, and change the resolution and frame rate. Finally, click the Export button to export the cropped Zoom video.
Pros:
- An intuitive interface makes the application easy to use.
- Export videos up to 4K for free and without watermarks.
- Support multiple popular video formats for output, along with adjustable settings.
Cons:
- Only compatible with Windows.
How to Crop a Zoom Recording Online
If you need an online tool to quickly crop your Zoom video, Clipchamp is a good option. It is now part of Microsoft, integrated as the built-in video editor in Windows 11, and it’s also still available via web browsers for easy access. How to crop a recorded Zoom video online with Clipchamp. Here’s the quick guide.
Step 1. Navigate to the Clipchamp website, sign in with your account, and click the Create a new video button to start.
Step 2. Click the Import media button to import your Zoom recording and drag it to the timeline.
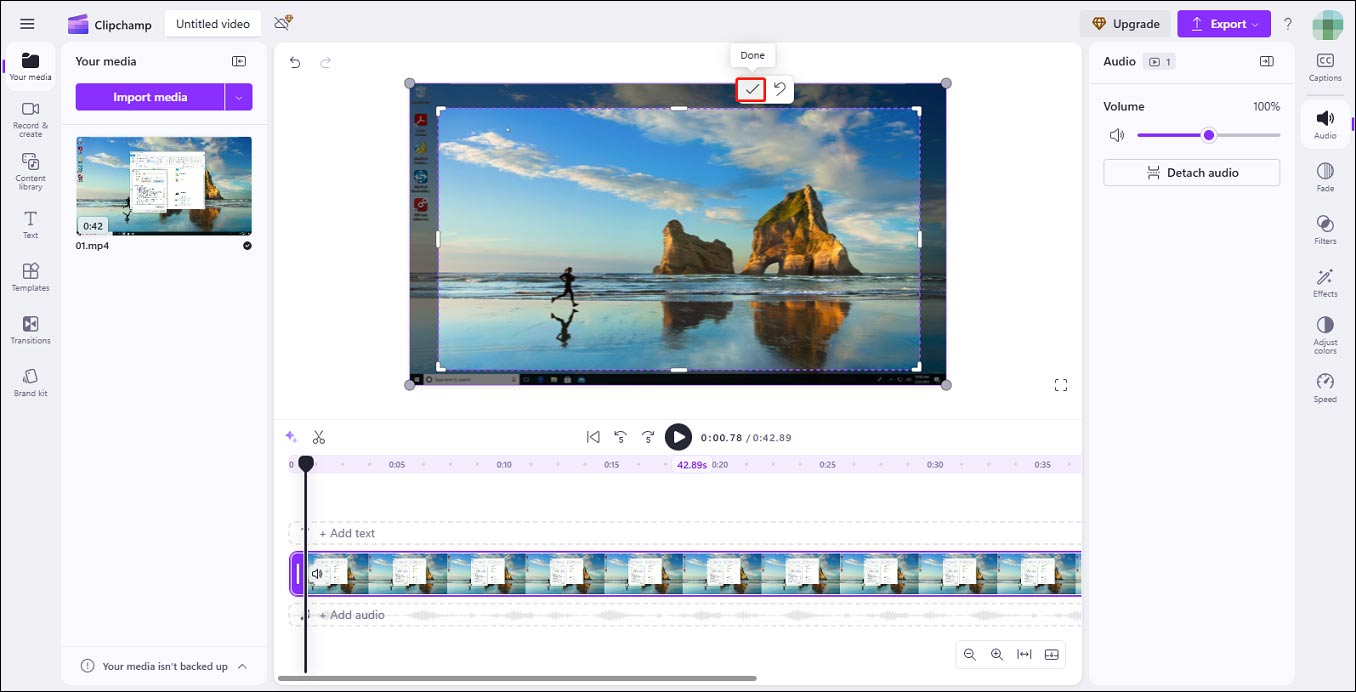
Step 3. Click the Crop icon on the floating bar at the top of the video player, and the cropping handles appear immediately. Drag any handle or side inwards or outwards to adjust the clip to any size. Click the Done icon to save changes.
Step 4. Click the Export button and select a resolution to export your video.
Pros:
- No installation required.
- A simple layout.
- A set of editing tools and effects.
Cons:
- 4K export is a premium feature.
- The output format is limited to MP4, with minimal customization options.

MiniTool Video ConverterClick to Download100%Clean & Safe
Conclusion
How to crop a Zoom recording? Since Zoom doesn’t include a built-in cropping feature, this post gives you two simple yet effective ways to edit your Zoom video. Whether you desire a desktop application or an online tool, this post covers the best option.
About The Author

Position: Columnist
Cora is a tech writer specializing in digital media workflows, with over six years of hands-on experience in video post-production, media transcoding, and screen capture. Her writing is always clear and practical. Cora also produces in-depth software reviews for users across skill levels to help them find the right tool and enjoy video editing.
User Comments :