This post will explain several Apple ProRes file compression techniques and how to compress Apple ProRes files on a Windows computer in detail. Use these tips to effectively reduce the size of your ProRes files, thereby saving storage space on your device.
4 Tips for Compressing Apple ProRes Files
Apple ProRes files are videos encoded using this codec and saved in the MOV container format. ProRes is a high-quality and lossy video compression format used in professional post-production that supports any frame size (including SD, HD, 2K, 4K, 6K, 8K, and larger) at full video resolution. Therefore, ProRes files are always bigger, more specifically they are up to 30 times larger than HEVC files. So, these files will take up a lot of storage space.
You can compress ProRes files to reduce the size, saving device storage space and sharing them easily. Here are several useful tips to help efficiently compress Apple ProRes files.
#1. Trim the video: Trim your ProRes file to delete unwanted parts at the beginning or end, making it smaller in size. Or you can remove unnecessary sections in the middle of the video to shrink the file size.
#2. Compress the video: Try a professional video editor to reduce the file size of your Apple ProRes footage efficiently without losing quality.
#3. Downscale the video resolution: A higher resolution means a larger file size. You can reduce ProRes file size greatly by lowering the resolution, such as 4K to 1080P or 720P.
#4. Reduce the bitrate: Reducing the video bitrate is also an effective way to compress Apple ProRes files to a smaller size.
#5. Convert ProRes to MP4: Alternatively, you can convert ProRes files to MP4 encoded with H.264 or HEVC (H.265) to shave the size down. While H.265 achieves higher compression efficiency, H.264 shares better compatibility.

How to Compress Apple ProRes Files on Windows
This part will explain how to compress Apple ProRes files using two simple tools, MiniTool MovieMaker and Video Converter.
Method 1: Use MiniTool MovieMaker
MiniTool MovieMaker is one of the best Windows video editors, featuring a user-friendly interface and rich editing tools and effects. The software allows you to edit, compress, and convert many video files, such as Apple ProRes, AV1 videos, HEVC, MOV, MP4, MKV, WebM, and more.
Here’s how to compress Apple ProRes files with MiniTool MovieMaker.
Step 1. Download and install the video trimmer
Click the button below to download and install the ProRes compressor on your computer.
MiniTool MovieMakerClick to Download100%Clean & Safe
Step 2. Upload your Apple ProRes file
Launch MiniTool MovieMaker and close the promotion window to enter the main interface. Then, click the Import Media Files button to open your Apple ProRes file. Here I imported a 318MB ProRes video. Next, click the + icon on the clip to add it to the timeline.
Step 3. Trim the video
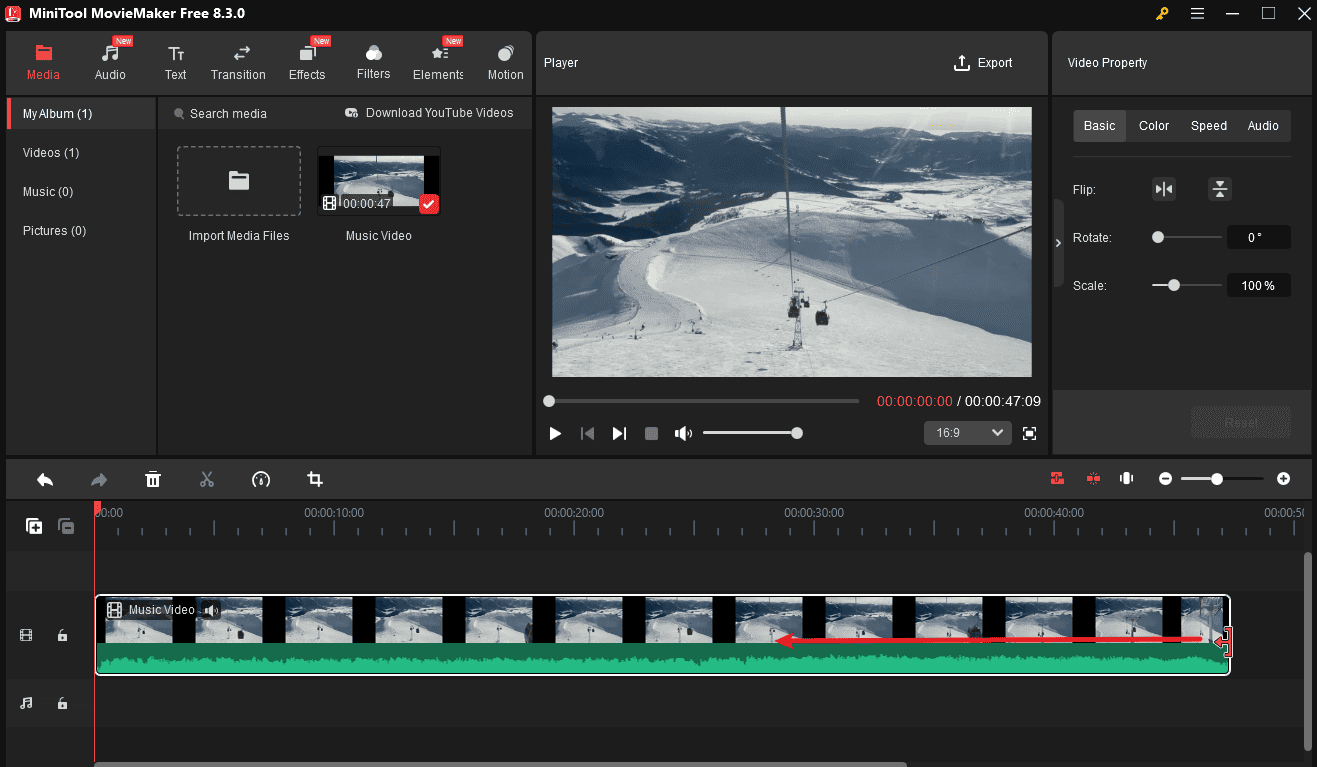
Select the clip on the timeline and hover over the clip’s start or end point until the Trim icon appears. Then, click and drag the icon to remove unwanted parts at the beginning or end.
Step 4. Cut off the middle part
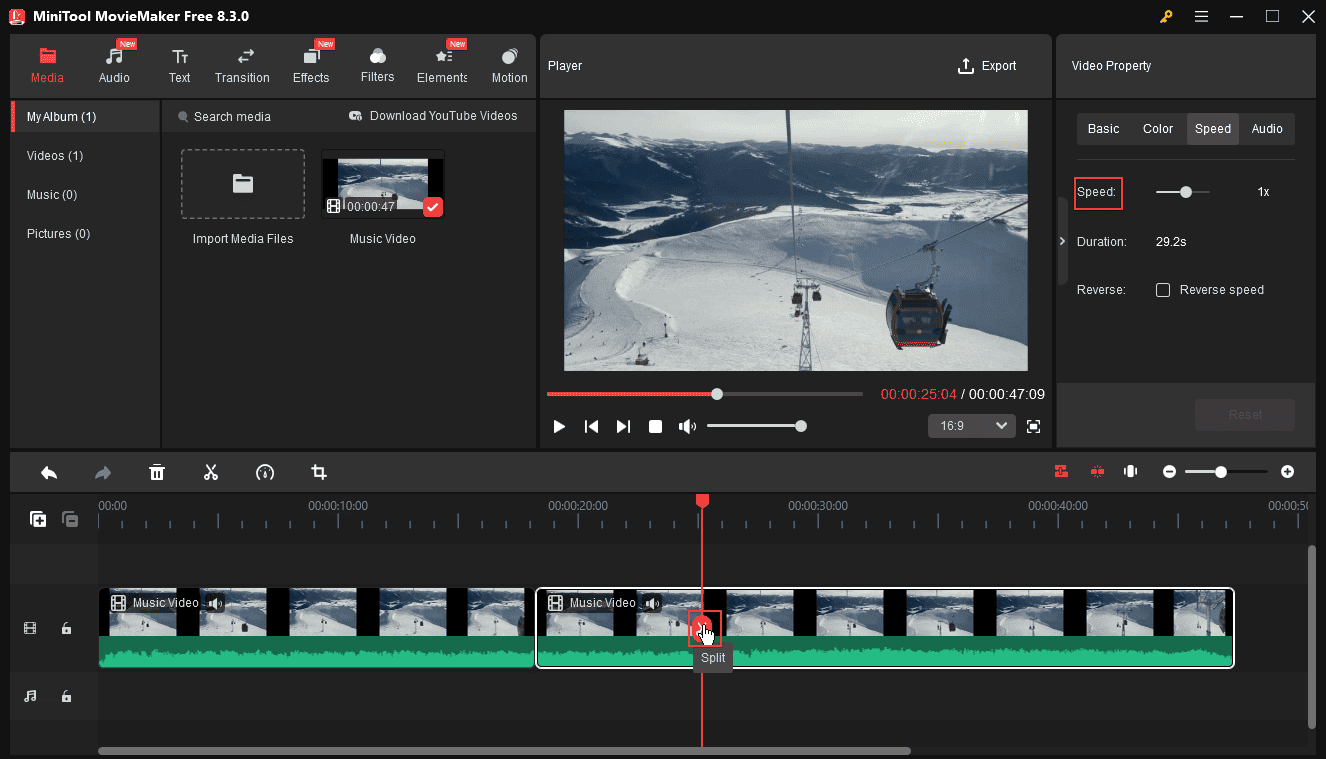
If you want to remove the middle part, separate the target part using the Split tool. Drag the playhead to the start point of the clip you want to remove, and click the Split icon; continue moving the playhead to the end of the clip, and click the Split icon again. Then, right-click on the clip and select Delete.
Step 5. Adjust output settings and export the video
Click the Export option in the upper right corner to open the Export window. Then, give the file a name and browse for a folder to save it.
Make sure the Format is set to MP4 to compress the ProRes file effectively. Then, open the Resolution drop-down menu and select 1920×1080 (1080P) or lower.
Next, click the Settings icon, set Quality to Better or Good, expand the Bit Rate menu, select a small number, and click OK.
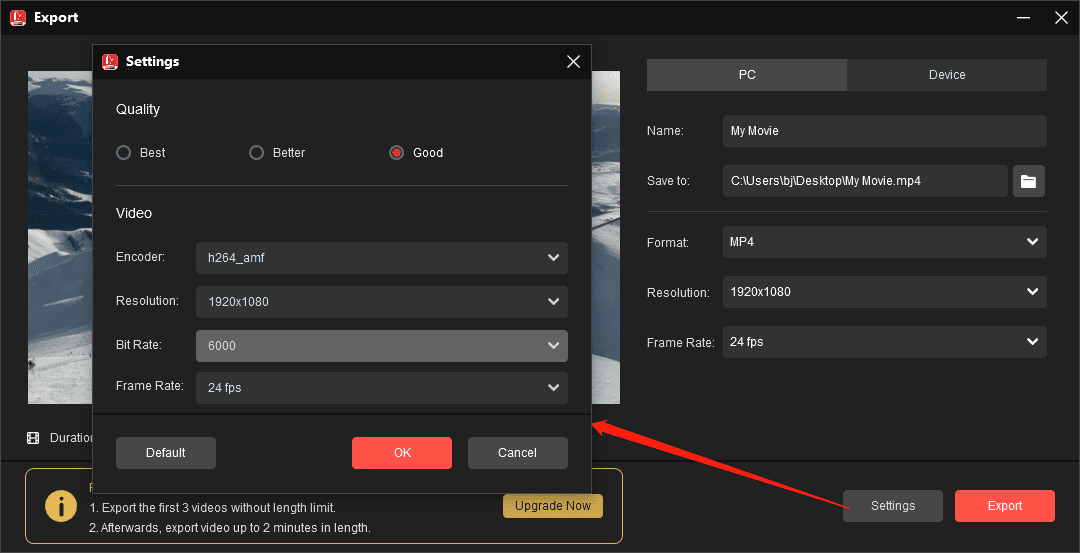
Finally, click the Export button to start the Apple ProRes file compression.
Method 2: Use MiniTool Video Converter
MiniTool Video Converter is the one-stop solution for converting, compressing, and downloading videos, as well as recording your screen. It also allows you to reduce ProRes file size using two differetne methods.
Option 1: Use the Built-in Video Compressor
MiniTool Video Converter’s built-in compressor lets you shrink videos quickly, with no watermarks, no file limits, and batch compression for up to 5 videos at once.
Step 1: Download and install
Click the button below to get the free compressor for PC and complete the setup.
MiniTool Video ConverterClick to Download100%Clean & Safe
Step 2: Open the compression tool
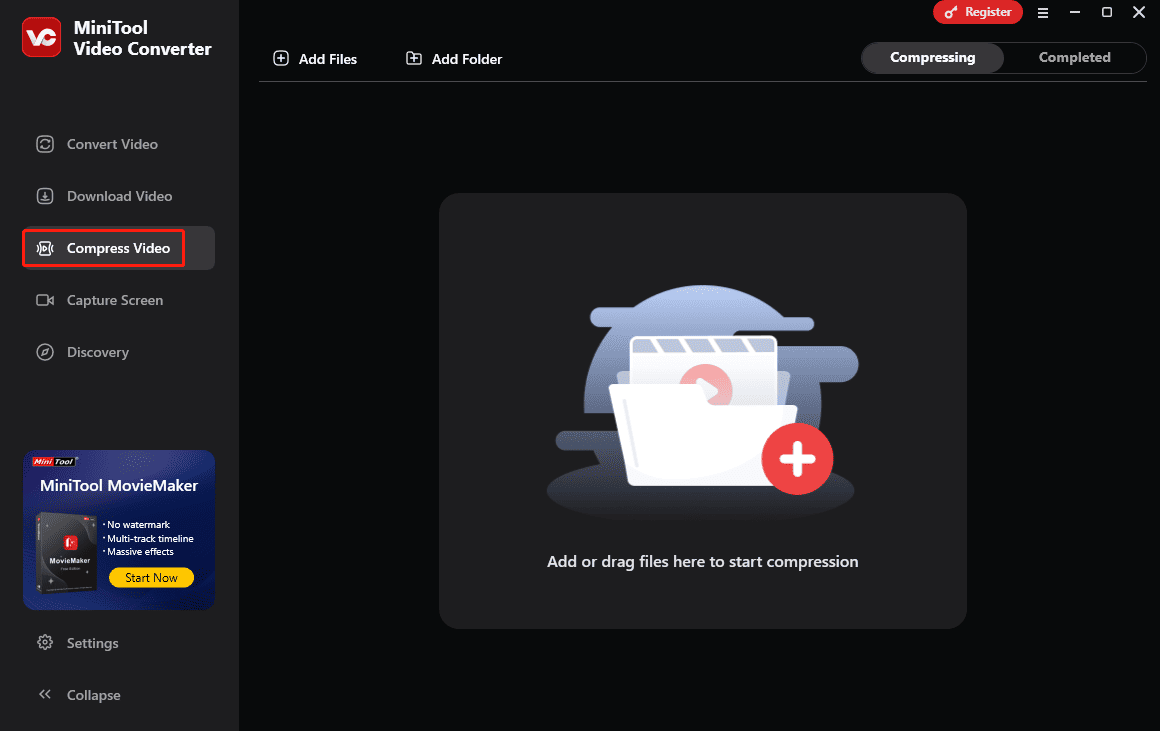
After opening the software, switch to the Compress Video tab from the sidebar.
Step 3: Upload your video
Click Add Files and choose the video you want to compress.
Step 4: Adjust compression settings
Click the Settings icon to customize the compression strength and output format.
By default, your video will be compressed to 70% of its original size. If you need smaller files, drag the slider to the left until you’re satisfied with the estimated file size.
Next, expand the Format menu and select MP4 from the dropdown list.
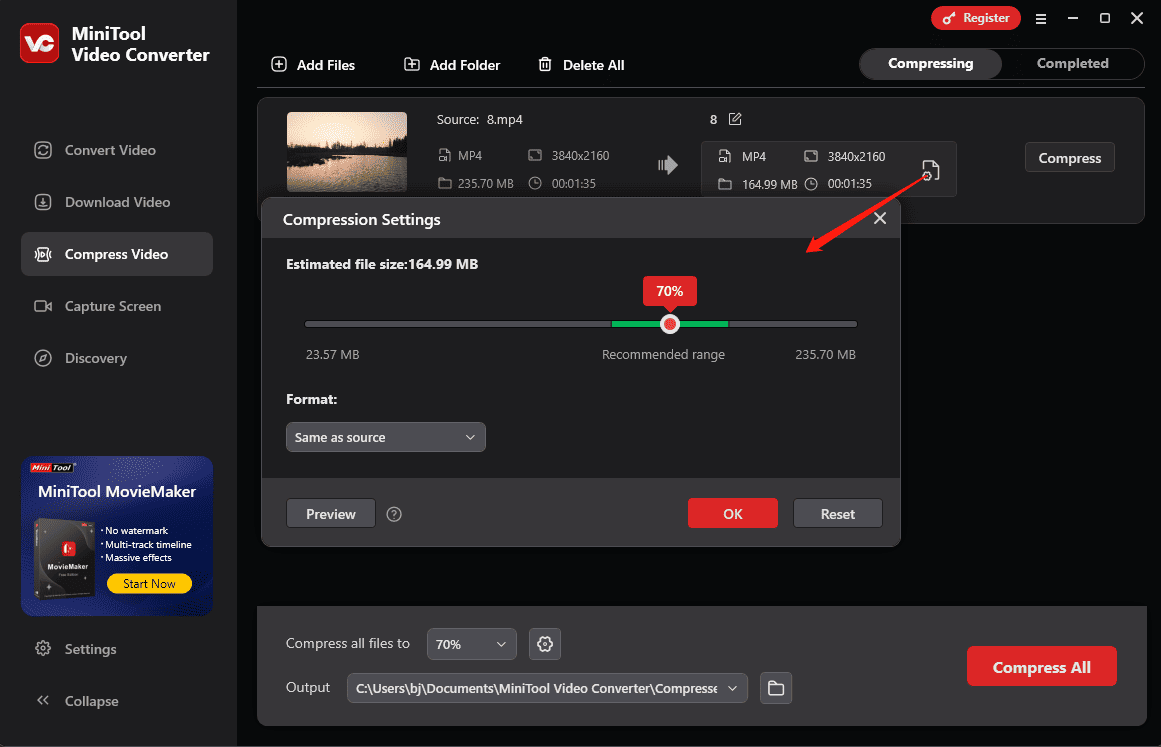
Step 5: Preview (Optional)
Click the Preview button to check a 10-second preview of the final result. If you’re satisfied with the quality, click OK to confirm.
Step 6: Compress the video
Click the Compress button to start the compression task. Once done, the optimized video will appear under the Completed tab.
Option 2: Use the Conversion Tool
MiniTool Video Converter also serves as a professional video converter. It allows you to convert between various video files. You can also use this application to convert ProRes to MP4 and adjust the encoding settings to fine-tune file size, without sacrificing too much quality.
MiniTool Video ConverterClick to Download100%Clean & Safe
Step 1. Upload your Apple ProRes file
Go to the Convert Video tab and click the Add or Drag files here to start conversion area to import your file.
Step 2. Set MP4 as output format
Click the Settings icon on the right and go to the Video tab. Next, select MP4 on the left sidebar and choose a low-resolution preset.
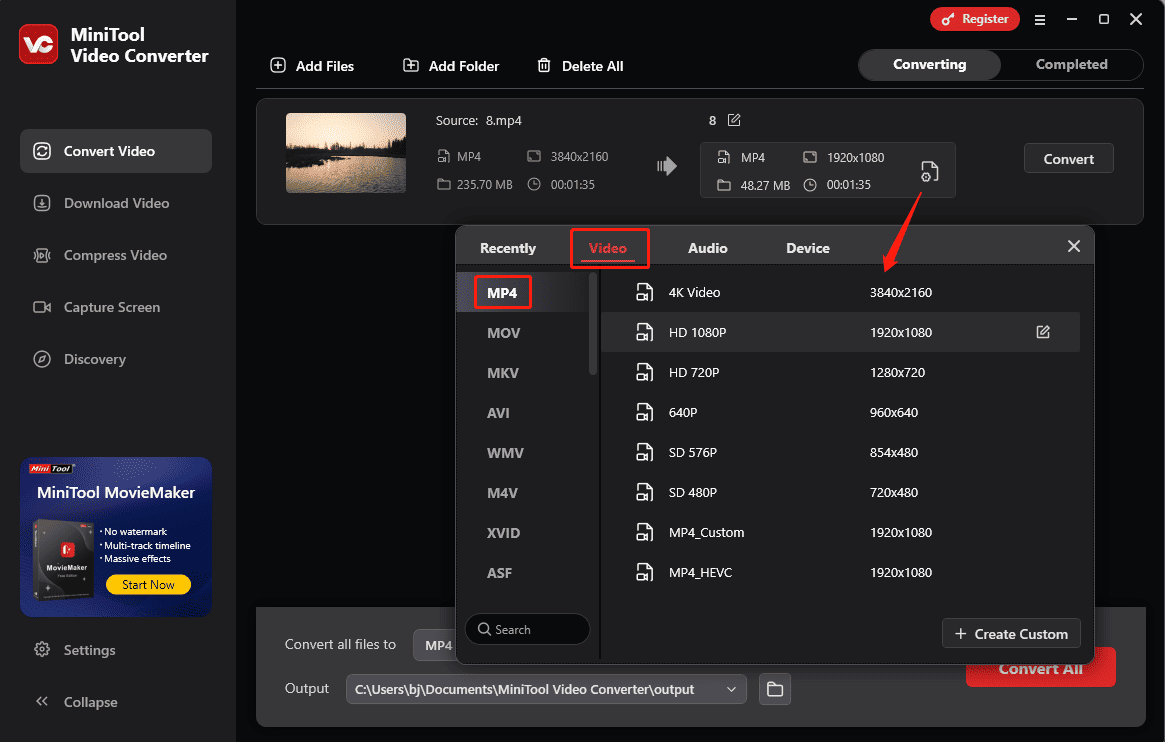
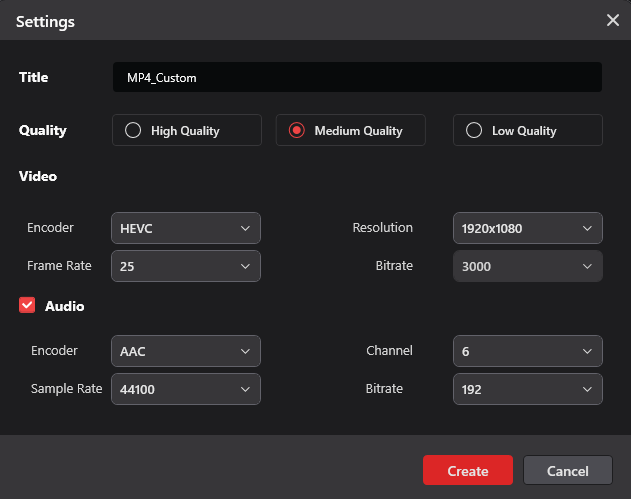
If you want to convert ProRes to HEVC for further size reduction, click the + Create Custom button. In the Settings window, set Encoder to HEVC, complete other settings, and click Create to add the profile. Then, find and click the format to set it as the output format.
Step 3. Convert and compress the ProRes file
Click the Convert button to start compressing the Apple ProRes file.

Conclusion
It’s easy to compress Apple ProRes files to smaller sizes. If you have some large ProRes files, follow the steps above to reduce their sizes quickly.
About The Author

Position: Columnist
Cora is a tech writer specializing in digital media workflows, with over six years of hands-on experience in video post-production, media transcoding, and screen capture. Her writing is always clear and practical. Cora also produces in-depth software reviews for users across skill levels to help them find the right tool and enjoy video editing.
User Comments :