Learn how to blur faces in a video effortlessly. This guide provides step-by-step instructions for preserving identity while maintaining video quality.
In the current digital world, video is the king. From viral social media clips to vlogs or interviews, there are countless reasons you might need to blur faces before sharing a video to protect the identities of the people in it. So, how to blur faces in a video?
If you’re a content creator respecting privacy, you’ve come to the right place. This post provides three effective methods to blur someone’s face in a video with minimal effort. It doesn’t matter if you don’t have much editing experience, as this post offers step-by-step instructions.
How to Blur Faces in a Video with CapCut
CapCut is a powerful video editing application due to its powerful features and ease of use. It provides a rich variety of tools and effects for most editing tasks and is robust enough for most creators. From basic cutting to advanced auto captions, CapCut has you covered. If you want to blur faces in a video for free, CapCut is a fantastic choice.
Here’s how to blur a face in a video using the CapCut desktop application.
Step 1: Download and Install
Go to the official website or Microsoft Store to download and install the app to blur faces in videos.
Step 2: Add Your Target Video
Run the software on your computer and click the Create project button at the top to create a new project. Then, click the Import icon in the left panel to import your video and add it to the timeline.
Step 3: Apply the Blur Effect
Duplicate the video and place it above the main track. Select the top video layer, go to the Effects tab, search for the blur effect, download, and add the Blur effect to the timeline.
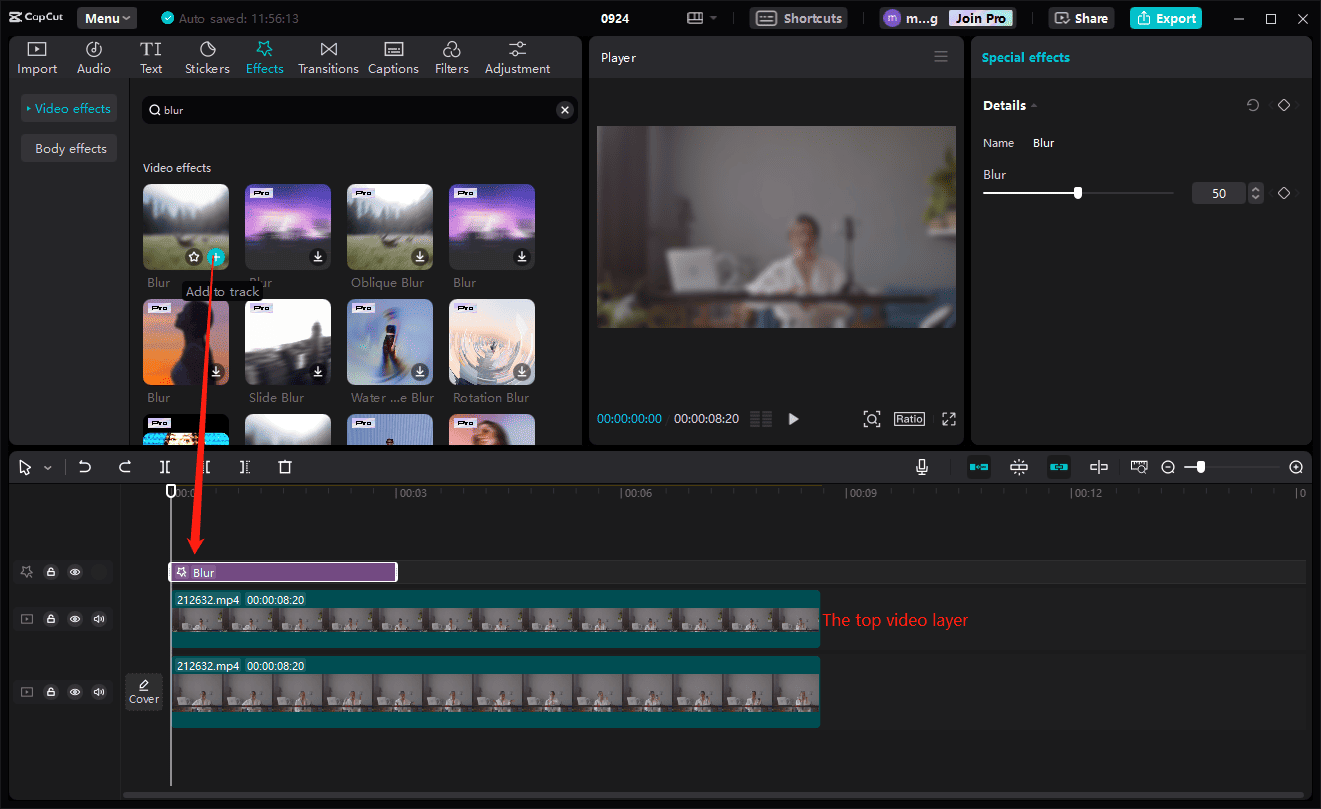
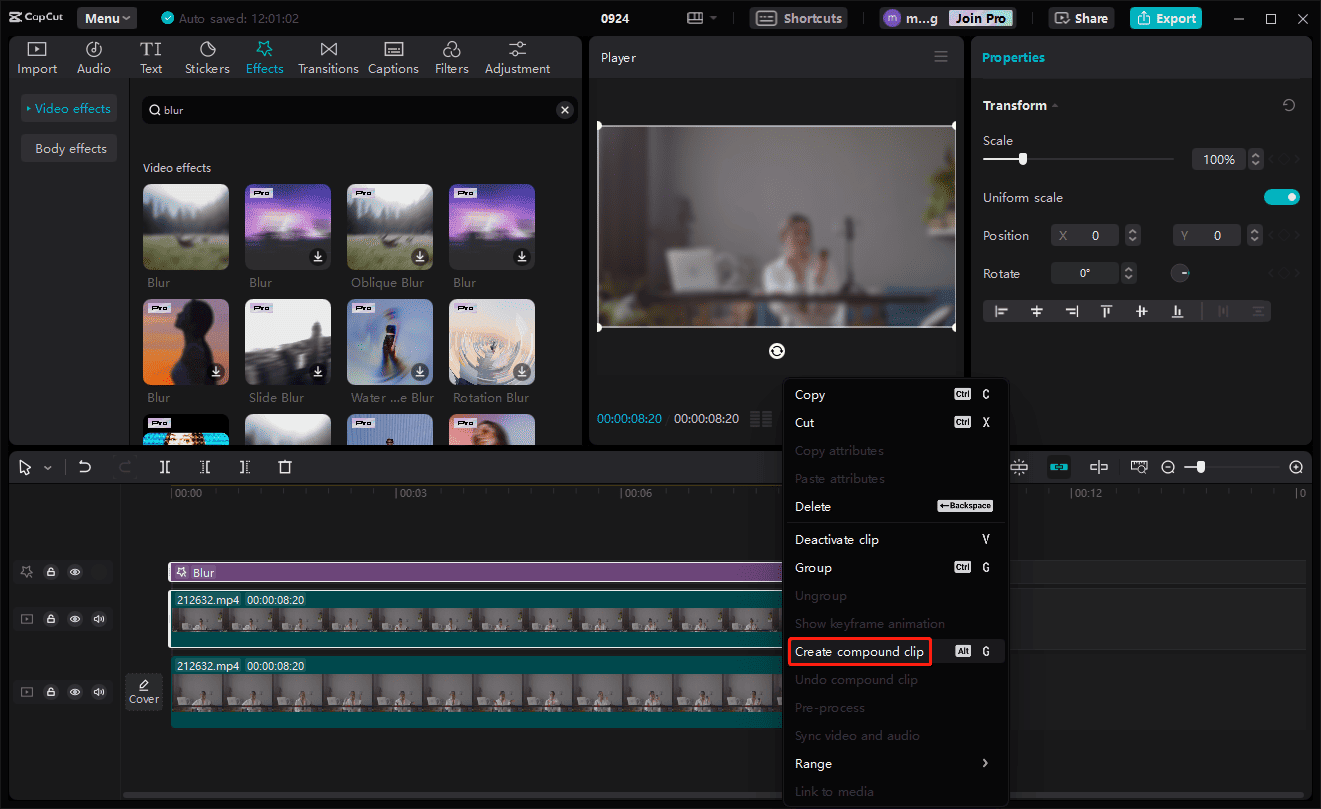
Then, drag any edge of the effect layer to adjust its duration. Also, you can adjust the blur intensity as needed on the right panel. Next, select the top video layer and the blur effect layer, right-click on them, and select the Create compound clip option to create a compound clip.
Step 4: Blur the Face in the Video
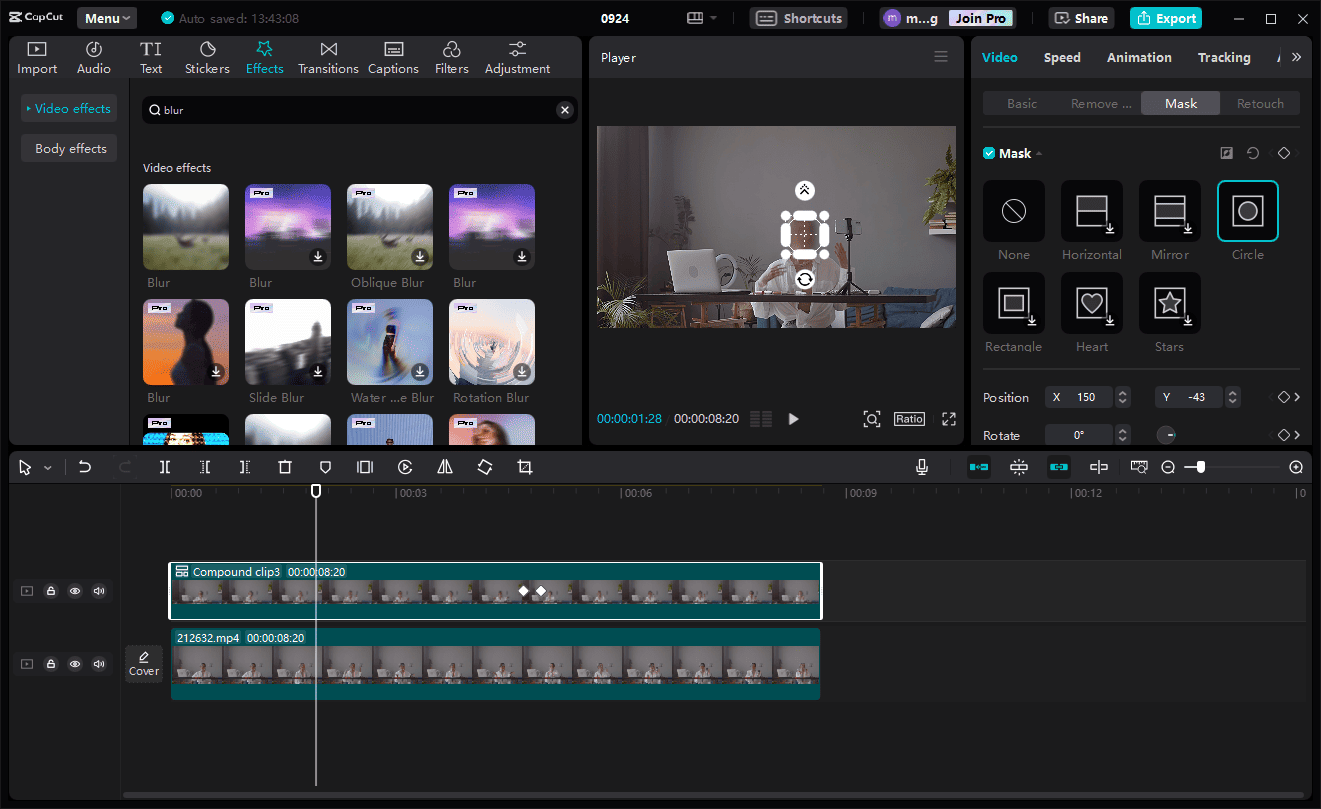
Select the compound clip and go to Mask under the Video tab. Download and add the Circle mask. On the player window, use the circle mask to outline the face you want to blur. Also, you can add keyframes to track moving faces.
Step 5: Export the Video
Click the Export button in the upper right corner, configure the output settings, and click the Export button again.

How to Blur Faces in a Video with DaVinci Resolve
DaVinci Resolve is a professional-grade video editor, known for its advanced color grading and color correction tools. It also allows you to blur any object you want. With the advanced motion tracking, you can easily blur the moving face in the video.
Here’s how to blur faces in a video using DaVinci Resolve.
Step 1: Add Your Video to DaVinci Resolve
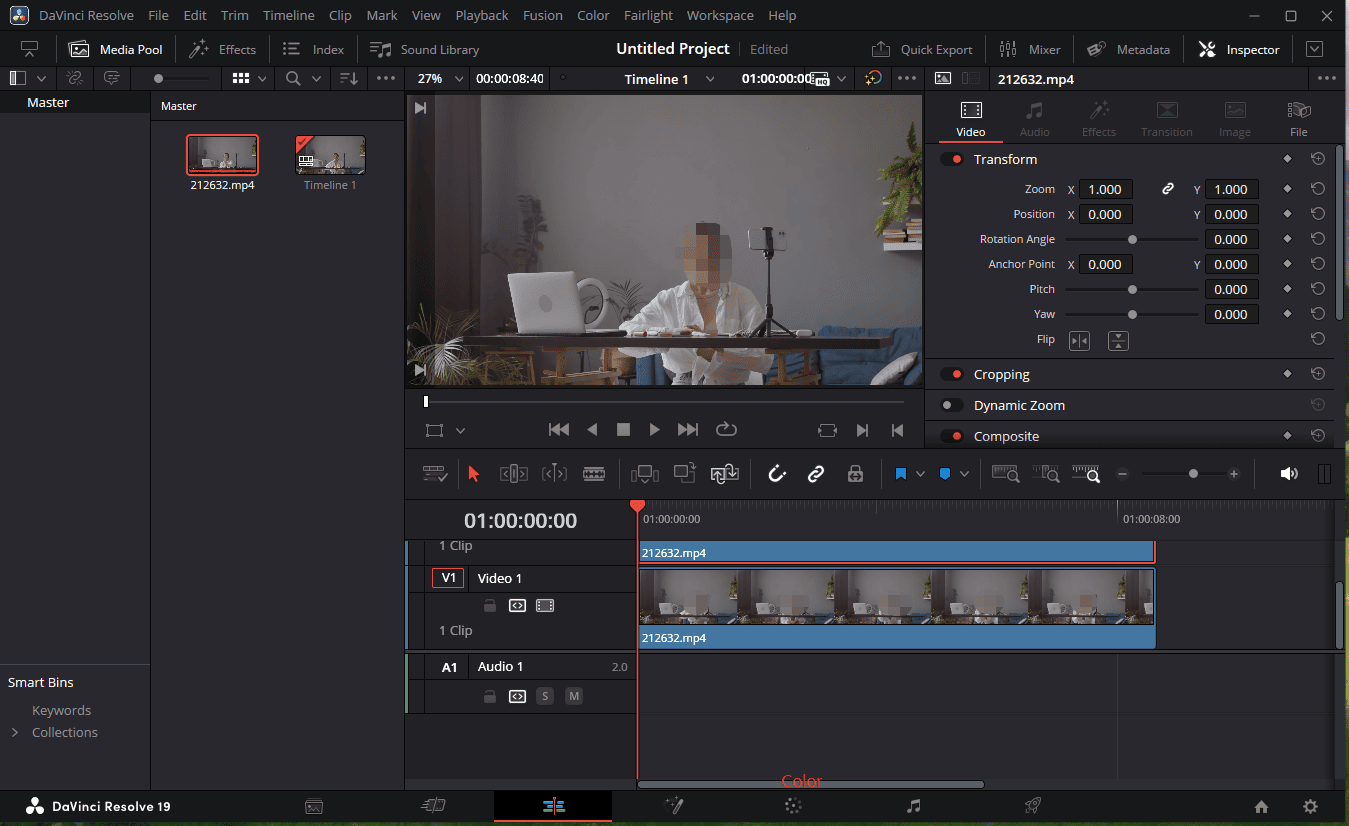
After installing the application, open it and create a new project. Go to the Edit page, right-click on the left blank area, and select Import Media to upload your video. Then, overlay the video on the timeline. Select the video layer 2 and go to the Color tab.
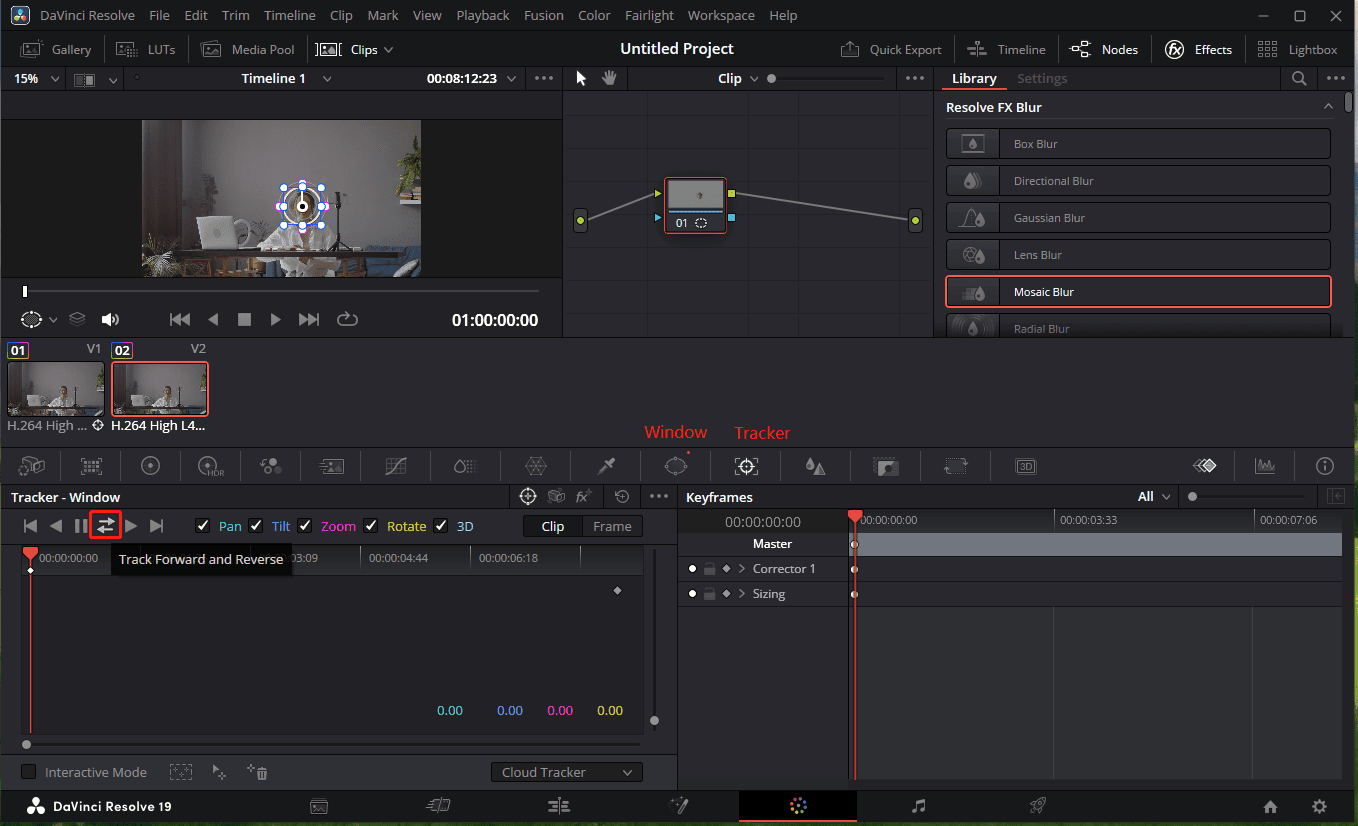
Step 2: Select and Track the Face You Want to Blur
Click the Window icon, then select the circle or pen tool to outline the face in your video. Click the Tracker icon and click the Track Forward and Reverse icon to start tracking the moving face throughout the video.
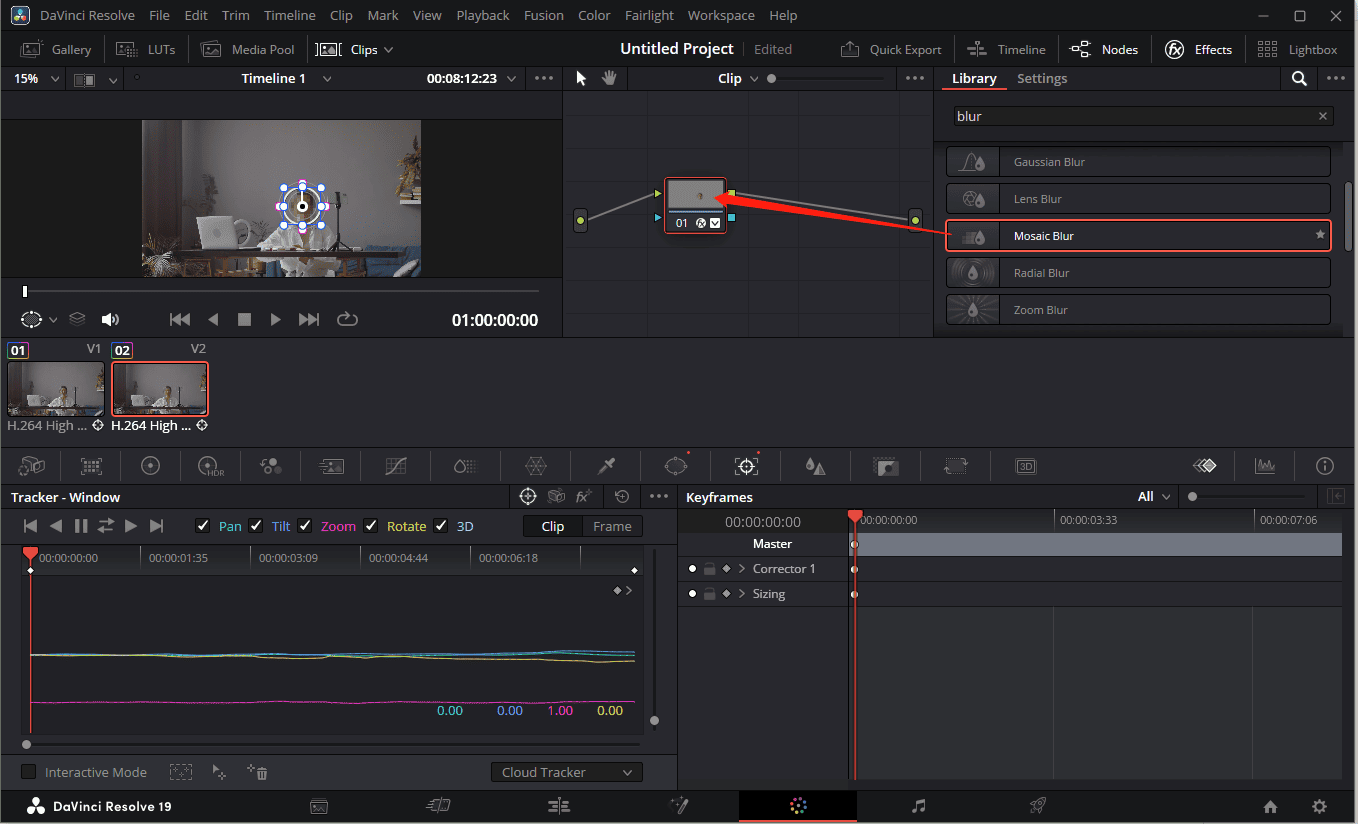
Step 3: Blur the Face
Click Effects on the top right panel and drag the Mosaic Blur to the node. Then, switch to Settings to adjust the mosaic blur effect.
Step 4: Export the Video
Click the Quick Export option at the top of the Color page to export the video quickly, or go to the Deliver page for more custom render settings.
![How to Fix the DaVinci Resolve Media Offline Issue [Full Guide]](https://images.minitool.com/moviemaker.minitool.com/images/uploads/2023/03/davinci-resolve-media-offline-thumbnail.jpg)
Final Thoughts
Thanks to the rapid development of video editing software, blurring a face (especially a moving face) in a video is no longer a complex task. With the efficient tools available today, everyone can easily protect privacy by blurring faces in the video with just a few clicks.
Whether you select the simple video editor – CapCut, or prefer DaVinci Resolve for its power, they can help you hide faces in the video effectively.
About The Author

Position: Columnist
Cora is a tech writer specializing in digital media workflows, with over six years of hands-on experience in video post-production, media transcoding, and screen capture. Her writing is always clear and practical. Cora also produces in-depth software reviews for users across skill levels to help them find the right tool and enjoy video editing.
User Comments :