Adding captions or subtitles to your video can make it more accessible and get other benefits. Canva is a useful online graphics design tool. Can you add subtitles in Canva? Can you use it to add captions or subtitles to your video? This post from MiniTool MovieMaker will give you the answer and guide you on how to add captions in Canva and other useful tools.
How to Add Captions in Canva
Canva can help you to create social media posts, videos, photos, logos, and others. You can use it to make your video better through trimming, cutting, cropping, flipping, adding text, adding transitions/sound effects/voiceovers, or other editing features. Furthermore, it is a good video collage maker and slideshow maker. Here’s a guide on how to add subtitles in Canva.
Step 1. Go to the official website of Canva and click on Sign up to create a new account for logging in. If you already have an account, just click on Log in.
Step 2. Click on the Create a design button and select the Video option or other options you need.
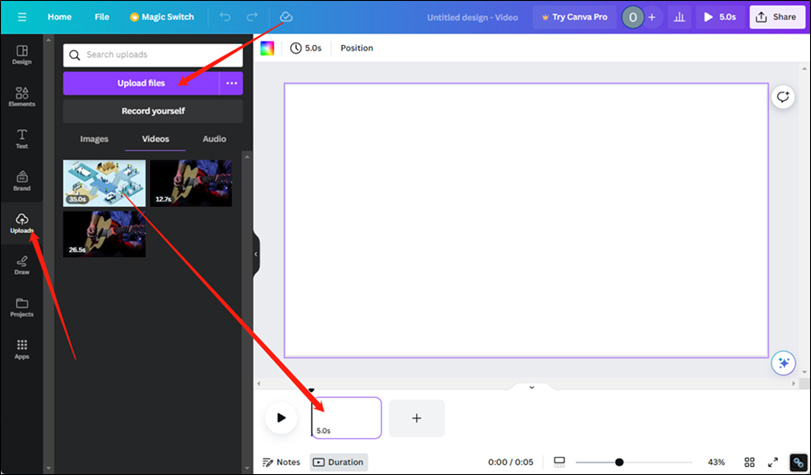
Step 3. Click the Upload tab on the left sidebar, click the Upload files button to choose the video or picture you want to add captions, and click Open. Next, directly drag and drop it to the timeline.
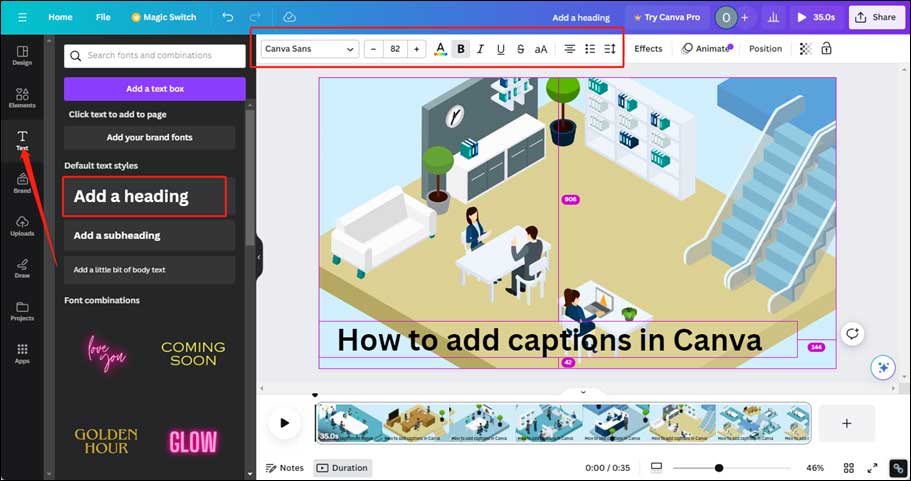
Step 4. Click the Text tab and choose the Add a heading option. Then you can type the captions that you want to convey. On the top of the screen, it offers many options to adjust the font, text color, bold, alignment, and other related settings.
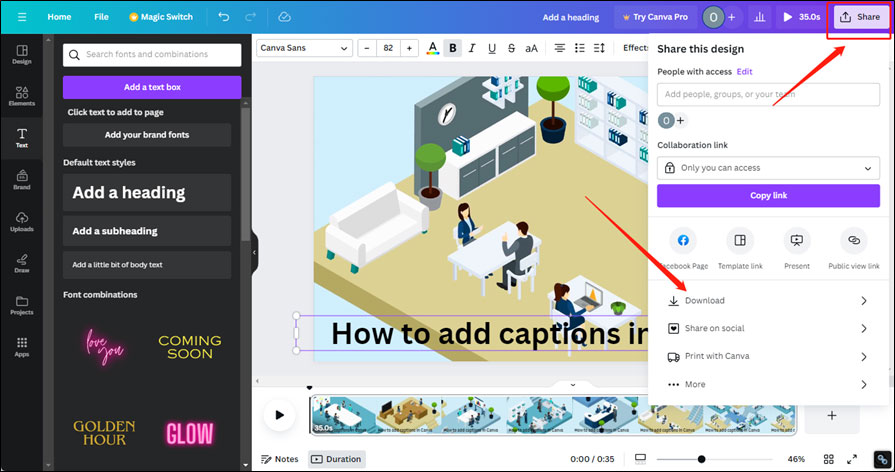
Step 5. Once finished editions, you can click the Share button and click on Download to export the video with captions.
How to Add Captions Using Canva’s Alternative
It is a little complex to add captions in Canva since it needs to split a video into several clips to add captions. To add captions or subtitles easily, you can try MiniTool MovieMaker which provides you with various text templates for captions, titles, and ending credits. It is an easy-to-use video editor that enables you to use it even though you are a beginner. You can follow the below steps to add captions to a video with MiniTool MovieMaker.
Step 1. Click the below download button to get MiniTool MovieMaker for free and install it on your computer.
MiniTool MovieMakerClick to Download100%Clean & Safe
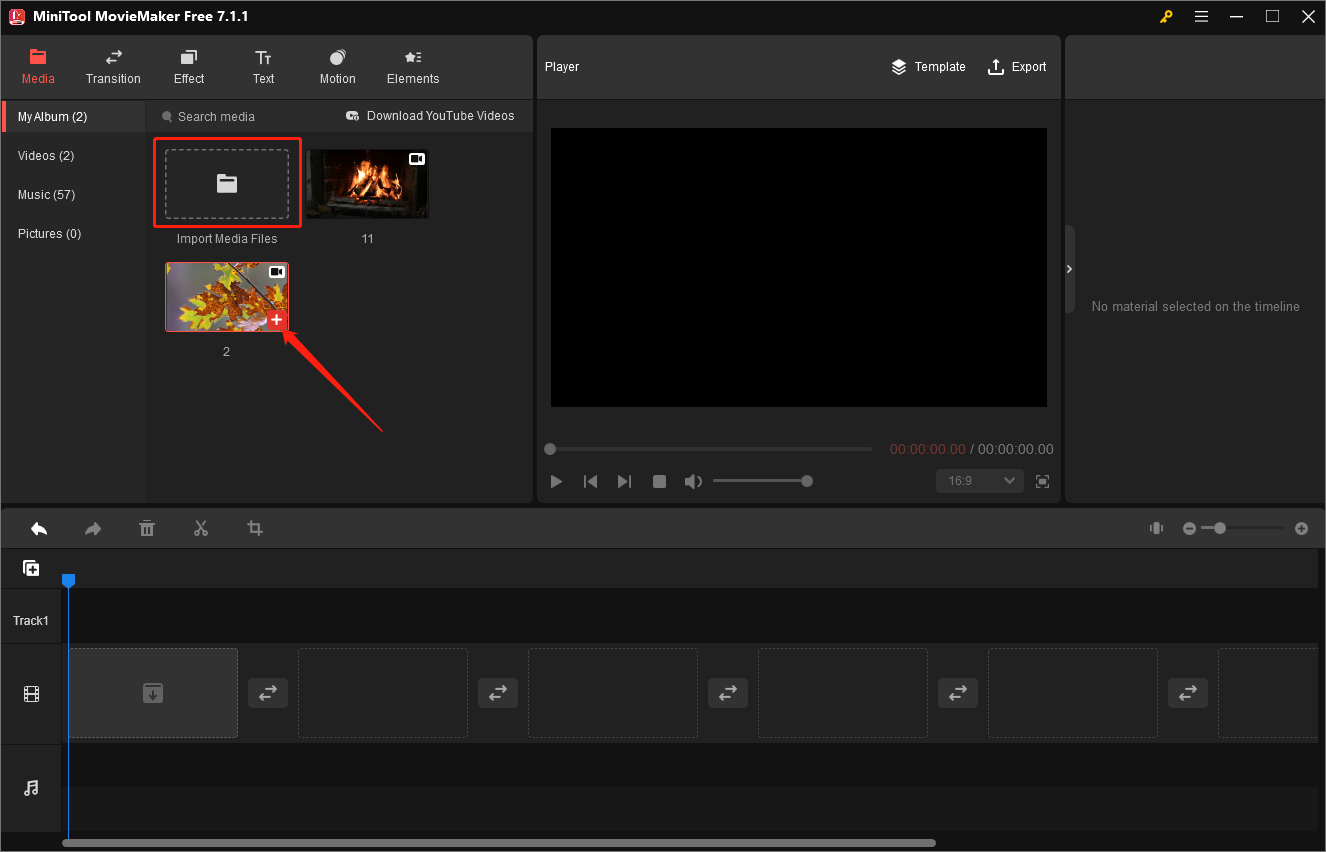
Step 2. Launch this excellent video editor and click the New Project button to enter its main editing interface. Click the Import Media Files area to upload your video to the Media library and click the plus (+) icon on the target video to add it to the timeline.
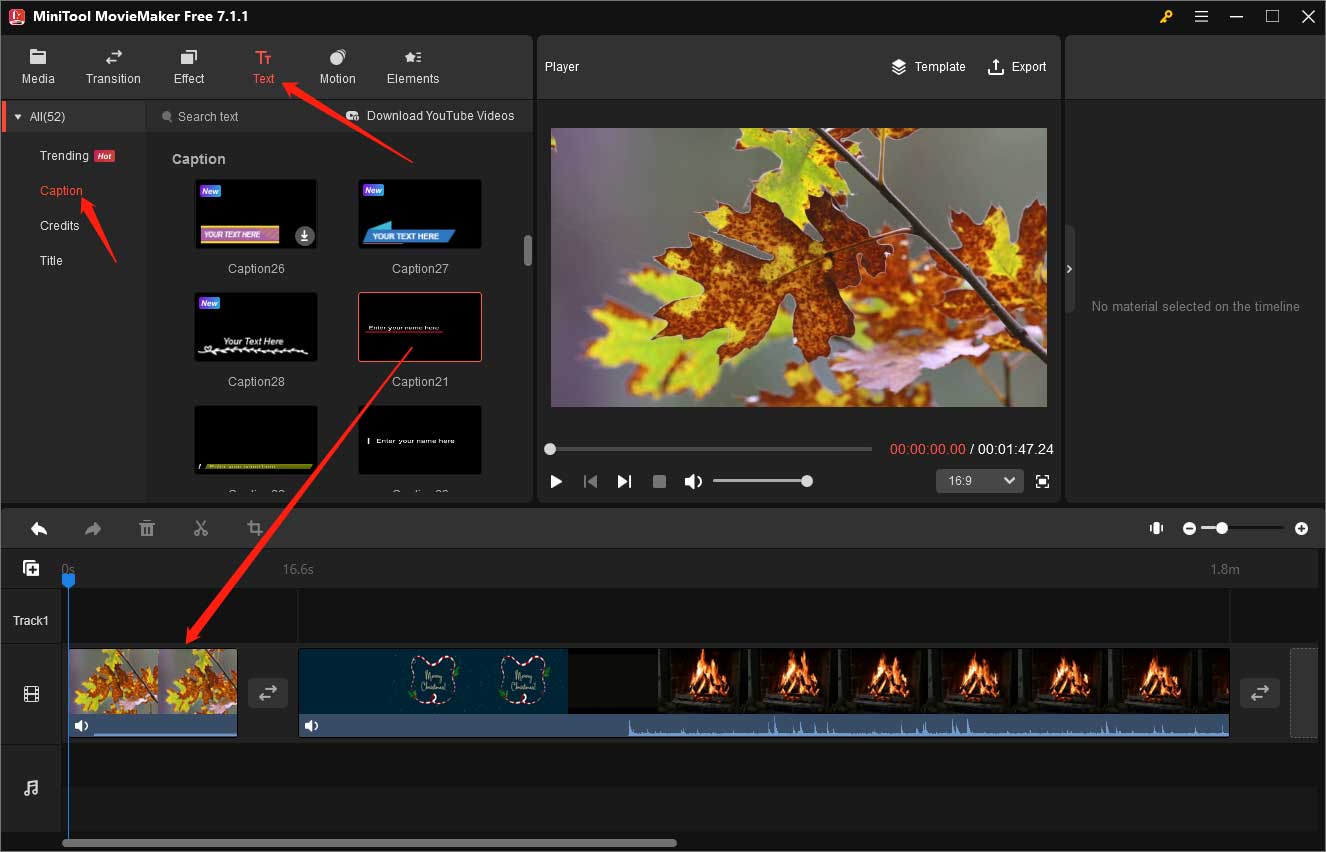
Step 3. Click the Text tab, choose the Caption option, select a style you prefer, and directly drag and drop it to the timeline. If the template is not downloaded, you need to click the download icon to get it first.
Step 4. Go to the Text Property section, you can enter the content you want to convey and change other settings like font, text color, text highlight, and others. Also, you can directly adjust the position of the caption in the Player section. Furthermore, you can change the duration and position of captions.
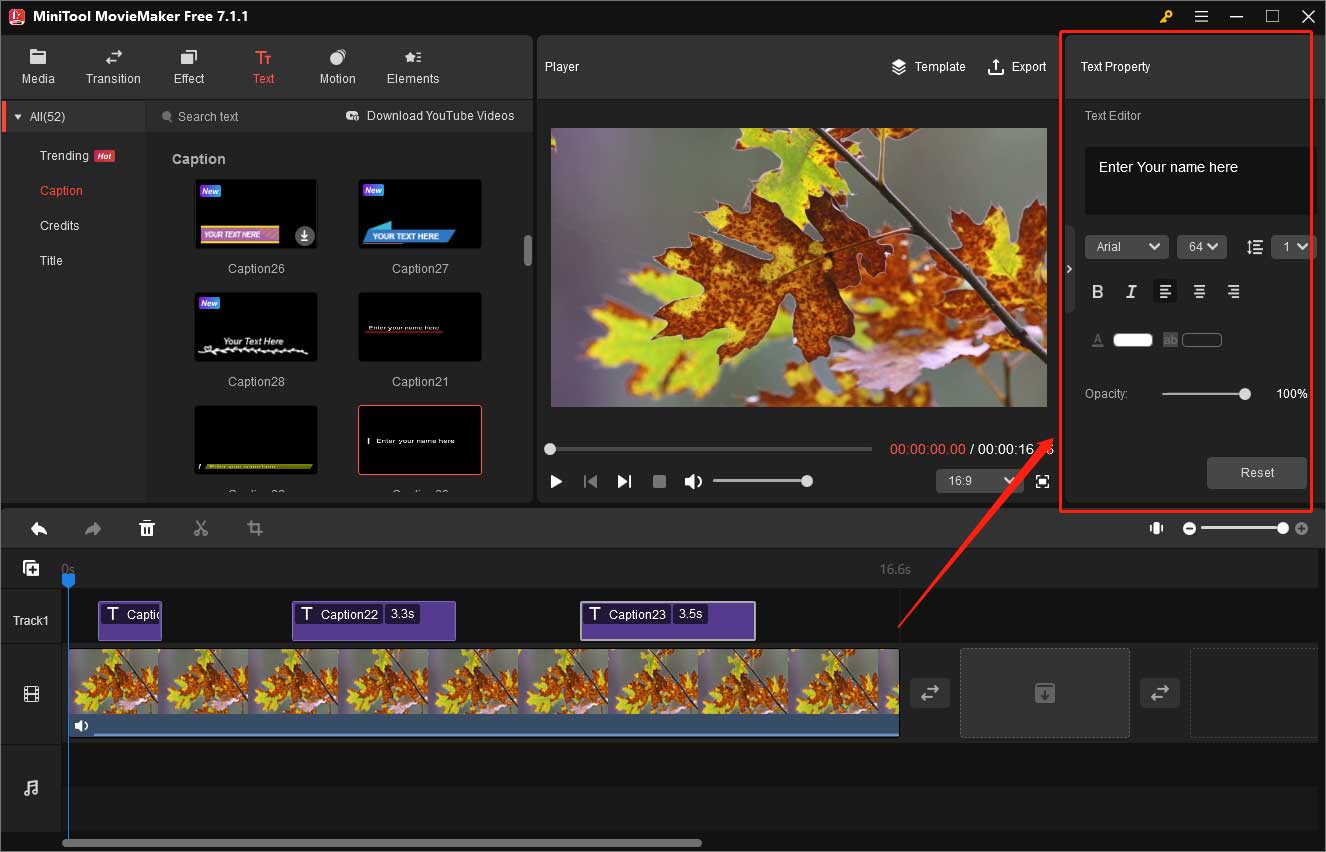
Step 5. You can add several captions to a video without splitting it into clips. After making other editions, you can click the Export option in the Player section, customize other output parameters, and click the Export button.
Other Good Tools for Adding Captions
In addition to the above two useful tools for adding captions, there are many good applications for adding captions or subtitles. Here is a list:
- Adobe Express
- Premiere Pro
- iMovie
- CapCut
- YouTube Studio
- …
Bottom Line
After learning how to add captions in Canva, you can do it by yourself according to the above guidance. Alternatively, you can try other video editors like MiniTool MovieMaker.


![How to Make a Picture Move Easily [PC/Online/Phone]](https://images.minitool.com/moviemaker.minitool.com/images/uploads/2023/12/how-to-make-a-picture-move-thumbnail.jpg)

User Comments :