HIEC (High Efficiency Image Container) is a modern file format used by Apple to store images on iPhones and Macs. It offers better compression efficiency than JPEG while maintaining high quality. My iPhone also uses this format to store photos taken by the camera. I haven’t changed the default format because HEIC files don’t take up much storage space.
On my latest trip, I took a lot of beautiful scenery pictures. Then I wondered how to convert HEIC to MP4 to share these memories conveniently. First, I tried this with the built-in video editor on my laptop – Microsoft Clipchamp. However, it doesn’t support the HEIC format. After experimenting with multiple tools, I found that the CapCut desktop app and Ezgif can handle the HEIC format and convert the images to an MP4 file. The specific steps are as follows.
How to Convert HEIC to MP4
Method 1: Use CapCut
CapCut is a popular video editor with an intuitive interface and rich features. It’s also one of my favorite tools for creating videos for work and entertainment. Personally, it’s also a great HEIC to MP4 converter when there’s a need to polish the images. Besides, the software can be used for free and doesn’t leave a watermark on the exported videos.
Here’s how to create a video with HEIC pictures in CapCut. Follow me!
Step 1: Install the HEIC to MP4 Converter
Navigate to the CapCut website or the Microsoft Store to download and install CapCut on the computer.
Step 2: Import HEIC Files
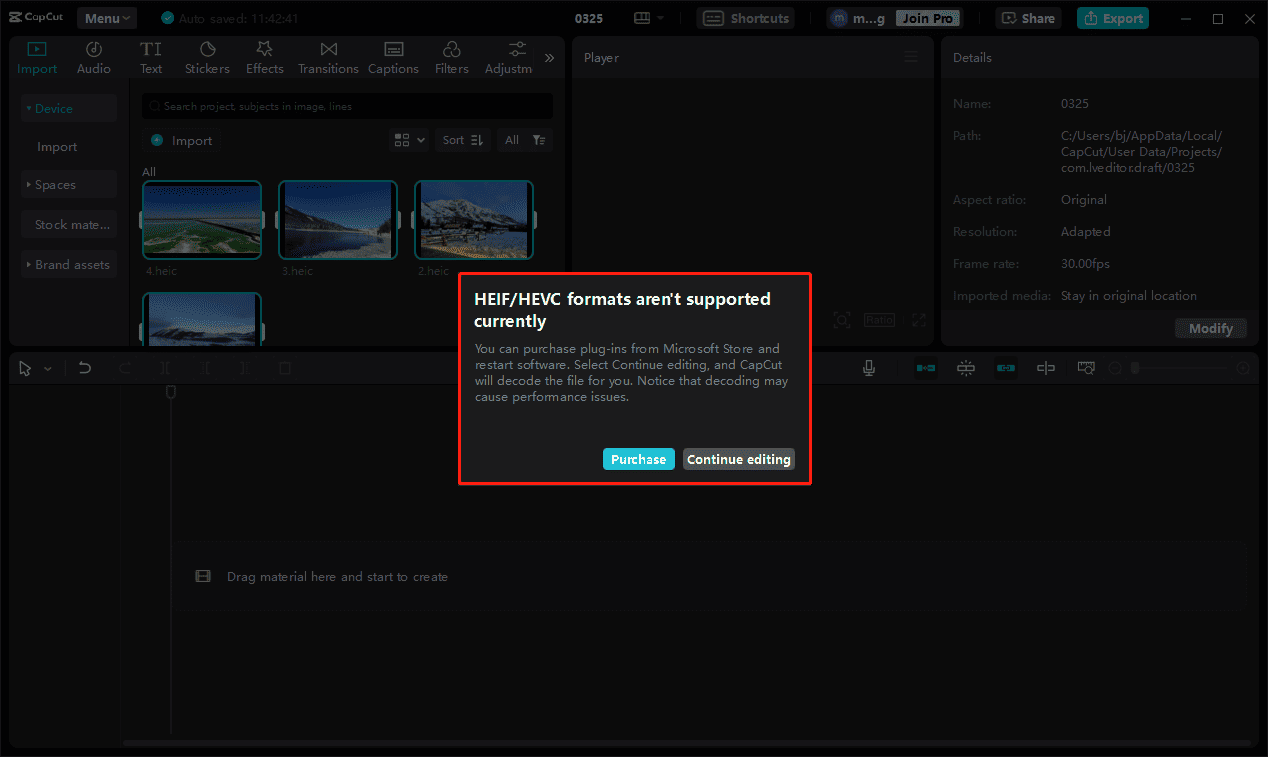
After installation, launch the software and click Create project at the top of the screen to enter the main interface. Next, click the Import area to open the File Explorer. Select the target HEIC files and click Open.
If the HEVC Video Extension, which is required to open HEIC files on Windows, is not installed on the computer, CapCut will display a pop-up window indicating that it can decode HEIC files. Select Continue editing to confirm.
Step 3: Arrange the HEIC Files
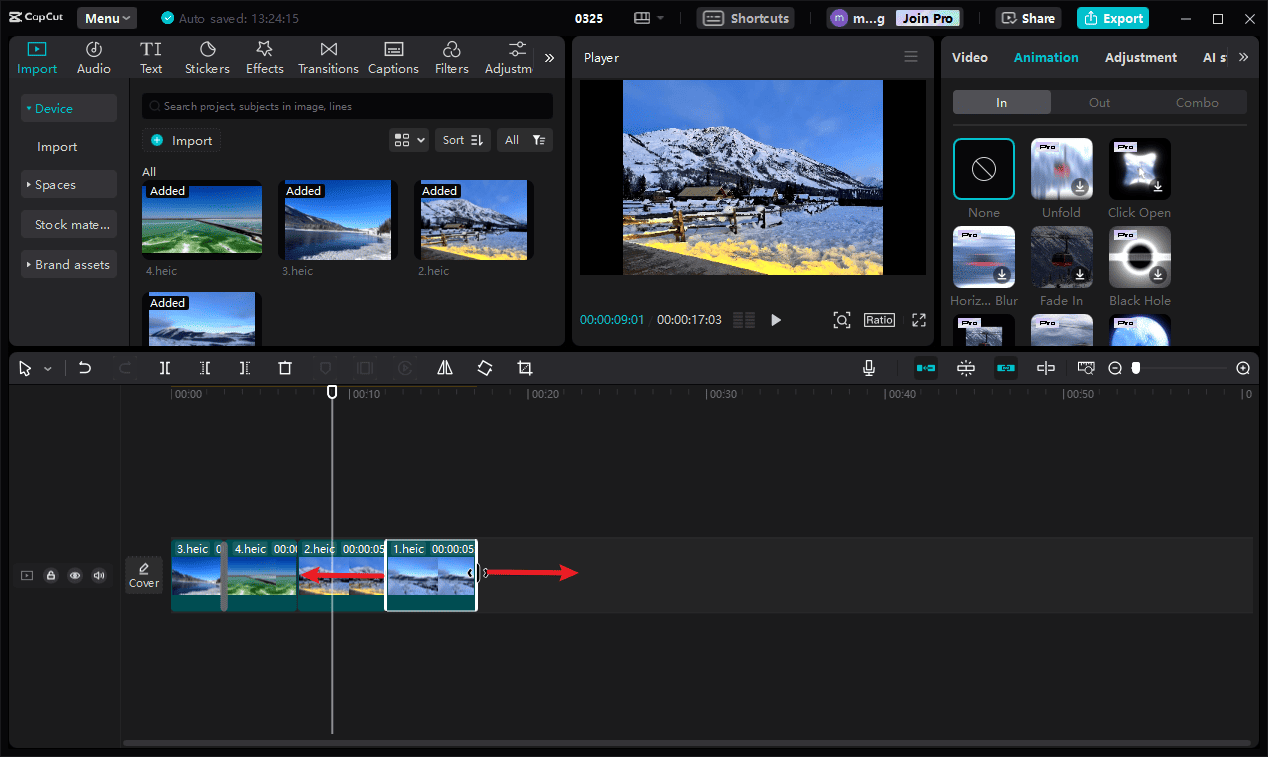
Add the photos to the timeline and drag and drop them to adjust the order.
Step 4: Edit the HEIC Files
Here are some things I did to make an amazing MP4 video.
Adjust the duration of each image: click the target clip on the timeline, drag either edge of the clip inward or outward to shorten or lengthen its duration.
Add transitions: Transitions can seamlessly connect two clips and effectively enhance storytelling. Click Transitions at the top menu, download the desired effect, and add it to the gap between any two images.
Add stickers: Stickers are funny decorations, and they can easily enhance the footage. Select Stickers from the top toolbar, download a sticker, and add it to the timeline.
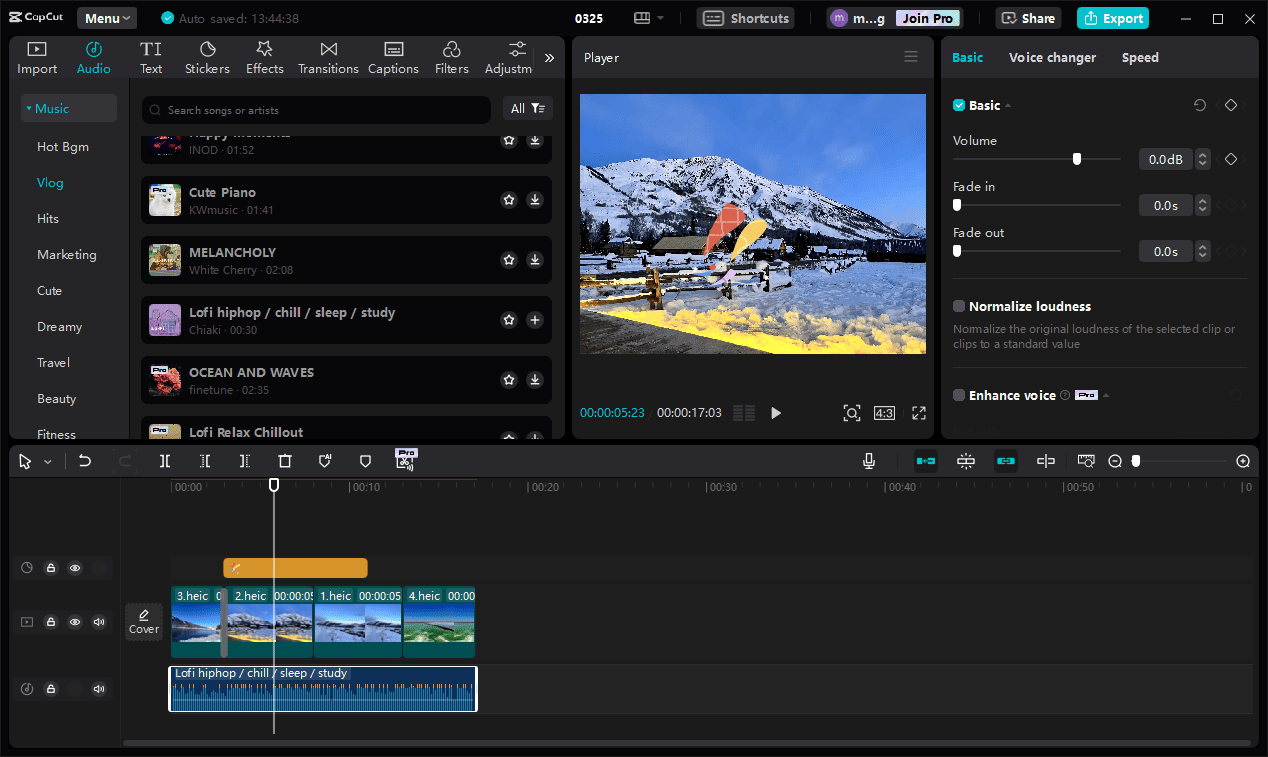
Add music: Go to Audio > Music, download a song, and add it to the timeline. Next, go to the right side to adjust the volume, apply fade-in/out effects, etc.
Step 5: Convert HEIC to MP4
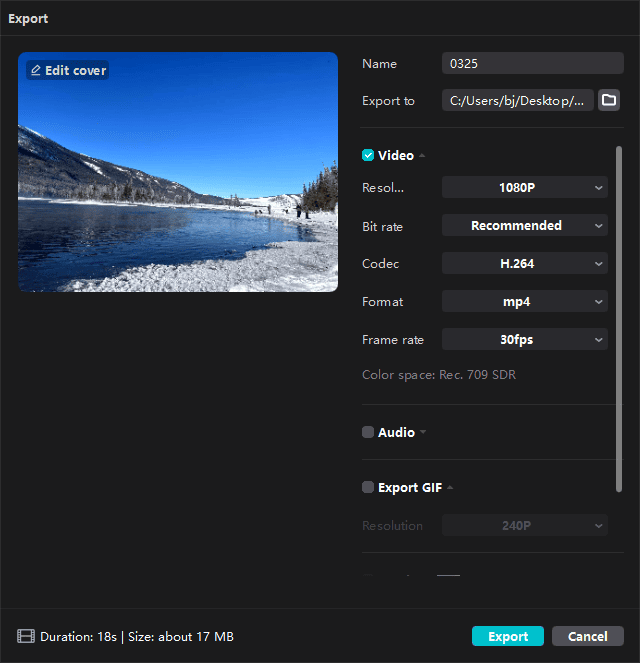
Click Export in the upper-right corner. On the Export Window, make sure the Video option is checked. Set Format to MP4, and select the desired resolution, codec, and frame rate. Click Export again to start the conversion.
Method 2: Use Ezgif
Ezgif is a popular online GIF maker and editor. In addition to the main functions, the platform also provides other video/image tools, such as converting images to videos, cropping videos, and adding a freeze frame to a video.
Now, follow me and see how to convert HEIC to MP4 using Ezgif.
Step 1: Access Ezgif’s Images to Video Maker
Navigate to the Ezgif website, move to the Video tools tab at the top, and select Images to Video.
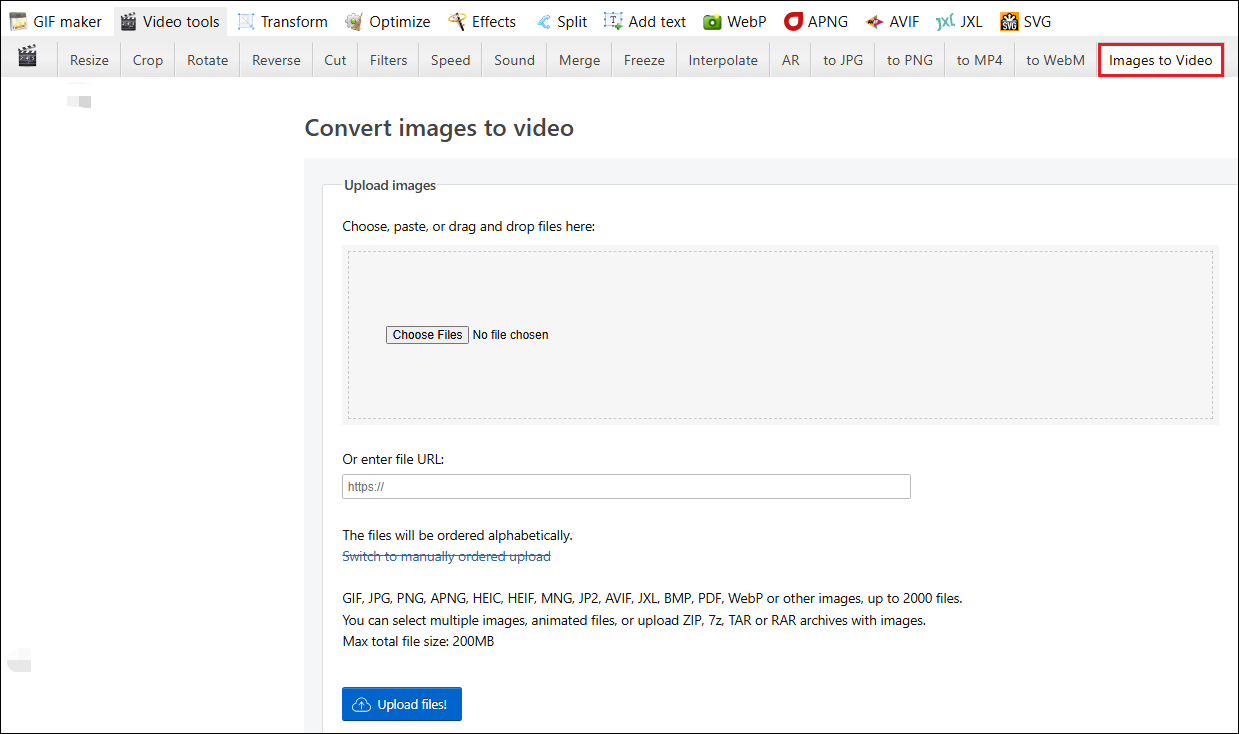
Step 2: Upload HEIC Images
Click the Choose Files option in the Upload images section to choose the target pictures saved on the computer, and click Upload files to continue.
Step 3: Add a Transition
Click the button next to Transition type and choose an effect. The duration of the added transition can also be edited.
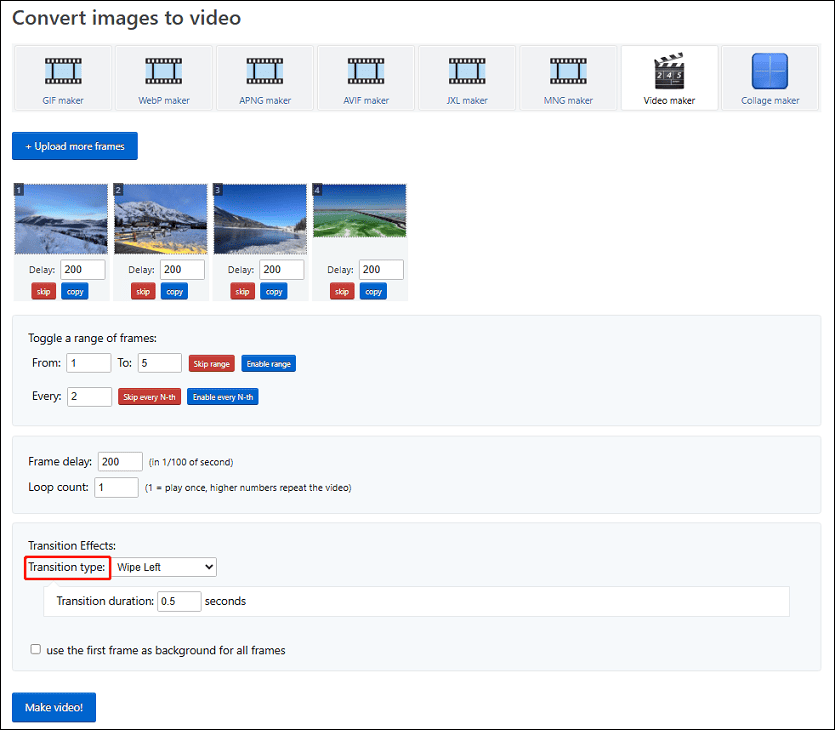
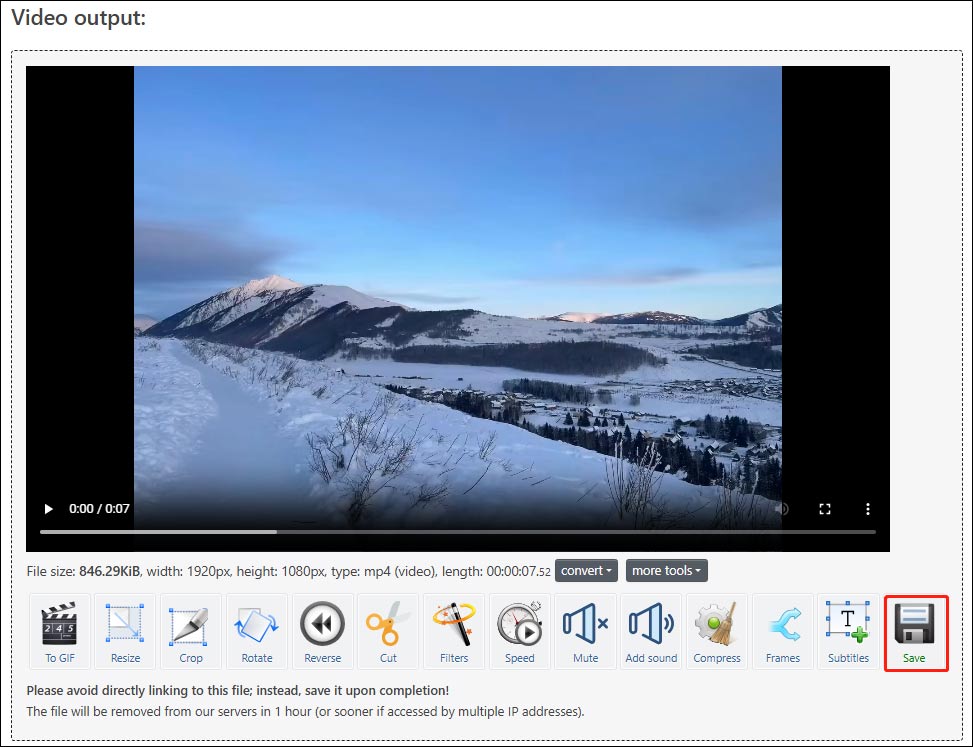
Step 4: Make an MP4 Video from the HEIC Files
Click the Make video button to start the conversion. Once done, the video will appear in the video output section, and click Save to download the MP4 file to the computer.
Compared to CapCut, Ezgif has limited tools and effects for editing images, but it can be quickly accessed in the browser. Similarly, it won’t watermark the final result.

Conclusion
With the right tool, converting HEIC to MP4 is a simple task. CapCut can be my first choice when I want options to edit the images before turning them into an MP4 video. If I want to make a photo slideshow and don’t need extra edits, Ezgif is a reliable option.
About The Author

Position: Columnist
Cora is a tech writer specializing in digital media workflows, with over six years of hands-on experience in video post-production, media transcoding, and screen capture. Her writing is always clear and practical. Cora also produces in-depth software reviews for users across skill levels to help them find the right tool and enjoy video editing.
User Comments :