What Is Color Grading in Photography
Color grading is the process of adjusting and enhancing the colors in a photograph to create a specific emotional atmosphere or visual style. This process is different from color correction. Color correction is mainly to correct the color imbalance and exposure problems in the image, while the color adjustment is to add more creative color processing on this basis to achieve artistic effects or meet specific visual needs. Therefore, it is very useful to learn color grading in Photoshop for creators.
MiniTool MovieMakerClick to Download100%Clean & Safe
How to Do Color Grading in Photoshop
In digital image processing, Photoshop is one of the most commonly used tools, and it offers a wealth of features for color grading. Whether it’s enhancing the atmosphere of your images or creating unique visual effects, Photoshop can help you achieve this goal.
Next, I will introduce how to color grade in Photoshop using various tools.
Option 1: Using Hue and Saturation
This method allows you to fine-tune specific colors within your image, changing their hue, saturation, and lightness to create a particular color tone or mood.
Step 1: Open the page
Go to File > Open to import the image you want to color grade in Photoshop.
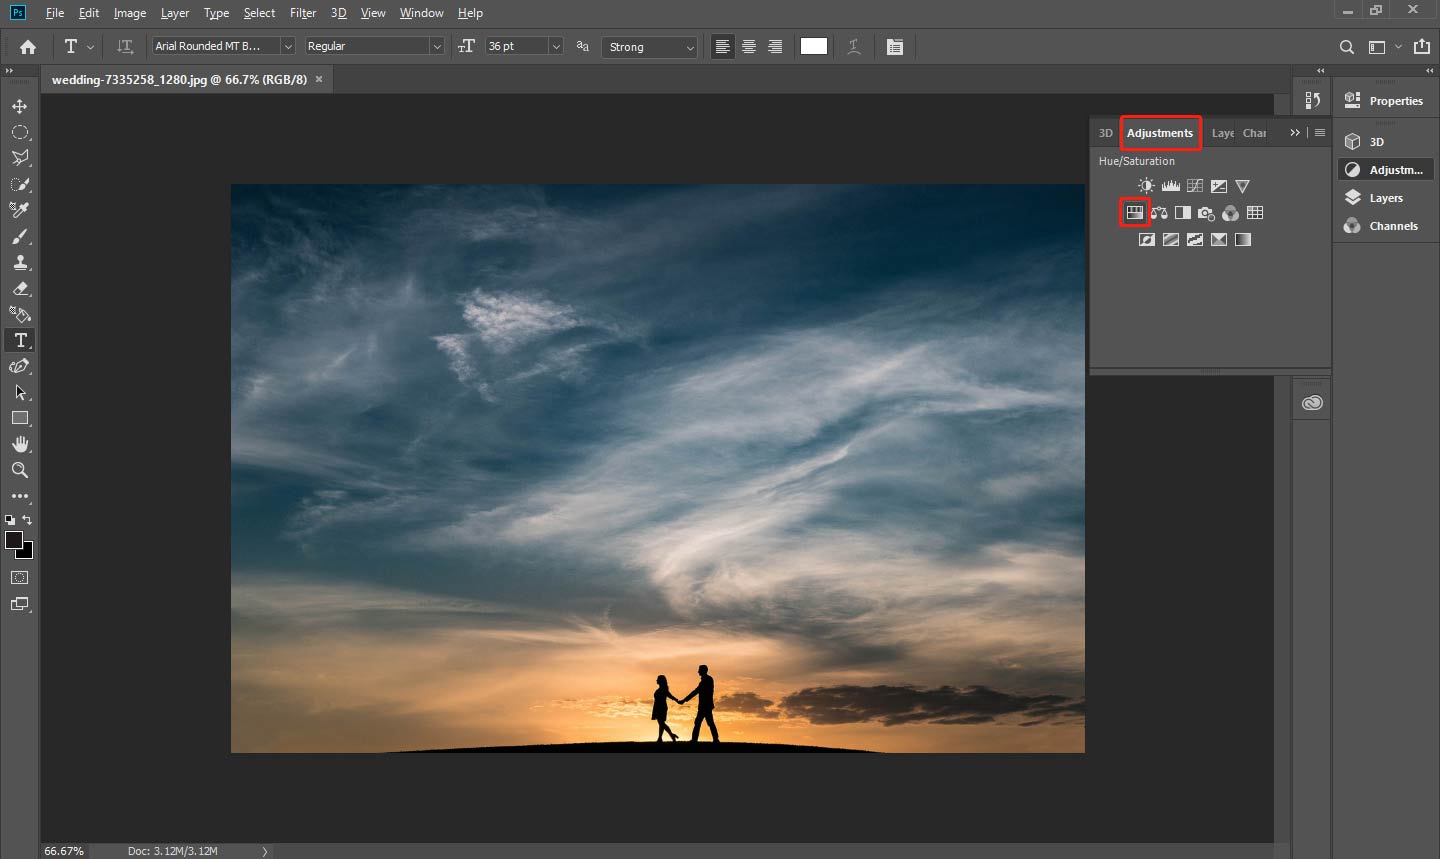
Step 2: Add a Hue/Saturation adjustment layer
Go to the Layers panel, and click the Adjustment button (the half-filled circle). Select the Hue/Saturation icon from the list.

Step 3: Adjust Hue, Saturation, and Lightness
In the Properties panel, you’ll see three sliders: Hue, Saturation, and Lightness. You can drag the corresponding slider to the right or left as needed.
- Hue allows you to shift the color spectrum in the image. Dragging it left or right will change all colors to their respective hues.
- Saturation controls the intensity of colors. Increasing saturation makes colors more vibrant while decreasing saturation makes them dull.
- Lightness adjusts the brightness of the entire image.
Step 4: Save your work
After getting the desired effect, go to File > Save As to save your image.
Option 2: Using Photo Filter
The photo filter adjustment in Photoshop is a quick and easy way to color grade your image.
Step 1: Open the photo you want to edit.
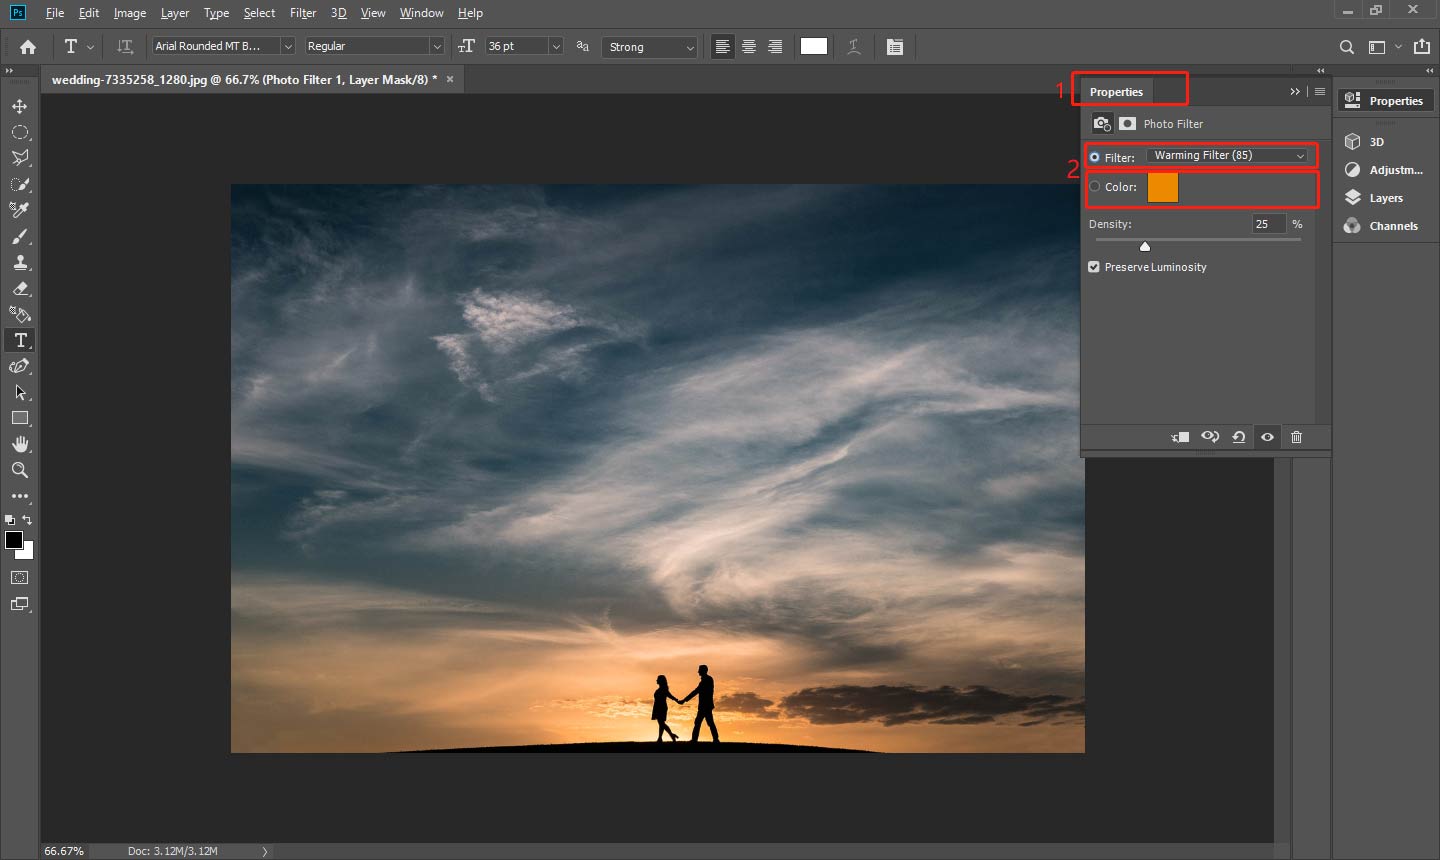
Step 2: Go to the Layers panel, click the Adjustment button, and choose Photo Filter from the dropdown menu.
Step 3: In the Properties panel, you will see a list of preset color filters, such as Cooling Filter (82), Warming Filter (85), etc. Choose a preset filter or click the Color box to select a custom color by using the color picker.

Step 4: The Density slider controls the strength of the color filter. Slide it to the right to increase the filter effect, or to the left to reduce it.
Step 5: Go to File > Save As to save your work.
Option 3: Using Camera Raw Filter
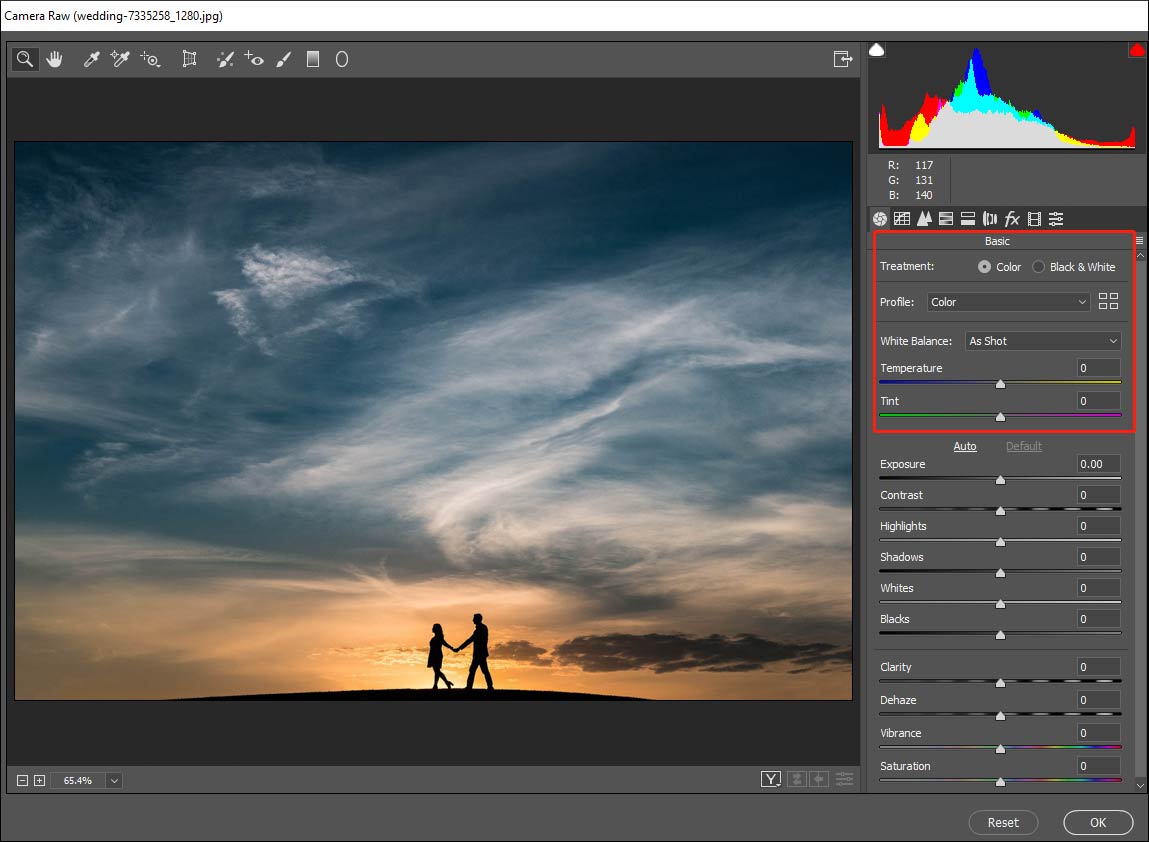
Step 1: Open your target photo. Then go to Filter > Camera Raw Filter in the top menu to open the Camera Raw workspace.
Step 2: In the Basic tab, drag the Temperature and Tint sliders to control the overall warmth or coolness of the image.

Step 3: Click the HSL Adjustments icon in the Camera Raw window, then you can adjust the Hue, Saturation, and Luminance of specific colors.
Step 4: Once you’ve made the necessary adjustments, click OK to apply the Camera Raw effect to your image.
Step 5: After finishing all editing, go to File > Save As to export your work.
Also read: How to Do Color Grading in Lightroom Like a Pro.
Bottom Line
Whether you’re using hue/saturation, photo filters, or camera raw filters, each method offers you a different level of control, allowing you to create various atmospheres and styles to suit your creative needs. In conclusion, by doing color grading in Photoshop, you can add emotion and depth to each picture, getting a more professional effect.


User Comments :