Windows 11/10’s built-in video editor has a Custom audio feature that allows you to add your own music from PC to the video. How to fix it when the Windows video editor custom audio not working? This post from MiniTool offers 4 ways.
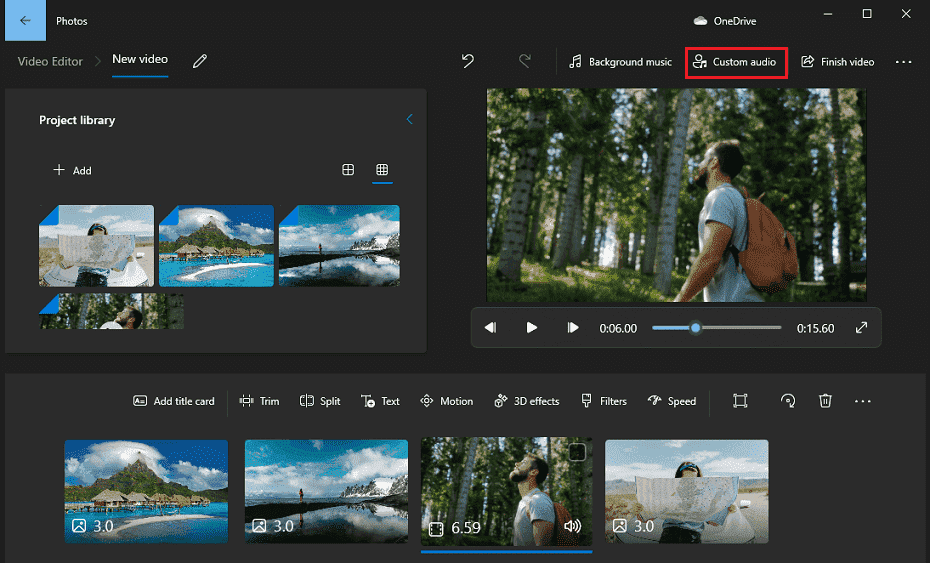
Windows 11/10 has a built-in video editor in Microsoft Photos, called Video Editor. It’s a free video editor equipped with many basic editing features.
The Windows 11/10 Video Editor can split, trim, slow down, and speed up videos, apply filters and motion effects, add text to the video, and add music to the video.
This Video Editor offers two ways to add audio to the video. You can click the Background music to choose a music track, or click the Custom audio to import and add your own music.

However, some users complained that the Windows video editor Custom audio does not work sometimes and they can’t add their music tracks from the PC.
If Custom audio doesn’t work in the Windows 11/10 Video Editor, try the following methods.
#Method 1. Check the Audio Format
To insert your music track from PC to Video Editor, you should choose the supported audio file, MP3, M4A, AAC, WAV, WMA, and ADTS. If your audio file is not supported by Video Editor, just convert it to the compatible audio format.
MiniTool Video Converter is recommended here. It’s a free audio converter. You can use it to convert your audio file to MP3, M4A, AAC, WAV, WMA, and more.
MiniTool Video ConverterClick to Download100%Clean & Safe
#Method 2. Restart the Windows Audio Service
If the Audio service fails sometimes, you may also meet the Windows video editor custom audio not working issue. Thus, you can restart the Audio service to fix the problem.
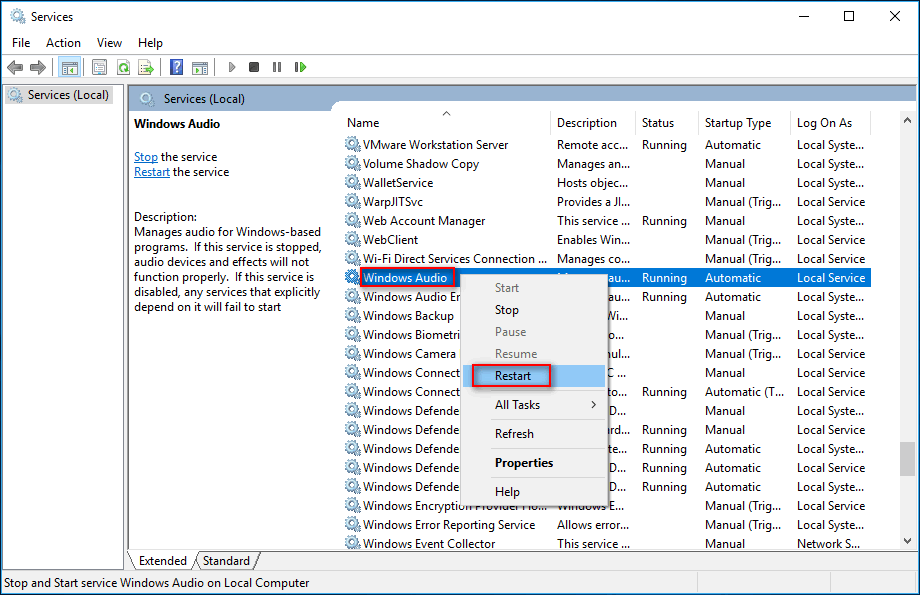
Step 1. Press Win + R and type services.msc the Run dialog box, and click OK to open Services.
Step 2. Scroll down and right-click Windows Audio, and click Restart.

Then, restart the Photos app and check if the issue is resolved.
#Method 3. Reinstall Photos App
If the Windows 11/10 video editor Custom audio is still not working, try to remove and reinstall the Photos app.
Step 1. Click the Start menu and choose Windows PowerShell (Admin).
Step 2. Type “get-appxpackage *Microsoft.Windows.Photos* | remove-appxpackage” and press Enter.
Step 3. Chose the Windows PowerShell window. Go to the Microsoft Store, search for Microsoft Photos, and click Get to install the Photos app.
#Method 4. Try Another Windows Video Editor
When you can’t import your music into the Microsoft Photos Video Editor, you can try an alternative way to add your music to the video – MiniTool MovieMaker.
MiniTool MovieMaker is a great Windows video editor for beginners. You can use this video editor to add music to a video, trim, split, rotate, flip videos, add text, and more.
Here’s how to use MiniTool MovieMaker to add music to the video.
MiniTool MovieMakerClick to Download100%Clean & Safe
Step 1. Download and install MiniTool MovieMaker. Open it and close the pop-up window.
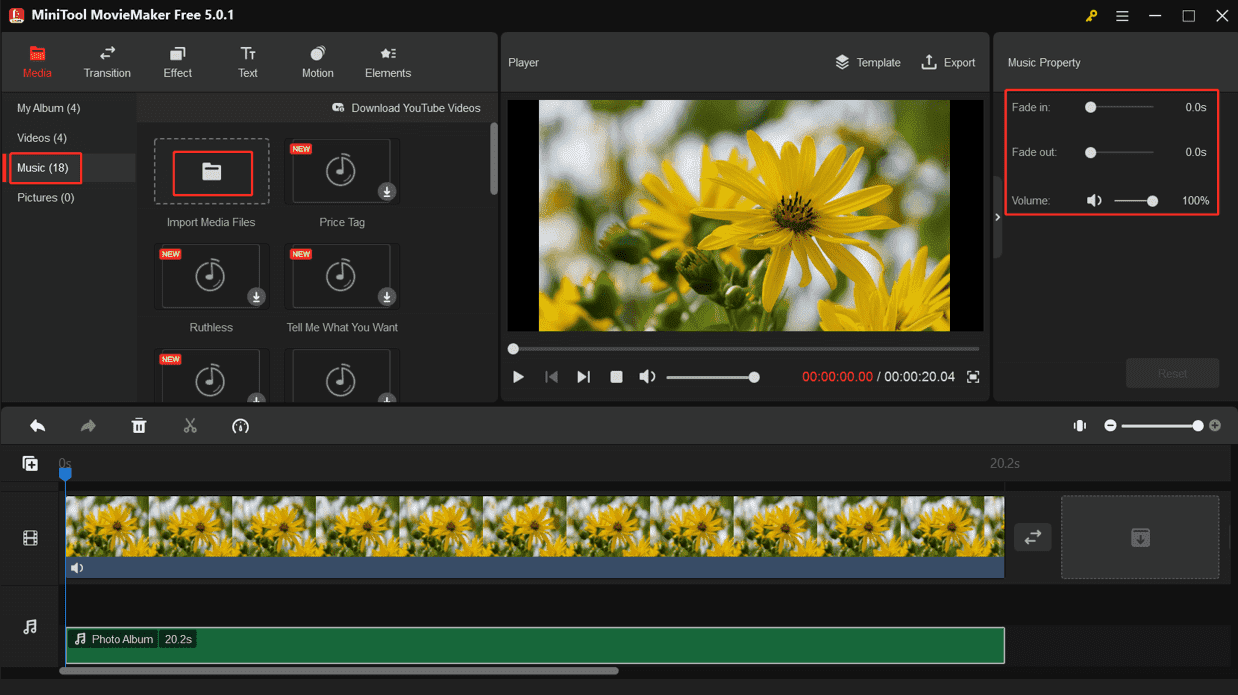
Step 2. Click Import Media Files to add your video and music.
Step 3. Drag the video to the timeline and edit it as you like.
Step 4. Drag the music track to the timeline. Then you can fade in, fade out the music and change the volume.

Alternatively, you can click the Music tab, choose an audio track, and click + to add it to your video.
Step 5. To export the video, click Export. Choose the output folder and click Export.
Conclusion
This post offers 4 solutions to Windows video editor custom audio not working. Hope they can fix your issue.


User Comments :