According to a PwC report, the gaming industry is tipped to maintain its recent rapid growth and could be worth $321 billion by 2026. The rise of the game industry followed the prosperity of game videos, but it also brings many challenges to novices of gaming video producers.
This guide attempts to help beginners to resolve the problem of how to make gaming videos on YouTube and further introduces some useful tools to perfect their videos.
So, what do you need to make gaming videos on YouTube? If you’re interested, please read on.
Part 1. Record Gaming Video Clips
Before recording a game video, the first thing for a novice is to pick a suitable game. If you make gaming videos just for fun, you can choose any games you like. However, if you want to monetize your videos, you must consider the subscription volume.
A Large subscription puts a higher demand on the quality of your gaming videos, which requires you to spend more time and energy on how to take and edit your videos.
Of course, choosing some popular or new games will be more attractive.
And then you can start to record gaming videos. To obtain high-quality gaming videos, some beginners are searching for the most suitable screen recorder. Here are some easy-to-use and free screen recorders for beginners.
#1. MiniTool Video Converter
MiniTool Video Converter is a comprehensive and free media converter with a clean interface friendly for beginners, which allows users to record screens on Windows without watermark and export videos and audio in various formats. Besides, it supports various video/audio conversions.
Let’s figure out how to record game videos!
Step 1. Download and install the video converter.
MiniTool Video ConverterClick to Download100%Clean & Safe
Step 2. Launch the software and click on Screen Record on top of the main interface where you can see four options, respectively Video Converter, Video Download, Screen Record, and Edit Video.
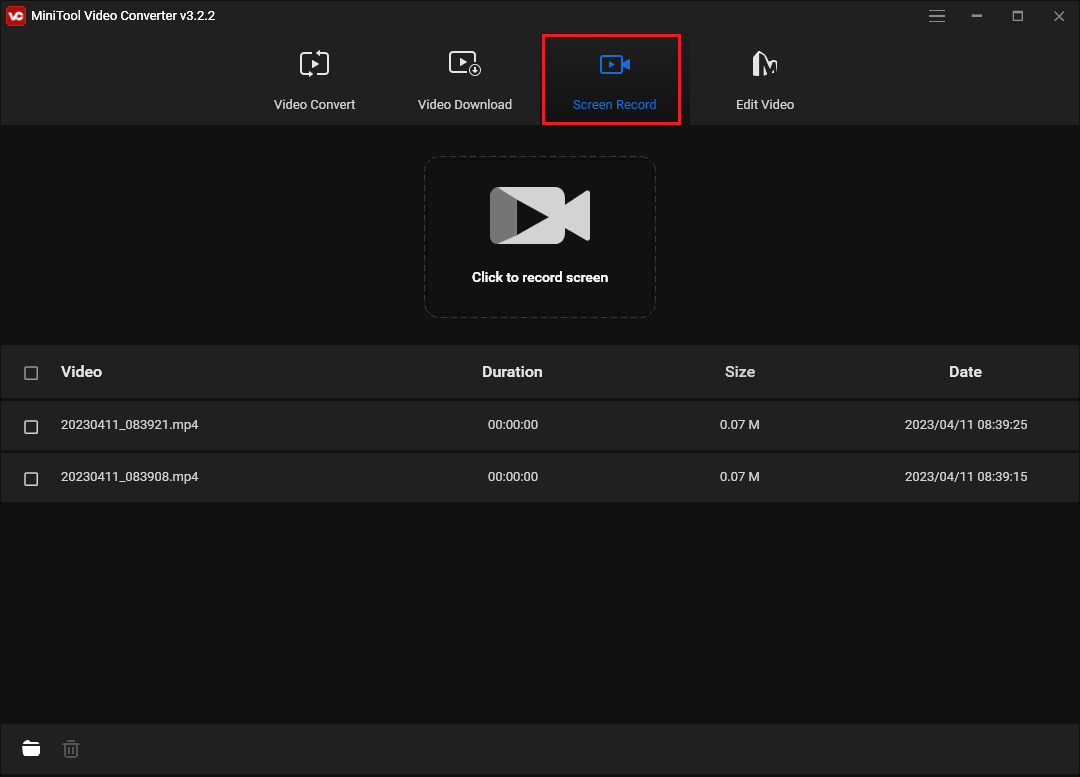
Step 3. Tap on Click to record screen area to enter the screen recording window.
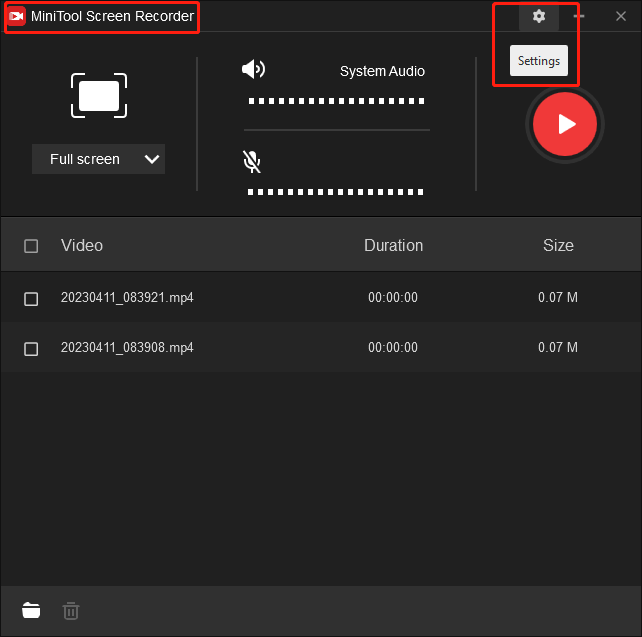
Step 4. After entering MiniTool Screen Recorder, you can click Settings on the top right of the interface to change the default settings according to your preference.
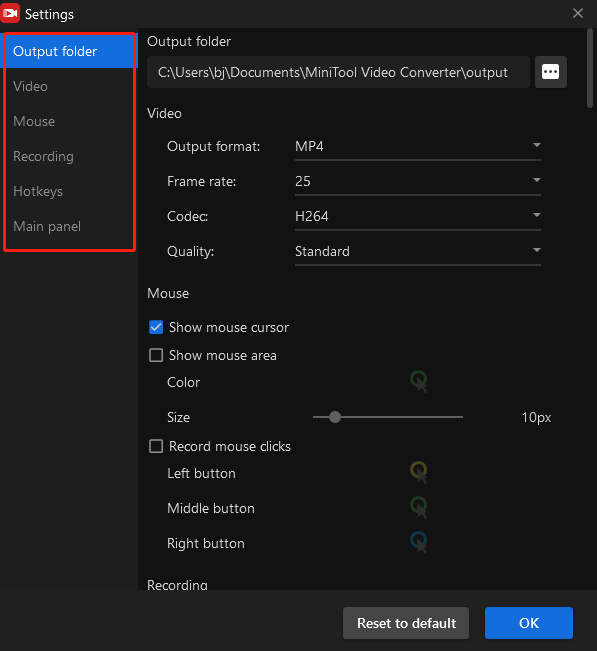
As shown below, you can modify the output folder, output format, video frame rate, and video quality. You can also choose whether to show the mouse cursor when recording and change the color of the cursor, and much more. But don’t forget to click OK to save your changes.
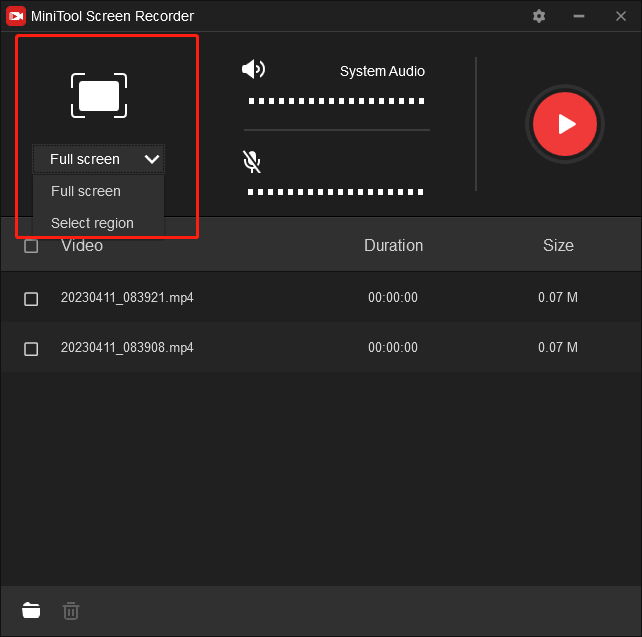
Step 5. Open the Full screen drop-down list. You can click the Full Screen to record the whole screen or tap on the Selected region to record only part of the screen.
Step 6. Determine if you want to record sound from the system or microphone. Just click the icon to turn on and off the sound. This future supports you to input your voice into gaming videos, which is greatly suitable for game commentary.
Step 7. Start a game and click the red Record button or F6 to start recording. After the 3s countdown, the recording screen starts.
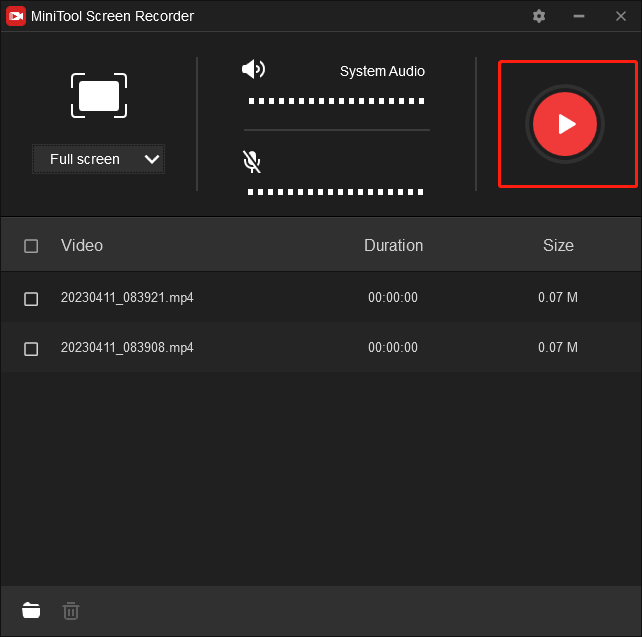
Step 8. Once done, press F6 to stop recording. Then the video you record will appear on the list. You can right-click on it to preview, delete, rename the recording, or check its folder.
#2. VideoProc Converter
VideoProc Converter is an all-in-one video processing program with a built-in game recorder for Windows 11, 10, 8, and 7. The software empowers users to record gaming videos with sound and record multiple monitors without affecting the performance of their PC.
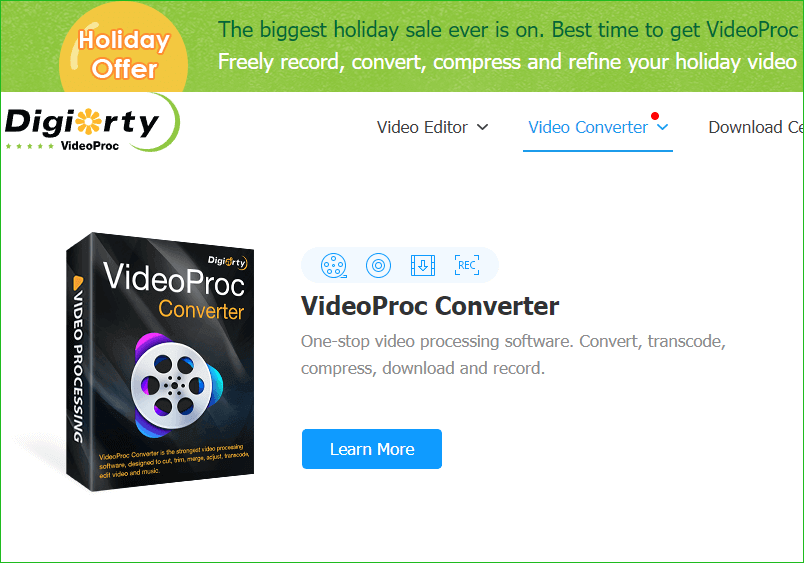
Let’s see how to record a screen by using this tool!
Step 1. Click on the Recorder icon.
Step 2: Choose Screen mode or Screen & Facecam mode.
Step 3: Click on the Crop button to select an area for recording or just record the full screen.
Step 4: Click the Record button to start recording and click the Stop button to stop recording. Hotkeys, recording formats, encoder, and video quality in the settings are available for changing. The mouse cursor can also be shown in the video.
#3. Bandicam
Bandicam is a lightweight screen recorder software for Windows, supporting to capture anything on your PC screen as a high-quality video. If you are a gamer who is in favor of the first-person shooter, Bandicam will be suited for you!
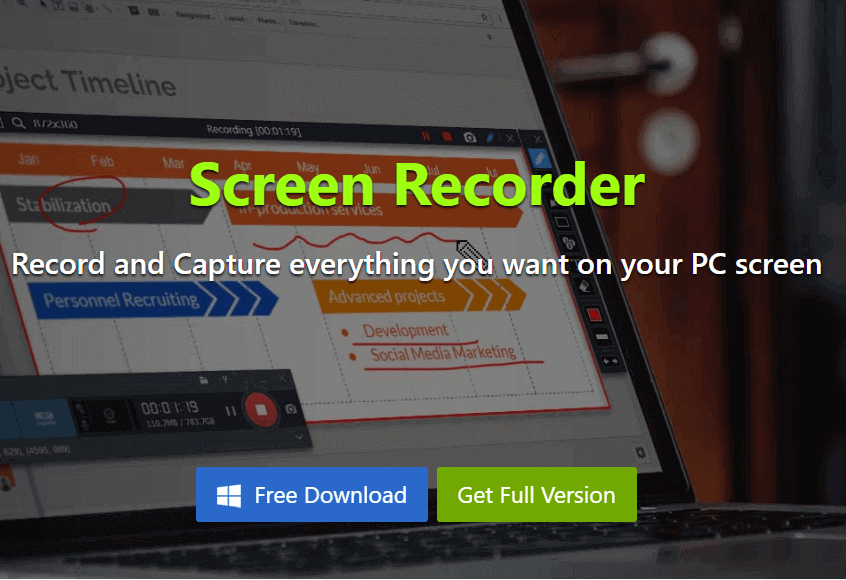
Bandicam allows you to achieve a high compression rate for game capture. At the same time, it will keep the video quality closer to the original.
Step 1: Open a game and check the green-colored number in the top left corner (fps) of the game interface.
Step 2: Click the REC button or press the preset record hotkey to start recording.
Step 3: Press the hotkey again to stop recording or click the Pause icon to record later.
However, this tool only supports videos within 10 minutes to be exported without a watermark if you use the unregistered free version.
After reading the above introduction, you must have a preliminary understanding of how to make gaming YouTube videos. At least you have got the first step of making gaming videos- how to record gaming video clips.
Part 2. Edit the Gaming Videos You Have Recorded and Saved
After recording and saving the gaming video clips, it’s time to put them together and edit them on a computer. There are many video editors in the market, so choosing the most suitable video editing software to produce high-quality videos is necessary.
As we all know, a high-quality video can boost conversion so that it can enhance sales and generate more revenue. Here are some popular video editors for you.
#1. MiniTool MovieMaker
MiniTool video editor is a full-featured video processing software. Both basic functions and advanced features are available. You can adjust the aspect ratio to adapt to different devices and platforms.
You are able to choose the output format of your gaming videos and export them without a watermark. MiniTool video editing software also supports adding motion, filters, and animated elements to enrich your videos.
Let’s follow the step-by-step guide to start editing your gaming videos!
Step 1. Download and install this tool to your PC by clicking on the Free Download button below. Double-click MiniTool MovieMaker to open it, then close the pop-up window to go to its main interface.
MiniTool MovieMakerClick to Download100%Clean & Safe
Step 2. Click on the Import Media Files to upload your gaming video clips to the software. Then, drag the gaming video clips onto the timeline.
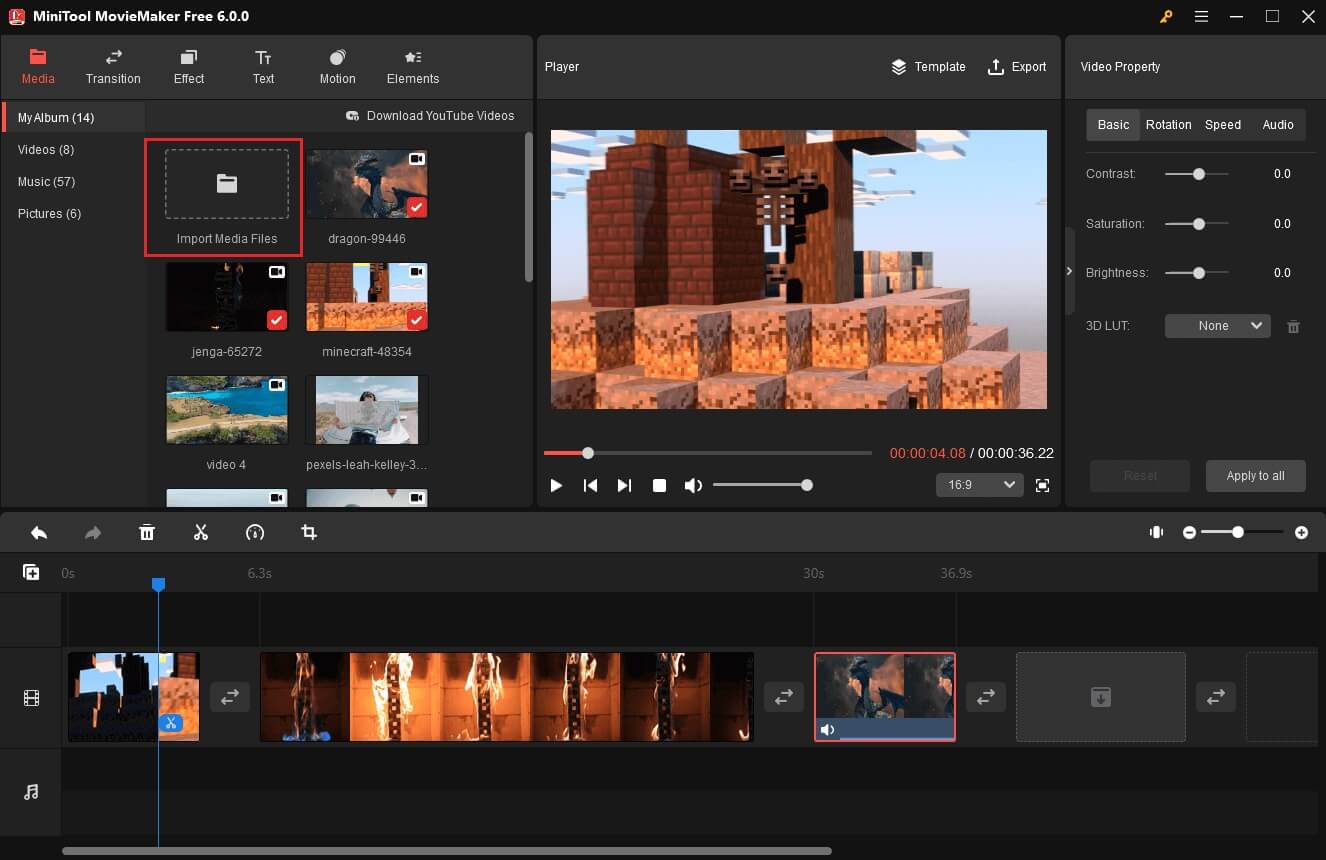
Step 3. Next, you can split, trim, crop and even reverse your gaming videos.
For video splitting, you can choose the video clips on the timeline and drag the playhead to the place where you want the split to occur. Then, click the scissors icon on the playhead or click the scissors icon on the timeline toolbar and choose Quick Split.
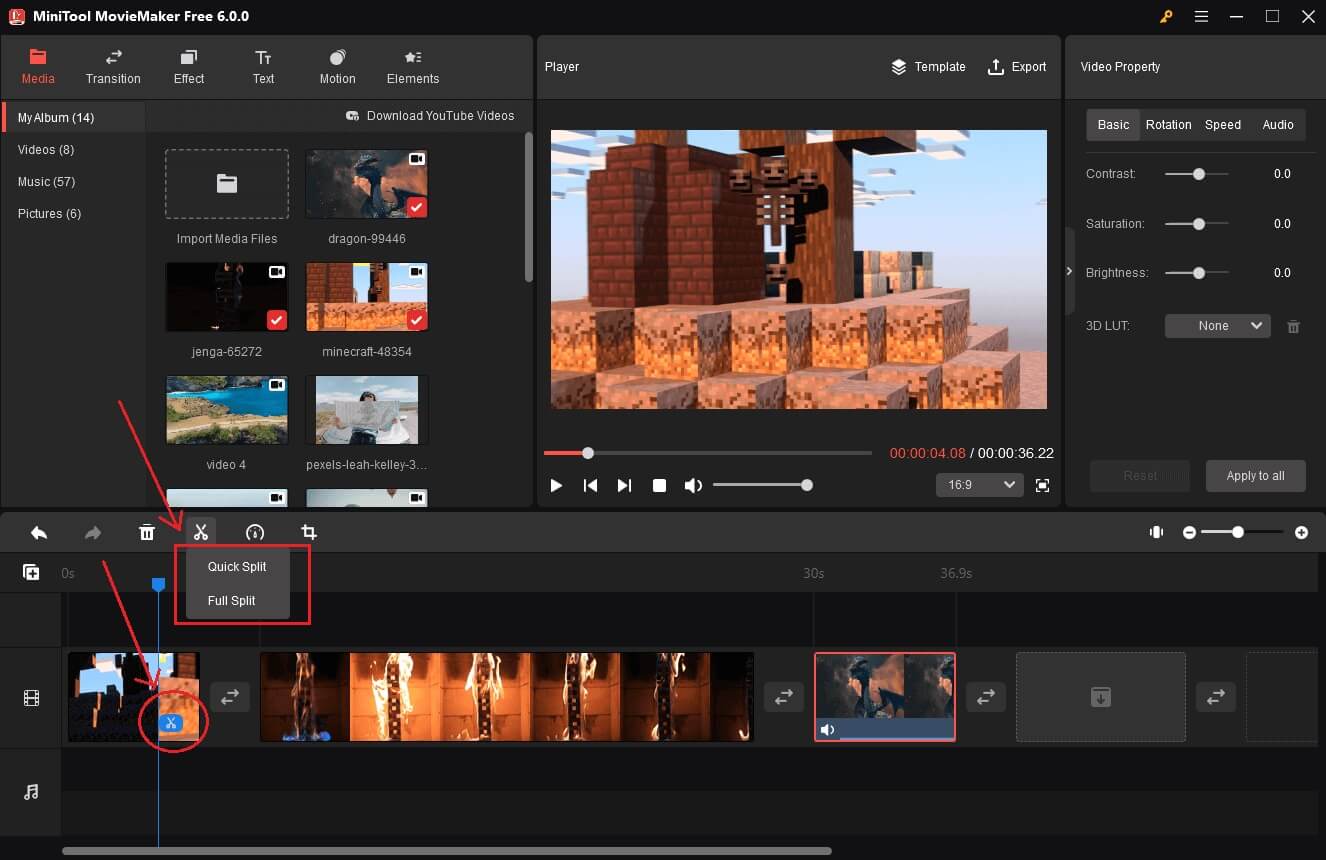
For video trimming, click the target video clip and hover your mouse at the start or end of the video clip until a double-headed arrow appears. Then, drag the arrow backward or forward to retain the wanted part.
For video cropping, click on the target video clips first and tap on the Cron icon on the timeline toolbar. And then there will be a new popup where you can crop your video to a proper size. Don’t forget to click OK to save the changes.
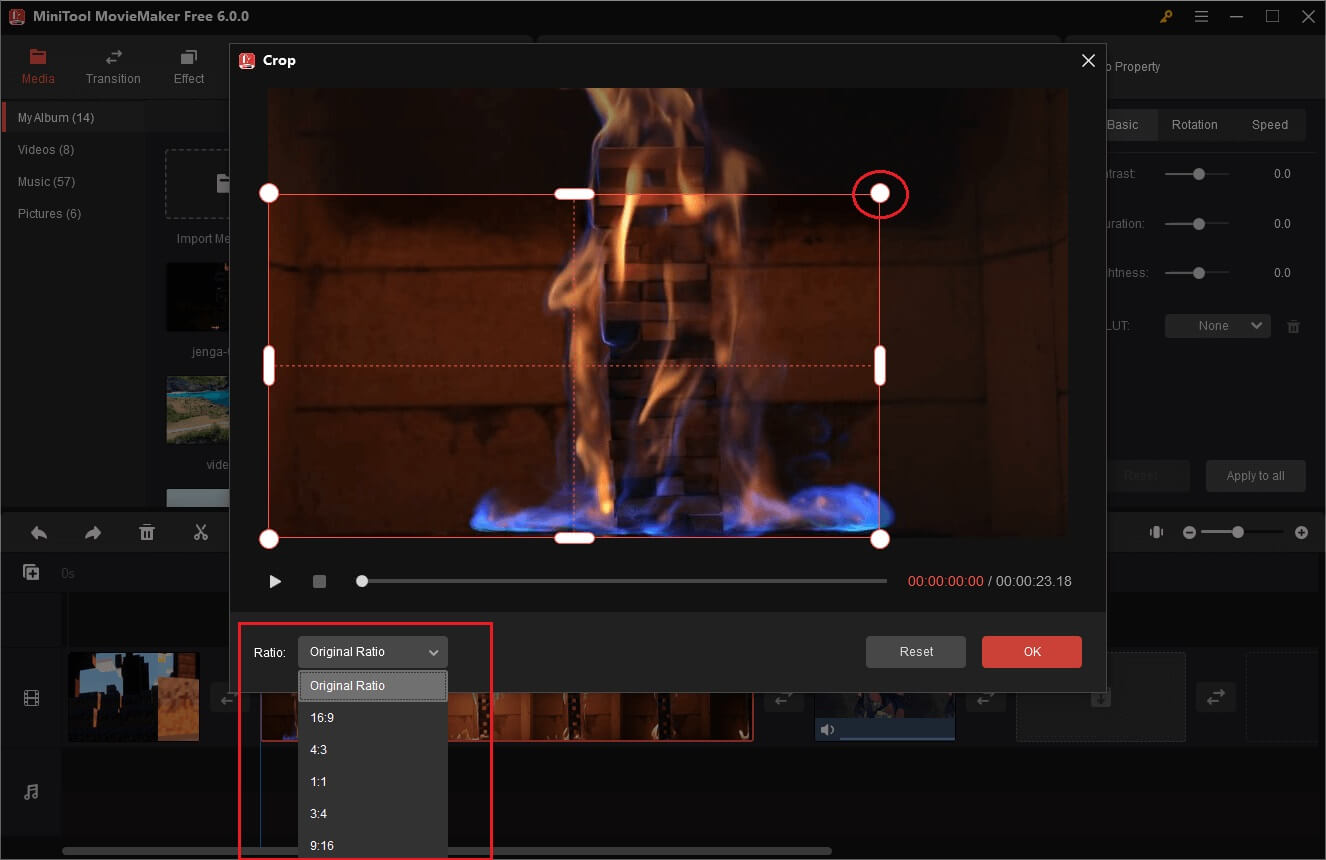
This tool provides six kinds of aspect ratios for you to crop your video clips.
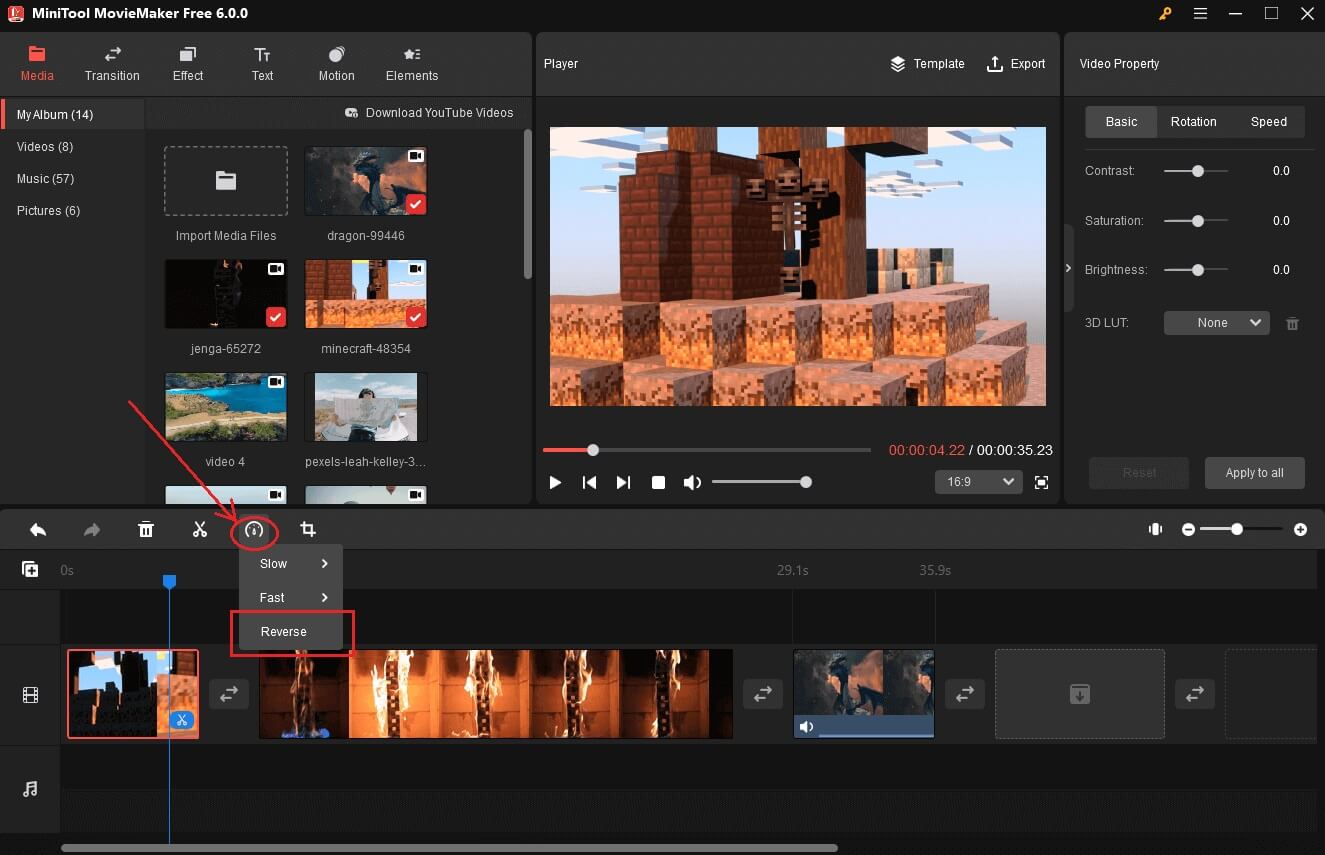
For reversing videos, select the video clip on the timeline and then click the Speed icon (dashboard) on the timeline toolbar. Choose the Reverse option from the list and the video clip will be reversed at once.
Step 4. Then, you are allowed to add subtitles, filters, motion, and animated stickers to your gaming videos. If you are interested or would like to explore more functions, you can also read:
- How to Add Subtitles to Your Videos For Free
- Transform Your Videos with Online Video Effects and Filters
- How to Do Slow Motion on TikTok & Watch a TikTok in Slow Motion
- How to Add Stickers to Video + 5 Free Places to Get Stickers
Step 5. Click Export from the upper right of the main window. In the Export popup, you can customize some settings. For example, you are allowed to modify the resolution and frame rate of your video.
If you are not sure which formats to save your gaming videos or are getting an “invalid file format” error message when you are uploading videos to YouTube, you can use the following formats supported by the YouTube platform:
- MOV
- MPEG-1
- MPEG-2
- MPEG4
- MP4
- MPG
- AVI
- WMV
- MPEGPS
- FLV
- 3GPP
- WebM
- DNxHR
- ProRes
- CineForm
- HEVC (h265)
#2. Adobe Premiere Pro
Adobe Premiere Pro is a professional video editing software that supports a wealth of advanced functions. For example, it supports automatic tone mapping, sequence locking for offline editing, and resetting options at launch.
However, due to its complexity, learning how to use the editor will spend too much time if you are a novice. And importantly, it is not for free use.
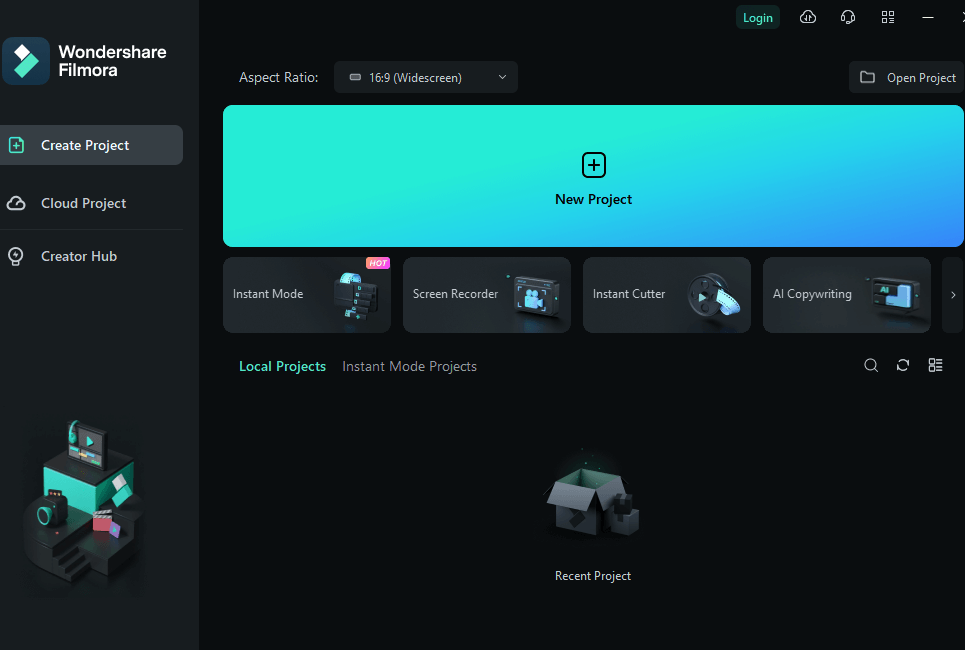
#3. Filmora Video Editor
Another video editing software for Windows that we have for you is Filmora by Wondershare. Filmora video editing software has a user-friendly interface, yet includes plenty of cool effects, elements, and transitions to use for titles, audio, and videos.
Part 3. Create a YouTube Video Thumbnail
Creating an eye-catching video thumbnail will have a great effect on getting more views. It’s also an important part of how to make gaming YouTube videos. You can finish this in most photo editing software easily.
A good thumbnail should include some bright and colorful images related to the games you record and edit, as well as adding text to make your gaming videos more noticeable.
In addition, be sure that no important information is missed out. Some vital information will make your audience want to click on it.
Part 4. Upload the Finished Gaming Videos on YouTube
Finally, you can upload your gaming videos on YouTube. or
Step 1. Sign in to YouTube Studio.
Step 2. Click Create on the top-right corner and then click Upload video.
Step 3. Select the file you’d like to upload. You can upload up to 15 videos at a time. Be sure to click Edit on each file to edit your video details.
Part 5. Several YouTube Gaming Video Ideas to Boost Gaming Channels
First, you should try to gain the trust of viewers and build a reputation.
Don’t turn things upside down or say things that go against the facts to suit some people’s preferences. If some games are not so fun, you can just tell your viewers frankly.
Second, keep your gaming videos current.
The gaming videos on YouTube are dynamic. If you stay the same, your video will have no innovation and eventually be obsolete. Whether it’s a new game or news about a hot game, you’d better show your reaction in videos. Those people who subscribe to you are interested in your opinions.
Third, show your gaming highlights in videos as much as possible.
If you’ve got footage of yourself achieving tricky moves, using special attacks, or finishing anything difficult, then you can put all of them together to make a highlight reel.
Fourth, pay attention to some upcoming games.
Nearly 30 video games were released every month in one year. If you can capitalize on viewers’ anticipation for a game that’s coming out soon and make a video in which you talk about your opinions and expectations, getting some search traffic is not so difficult.
Conclusion
Whether you’re a pro or a novice, the above tutorials will help you to resolve the problem of how to make YouTube gaming videos, so that you can start your YouTube gaming Channel.
In addition, if you encounter problems while using MiniTool Video Converter or MiniTool MovieMaker, please contact us via [email protected] or leave a comment below. We will get back to you as soon as possible.



User Comments :