This post explains how to edit PowerPoint video recordings using the built-in editor and a third-party video editor – MiniTool MovieMaker. Select the PowerPoint's built-in tool for basic edits (trimming and rotation), and try MiniTool MovieMaker for more advanced features (adding elements, subtitles, speed changes, exporting in 4K).
Before going into detail about the steps, let’s look at the brief comparison between the native editor in PowerPoint and MiniTool MovieMaker.
| Software | PowerPoint Built-in Editor | MiniTool MovieMaker |
| Use Case | Quick and simple trimming, cropping, and brightness adjustment | Advanced editing needs such as adding subtitles, elements, speed changes, effects, etc. |
| Editing Capabilities | Basic (trim, crop, rotate, color adjustment, fade in/out) | Professional (subtitles, effects, speed adjustment, overlays, 4K export) |
| Output Quality | Preserves original quality | Supports up to 4K, adjustable bitrate |
| Watermark | No watermark | Free and no watermark |
| Price | Free (built into PowerPoint) | Free |
| Learning Curve | No learning curve | No learning curve, intuitive interface |
How to Edit Video Recording in PowerPoint
Fast Track:
- After recording, go to the Playback tab.
- Trim the video to remove unwanted segments.
- Set the fade duration.
- Adjust the video’s brightness and contrast.
- Crop, rotate, and make other changes.
- Keep the video in the presentation, or save it as an MP4 file.
PowerPoint has a built-in screen recording tool that enables users to record presentations with narration. After ending a recording, most people need to edit the video to give it a professional look. For example, trimming is a common technique in screen recording editing to remove unwanted parts at the beginning or end of the clip. Now, let’s see how to edit a video recording in PowerPoint.
Step 1. Select the video and go to the Playback tab.
Step 2. To trim video, click the Trim Video button, drag the green or red handle to eliminate unnecessary parts at either end of the clip, and click OK to save changes. Also, you can apply fade-in and fade-out effects to the video and adjust the volume. On the right side, you can change the color of the video and adjust the video’s brightness and contrast.
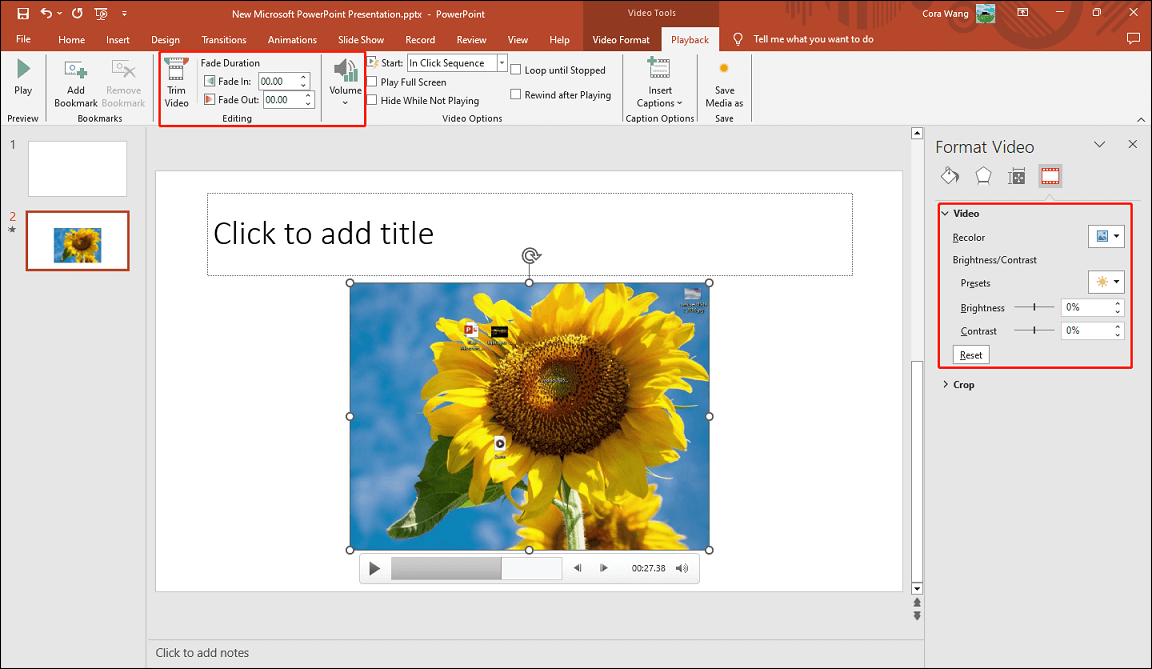
Step 3. Switch to the Video Format tab, click the Crop button, and click and drag the cropping handles on the video to adjust the height and width of the video. Open the Rotate drop-down list to rotate or flip the video. Additionally, you can add a style to the video, change the video shape, add a border, and add effects.
Step 4. To save the video as a separate file, right-click it, select Save Media as, choose a folder to save the video, and click Save.

How to Edit PowerPoint Video Recording with MiniTool MovieMaker
Fast Track:
- Save the PowerPoint video recording to the PC.
- Get MiniTool MovieMaker.
- Import the PowerPoint video recording.
- Trim, split, crop, and change the speed.
- Make other changes.
- Export the video.
PowerPoint has very limited editing capabilities. If you’re looking for additional tools to edit PowerPoint video recordings, try third-party video editing apps. MiniTool MovieMaker is an easy-to-use and feature-rich video editor without watermark, your go-to tool for enhancing your PowerPoint video. It does not add watermarks to exported videos and supports exporting MP4 videos up to 4K resolution.
Step 1: Save the Video Recording from PowerPoint to Your PC
Right-click on the video in your presentation, select the Save Media as… option, give it a name, choose where to save the video, and click the Save button to get an MP4 file.
Step 2: Install MiniTool MovieMaker
Click the button below to download and install this video editor on your computer.
MiniTool MovieMakerClick to Download100%Clean & Safe
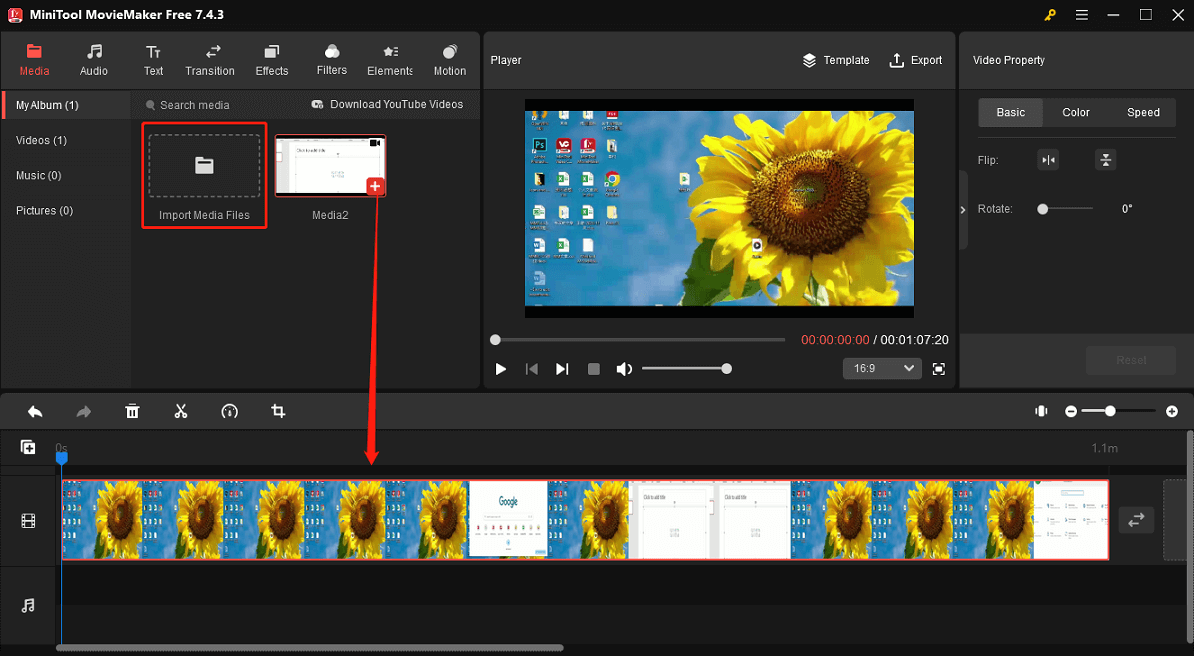
Step 3: Import the PowerPoint Video Recording
Launch MiniTool MovieMaker and close the promotion window to enter the editing page. Click the Import Media Files button to open the PowerPoint video recording you saved on your computer. Then, click the + icon at the bottom of the clip to add it to the timeline.
Step 4: Edit the Video Recording
MiniTool MovieMaker includes various tools and effects for editing videos. Here are the most commonly used functions when editing recorded videos.
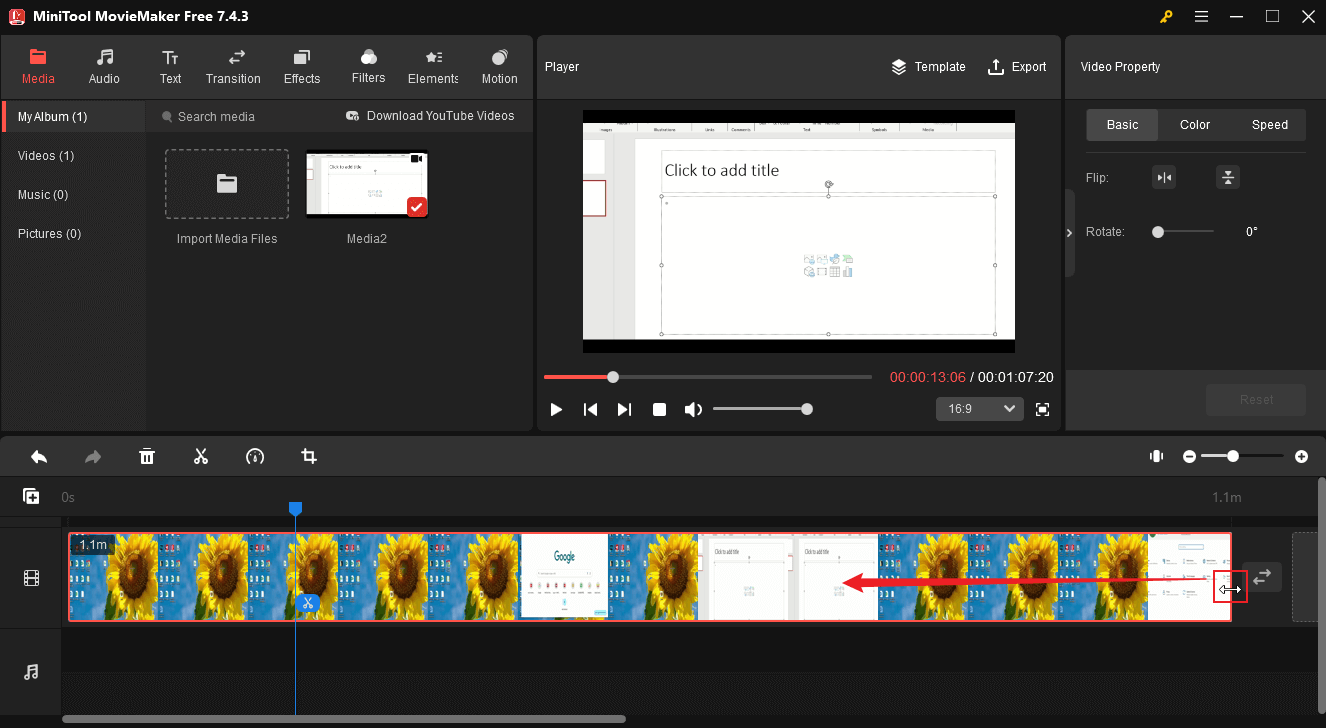
Trim and split video: select the clip on the timeline and hover over the clip’s start or end point until a double-headed arrow appears. Click and drag the arrow to remove unwanted parts at the beginning or end of the video. To split the video, drag the playhead to the target place, and click the Split icon.
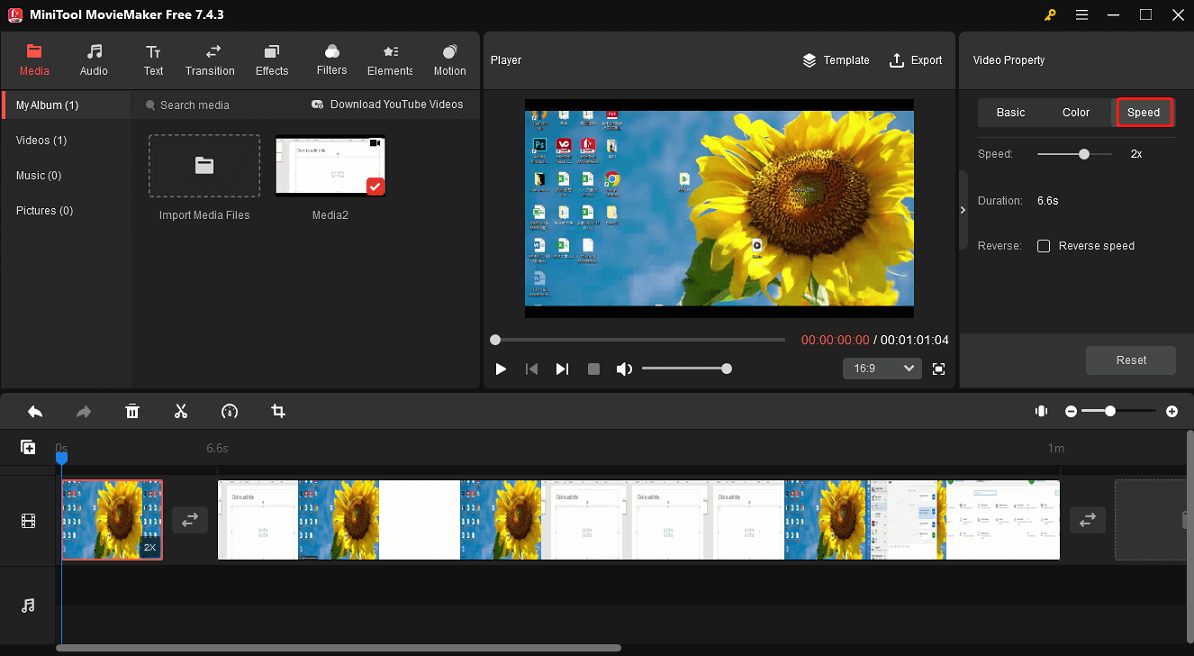
Speed up the video: increase the playback speed of loading or frozen sections to make the video smoother. If you just need to speed up part of the video, split the target section from the video. Click the clip on the timeline to open Video Property, go to the Speed tab, and drag the slider to the right.
Also in Video Property, go to the Basic tab to flip and rotate the video, or go to the Color tab to edit the clip’s saturation, brightness, and contrast.
Crop the video: choose the clip on the timeline and click the Crop icon to open the Crop window. Then, drag any handle on the red rectangle and move it to select the area you want to save. Click OK to save the changes.
Add an element: use an element like arrows to shapes to highlight something in the video. Drag the playhead to the target position where you want the element to start, go to Elements, download an element, and click the + to add it to the video. Then, you can change the element’s position on the video frame and rotate, flip, or scale it in the Elements Property.
Add captions: select where you want the text to start, go to Text > Caption, and add the desired text template to the timeline. Then, go to the Text Editor to enter and edit your text.
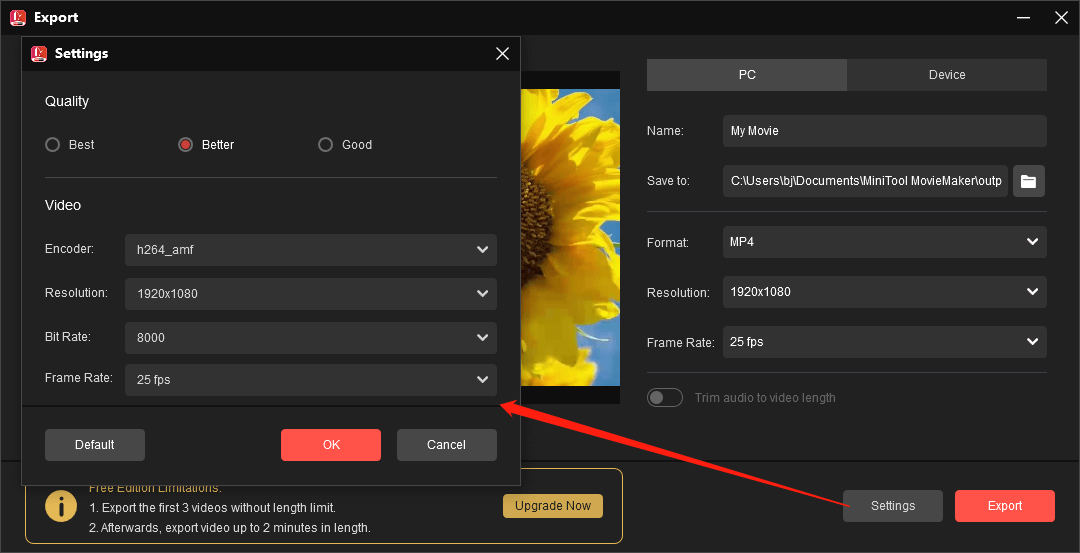
Step 5: Export the Edited PowerPoint Video Recording
Click the Export option in the upper right corner. In the Export window, you can select the output folder, format, resolution, frame rate, bitrate, etc. Finally, click the Export button to start rendering the edited video.
Other features of MiniTool MovieMaker:
- Add music or sound effects to the video and edit audio in the video.
- Add title cards and end credits to the video to make it look more professional.
- Apply transition effects between two video clips to move smoothly from one scene to the next.
- Use filters or special effects to make the video more visually appealing.
- Change the aspect ratio of the video.
- …
MovieMaker by MiniTool is an inexpensive, easy-to-use video editing program. It includes a fair number of effects and gives you easy ways to join your clips, add transitions, and overlay objects and text.https://www.pcmag.com/reviews/minitool-moviemaker
Conclusion
If you’re not satisfied with PowerPoint’s built-in video editing features, use MiniTool MovieMaker to add a professional touch to your video recording. If you encounter problems creating videos with MiniTool MovieMaker, please contact us via [email protected].
How to Edit PowerPoint Video Recording FAQ
First, go to File > Export > Create a Video.
Then, select the desired video resolution, such as 1080P, 4K, or 720P.
Next, set the time spent on each slide.
Finally, click Create Video to save the presentation as an MP4.
About The Author

Position: Columnist
Cora is a tech writer specializing in digital media workflows, with over six years of hands-on experience in video post-production, media transcoding, and screen capture. Her writing is always clear and practical. Cora also produces in-depth software reviews for users across skill levels to help them find the right tool and enjoy video editing.
User Comments :