This post details how to edit bikepacking videos using MiniTool MovieMaker. Import your footage, remove unwanted parts by trimming and splitting, add transitions to connect scenes, and add background music.
Bikepacking videos document the ride routine and immersive landscapes along the way, showcasing the natural beauty and sense of freedom to viewers. They have become a hot trend on social media platforms as more and more biking enthusiasts and YouTubers tend to share their cycling route content.
If you also enjoy recording your bike rides but have no idea about how to edit bikepacking videos on Windows, you’ve come to the right place. This post will share the best video editors suitable for all levels and offer a step-by-step example using MiniTool MovieMaker to help you learn the editing steps better.
How to Edit Bikepacking Videos on Windows: 3 Methods
Fast Track:
- Install MiniTool MovieMaker.
- Import your bikepacking videos.
- Trim, split, add transitions, and add music.
- Export the bikepacking video.
1. MiniTool MovieMaker
MiniTool MovieMaker is an easy-to-use video editor without watermark for beginners. With broad format compatibility, it supports importing MP4, MKV, MOV, and more video formats. Importing and editing videos from GoPro, DJI, drones, and phones are supported in MiniTool MovieMaker.
Besides, as one of the best Windows video editing software, MiniTool MovieMaker covers your most basic editing needs. You can easily crop, trim, and split your bikepacking footage to organize and rearrange the clips. To add an attractive touch to videos, it allows you to add transitions, music, text, and create a picture-in-picture effect to enrich video content.
Step 1: Download and Install
Click the button below to download MiniTool MovieMaker. Then, follow the on-screen instructions to complete the installation.
MiniTool MovieMakerClick to Download100%Clean & Safe
Step 2: Import Your Videos
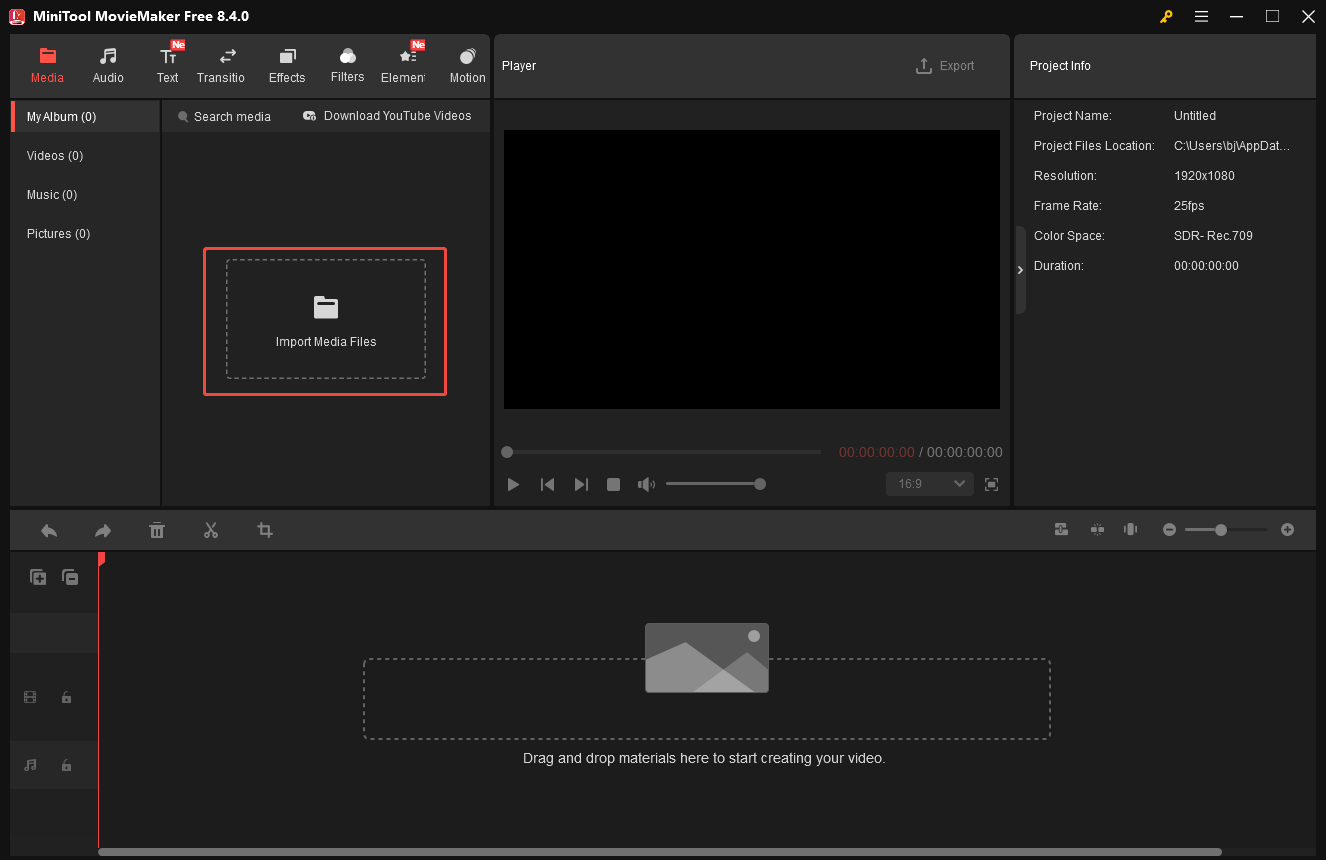
Launch MiniTool MovieMaker and close the pop-up project window to access the editing interface. Click Import Media Files to upload your videos. Then, select the Plus icon on the video to add it to the timeline.
Step 3: Trim and Split Video Clips
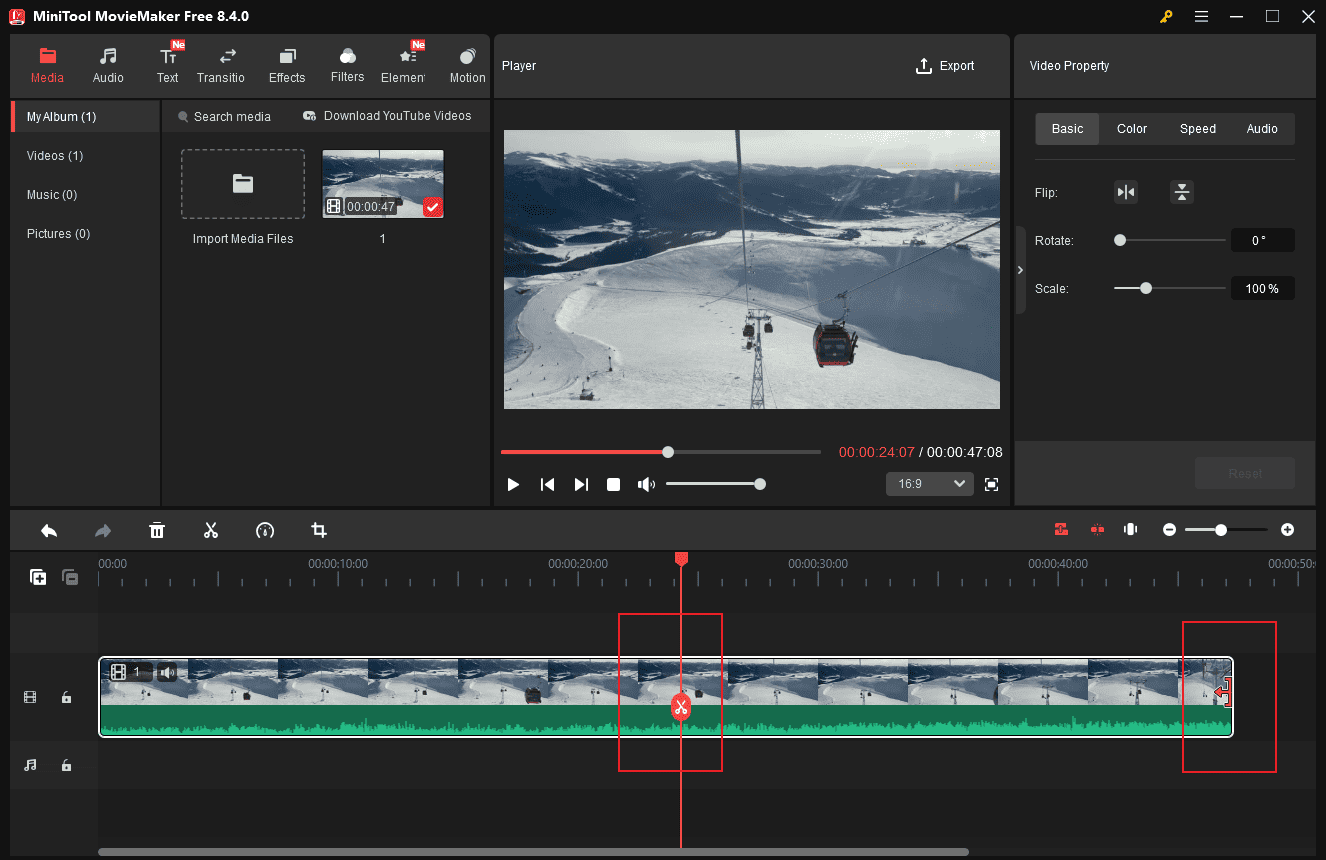
To cut unwanted video clips, hover your mouse cursor over the edge of the clip until the Trim icon appears, and drag it inwards to delete. Move the playhead to the desired point and click Scissors to cut it from the video for precise editing.
Step 4: Add Transitions
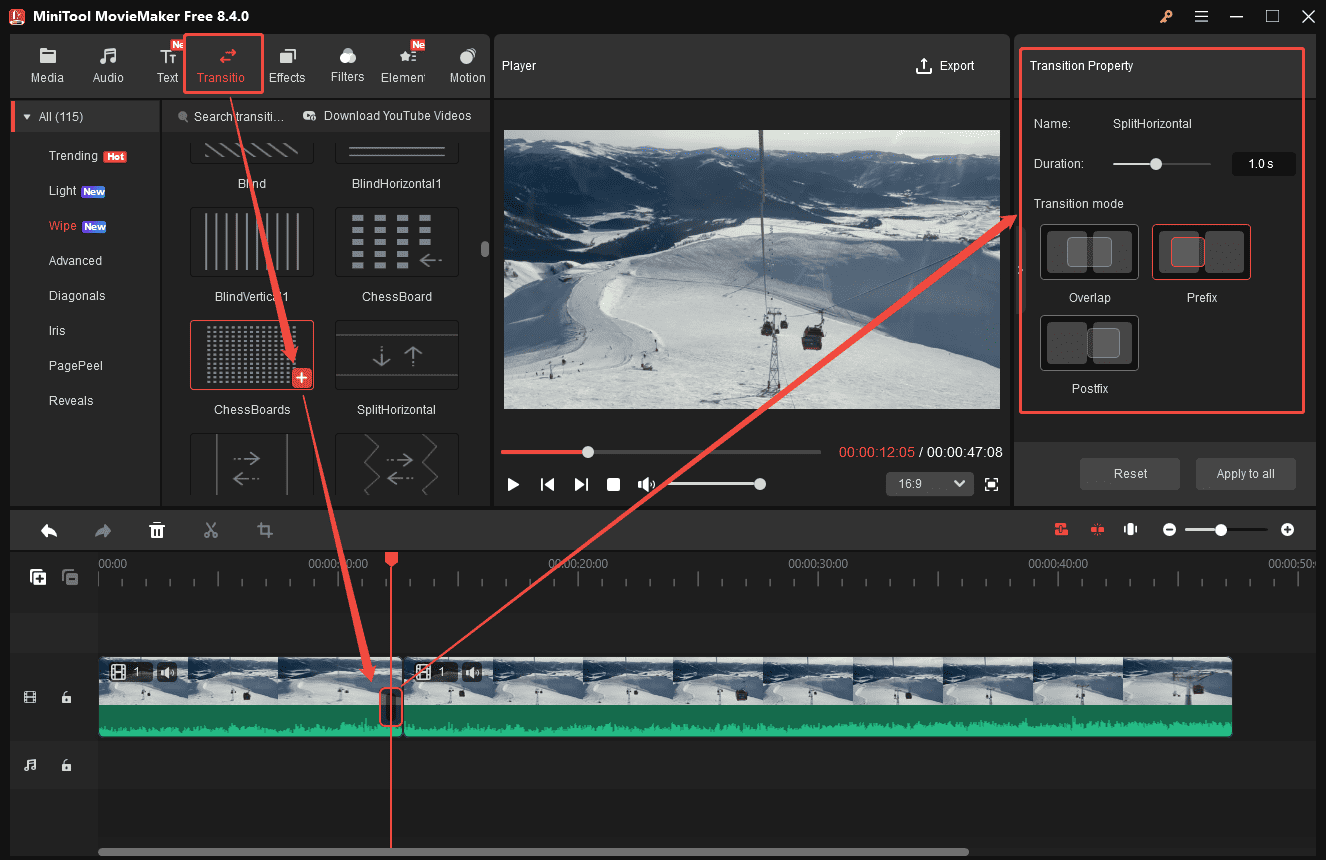
To make the separated clips look harmonious, MiniTool MovieMaker offers a variety of transitions. Click the Transitions tab at the top of the menu and scroll down to find your desired one. Hover your cursor over the transition to preview the animation. If you are satisfied with it, drag it to the timeline. You can also adjust its duration and mode on the right transition property panel.
Step 5: Add Music
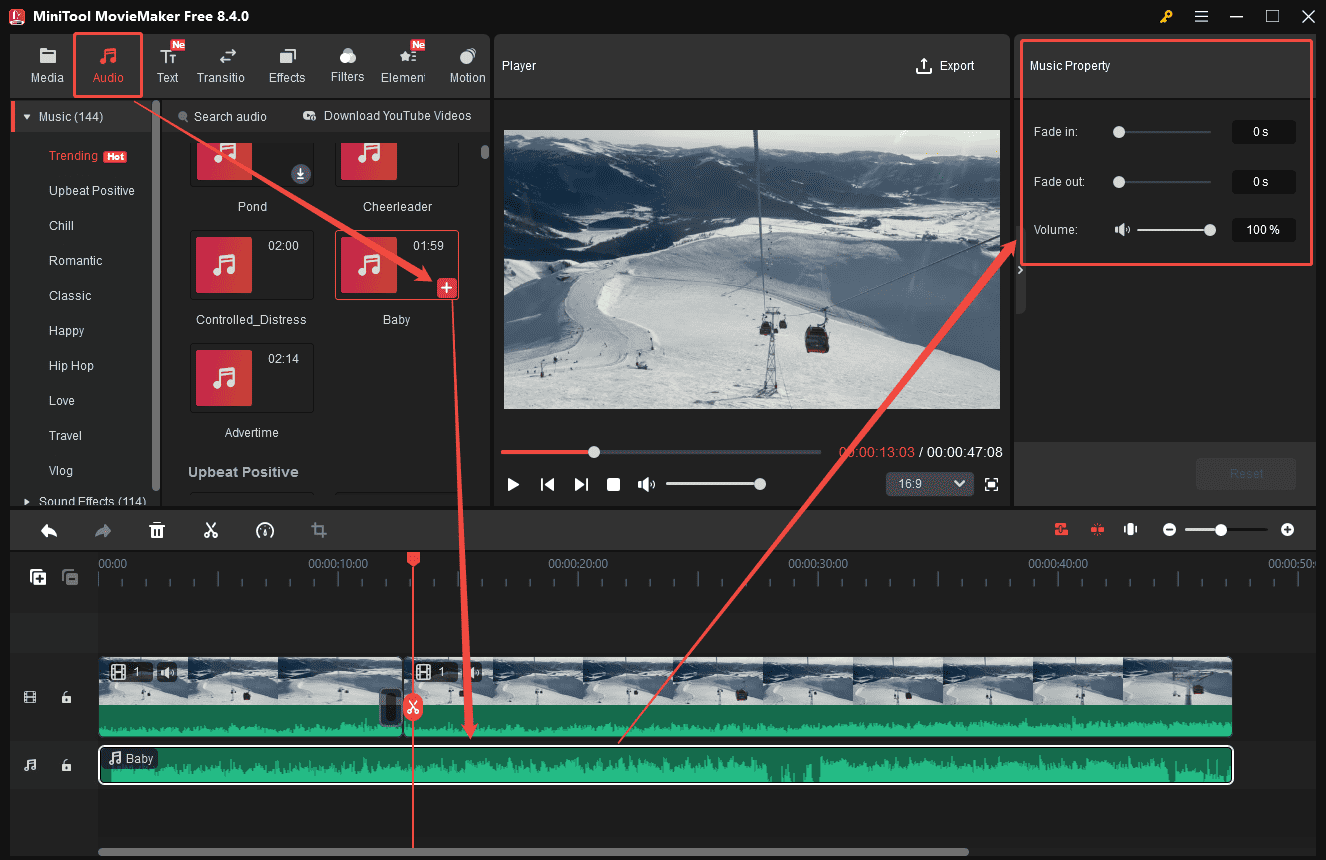
Music plays an indispensable role in bikepacking videos. Choose the Audio tab at the top of the menu to explore its sound library. Click the Download icon in the corner of the desired music and drag it to the timeline. Select the music track to add fade-in/out effects and adjust volume by dragging the sliders in the right Music Property panel.
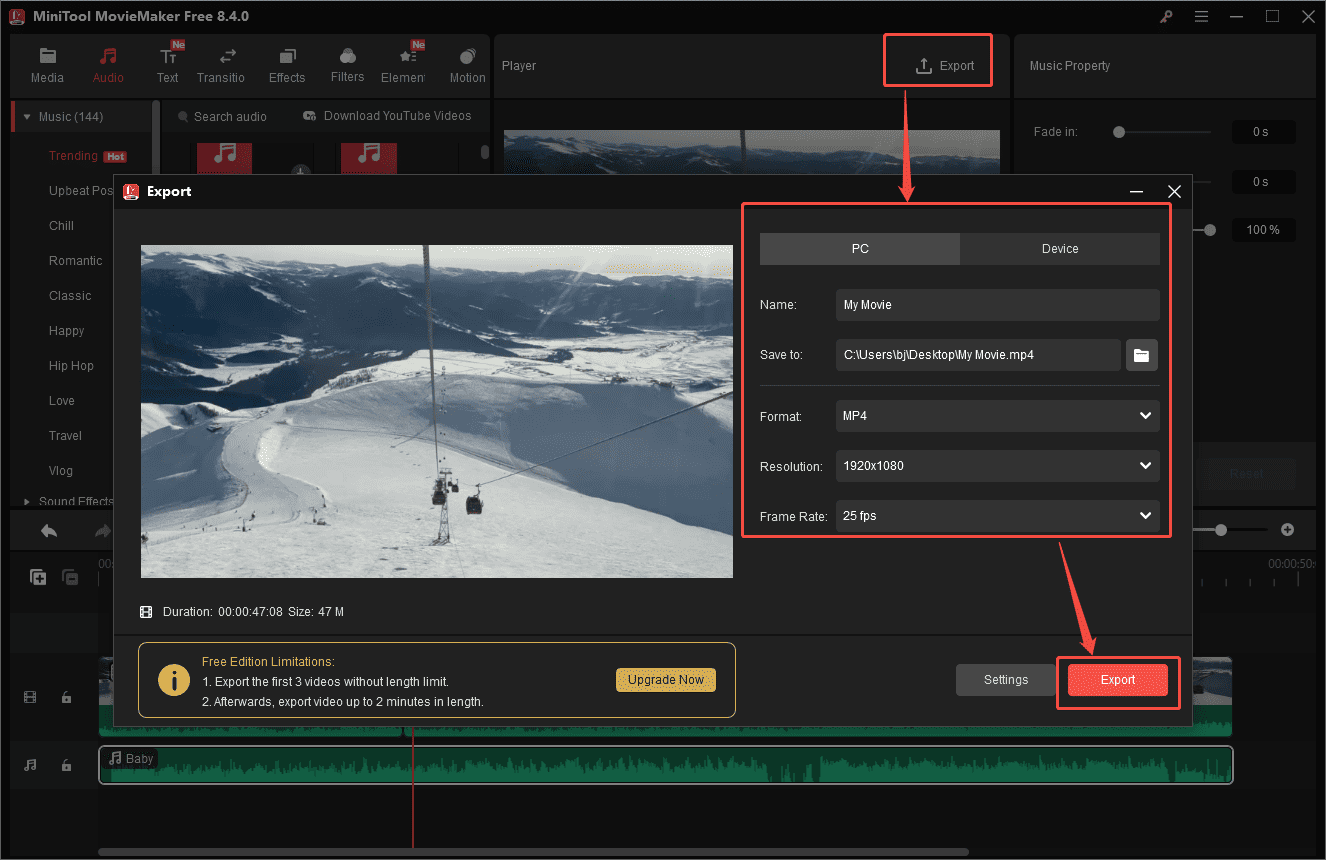
Step 6: Export the Final Video
Once the video is edited, click the Export icon at the top of the menu to enter the export settings window. Then, you can adjust the video format, resolution, and frame rate. Click the Export option at the bottom of the window to save the final video to your computer.
MovieMaker by MiniTool is an inexpensive, easy-to-use video editing program. It includes a fair number of effects and gives you easy ways to join your clips, add transitions, and overlay objects and text.https://www.pcmag.com/reviews/minitool-moviemaker
Additional Bikepacking Video Editors
VSDC: Edit Bikepacking Videos for Medium Level
For users who have mastered some video editing skills, VSDC is a great option to improve editing efficiency and achieve better performance.
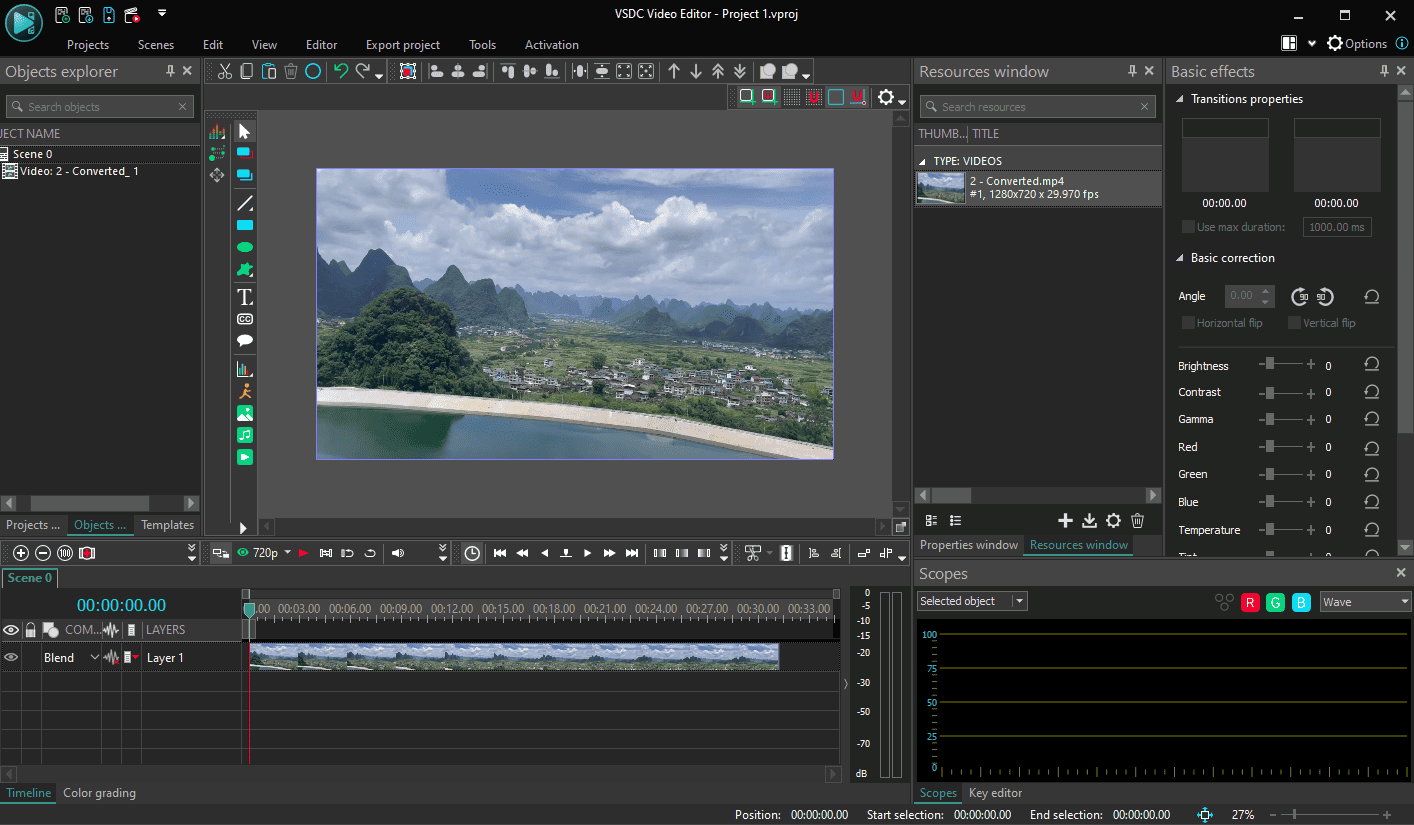
Besides the basic editing tools, VSDC also offers a collection of powerful features, including non-linear and multi-cam editing capabilities, a stabilization tool, and more. You can combine multiple shots and camera angles efficiently to create picture-in-picture and split-screen effects. To enhance the shaky footage quality, the video stabilization tool can eliminate unwanted camera shake.
Stabilization is accessible as the first button in the Tools mode. Before you apply this correction, a message box informs you that you won’t see the stabilized result until after you export the clip. That's less than ideal. The stabilization dialog has a large helping of settings, probably more than is useful in an amateur consumer product. It worked quite well in a test of a shaky cycling video.https://www.pcmag.com/reviews/vsdc-video-editor-pro
Premiere Pro: Edit Bikepacking Videos for Professional Level
For users at professional levels, basic editing features are not enough for their projects. It is recommended to use Adobe Premiere Pro.
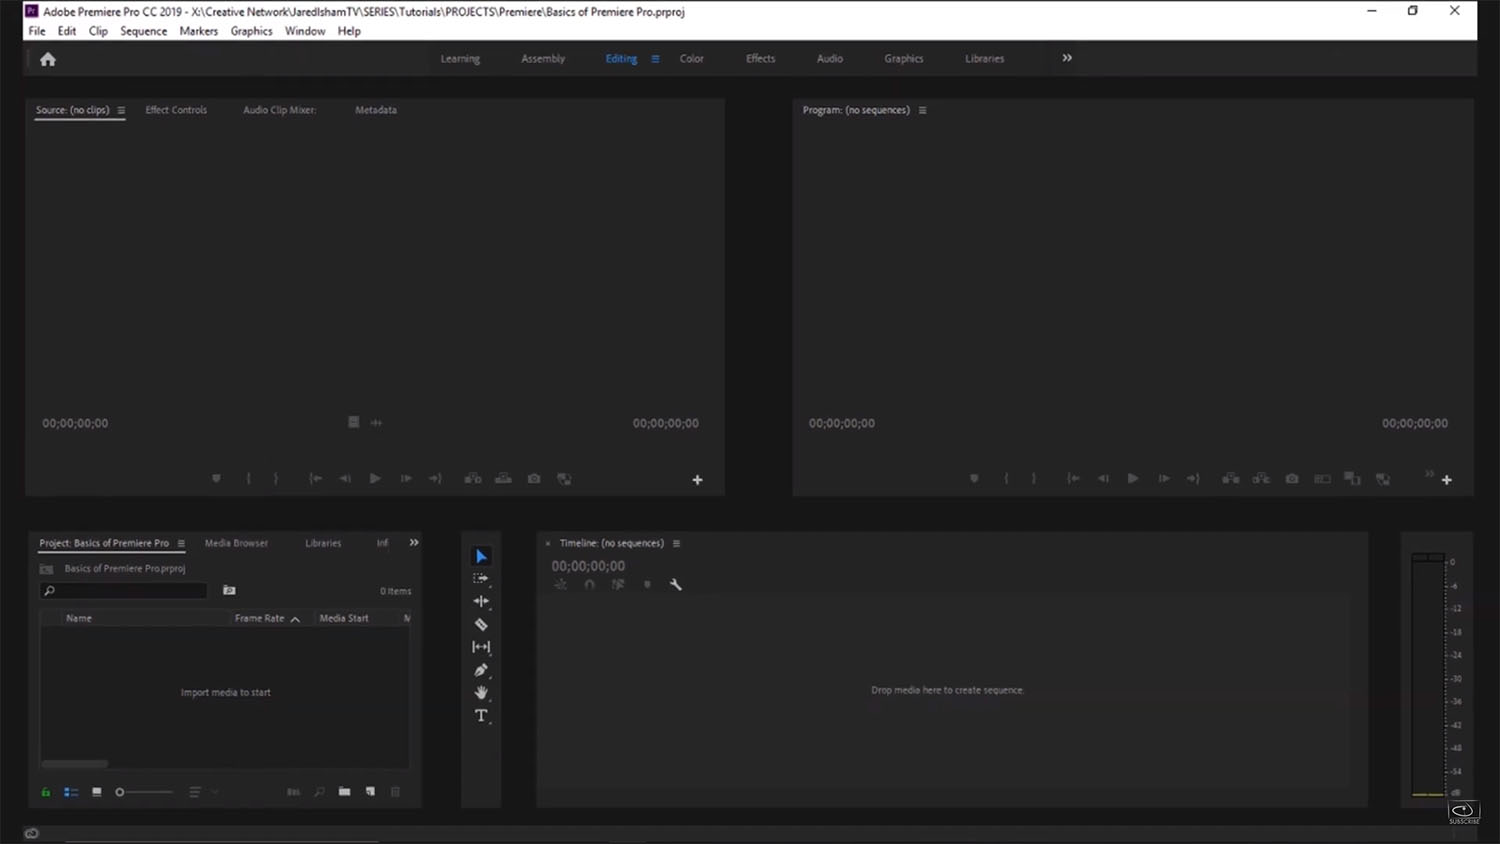
Adobe Premiere Pro comes equipped with a wide range of editing tools. It allows you to crop, cut, and trim video precisely. It also supports stabilizing videos and correcting lens distortion to improve video quality. Besides, you can work on multiple projects at the same time and switch between projects seamlessly at any time.
The Warp Stabilize feature (originally from After Effects) is very effective at smoothing out bumpy video. This feature now works more quickly than before. In testing, it got through a 1:33 (min: sec) clip from a moving tram in 2:38, smoothing out all but the biggest shakes. You can adjust the amount of cropping, make the borders auto-scale, and tweak the smoothness percentage.https://www.pcmag.com/reviews/adobe-premiere-pro
This post introduces three powerful video editors, from beginner-friendly to professional-grade, to make your bikepacking videos more polished. Select the right one based on your needs.
| Tool | MiniTool MovieMaker | VSDC | Premiere Pro |
| Platform | Windows | Windows | Win/Mac |
| No Watermark | Yes | Yes | Yes |
| Color Grading | Basic | Intermediate | Professional |
| Video Stabilization | No | Yes | Yes |
| Maximum Output Resolution | 4K (free) | 4K, 8K | 4K, 8K |
| Suitable for Skill Level | Beginner | Intermediate | Advanced |
Conclusion
Editing bikepacking videos is a powerful way to relive your journey and highlight the most memorable moments to share with friends or fans. This post demonstrates how to edit bikepacking videos on Windows using three effective methods, helping you choose the right tool based on your skills and turn your bikepacking journey into a stunning video.
If you have any problems or suggestions when using MiniTool MovieMaker, please do not hesitate to contact us via [email protected].
How to Edit Bikepacking Videos FAQ
About The Author

Position: Columnist
Cora is a tech writer specializing in digital media workflows, with over six years of hands-on experience in video post-production, media transcoding, and screen capture. Her writing is always clear and practical. Cora also produces in-depth software reviews for users across skill levels to help them find the right tool and enjoy video editing.
User Comments :