Slow motion (slo-mo or slow-mo) is a popular film-making effect. You can easily record a slow-motion video on your iPhone or with cameras. Now, you can easily make a video slow motion by applying slow-motion effects. This post tells you how to do slow mo on CapCut.
CapCut is one of the best free video editors for Android and iPhone and is equipped with almost all features and tools you may need, such as speed adjustment, green screen, auto caption, special effects, and more. And in this post, we’ll show you how to do slow mo on CapCut.
If you want to change a video’s playback speed on Windows, try MiniTool MovieMaker.
MiniTool MovieMakerClick to Download100%Clean & Safe
How to Do Slow Mo on CapCut
This part will show you how to slow down a video on CapCut.
Step 1. Open the CapCut app on your phone, click the New Project to button to choose a video, and click the Add to upload it to CapCut.
Step 2. Click the Edit icon at the bottom left, and then select the Speed option.
Step 3. Choose the Normal option. Then drag the speed controller to the left to slow down the video (up to 0.1x). Also, you can tick the Pitch to change the pitch of the sound in the video.
Step 4. Click the Play button to preview the video, and click the checkmark to apply the changes. Then you can export or share this video.
This method will make a smooth slow-motion video, and here’s a second way you can try. Velocity edit (curve speed edit) is one of CapCut’s most popular features. It lets a video have different speeds at certain seconds.
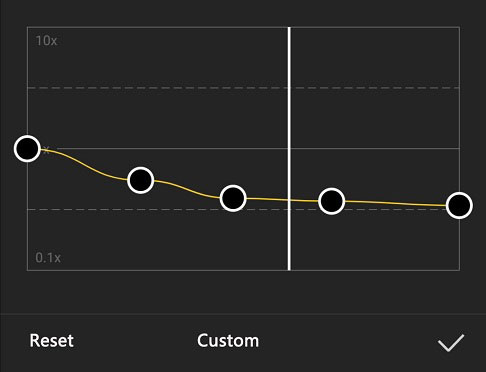
After completing steps 1 and 2, click the Curve option. Then click the Custom and tap it again to open the editing menu. Next, you’ll see 5 circles on the horizontal line. Then you can move any circle down to any place below the 1x line to decrease the clip. You can click the Play button to preview the video, and then click the checkmark to save changes.

How to Speed up a Video on CapCut
After learning how to slow mo on CapCut in 2 ways, let’s learn how to speed up a video on CapCut.
Step 1. Open the CapCut app, click the New Project to add a video.
Step 2. Click the Edit icon, then choose the Normal. Next, drag the speed controller toward the right to increase the video speed up to 100x. Click the checkmark to apply changes.
Alternatively, select the Curve and click Custom. After opening the editing menu, drag any circle upwards and from 1x. Also, you can move the circle to the right or left to set a speed for a certain portion. Then save your changes and export the video.
How to Change Video Speed with MiniTool MovieMaker
MiniTool MovieMaker is a free video speed editor for Windows, allowing you to slow down or speed up a video with ease. Besides, this video editor enables you to trim, split, rotate, flip videos, and add text, transition, filter to the video, edit the video color, etc.
Here’s how to change video speed with MiniTool MovieMaker.
MiniTool MovieMakerClick to Download100%Clean & Safe
Step 1. Open MiniTool MovieMaker after installation, close the pop-up window, and click the Import Media Files to upload your video.
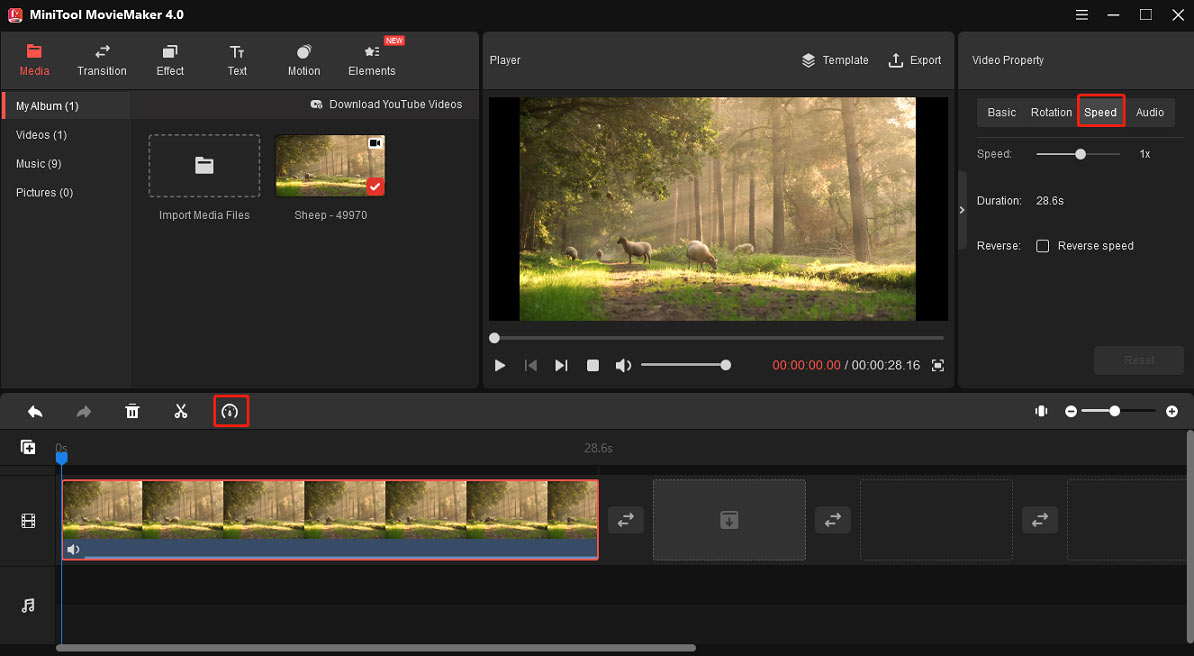
Step 2. Drag the video to the timeline. In the Video Property window, go to Speed, drag the speed controller to the left or right to slow down or speed up the clip.
Alternatively, click the Speed icon above the timeline, then choose Slow or Fast, and then select a value.

Step 3. You can continue to edit this video. To export it, click the Export. Then choose an output folder and format, and click the Export.
Conclusion
Now, you can easily make a slow-motion video with the CapCut app. And if you need a video speed controller for Windows, MiniTool MovieMaker is recommended here. It’s free and simple to use.


User Comments :