It would be annoying when you watch a movie without subtitles. Can you properly add subtitles to Windows Media Player? Don’t worry, this post will show you how to add subtitles in Windows Media Player with clear steps. Also, you can try MiniTool MovieMaker to add subtitles for your videos.
Windows Media Player is still popular around the world, and users always try to do more things over it like rotating videos, trimming MP3 or video files, or adding subtitles.
Can you play SRT files on Windows Media Player? How to add subtitles in Windows Media Player? This post teaches you how to add subtitles to a movie in Windows Media Player.
How to Add Subtitles in Windows Media Player
When you play a downloaded movie in Windows Media Player, but find it doesn’t have subtitles. You must want to get the subtitle file and add it to Windows Media Player to get a better understanding of this movie. This part explains how to add subtitles to a movie in Windows Media Player.
Step 1. Prepare the Subtitle File.
If your movie doesn’t have subtitles, firstly, you should get the subtitle file. Where to download movie subtitles? There’re many websites where you can download movie subtitles for free, such as OpenSubtitles, Subscene, YIFY Subtitles.
To help Windows Media Player detect the subtitle file, make sure your movie file and the subtitle file have the same file name and put them in the same location on your device.
Step 2. Import a Video and Add the Subtitle File.
Right-click the video, click the Open with and then select the Windows Media Player in the pop-out menu.
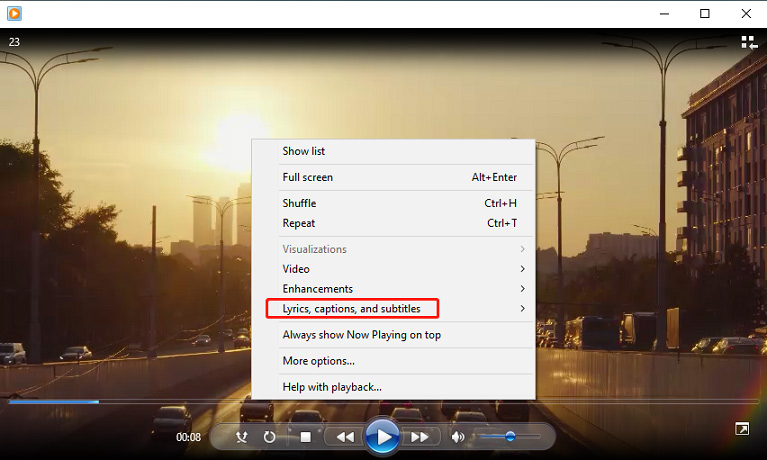
Then right-click on the Windows Media Player window, and then click the Lyrics, captions, and subtitles option from the drop-down menu.

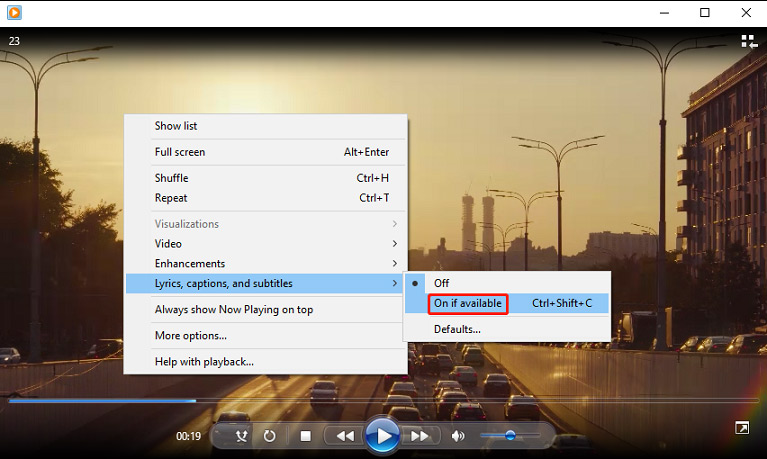
Next, tap the On if available option to tell Windows Media Player to use available subtitle files.

Step 3. Download a Third-party Codec.
Because Windows Media Player can’t recognize the downloaded SRT file, you can download and install DirectVobSub (VSFilter) codec on your PC. Then play the movie in Windows Media Player and check if subtitles are working.
If not, you can try Shark007’s Advanced Codecs. And you should download the codecs from the official website. After downloading, run Shark007’s Advanced Codecs with administrator rights.
Then go to the video file types tab, check the disable Media Foundation for MP4 option. Then go to Swap tab and check disable Windows Media Foundation. After that, open the movie in Windows Media Player and see if the subtitles work well.
Also read: 2 Methods – How to Extract Subtitles from MKV
How to Add Subtitles to a Video with MiniTool MovieMaker
MiniTool MovieMaker is a free video editor for Windows. It allows users to add captions/titles/credits to the video, rotate, flip, trim, split, speed up, slow down videos, apply video filters and transitions, combine multiple video clips into one, and more.
Here’s how to add subtitles to a video using MiniTool MovieMaker.
Step 1. Launch MiniTool MovieMaker after installation, then close the pop-up window.
MiniTool MovieMakerClick to Download100%Clean & Safe
Step 2. Click the Import Media Files to add your video, and then drag it to the timeline.
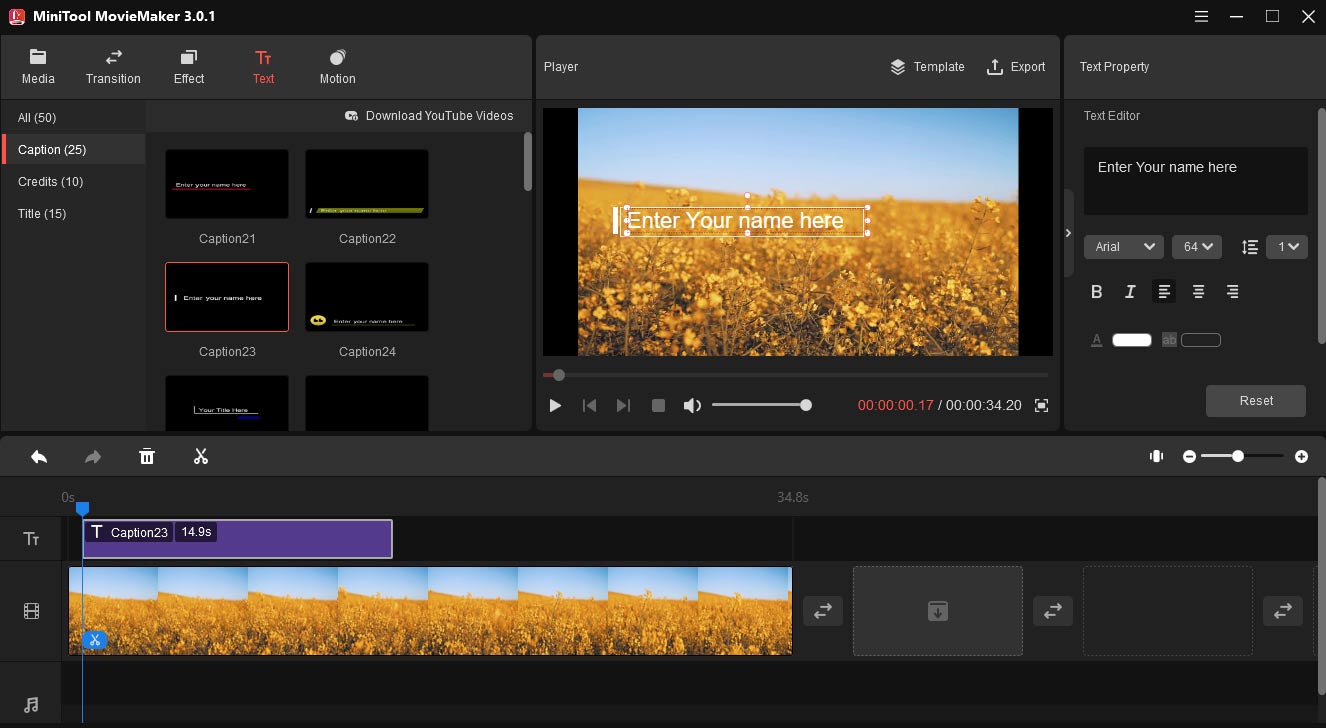
Step 3. Go to Text > Caption, preview and select a caption template, and click the +. In the Text Editor, enter your text, and then change the font, size, color, position, and more.

Step 4. To export the video, tap the Export, then choose the output format and location, click the Export.
Conclusion
Now, you can follow these steps to add external subtitles to a movie in Windows Media Player. However, if this method does not work for your video, you can try VLC Media Player instead. If you want to add captions to a video by yourself, try MiniTool MovieMaker.


User Comments :