Can you add music to PowerPoint? Absolute Yes. Here will show you 2 different ways to finish this task. Before adding music to PowerPoint, you can trim or cut the music file to delete unwanted parts with MiniTool software.
Now, let’s have a look at the first method to add music to PowerPoint.
How to Add Music to PowerPoint – Audio on My PC
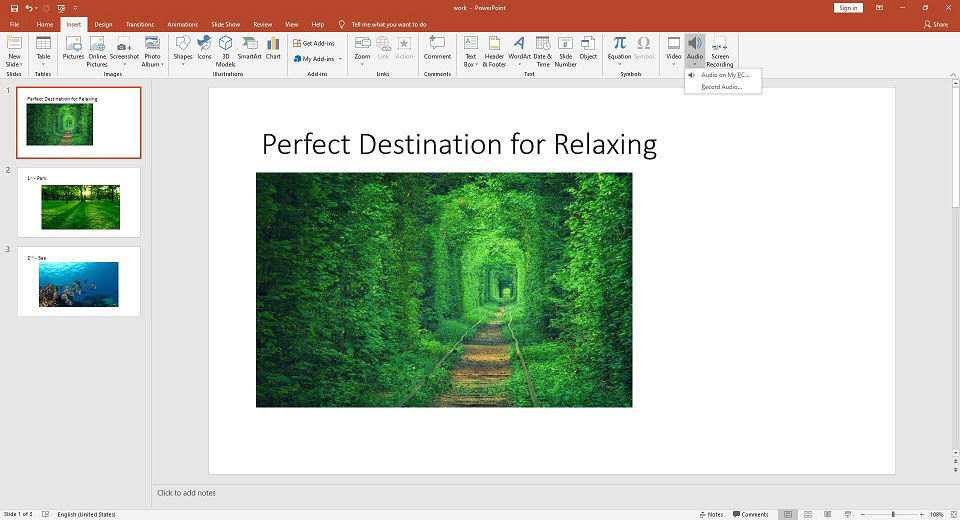
Step 1. Open your PowerPoint presentation and select the slide where you want to add audio.
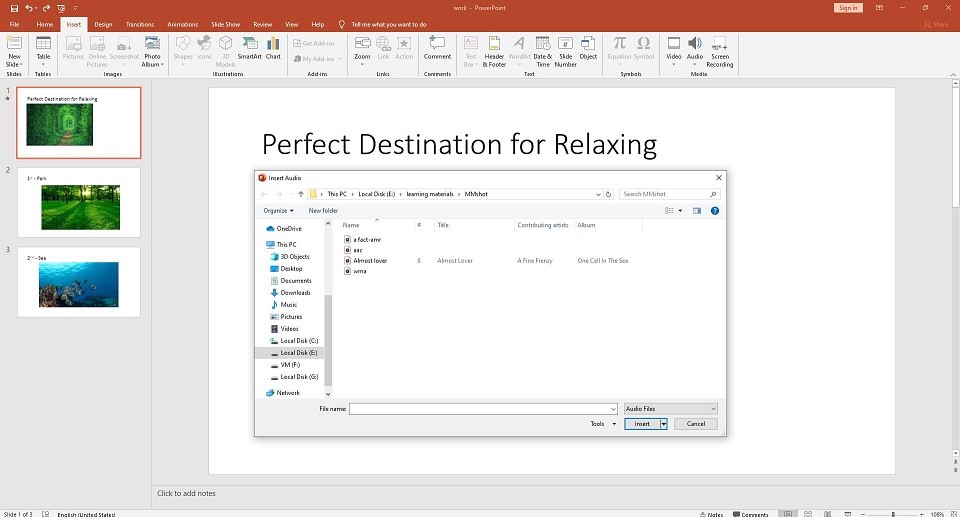
Step 2. Go to Insert > Audio > Audio on My PC…
Step 3. Then A new window will open, where you have to locate the music file you want to add to your presentation.

Step 4. Once located, click the Insert drop-down arrow and you’ll see two options:
- Insert – The audio will be directly inserted into your presentation, increasing the size of the document.
- Link to File – A link to the file will be created, reducing the size of the document. However, problems may occur if you use the presentation on another computer.
Step 5. Select the option that best suits your needs and click Insert.
Related article: 5 Best Free MP3 Cutters
How to Add Music to PowerPoint – Record Audio
If you prefer to record audio instead, follow the steps below.
Step 1. Locate the slide where you want to add music.
Step 2. Select Insert > Audio > Record Audio.

Step 3. Give a name for the audio file you’re about to record.
Step 4. Press Record to start recording and then a timer will start which shows you the total length of the sound being recorded.
Step 5. Once you’re ready to stop recording, press the Stop icon.
Step 6. To listen to play what you’ve recorded, you can press the Play icon.
Step 7. If you’re happy with what you’re recording, select OK to insert it into your presentation. If not, click Cancel.
You might be interested in: How to Make a Music Video
Bonus Tip – Edit Music in PowerPoint
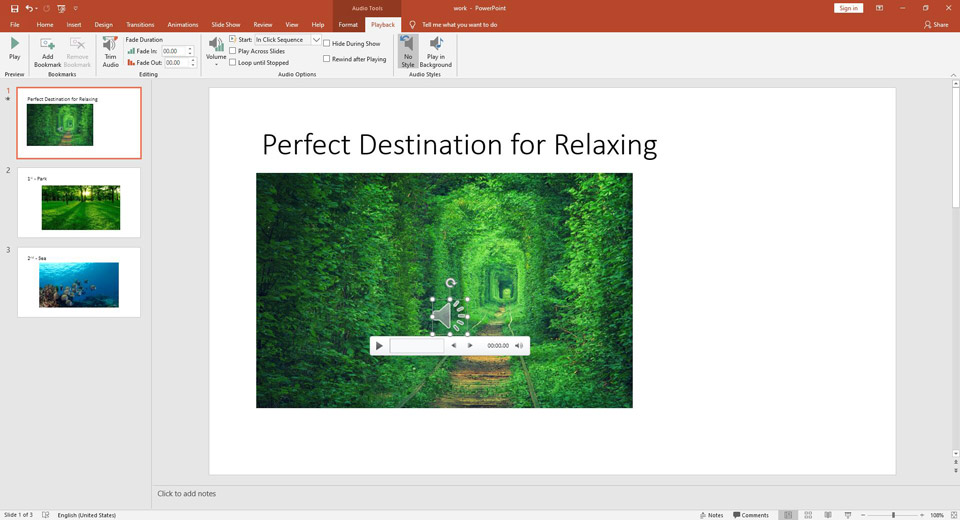
How to perfect the music file you inserted or recorded for your presentation? It’s pretty easy with the following guide. Click the music icon, and Audio Tools will appear on the toolbar, which contains 2 categories.
1. Format
If you want to change or modify the standard audio file icon, use options under the Format tab, such as Change Picture, Picture Style, Picture Effects and so on.
2. Playback
# Play
Click Play to preview whether the music clip matches your PowerPoint presentation.
# Bookmarks
In the Bookmarks group, there is an Add Bookmark option, which will be visible in the timeline and will be helpful if you want to quickly find the main points of your music file in the presentation.
# Playback
In the Editing group, there are multiple options, such as Trim Audio, Fade in and Fade out.
# Audio Options
- Volume: It allows you to set the volume of the music clip.
- Start: Click the drop-down arrow to choose how you want the music clip to start playing.
- Play Across Slides: If you enable this, the music clip will be played during the entire presentation. Please note that if you want to play a different music file in each slide, you’ll need to add the music files one by one and uncheck Play Across Slides.
- Loop until Stopped: Once the music clip finishes, it starts again indefinitely until you stop it.
- Hide During Show: Check this option if you want to hide the icon during playing the music clip.
- Rewind after Playing: Check this option if you want the timer of the audio clip to go back to the beginning when it reaches the end.
# Audio Styles
- No Style: Select it if you don’t want additional effects.
- Play in Background: Enable it if you want the music clip to be played in the background during your presentation.

If you want to export the music clip included in your PowerPoint presentation, right-click its icon and select Save Media as. However, you can only do this with the music file inserted from your PC.
Bottom Line
Have you mastered how to add music to PowerPoint after reading this post? If you have any questions or suggestions about it, please let us know via [email protected] or share them in the comments section below.


User Comments :