With Google Photos, you can not only share and store pictures but make animations, collages, movies, and display an album in a slideshow. And this post will show you how to make slideshow with Google Photos.
How to Make a Slideshow with Google Photos
This part will show you how to create a slideshow in Google Photos on your computer via a web browser.
Step 1. Open your Google Chrome, click the Google apps icon, find and click the Photos button to open Google Photos.
Step 2. Go to Albums, and click the Create album. Give the new album a name, then tap Add photos to add photos from other albums or click the Select from computer to upload pictures from your device.
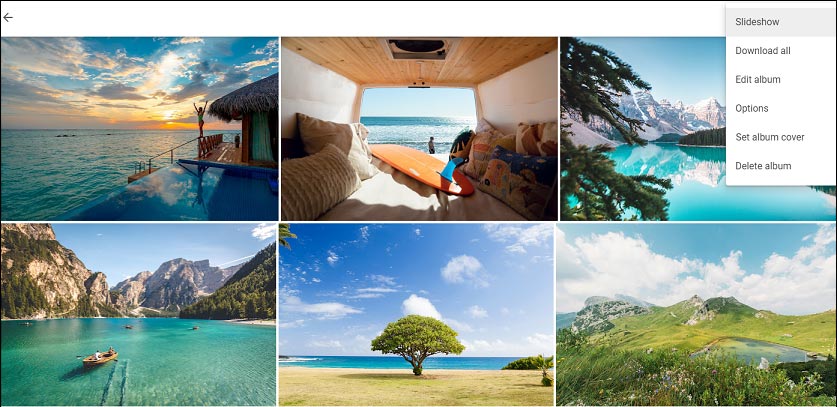
Step 3. After photos are uploaded, click the three vertical dots (More options icon) at the top right corner, and select the Slideshow option.

Step 4. Then all images in this album will be displayed in a slideshow. During the view, you can choose a specific picture, then click the Edit icon to add a filter, adjust the light, color, and pop, rotate the image, and change the aspect ratio.
With the above steps, you can display an album as a slideshow in Google Photos. However, it doesn’t offer slideshow settings that let you add background music, or change the order of the photos, and even you cannot save the slideshow separately from Google Photos. And you can’t share a slideshow from Google Photos, either.
If you want to view multiple pictures in a slideshow with a few clicks, Google Photos slideshow is a good choice.
Want to make a photo slideshow on your phone? Check this post – 5 Best Free Slideshow Apps You Should Know to find the best slideshow app.
How to Make a Photo Slideshow with MiniTool MovieMaker
If you want to make a photo slideshow with music, you can try MiniTool MovieMaker, one of the best photo slideshow makers for Windows.
To help you make a beautiful photo slideshow, MiniTool MovieMaker allows you to add filters, captions, motion effects to the images, rotate and flip the image, change the duration of photos, etc.
As a video editor, MiniTool MovieMaker lets you trim, split, flip, rotate videos, change video speed, edit audio in the video, extract audio from video, and more.
Here’s how to make a photo slideshow using MiniTool MovieMaker.
MiniTool MovieMakerClick to Download100%Clean & Safe
Step 1. Launch MiniTool MovieMaker after installation, and close the pop-up window.
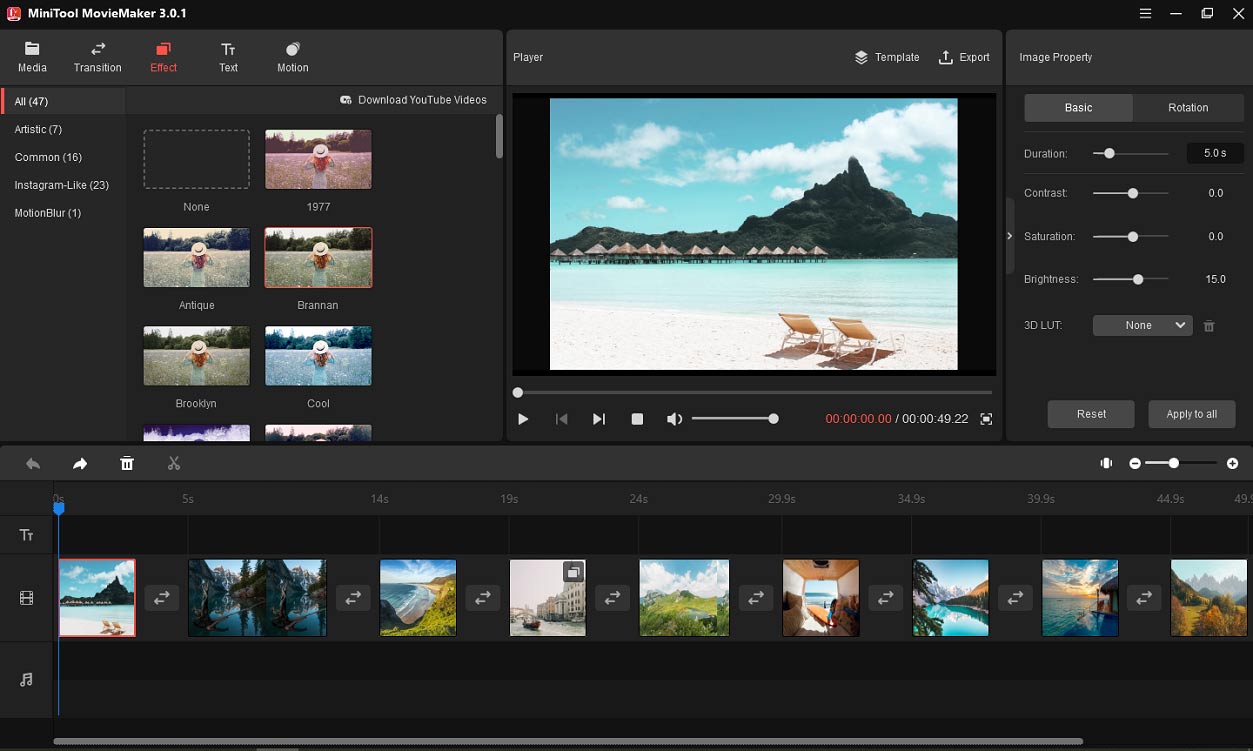
Step 2. Click the Import Media Files to add all pictures you need. Then select the first one, press Shift and click the last, then drag them into the timeline.
Step 3. To change the order of images, just drag one picture into another place on the timeline to exchange with another photo.
Step 4. Click a picture, under the Basic tab, you can change the duration and do the basic color adjustment, and click Apply to all to apply the same changes to the images on the timeline. Optionally, you can do more editing for the images like adding filters.

Step 5. To add music, click the Media > Music, choose one and click the +. Or click the Import Media Files to upload your music from the computer, and drag it to the timeline. And you can fade in and fade out the music, and edit the volume.
Step 6. Then click the Export, and you can change the filename, video format, output folder, etc. Click Export to export the slideshow with music.
Conclusion
With Google Photos slideshow, you can display all images in an album as a slideshow, but you cannot add music or download the slideshow on your computer.
If you want to create a slideshow with music, you can try MiniTool MovieMaker or other online slideshow makers to make a stunning photo slideshow and share it with friends.


User Comments :