Google Photos is a photo storage service. It can also be used as a photo collage maker. Wondering how to make a collage in Google Photos? In this post, I’m going to show you how to make and edit Google Photos collage (Try MiniTool MovieMaker to create photo slideshow).
Google Photos lets you store photos, edit photos and create a movie, animation, and photo collage from photos. This post will walk you through the steps to make a collage in Google Photos on computers and mobile phones.
How to Make a Collage in Google Photos on Computer
There are two methods of how to make a collage in Google Photos on the web.
Method 1
Step 1. Open Google Chrome and click the Google Apps icon next to your profile picture. Then Select the Photos app.
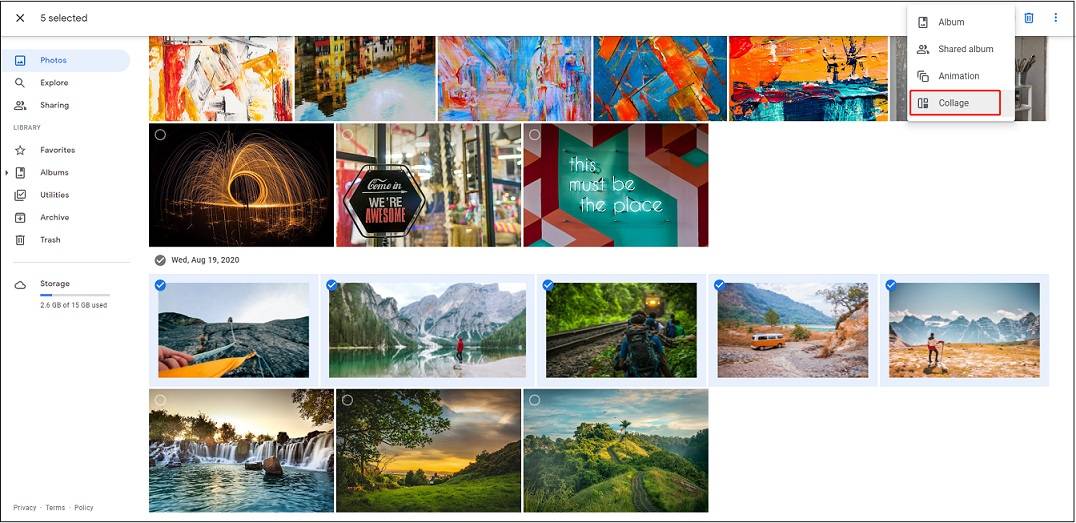
Step 2. Upload the needed photos. Hover your mouse on the desired photo and you will see the checkmark icon. Click it to select the photos you want.
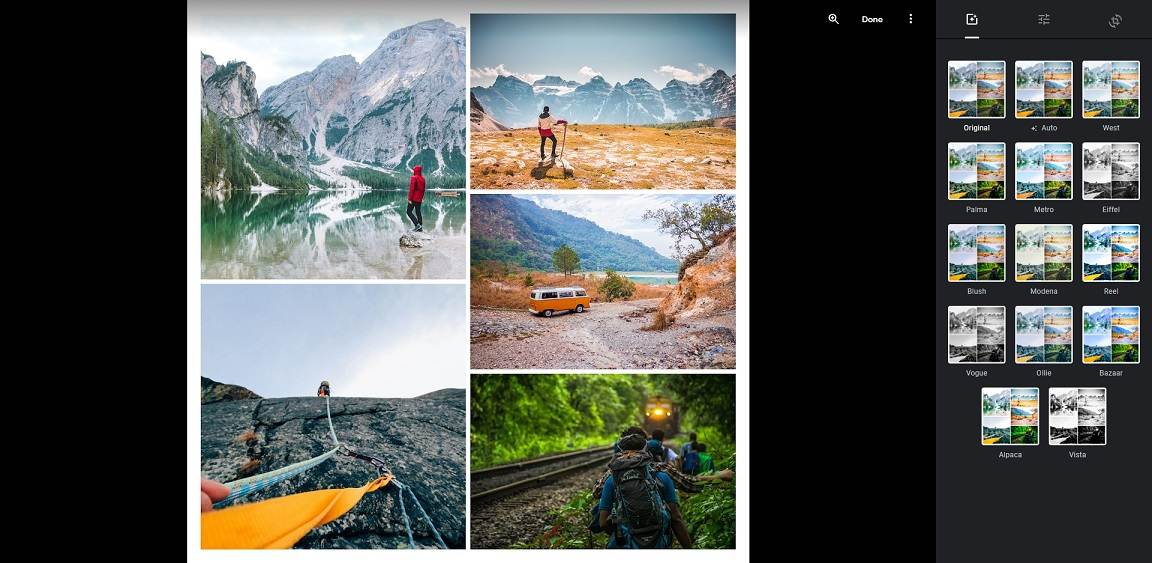
Step 3. Click the plus icon at the top of your screen and select Collage from the drop-down menu. After the process finishes, right-click on this collage and save it to your computer.

Step 4. Click the Edit icon, you can apply the wanted color filter, make basic adjustments, rotate the photo collage, and change the aspect ratio of the photo collage. Tap the three dots and choose Save copy to save the edited collage.

Method 2
Step 1. Open the Google Photos web app.
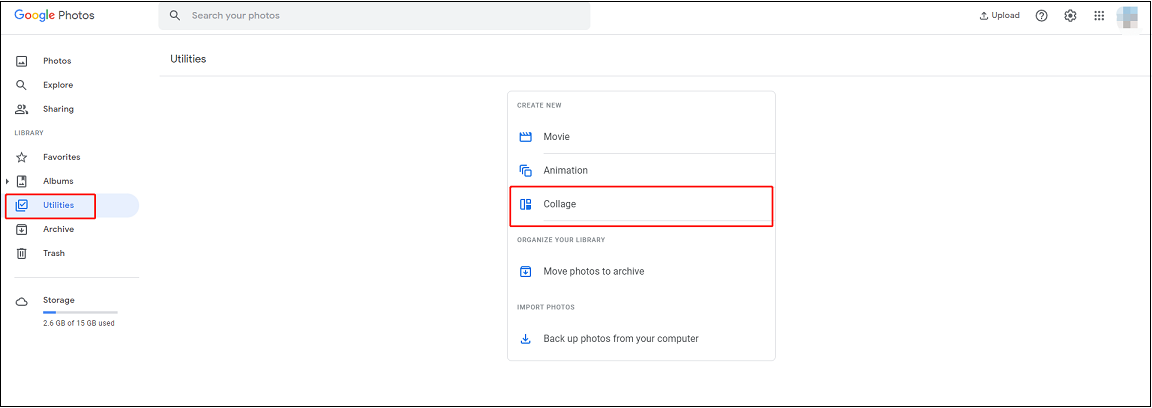
Step 2. In the left panel, tap on Utilities. Then choose the Collage option.

Step 3. Select the photos you want to use. After that, click the Create button in the top right corner of the window.
Step 4. Once done, you can edit the photo collage or click the three dots to download the collage.
Related article: How to Share Google Photos & Stop Sharing Photos with Others
How to Make a Collage in Google Photos on Android and iOS
On mobile phones, you can also use the Google Photos app to create cool collages. Here’s how to make a Google Photos collage on Android and iOS:
Method 1
Step 1. Open the Google Photos app on your phone and sign into your Google account.
Step 2. Tap Library in the lower right corner and then choose the Utilities option.
Step 3. Under CREATE NEW, choose Collage to go on.
Step 4. Pick the photos you want and click the Create button after you’ve chosen the desired photos.
Step 5. It will take a few seconds to create the collage. Once done, the created photo collage will be saved to Google Photos automatically.
Step 6. Tap Edit to edit the collage according to your needs.
Related article: Top 10 Online Photo Collage Editors
Method 2
Step 1. After launching the Google Photos app, select the photos you need.
Step 2. Click the + icon. From the popup menu, choose Collage.
Step 3. It will automatically create a photo collage for you.
Conclusion
Google Photos is a simple photo collage maker. With it, you can create and edit collages in minutes. Follow the above guide to make a collage in Google Photos.


User Comments :