It must be frustrating when you watch foreign videos with VLC but it doesn't display subtitles correctly. This post from MiniTool MovieMaker offers 5 solutions to the VLC subtitles not showing issue.
Subtitles refer to the textual translations of the film/video dialogue and they can be translated into another language of the audience. Subtitles are crucial for videos because they can help non-native audiences understand dialogues in a movie.
VLC is a free and cross-platform video player that can be used to play movies/videos in different file types. However, some users reported VLC subtitles not showing when watching videos. What can you do when you can’t watch videos with subtitles in VLC? Here’re 5 fixes.
Way 1: Check Subtitle Settings
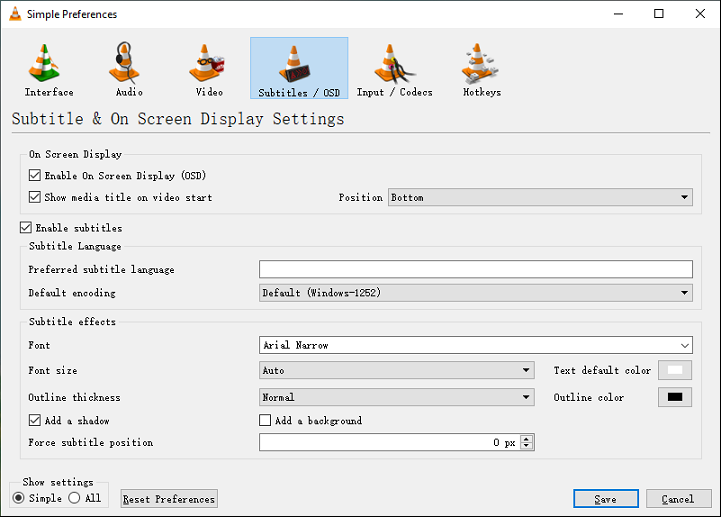
Your VLC should have the proper settings to make subtitle work with your video. The first solution to VLC not showing subtitles is to check the related settings. Follow the steps below.
- In VLC, click Tools at the top and choose Preferences from the dropdown list.
- In the Simple Preferences window, click the Subtitles / OSD option.
- Tick the box next to Enable subtitles if it’s not selected.
- In the Subtitle effects section, set Font size as Auto and Force subtitle position to 0 px.
- Click Save to apply your settings.

Way 2: Rest VLC Preferences
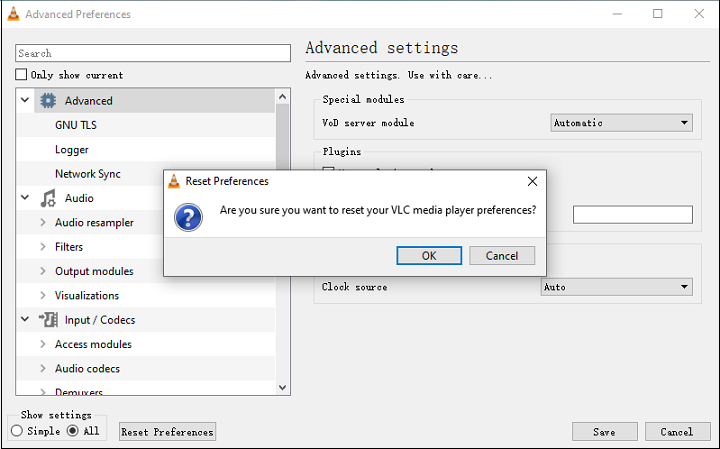
You can also reset VLC to fix the subtitles not working issue. Here’s how to reset VLC.
- In the main interface of VLC, click Tools and then select Preferences.
- At the bottom left corner of the Simple Preferences window, choose All.
- Click the Reset Preference button next to All and click OK to confirm.
- Click Save to apply the changes.

Way 3: Check Your Subtitle File
If you downloaded a movie without subtitles, you can visit some sites to download the movie subtitles. To correctly play a movie with the subtitle file in VLC, they should be stored in the same directory and have the same file name.
When you can’t watch videos with subtitles using VLC, check your subtitle file and make sure the subtitle file has the same name as the video and is saved in the same directory. After that, manually load the subtitle file to VLC by clicking Subtitle > Add Subtitle File.
Way 4: Download the Subtitle File
If your subtitle file is damaged or corrupted, it cannot work properly. If so, you can re-download the subtitle file to fix VLC subtitles not working. For instance, you download it from Subscene Subtitles, one of the best places to download subtitles for movies and TV series.
Way 5: Try Another Video Player
The above tips should get your subtitles back. However, if these methods don’t work, you can try other video playermos with subtitles. In addition to VLC, there’re many alternatives for playing videos/movies like KM Player.
Tip: How to Manually Add Subtitles to a Video on Windows
If you want to add subtitles or captions to a video, you can try MiniTool MovieMaker. It’s a video editor that lets you add titles/captions/credits to a video, crop, trim, split videos, and more.
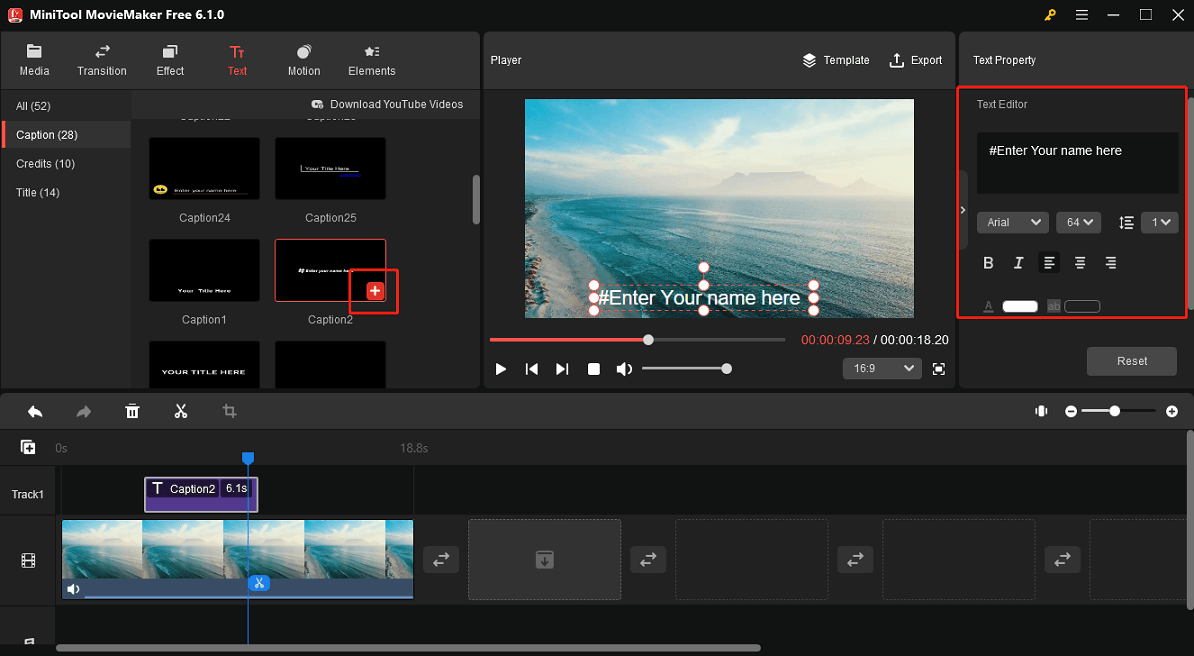
MiniTool MovieMaker provides different text styles for you to choose from. Here’s how to use MiniTool MovieMaker to add subtitles to a video.
MiniTool MovieMakerClick to Download100%Clean & Safe
Step 1. Launch MiniTool MovieMaker after the installation and close the pop-up window.
Step 2. Click Import Media Files to add your video and then drag it to the timeline.
Step 3. On the timeline, move the playhead to the position where you want the captions to start, go to Text, and click Caption on the left. Choose a text style and click + to add it and edit your text in the Text Editor.

Step 4. Click Export to export the video to your PC.
MiniTool uTube DownloaderClick to Download100%Clean & Safe
Conclusion
That’s all about the 5 methods to fix VLC subtitles not showing when this app cannot show subtitles properly. Hopefully, these methods can help you watch videos with subtitles.


User Comments :