This post will guide you through how to turn a photo into a silhouette using Photoshop and Fotor. Effortlessly give your memories a unique style using the two reliable silhouette makers.
What Is a Silhouette
Before learning how to turn a photo into a silhouette, let’s first understand what a silhouette is.
A silhouette originally referred to the pieces of cut paper. Now it is an image with a solid shape in a single color (typically black), used to represent a person, animal, object, or scene, with its edges matching the outline of the subject. A silhouette has no details inside, and it’s presented on a light background (usually white), or sometimes without a background at all.
The silhouette is different from an outline, which describes the edges of a subject in a line form, while a silhouette is a dark, solid shape that lacks depth and detail.
How to Turn a Photo into a Silhouette in Photoshop
As the industry-leading photo editing software, Photoshop provides almost all the tools for photo retouching and graphic design. If you’re seeking a silhouette maker, don’t miss this versatile application.
Here’s how to turn a photo into a silhouette using Photoshop.
Step 1: Open Your Photo with the Silhouette Maker
Launch Photoshop on your computer, then select File > Open to select your target photo from your PC and open it in the application.
Step 2: Select the Subject in the Photo
Click Select at the top menu bar and choose Subject from the dropdown list. Then Photoshop will automatically detect and select the main subject in your photo.
Then, the dotted lines will outline the shape of the target object. To adjust details, for example, remove unwanted selections from the silhouette, press Q on the keyboard. The red areas will not be included in your silhouette. Next, use the Brush tool and paint over the areas you don’t want.
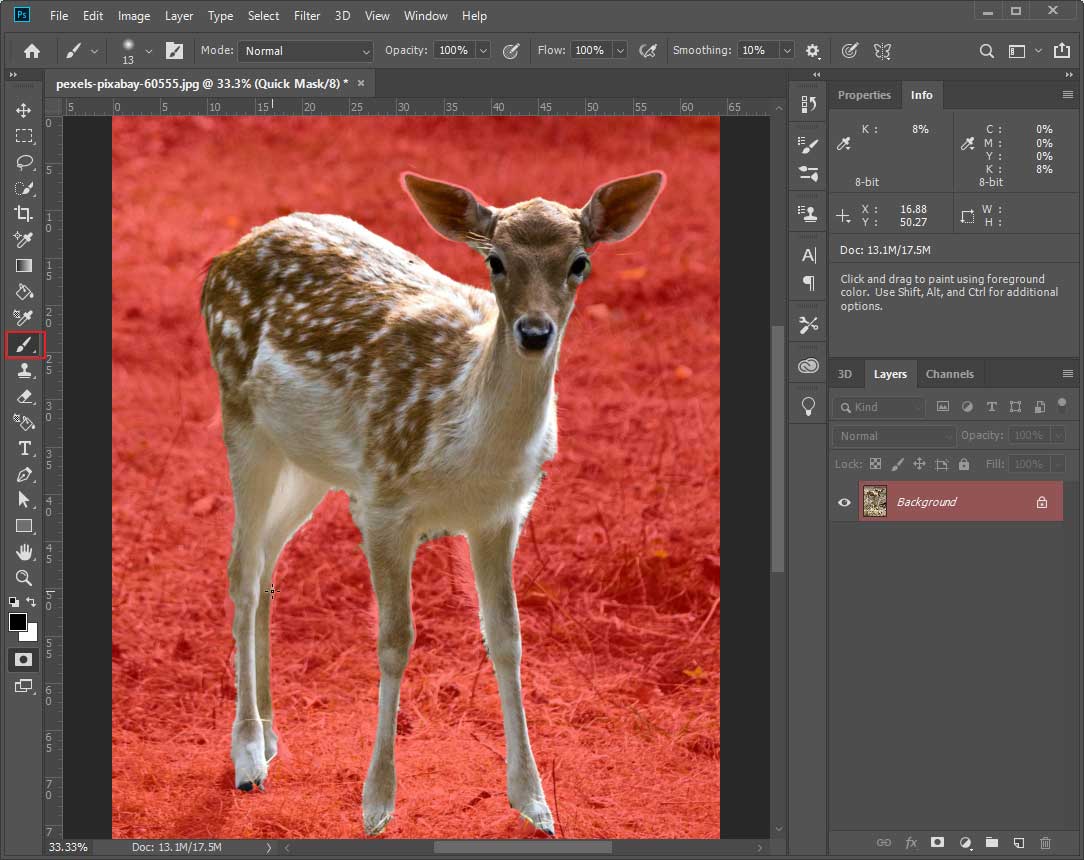
Once done, press Q again to switch back.
Step 3: Remove the Background
Click the Add layer mask icon in the lower-right corner to remove the background from the subject.
Step 4: Turn the Subject into a Silhouette
Option 1: Create a Graphics Silhouette
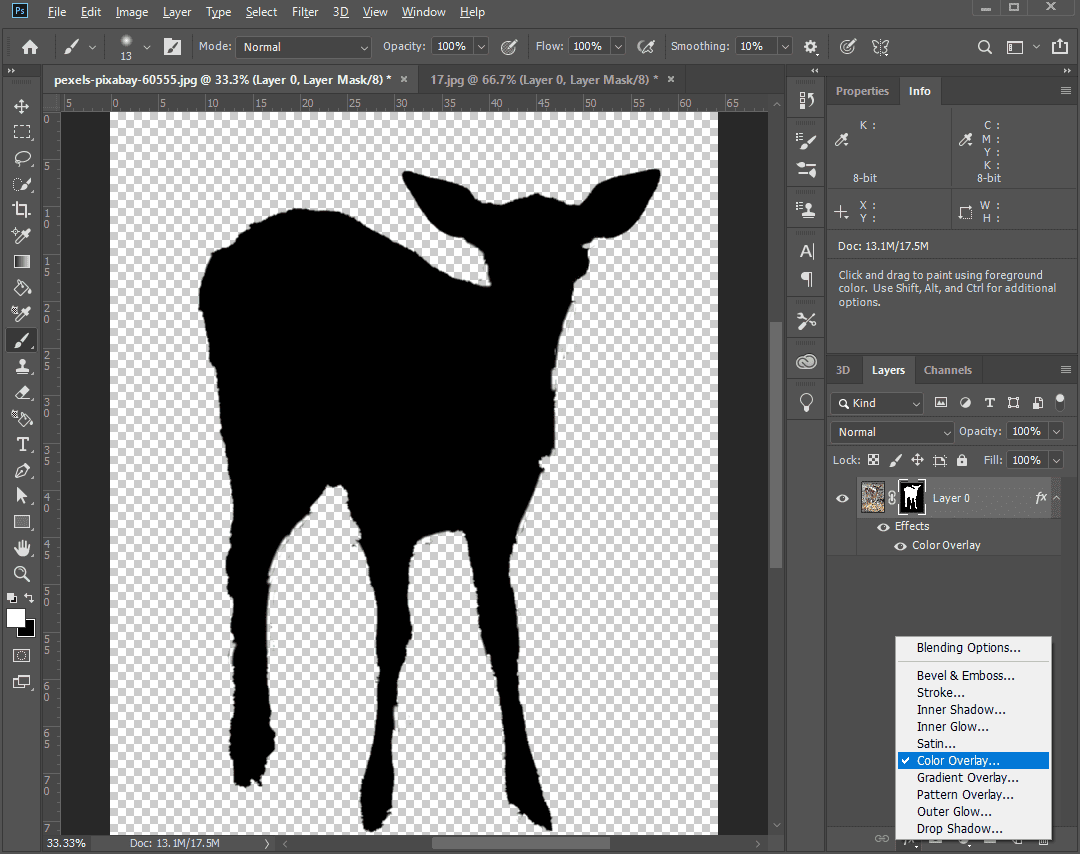
Click the Add a layer style button (the fx icon) and choose Color Overlay from the menu. Next, set the color to black and click OK.
Alternatively, you can add a new layer as the background and set the color to white. Again, add a blank layer and drag it above the layer of your subject. Select the black layer, hold down the Ctrl key, and click the mask thumbnail to load the subject selection from the mask onto the blank layer. Finally, set the foreground color to black and fill the subject section with black.
Option 2: Create a Realistic Silhouette
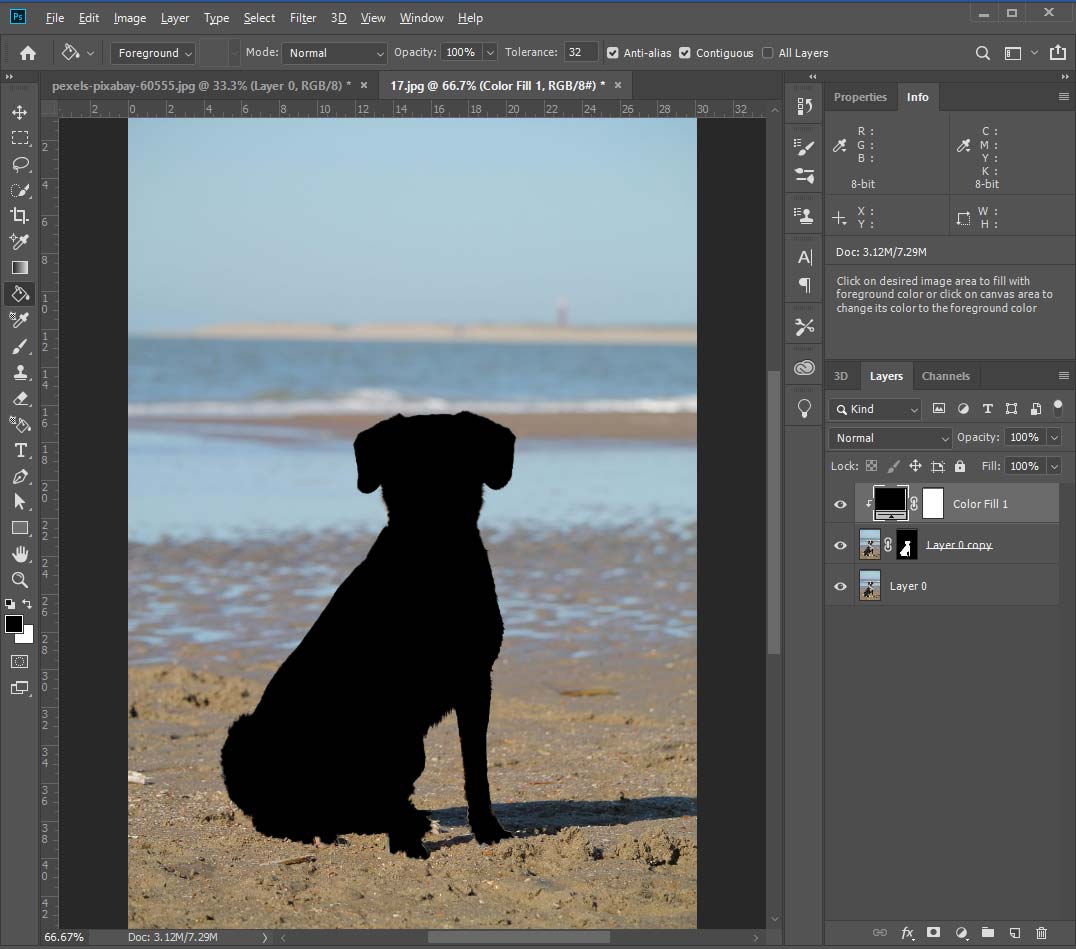
After opening your photo, duplicate the layer by selecting the layer and pressing Ctrl + J, then name the duplicated layer as you like. Then, select the duplicated layer, select the subject, and remove the background with the steps above.
Next, add a new black color fill layer by clicking Layer > New Fill Layer > Solid Color. Right-click the black color fill layer and choose Create Clipping Mask, then the main subject will turn black and be present on the original background.
Step 5: Save Your Silhouette
Click File > Save as and choose your preferred format to save the silhouette.
How to Turn a Photo into a Silhouette with Fotor
Fotor, a powerful online photo editor, utilizes the power of AI to simplify the editing process. If you want to convert an image to a silhouette in just a few clicks, Fotor is a fantastic choice. It offers various silhouette filters to help you make a silhouette on a transparent or other creative backgrounds.
How to turn a photo into a silhouette in Fotor? Follow the steps below.
Step 1: Upload Your Photo to Fotor
Navigate to Fotor.com and sign in with your account. Click AI Photo Editor on the homepage, then click Upload Image to add your photo.
Step 2: Apply a Silhouette Effect
Select Effects on the left toolbar, then switch from Filters to Effects, and click Silhouette to expand all the options available. Then, choose a Silhouette effect to turn your photo into a Silhouette.
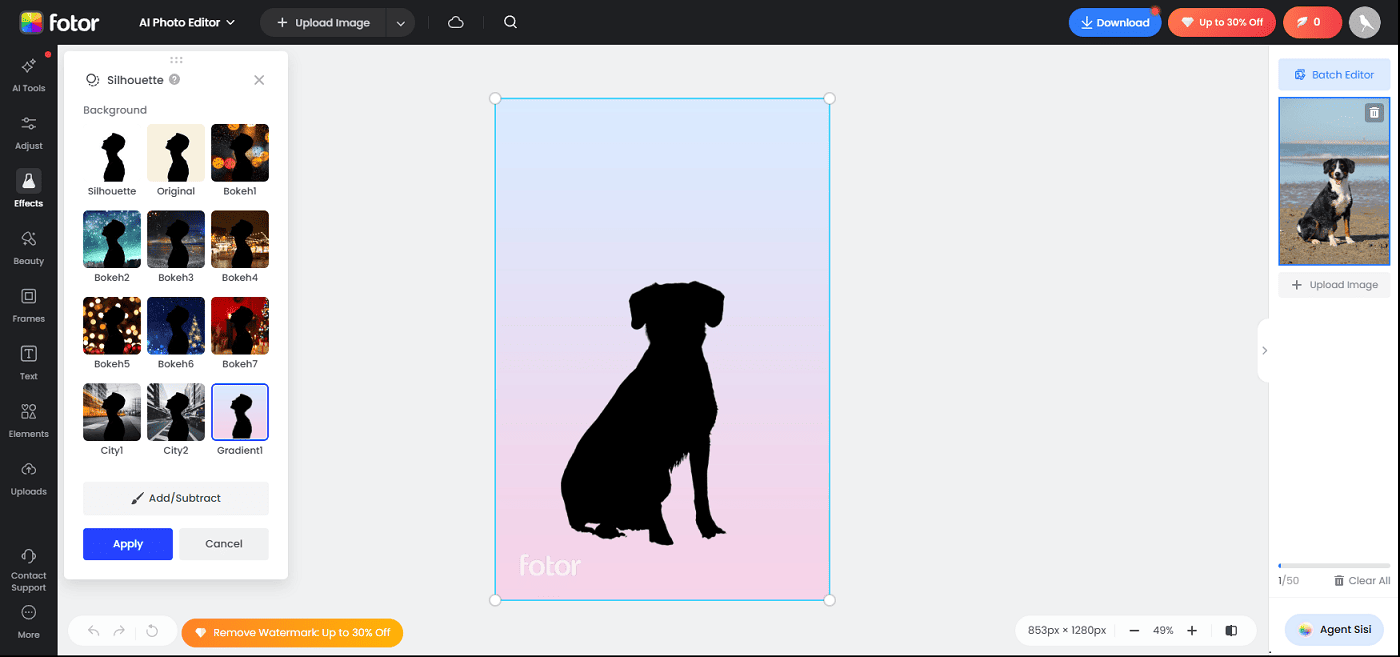
Preview the silhouette. If you’re satisfied with the result, click Apply to save changes.
Step 3: Save Your Silhouette
Click the Download button and choose the format, PNG or JPG, to save the photo.
Conclusion
It’s not difficult to turn a photo into a silhouette. While Photoshop requires multiple settings and actions to complete the task, it offers precise control over the details of the silhouette. Fotor is more convenient and easier to use, but it doesn’t provide additional settings to modify the silhouette.
About The Author

Position: Columnist
Cora is a tech writer specializing in digital media workflows, with over six years of hands-on experience in video post-production, media transcoding, and screen capture. Her writing is always clear and practical. Cora also produces in-depth software reviews for users across skill levels to help them find the right tool and enjoy video editing.
User Comments :