What Is Sepia Tone
Sepia tone is a photographic effect that applies a reddish-brown tint to an image, transforming it into a warm, monochromatic look. I often see this effect used in old photographs, where it was originally created through a chemical process to improve image longevity. Over time, sepia tone has become a popular stylistic choice rather than just a preservation technique.
When I add sepia tone to an image, the original colors are replaced or blended with brown hues, which reduces visual complexity and creates a softer, more cohesive appearance. This effect is commonly used to evoke a sense of nostalgia, making photos feel more classic, vintage, or even emotional.
Today, sepia tone is widely used in digital editing. Whether I’m enhancing portraits, landscapes, or historical-style images, applying a sepia filter is a simple way to give photos a timeless and artistic touch without heavy adjustments.
How to Add Sepia Tone to Images
In this section, I’ll demonstrate how to add sepia tone to images using Photoshop, Lunapic, and PineTools.
Method 1: Use Photoshop
As the industry-leading image editing software, Photoshop offers a wide range of color filters, such as grayscale conversion. Here’s how I add a sepia tone to an image in Photoshop.
Step 1: Open the Photo
After running Photoshop, click File > Open to open the target photo.
Step 2: Add a Black & White Adjustment Layer
Go to Layer > New Adjustment Layer > Black & White. This removes the original colors and prepares the image for the sepia effect.
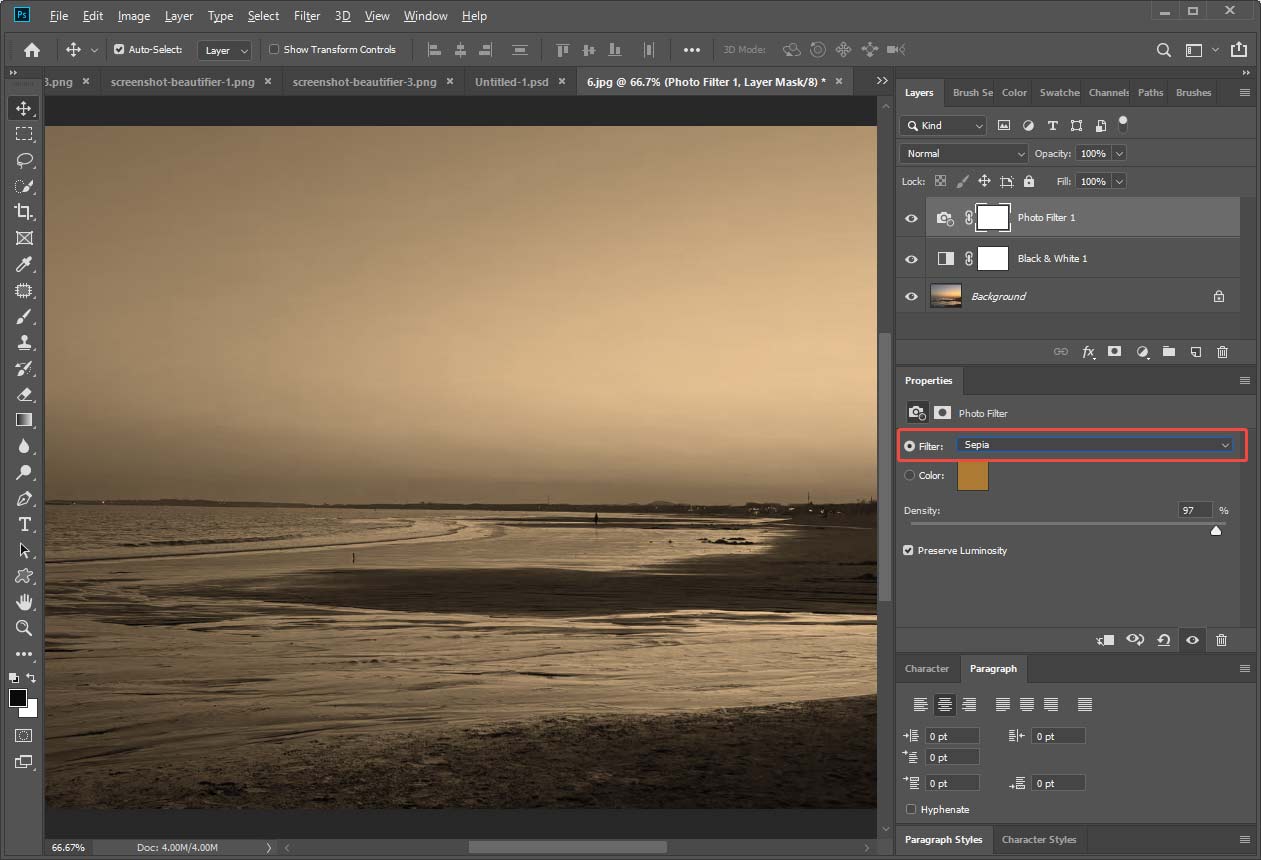
Step 3: Apply a Photo Filter
Next, navigate to Layer > New Adjustment Layer > Photo Filter. Click OK in the pop-up New Layer window. Then, choose the Sepia filter in the properties panel and adjust the Density slider to control the intensity of the effect.
Step 4: Fine-Tune the Effect (Optional)
For a more customized look, tweak brightness, contrast, or even use the Color Balance tool to refine the tones.
Step 5: Save the Image
Go to File > Save As to export the edited image.
Method 2: Use Lunapic
When I need quicker results, Lunapic is a more suitable option. As a web-based tool, it doesn’t require signing in, and I can apply a sepia tone to an image in just a few clicks. Follow the steps below to get started.
Step 1: Upload the Image
Visit the official website of Lunapic (https://www2.lunapic.com/editor/). Click Upload to import the image from my computer.
Step 2: Apply the Sepia Effect
After uploading the image, click Filters and select the Sepiatone option. The effect will be applied instantly.

Step 3: Download the Image
I can preview the result directly in the interface. Then, click File and choose Save Image to download the photo with the sepia tone effect to my device.
Method 3: Use PineTools
PineTools is another versatile online tool that provides multiple image editing features. I can perform basic edits like cropping an image or rounding its corners. In addition, it offers various effects, such as sepia, pixelate, and more. The process of adding a sepia effect is also simple and straightforward.
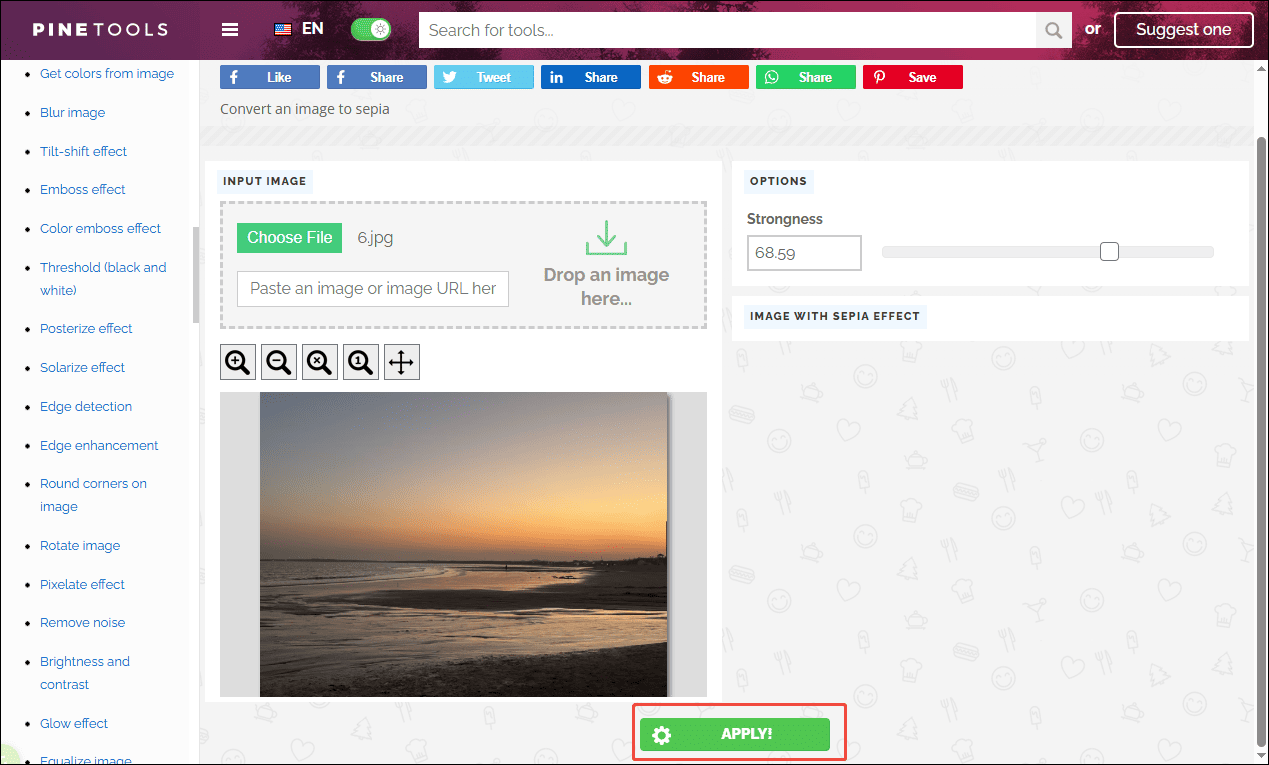
Step 1: Open the Sepia Tone Tool
Go to the sepia image tool on the PineTools website (https://pinetools.com/sepia-effect-image). Then, click Choose File to upload an image from my computer.
Step 2: Apply the Sepia Effect
PineTools provides a Strongness slider that allows me to adjust the intensity of the sepia effect. After adjusting the level, click APPLY. The tool will automatically process the image and generate the sepia-toned version.
Step 3: Download the Image
Once the result appears, I can preview the effect. Then, click Download to save the edited image to my device.

Conclusion
Adding a sepia tone to images is a simple yet effective way to create a warm, vintage look. This post explains what sepia tone is and how to add a sepia tone to images using Adobe Photoshop, Lunapic, and PineTools. Each tool is easy to use and delivers effective results. Choose the one that best fits your needs and start creating timeless photos right away!
About The Author

Position: Columnist
Alice is a tech writer at MiniTool, specializing in tutorials and guides on video editing and screen recording. She stays up to date with the latest tools and techniques to ensure her content is accurate and easy to follow. By combining hands-on testing with continuous learning, Alice aims to help readers solve tech problems efficiently.
User Comments :