A vignette is a dark, blurred, or shadowed border around the edge of a photo or video. Adding a vignette effect to a photo darkens or lightens the edges, creating a subtle border that guides the viewer’s eye to the central subject and reduces distractions from the edges.
Dark vignettes can create a vintage, nostalgic feel, and white vignettes can add a soft, ethereal, or dreamy look to the picture, effectively adjusting the image’s mood and atmosphere. So, how to add a vignette to a photo? I’ll share three simple methods.
How to Add a Vignette to Photos
Here are one desktop application and two online tools to create vignette effects for photos.
Method 1: Use Windows Photos
Photos is a free and built-in photo viewer and organizer for Windows 10 and 11, designed to play, manage, and share photos and videos. Additionally, the Photos app offers some image editing tools. It can crop images flexibly, adjust the clip’s color and light, draw on the photo, apply filters, blur, and remove backgrounds, etc.
How to add a vignette to a photo using the Photos app? Follow me.
Step 1: Open the target photo with the Photos app
Right-click the desired photo, hover over the Open with option from the dropdown list, and select Photos.
Step 2: Add a vignette
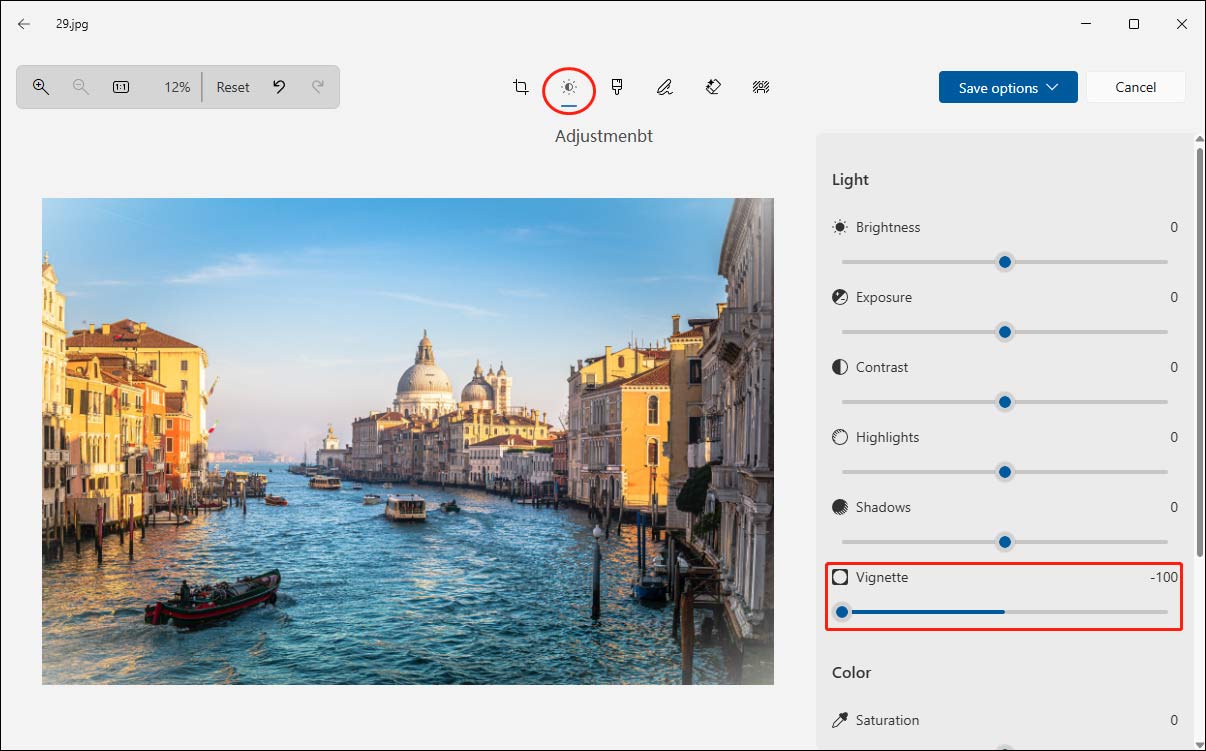
In the preview window, click Edit in the upper left corner to open the editing window. Next, click the Adjustment icon at the top toolbar. On the right section, go to Vignette, drag the slider to the left to add a white vignette, or drag the slider to the right to add a dark vignette.
Step 3: Save the photo
Click the Save options in the upper right and select Save as copy or Save to save the photo to my computer.
Method 2: Use Fotor
Fotor is one of my favourite online photo editors. It provides extensive editing features, such as various effects (vintage, anime, grayscale, artistic, oil painting, and more), brightness & color tools, diverse frames and elements for decoration. Besides, it offers AI-powered tools, such as skin retouch and AI art effects, to transform my photos. Additionally, I also found that Fotor lets me add a vignette effect to a photo online.
Step 1: Upload the target photo to Fotor
Go to the Fotor website and sign in. After entering the main editing page, click Upload Image to open the target picture.
Step 2: Add a vignette
I found that Fotor offers two ways to add a vignette to a photo.
Option 1:
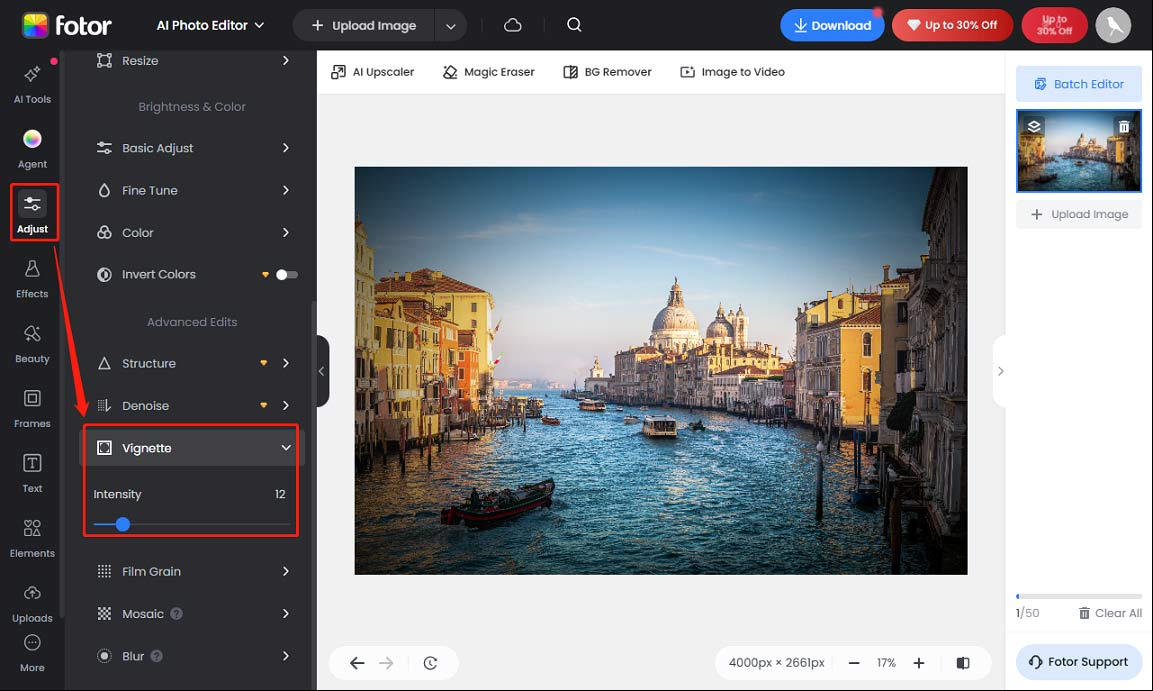
From the left sidebar, click Adjust, and scroll down to the Advanced Edits section. Click Vignette and move the Intensity slider to the right to add a dark vignette.
Option 2:
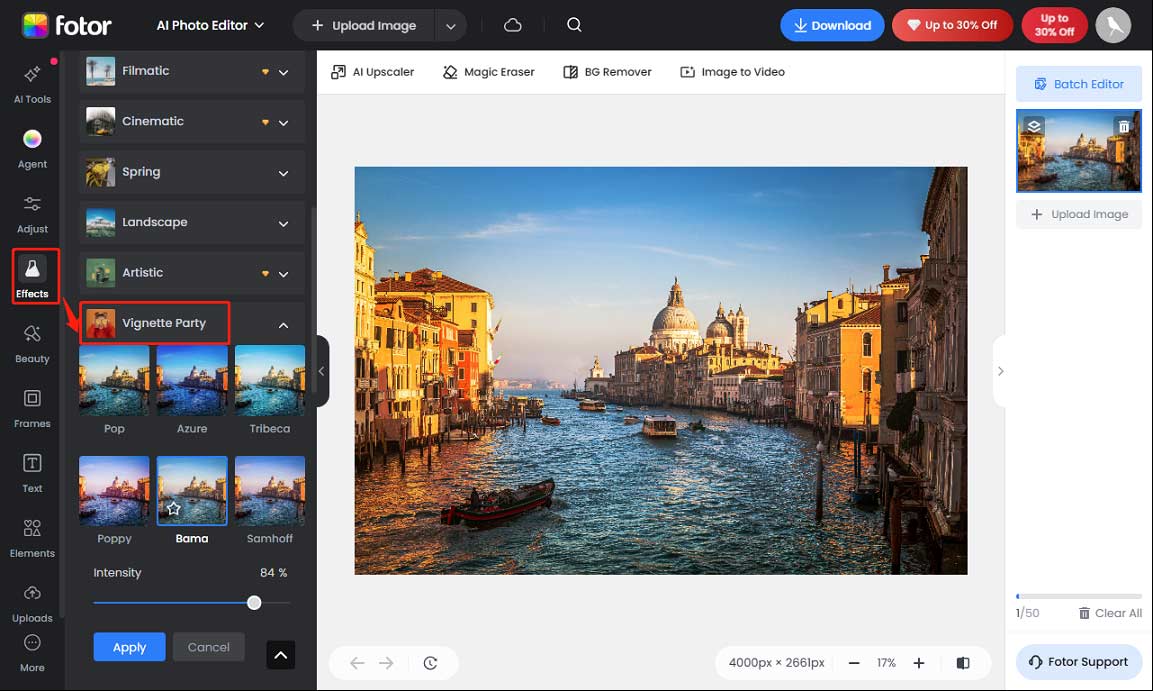
Select Effects on the left sidebar, scroll down to browse the effect category, and click Vignette Party. Next, I’ll see six vignette effects. Click one effect to apply it, drag the Intensity for adjustment, and click Apply to add the vignette effect to the photo.
Step 3: Download the photo
Click the Download option at the top toolbar, then select the output format, PNG or JPG, and click Download again to save the photo. It’s free to create vignette effects within Fotor, and it doesn’t leave a watermark on the final photo.
Method 3: Use Lunapic
Lunapic is a free online photo editor that offers a variety of tools and effects for editing and enhancing images. It can also add a vignette to a photo. Its key feature lies in the support for custom colors of the vignette.
Step 1: Locate the vignette tool in Lunapic
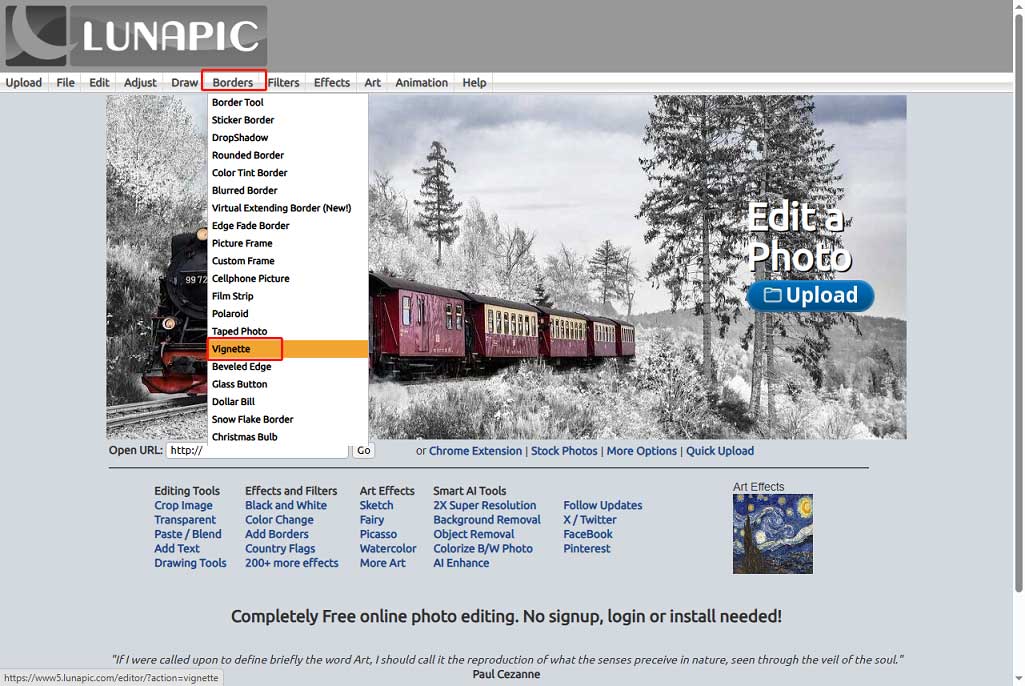
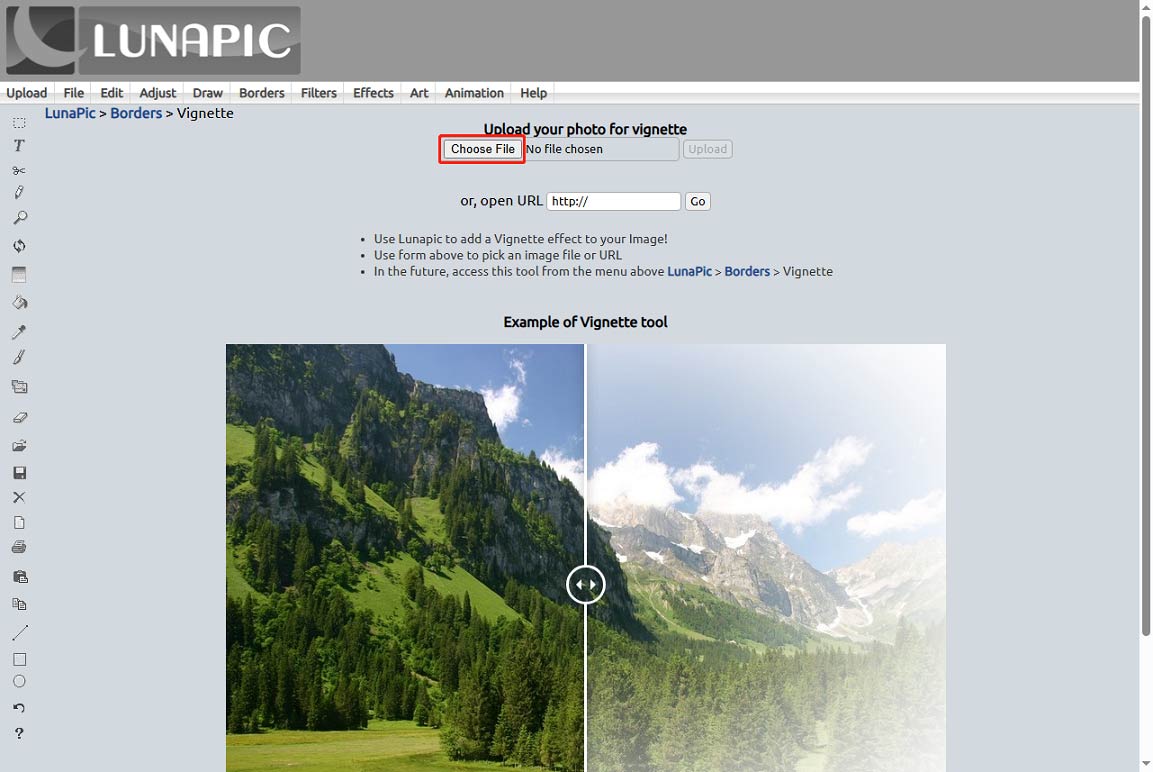
Navigate to the Lunapic website, hover over Borders in the top menu, and select Vignette from the dropdown list.
Step 2: Open the desired photo
Click Choose File to open the target photo from my computer.
Step 3: Add a vignette
After the image is uploaded, click the Color tab to choose a color for the vignette and change the Radius and Sigma numbers if needed. Click Apply to add a vignette.
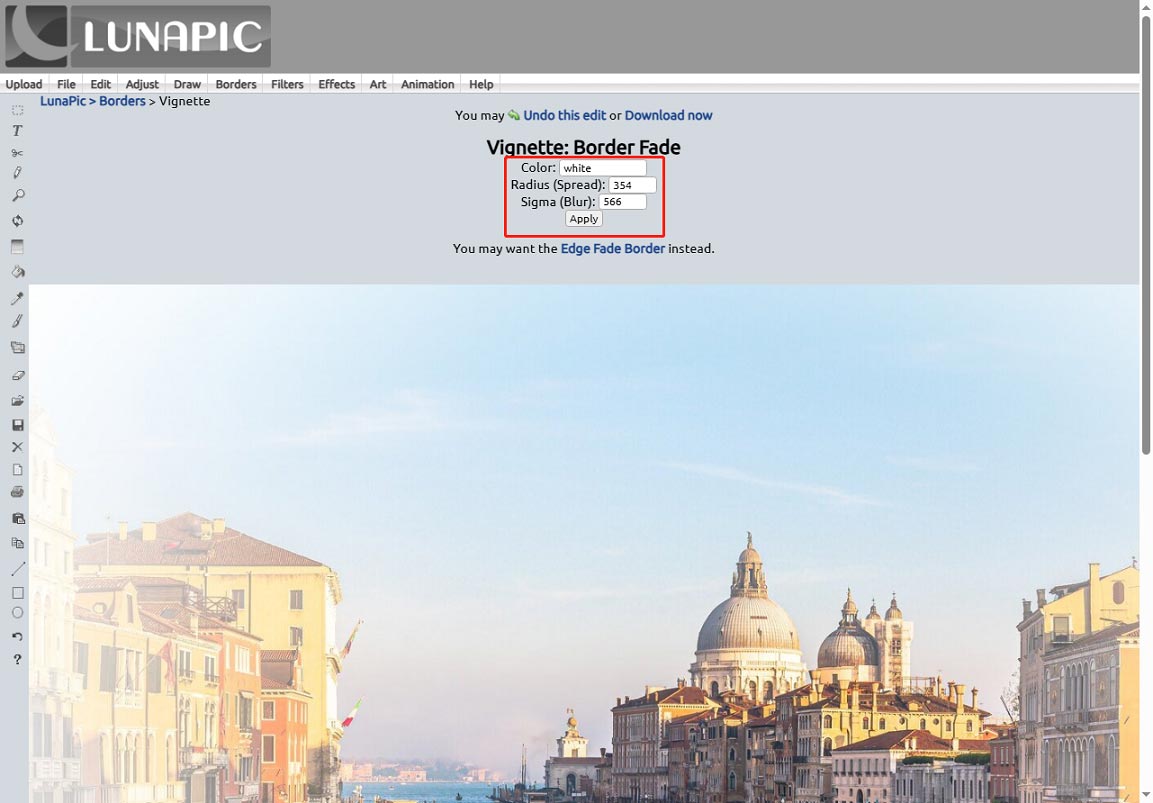
Finally, click Save below the image preview to download the photo.
![How to Add Vignette in CapCut [Step-by-Step Guide]](https://images.minitool.com/moviemaker.minitool.com/images/uploads/2024/10/how-to-add-vignette-in-capcut-thumbnail.jpg)
Conclusion
In this post, I’ve introduced three free ways to add a vignette to a photo. All of them are easy to use and can create professional-looking vignettes for my pictures.
About The Author

Position: Columnist
Cora is a tech writer specializing in digital media workflows, with over six years of hands-on experience in video post-production, media transcoding, and screen capture. Her writing is always clear and practical. Cora also produces in-depth software reviews for users across skill levels to help them find the right tool and enjoy video editing.
User Comments :