When I want to give my photos a more artistic and timeless look, turning them into oil paintings is always a great choice. Instead of relying on complex design skills or traditional painting techniques, I can easily convert photo to oil painting using digital editing tools.
How to Convert Photo to Oil Painting
In this section, I’ll show how to convert a photo to an oil painting using Photoshop and online tools, including BeFunky and PortraitArt. Let’s take a closer look at each option.
Method 1: Use Photoshop
Adobe Photoshop is a leading photo editing software that allows me to create, enhance, and manipulate images using layers, masks, and a wide range of advanced tools. With its powerful editing features, I can retouch portraits and apply various artistic effects, like a rain effect, to my photos.
When it comes to converting a photo to an oil painting, Photoshop offers a straightforward process with high-quality results. By using its built-in Oil Paint filter, I can easily transform an image into a realistic painting style. In addition, it provides adjustable parameters such as stylization, cleanliness, and scale, giving me more control over the final effect. Follow the steps below to get started.
Step 1: Open the Photo in Photoshop
Open Photoshop, click File, and choose Open to select the target photo from the local storage.
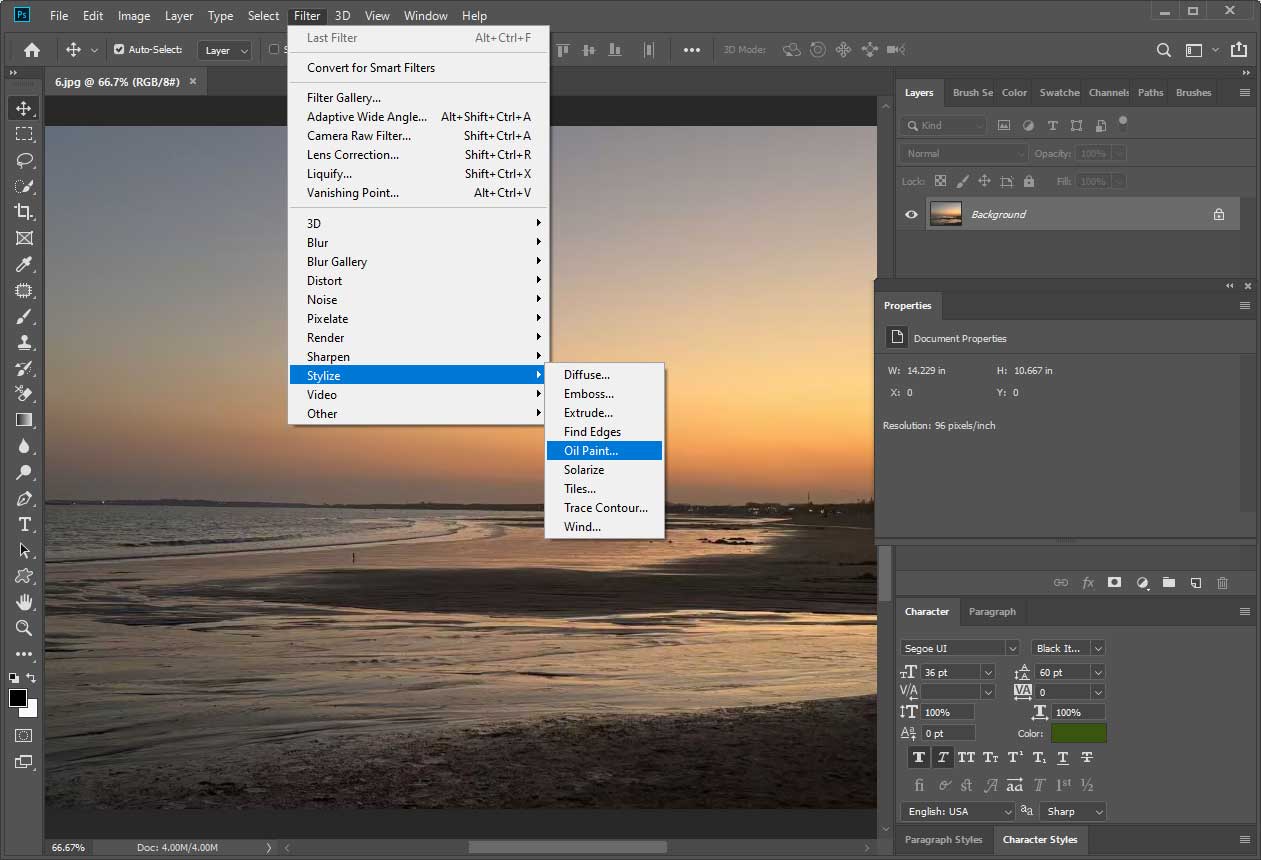
Step 2: Apply the Oil Paint Filter
Click Filters at the top of the menu. Choose Stylize and click Oil Paint…. Then, adjust parameters like stylization, cleanliness, scale, and bristle detail by dragging the slider. The effect is previewed in real time, allowing me to fine-tune the result before clicking OK.
Step 3: Save the Final Oil Painting
Once editing is finished, click File, select Save as, and follow the on-screen prompts to save the oil painting to the computer.

Method 2: Use BeFunky
BeFunky is an all-in-one online photo editing platform that offers a wide variety of easy-to-use editing tools. With its built-in features, I can remove backgrounds, create photo collages, and resize images in bulk. More importantly, it provides powerful photo-to-art effects, allowing me to transform a photo into different artistic styles, including oil paintings, cartoons, sketches, and watercolor artworks.
Below is a step-by-step guide to help me get started.
Step 1: Upload the image to the Photo-to-Painting Tool
Go to BeFunky’s photo-to-painting page (https://www.befunky.com/features/photo-to-painting/) in the browser. Click Upload Your Photo Now to import the image.
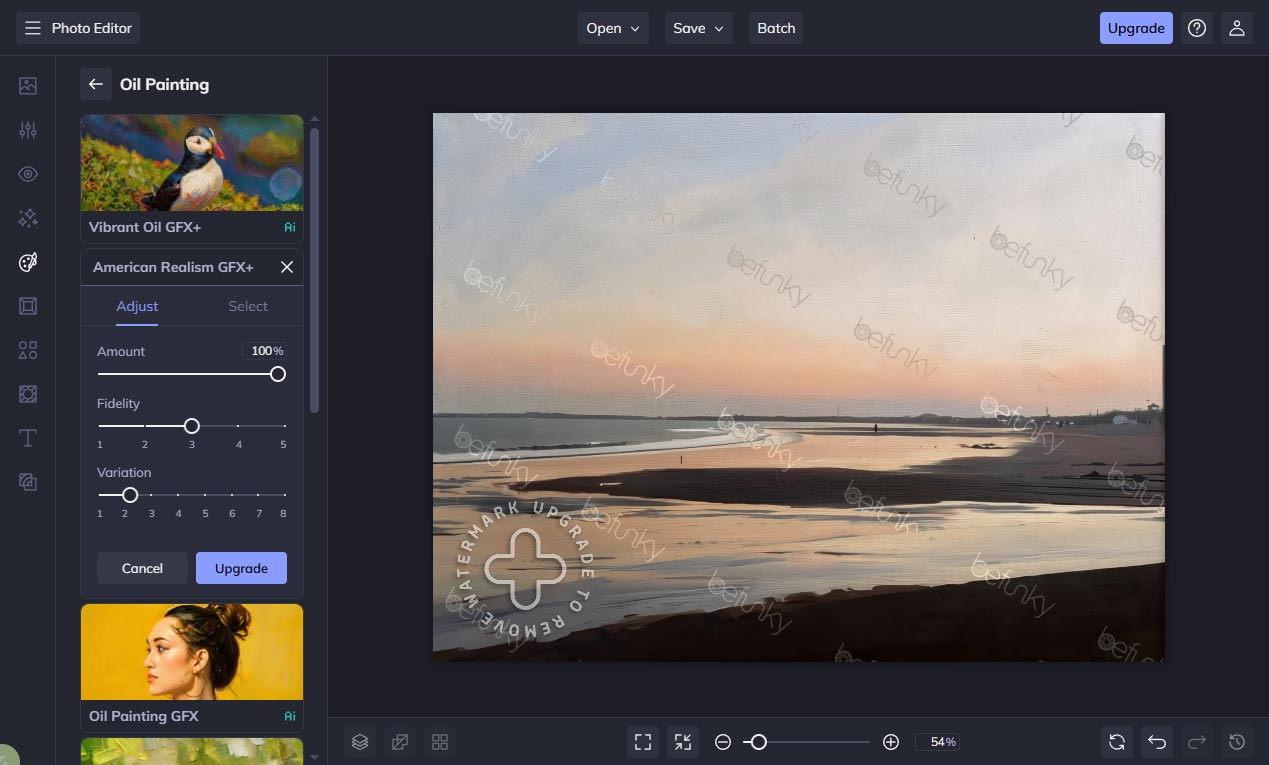
Step 2: Apply the Oil Painting Effect
Select Oil Painting in the left Artsy menu. Then, select the desired oil painting effect, and BeFunky will automatically transform the photo into an oil painting on the canvas. Then, click the Settings icon to adjust the image. By adjusting parameters like amount, fidelity, and variation, I can achieve a more natural and detailed oil painting effect.
Step 3: Save the Oil Painting
Click Save, choose Computer, and download the final oil painting to the device.

Method 3: PortraitArt
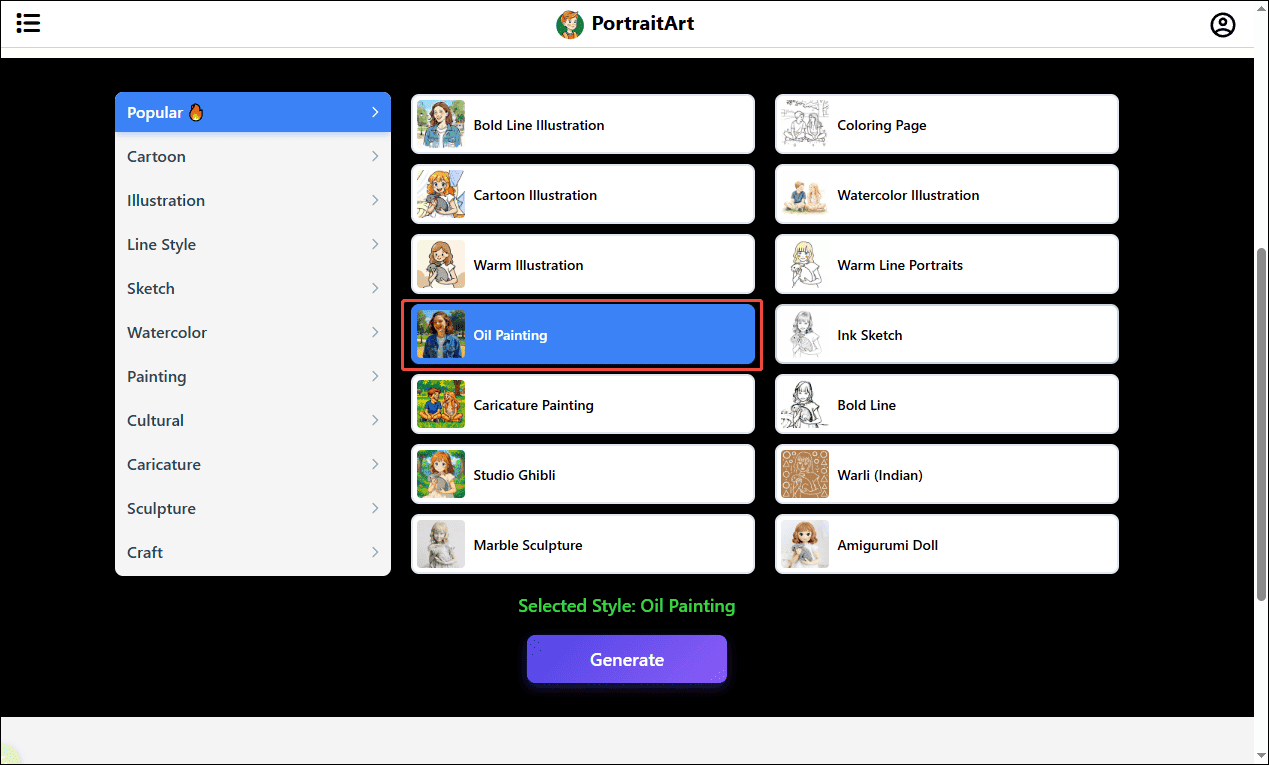
PortraitArt is an online platform that specializes in transforming photos into stunning artistic works. Powered by AI technology, it offers multiple artistic styles, including sculptures, 3D cartoons, pencil sketches, and more. As a one-click photo to oil painting converter, it allows me to quickly turn a photo into an elegant oil painting effect in just a few minutes.
How to convert photo to oil painting online using PortraitArt? Here is the detailed guide.
Step 1: Upload a Photo to PortraitArt
Visit https://portraitart.app/photo-to-oil-painting and sign in with my account. Click the Upload icon to import the image.
Step 2: Generate the Oil Painting Effect
Click Generate to start the conversion. After a few seconds, the image will be automatically transformed into an oil painting and displayed on the screen.
Step 3: Download the Oil Painting
Click the Download icon, choose the desired format, and save the final image to my device.
Conclusion
In this post, I explored three effective ways to convert photo to oil painting, including Adobe Photoshop, BeFunky, and PortraitArt. Photoshop offers precise control, while online tools like BeFunky and PortraitArt provide more convenient and beginner-friendly solutions. It’s your turn now! Follow my steps and transform your photos into stunning oil paintings easily.
About The Author

Position: Columnist
Alice is a tech writer at MiniTool, specializing in tutorials and guides on video editing and screen recording. She stays up to date with the latest tools and techniques to ensure her content is accurate and easy to follow. By combining hands-on testing with continuous learning, Alice aims to help readers solve tech problems efficiently.
User Comments :