Watercolor is a classic and timeless art medium. With the advent of editing technology, creating a watercolor effect in photography is easy. This post will show you how to turn photo into watercolor using BeFunky, FlexClip, and Photoshop.
Creating a watercolor painting is both enjoyable and challenging. If you want to make a quick watercolor painting without hassle, you’ve come to the right place. This tutorial will walk you through the exact steps to turn photo into watercolor painting using 3 effective tools.
How to Turn Photo into Watercolor Online: 2 Tools
Online platforms stand out for their flexibility and convenience, especially when you don’t want to download any software. Tools like BeFunky and Flexclip allow you to turn photo into watercolor painting with just a few clicks.
Method 1: BeFunky
BeFunky is a robust online photo editor suitable for all users, regardless of their level. The user-friendly platform features an intuitive and straightforward interface. Besides, it provides a wide collection of tools for photo editing, collage making, and graphic design.
When it comes to converting photos to watercolor paintings, Befunky offers multiple exclusive filters created by its team to turn your photos into art. Moreover, with built-in AI technology, this platform enhances details like textures, shadows, depth, and others, making it easy to create a captivating result.
Here is how to turn a photo into a watercolor using BeFunky.
Step 1: Navigate to the Official Website
Head to BeFunky’s official website for watercolor filters (https://www.befunky.com/features/photo-to-watercolor/) in your browser.
Step 2: Import Your Photo
Click Upload Your Photo Now to import your photo.
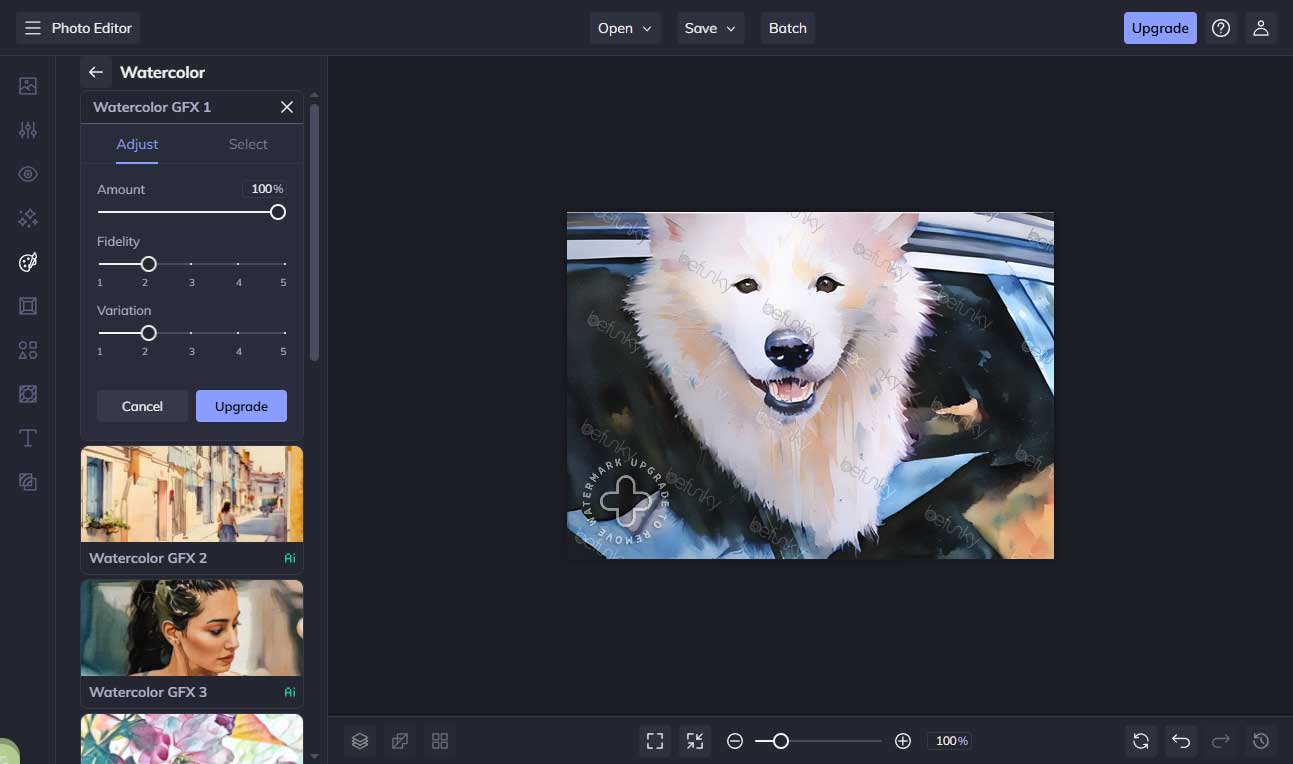
Step 3: Choose a Watercolor Filter
Scroll down to select your desired watercolor filter. Next, click the Settings icon to adjust its amount and other properties. You can see the variation in the player section.
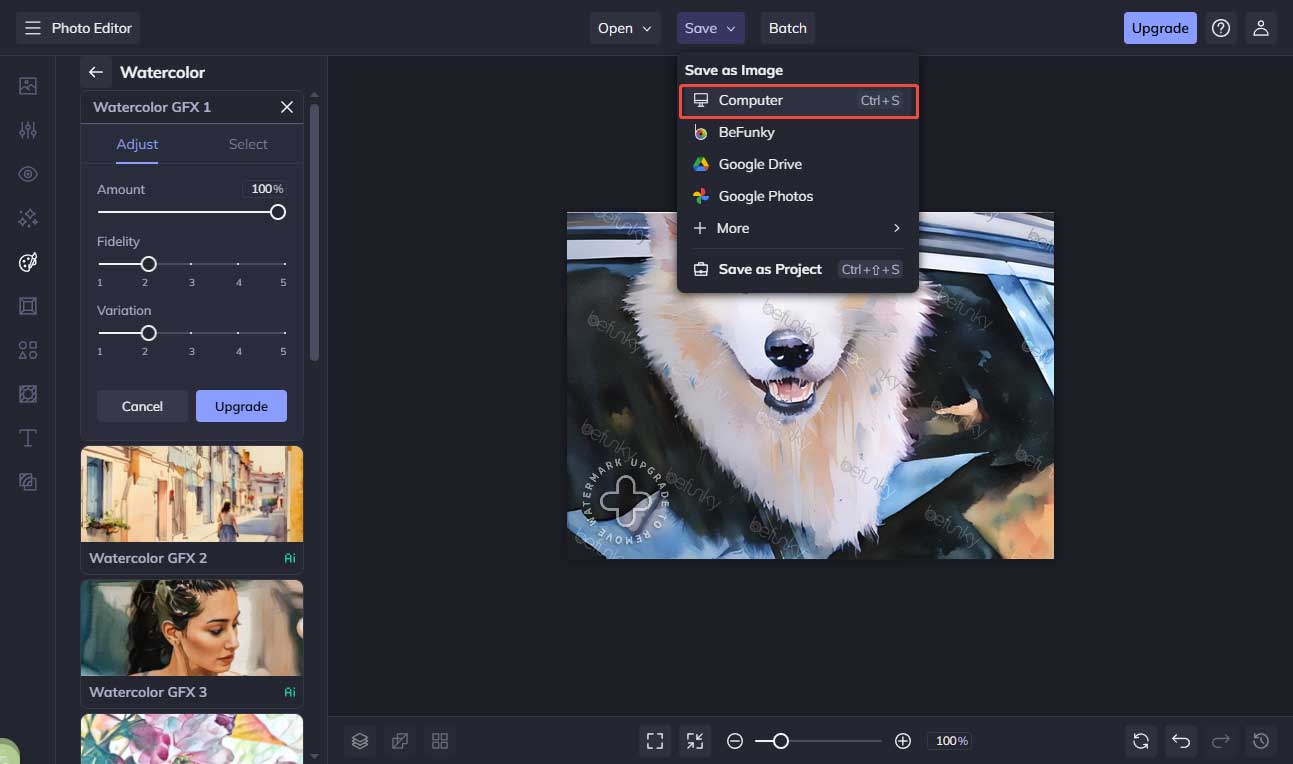
Step 4: Export the Final Photo
Click the Save tab at the top toolbar. Select the Computer option to save the final photo to your computer.
Method 2: FlexClip
FlexClip is not only an all-in-one online video editor with extensive templates, but it also serves as a photo editor that offers various editing tools. Powered by AI, it enables you to create transparent images, remove the background, and so on.
FlexClip offers the updated image model to help you turn your photos into popular styles, including Ghibli, oil painting, 3D Cartoon, and more. The process is easy and takes only a few clicks, resulting in an engaging visual look.
Here is how to turn a photo into a watercolor using FlxClip.
Step 1: Visit the Official Website
Go to FlexClip’s official website for watercolor tools (https://www.flexclip.com/tools/photo-to-watercolor/) in your browser.
Step 2: Import Your Image
Click Upload Image to import your photo.
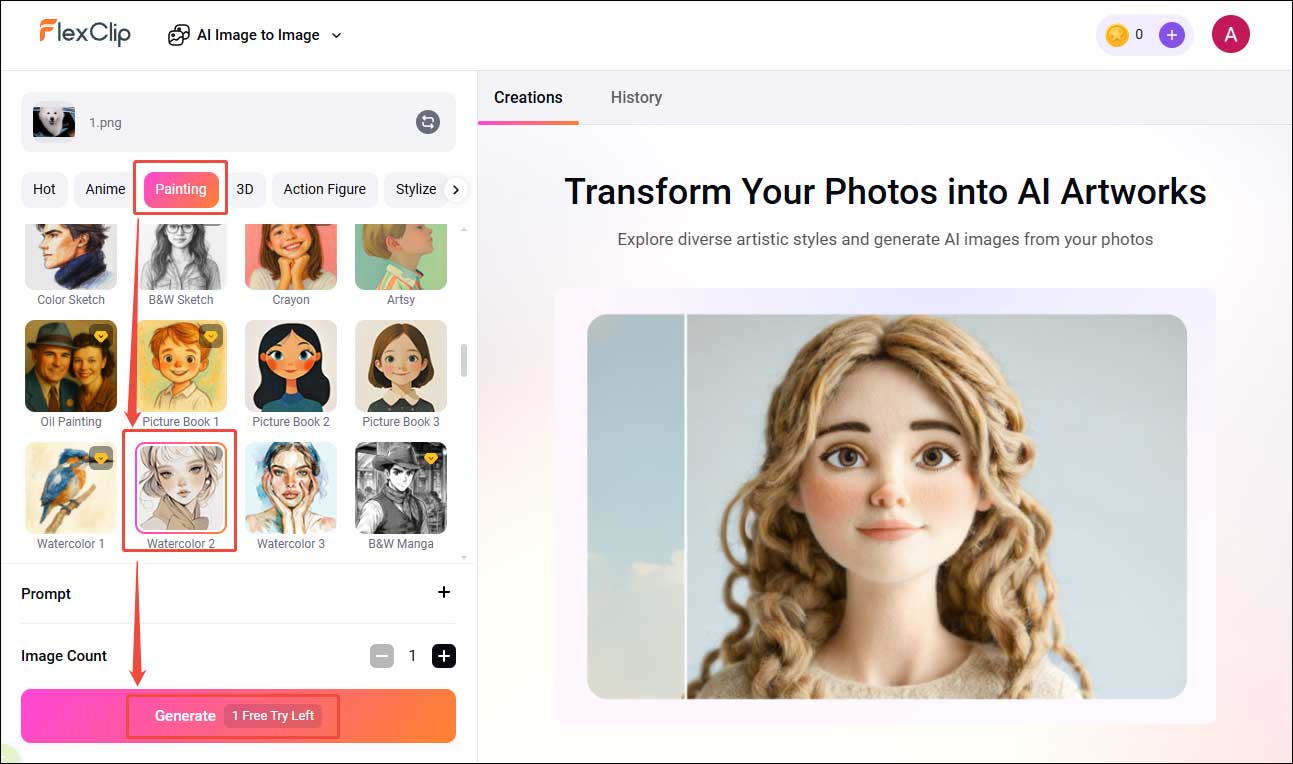
Step 3: Select a Proper Watercolor Effect
Scroll down to the Painting category to choose a desired watercolor template. Then, click Generate. It takes a few seconds to see the final picture in the right section.
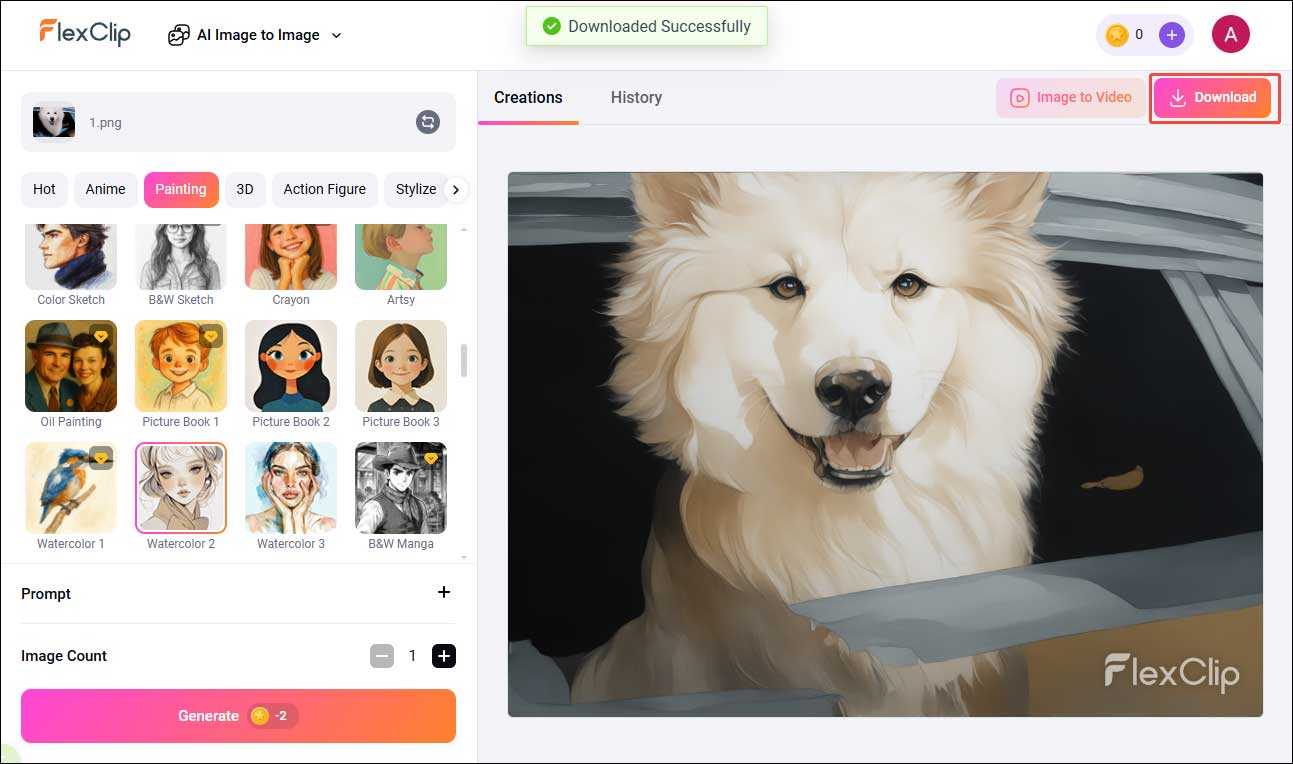
Step 4: Save the Final Photo
After generating, click the Download icon to save the image to your computer.
How to Turn Photo into Watercolor on Windows: Photoshop
For more professional and high-quality results, Photoshop is highly recommended.
As a leading photo editor, Photoshop offers a wide range of customizable filters, including Colored Pencil, Dry Brush, Fresco, and more, which can turn your photos into beautiful paintings. Moreover, it provides extensive control over brush details, texture, and filter intensity, giving you greater creative flexibility.
To further enhance realism, you can apply a Blur filter and adjust the blending mode, resulting in a smoother and more natural watercolor effect.
How to convert photos to watercolor paintings using Photoshop? Follow the guide below.
Step 1: Import Your Photo
Open Photoshop and click the Open option to import your photo.
Step 2: Add the Watercolor Filter
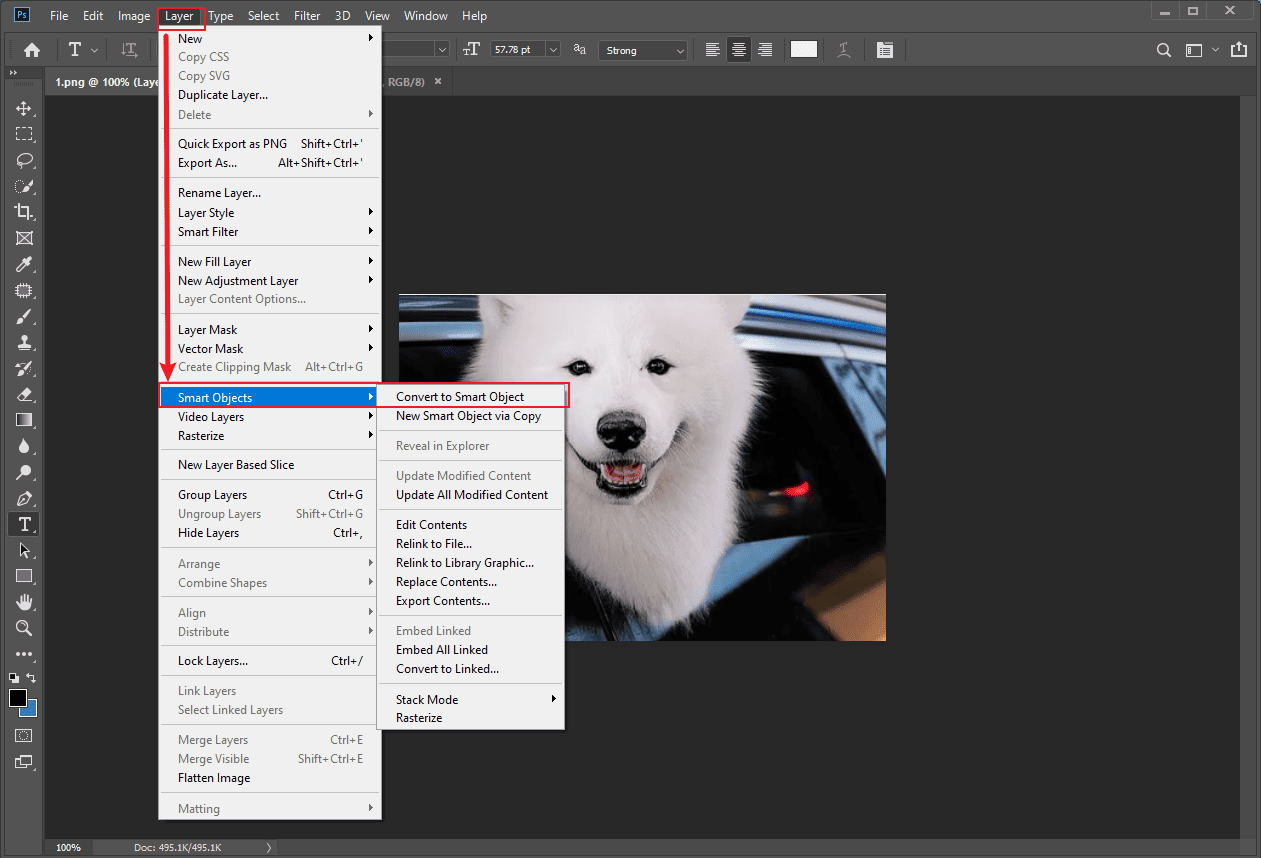
Select the Layer tab at the top of the toolbar, choose Smart Objects, and click Convert to Smart Object.
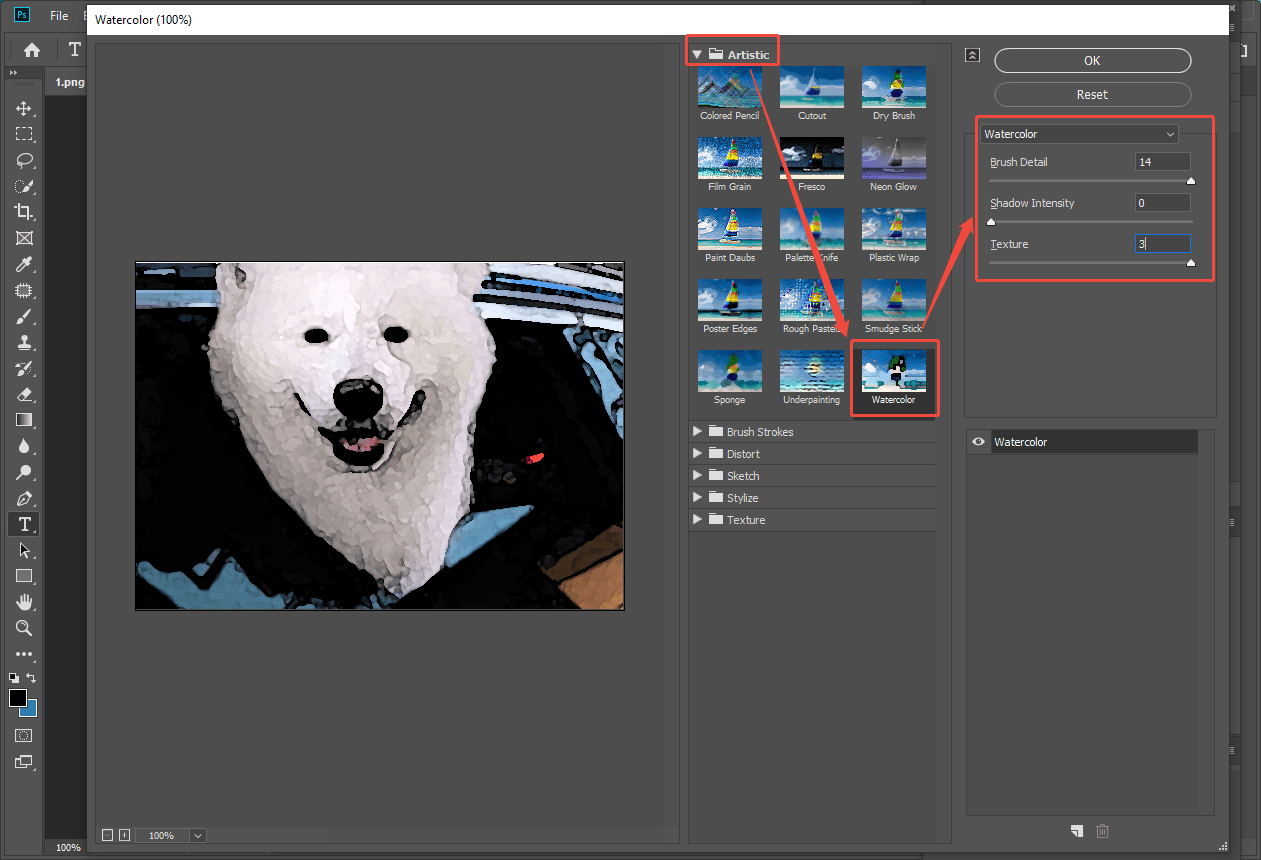
Click the Filter tab on the top toolbar and click Filter Gallery… to enter the Filter window. Select Watercolor from the Artistic dropdown list. Move sliders of Brush Detail, Shadow Intensity, and Texture to adjust the effect. Then, click OK.
Step 3: Adjust the Photo
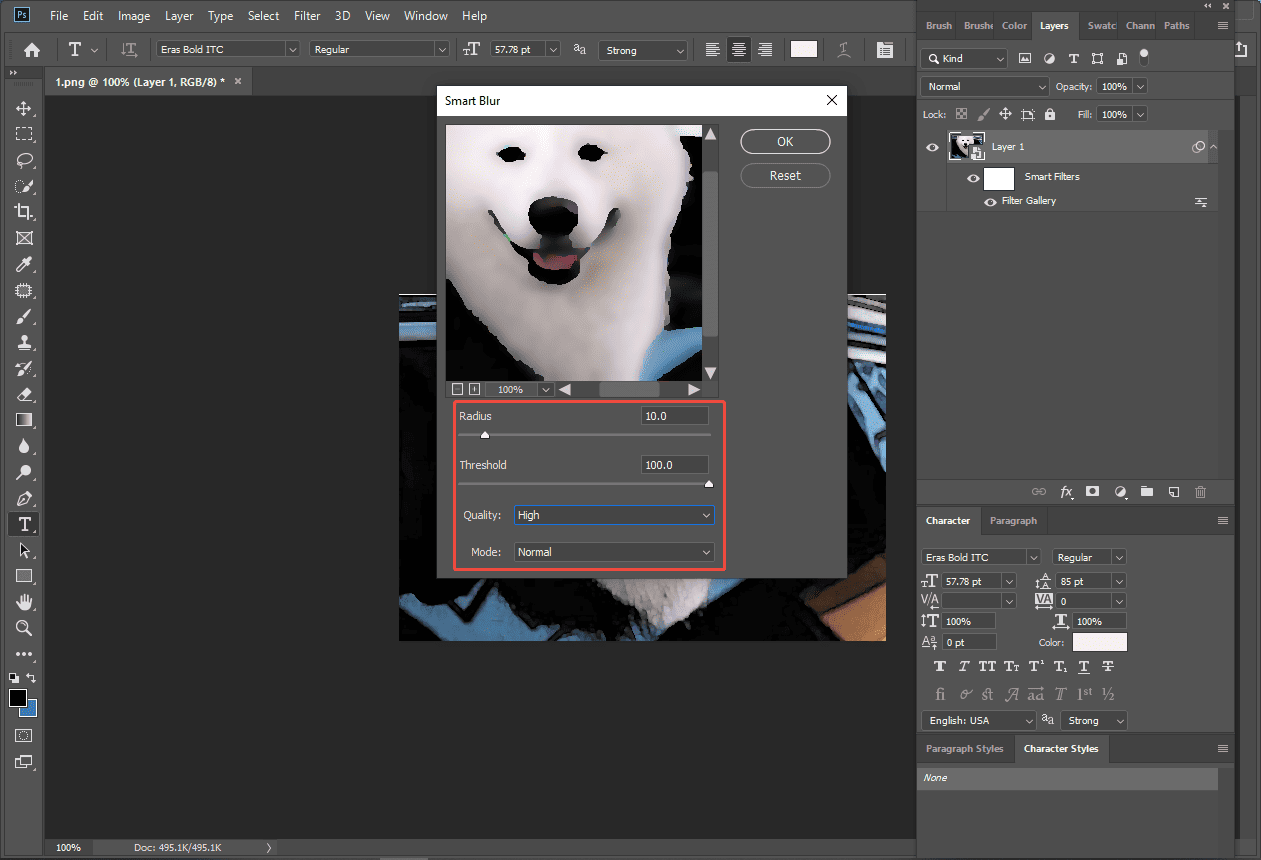
To make the photo natural, you can adjust it with additional editing. Click Filter again and select Smart Blur from the Blur. Adjust the Radius, Threshold, and set Quality to High. Next, click OK.
Then, click Filter and select Stylize. Choose Find Edges. Double-click it on the Layer panel to adjust the blending options. Select the Mode to Multiply and adjust the Opacity.

Step 4: Export the Final Photo
Click the File tab and select Save As to save the photo with the rain effect to your computer.
Conclusion
The watercolor effect provides a unique way to make your photos outstanding. With the 3 tools mentioned above, you can turn photo into watercolor painting with a few clicks. Hope this article helps you a lot!
About The Author

Position: Columnist
Alice is a tech writer at MiniTool, specializing in tutorials and guides on video editing and screen recording. She stays up to date with the latest tools and techniques to ensure her content is accurate and easy to follow. By combining hands-on testing with continuous learning, Alice aims to help readers solve tech problems efficiently.
User Comments :