This post from MiniTool MovieMaker (one of the best video editing software for beginners) explains how to make timelapse from photos. Explore tips and tools to bring your still images to life in a dynamic way.
What Are Timelapse Videos
Before learning how to make timelapse from photos, let’s understand what timelapse videos are.
Timelapse photography is often used to capture slow-moving scenes, such as plant growth, sunsets, urban traffic, etc. Timelapse videos are shot at a frame rate lower than the frequency used to view a sequence of images. So, when playing them at normal speed, time appears to move faster.
Timelapse photography is not only a technical means but also a method of artistic expression that can enhance the visual impact and appeal of videos. You can easily convert an existing video to timelapse or turn timelapse videos into normal speed by adjusting the clip’s playback speed. So, how to make a timelapse video from photos? What is the best app for creating captivating timelapse videos from your photos? Please read on.
![3 Best Methods to Convert Video to 120FPS [Desktop & Online]](https://images.minitool.com/moviemaker.minitool.com/images/uploads/2024/12/convert-video-to-120fps-thumbnail.jpg)
How to Make Timelapse from Photos
MiniTool MovieMaker is one of the best photo video maker apps that enables you to create amazing videos from images in minutes. You can also easily make a timelapse video from pictures using this application. It supports importing multiple image files, including PNG, JPG, JPEG, BMP, ICO, GIF, and TIF.
With this video maker, you can add overlays, frames, stickers, text, and music, edit the image’s color, and apply filters to create high-quality timelapse videos. Additionally, MiniTool MovieMaker can save videos in different formats without watermarks.
Here is how to make a timelapse video from photos using MiniTool MovieMaker.
Step 1. Download and install the photo to video maker on your computer by clicking the button below.
MiniTool MovieMakerClick to Download100%Clean & Safe
Step 2. Close the pop-up window to enter the main interface. Click the Import Media Files button to open your photos to build a timelapse video. To add these pictures to the timeline at the same time, select the first one, press the Shift key, select the last one, and click the + icon on any image.
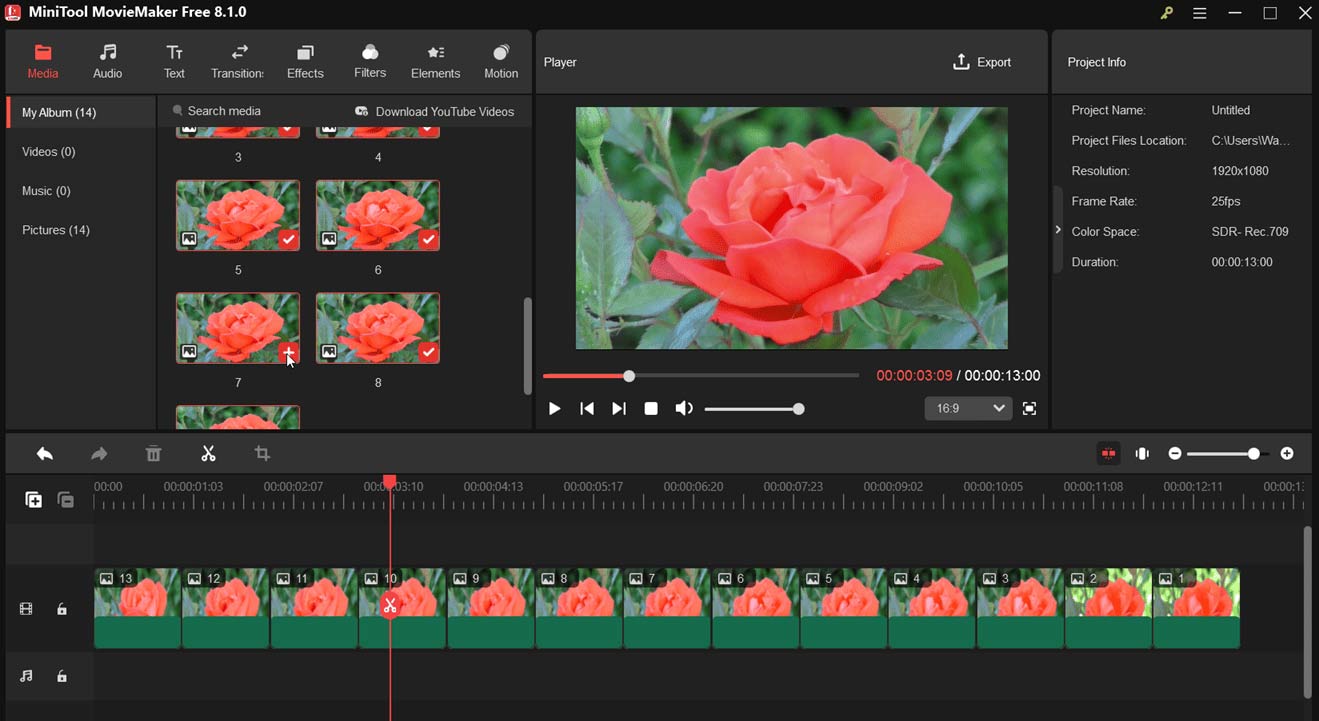
Step 3. Next, adjust the order of your image sequences by dragging and dropping your media on the timeline.
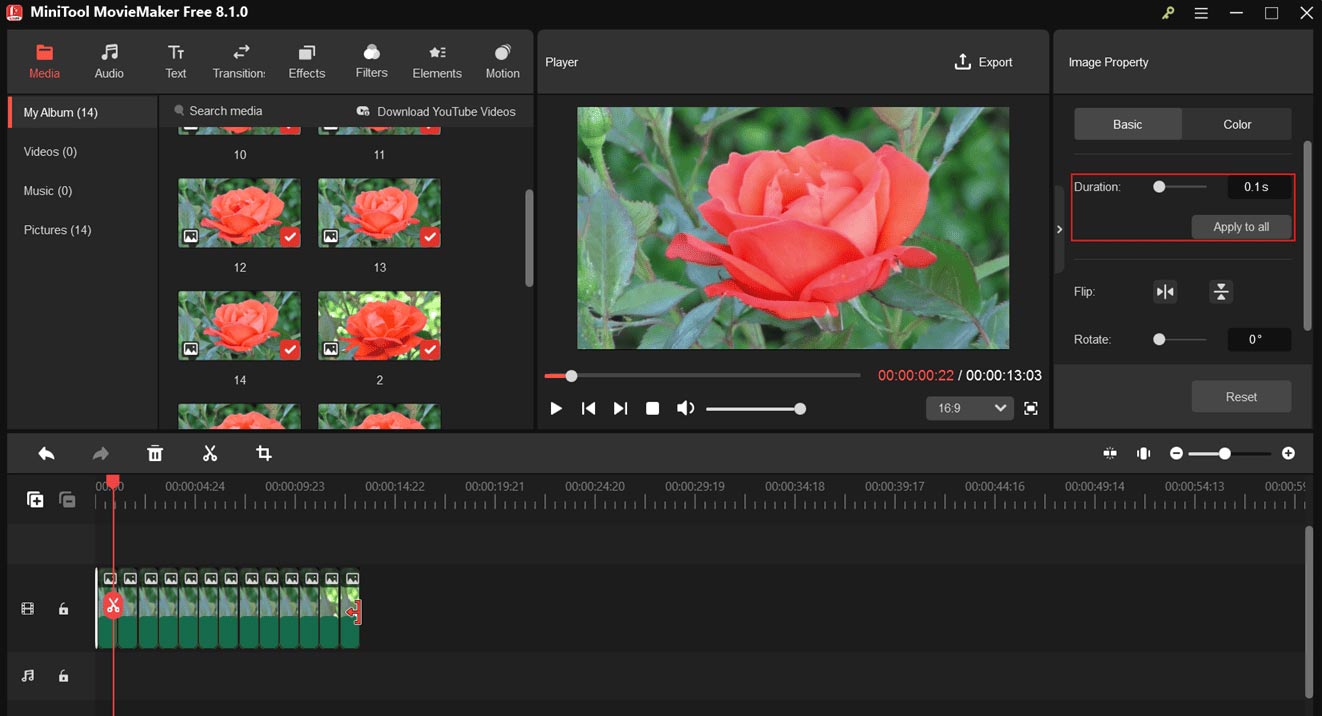
Step 4. By default, the duration of all photos added to the MiniTool MovieMaker’s timeline is set to 5 seconds. Therefore, you need to edit the length of some or all the photos to make a perfect timelapse video. In this application, you can increase the duration of the image to 30 seconds or reduce it to 0.1 seconds.
To change the duration of a photo, you can hover over either edge and drag the Trim icon or move the Duration slider on Image Property. If you want to create a time-lapse effect, it is recommended to set the duration of each photo to 0.5 to 1 second. Of course, you have the flexibility to adjust the duration based on your image.
If you want to set the same duration for all the photos on the timeline, enter the target number in the Duration box, and click the Apply to All button.
Step 5. Additionally, you can polish your timelapse video with the following tips:
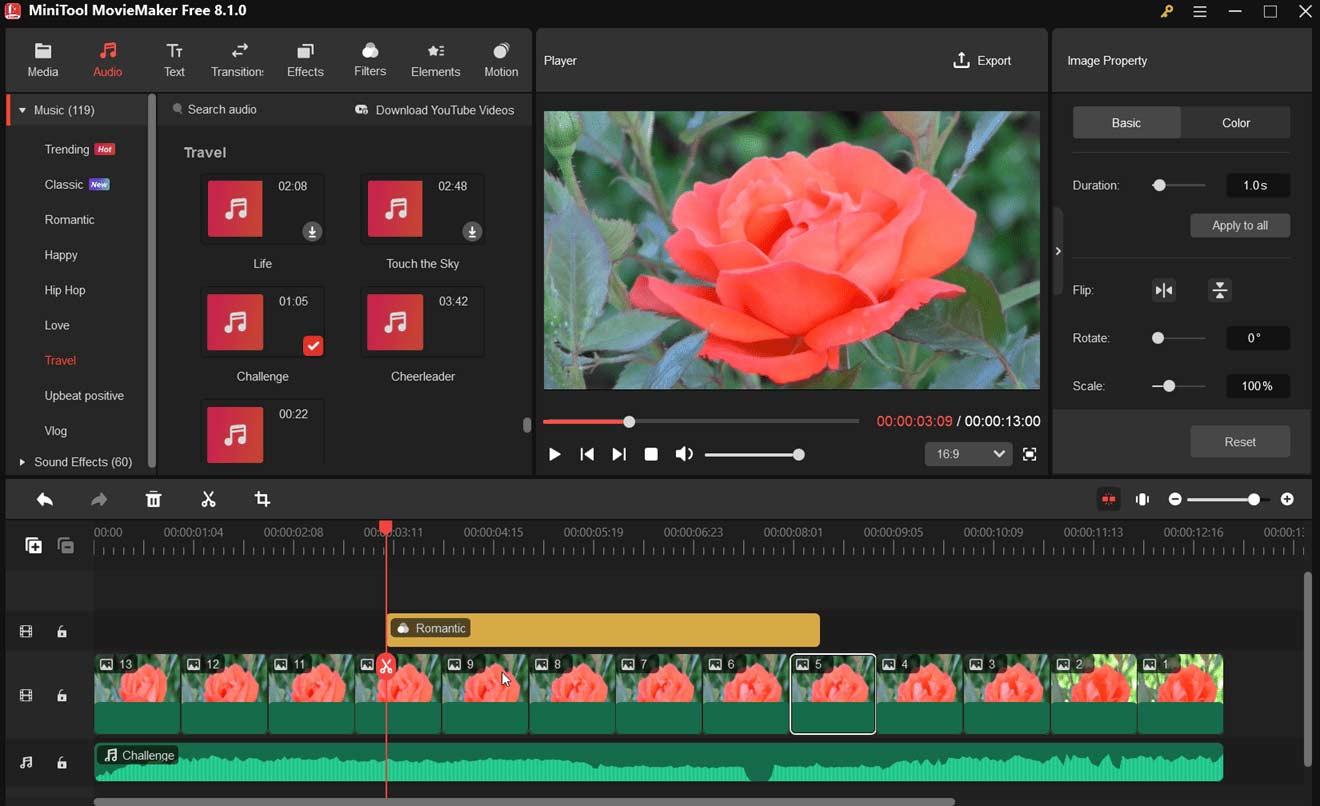
#Edit the image’s color: select the photo on the timeline to open Image Property, go to the Color tab, and drag the sliders to adjust the contrast, saturation, and brightness.
#Apply filters: go to Filters on the top, find and download the desired filter, and click the + icon to add it to the timeline. Drag any edge of the filter track on the timeline to adjust the duration.
#Add music or sound effects: go to Audio, download a music clip or a sound effect, or go to Media > Import Media Files to open your music, and click the + icon to add the audio to the timeline.
Step 6. After that, click the Export button to open the Export window. Then, select the save path, output format, resolution, and other settings. Finally, click the Export button to render your timelapse video.
Conclusion
This post introduces the best app to make timelapse from photos – MiniTool MovieMaker. You can easily transform photos into stunning timelapse videos by following the steps and tips above.
About The Author

Position: Columnist
Cora is a tech writer specializing in digital media workflows, with over six years of hands-on experience in video post-production, media transcoding, and screen capture. Her writing is always clear and practical. Cora also produces in-depth software reviews for users across skill levels to help them find the right tool and enjoy video editing.
User Comments :