You’ve taken an excellent clip, and now you wish to overlay visual effects, images, audio, borders, etc. onto your footage to generate visually stunning results. Overlaying might seem like a hard editing operation for professionals only. So, prepare to be surprised. In this post from MiniTool video editing software, we will guide you on how to overlay in Filmora with ease.
Step-by-Step Guide: How to Overlay in Filmora
You might wonder, why add overlays? There are numerous reasons, ranging from making fun footage for entertainment to adding branding.
With overlay editing, you can apply overlay motion graphics for special effects like ghosts, snow, or fire to create the illusion of a scenario that would not be possible for you to shoot.
Also, you can overlay a call to action on your video to encourage followers to take some action, whether that be buy, follow, or like. This can be a more effective method of increasing audience engagement and communicating successfully.
How to overlay video in Filmora? Scroll down for step-by-step instructions.
What You Can Overlay
You can overlay a smaller video onto a larger video, a technique popular in the tutorial video. This is referred to as picture-in-picture video or PiP video.
You can overlay effects, borders, and filters for branding purposes or to add a personalized touch with the video editor from Filmora.
Adding text to a video is an excellent way to introduce people or quickly relay additional information.

How to add overlay in Filmora? Here is a step-by-step tutorial:
Step 1. Open Filmora
Head over to Filmora’s official website, download the video editing software from there, and install it on your computer.
Open Filmora video editing software to perform the task of adding overlays.
Step 2. Upload Your Video
Open an existing project or create a new one. Choose the footage you would like to upload.
To upload, click the Import dotted area, select the video clip, and hit Open.
Step 3. Add Your Background Video
You’ll need to add additional video tracks in order to overlay the video.
Click the Manage tracks icon and select the Add Video Track option. Each time you do this procedure, an extra video track will be added.
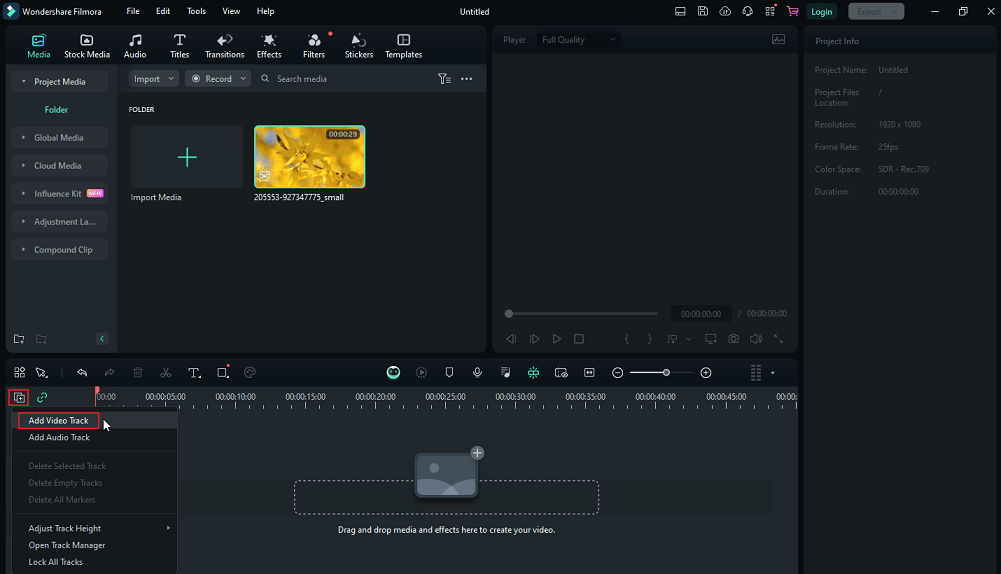
Add the same number of video tracks as you want to add overlays. Once added, they will be empty and can be used to overlay video effects.
Drag and drop your background video from the projects area to the video track timeline panel.
This will position the video clip as the background onto which you can add overlays.
Step 4. Add the Video Overlay
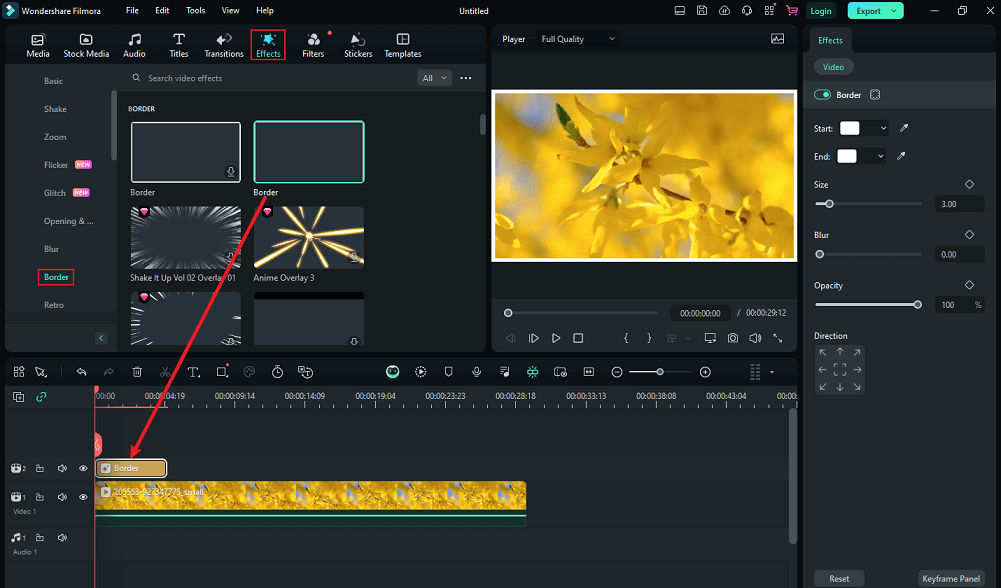
Filmora includes a range of filters and border templates and easy access to copyright-free videos and images. All of these can be used as video overlays.
Click the Effects tab at the top of the workspace. A side panel will appear on the left when you click on it.
Then, you’ll see Filmora’s variety of video effects, such as borders, textures, shadows, etc.
Put your selected overlay effect onto the timeline by clicking on it and then dragging and dropping it to the place on the empty track above the background clip.
Step 5. Customize the Video Overlay
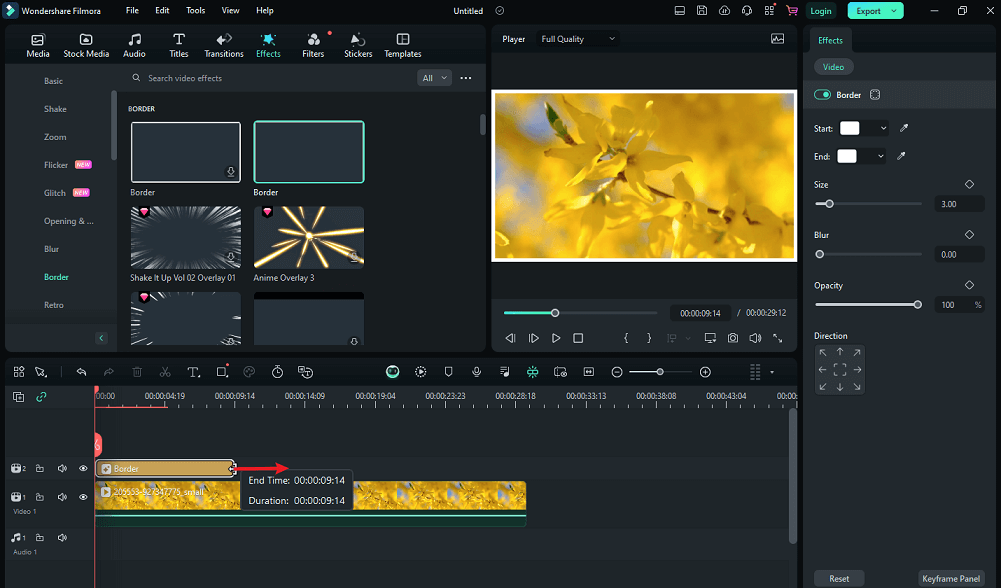
To change the playback time of the video overlay, slide its edges inward or outward to make it longer or shorter.
The overlay effect, as shown below, will only play for the second portion of the video and then disappear.
To preview the video overlay effect you set, click the Play icon and the video clip will play in the preview window.
If you’re satisfied with this, you can skip to the last step.
Step 6. Export Your Project
To export your final video, whether to save it to your device or share it with the world, go to the top menu bar and click Export.
When clicked, a pop-up window will come up, offering you some export options.
Choose the one you want: to save to your device, burn to a CD, or share to YouTube.
That’s it! Your wonderfully edited overlay video is finished.
MiniTool MovieMakerClick to Download100%Clean & Safe
Conclusion
After reading the above step-by-step guide, you now know how to overlay in Filmora. It is a simple and hassle-free process.
User Comments :