In digital creation, the outline design of an image is a basic and important skill. Through reasonable outlining, artworks can be more vivid and effectively guide the viewer's eyes. This post from MiniTool MovieMaker – a free video maker will introduce how to outline an image to make it clearer and more appealing.
The Benefits of Outlining an Image
Adding outlines to an image has many significant benefits. First, outlines clearly define the boundaries of an image, making the main elements stand out and helping the viewer quickly understand the subject of the image.
Second, outlines enhance the contrast of an image, making it more recognizable in different backgrounds and thus more appealing in visual terms.
In addition, outlines can add layers to the image, making it look more three-dimensional and vivid. This effect is not only applicable to graphic design but also can be applied to illustration and other artistic creations.
Finally, adding outlines can help guide the viewer’s eye, highlight important information or details, and improve the effectiveness of the message conveyed.
MiniTool MovieMakerClick to Download100%Clean & Safe
How to Outline an Image in Canva
Canva is a popular online design tool, and adding an outline to an image in Canva is a great way to enhance the visual appeal of your design. With a few simple steps, you can create sharp borders for your image, making it stand out more in the overall design.
Step 1: Go to Canva’s official website and click Upload your image to import your image.
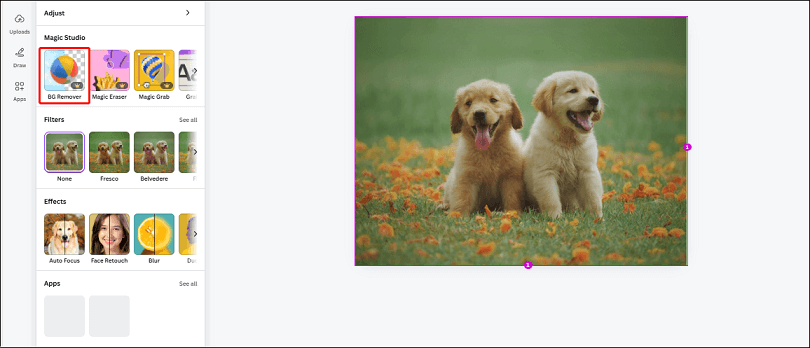
Step 2: Select your image and click the Edit photo button, then click BG Remover to remove the background.

Step 3: Add outline to an image
- Select your image.
- Go to Effects.
- Click the Shadow button and select Outline.
- Adjust the outline settings like Size, Blur Amount, Angle, Distance, Color, and Intensity according to your needs.
Step 4: After finishing all designs, click Download to save your work.
How to Outline an Image Using Outline Image
Outline Image is a handy online tool focused on providing users with image outlining services. It allows users to simply upload an image and quickly generate a version with clear edges and outlines, perfect for use in a variety of design projects. The following are the exact steps to add an outline to an image.
Step 1: Go to the Outline Image website and click Create Outline Now.
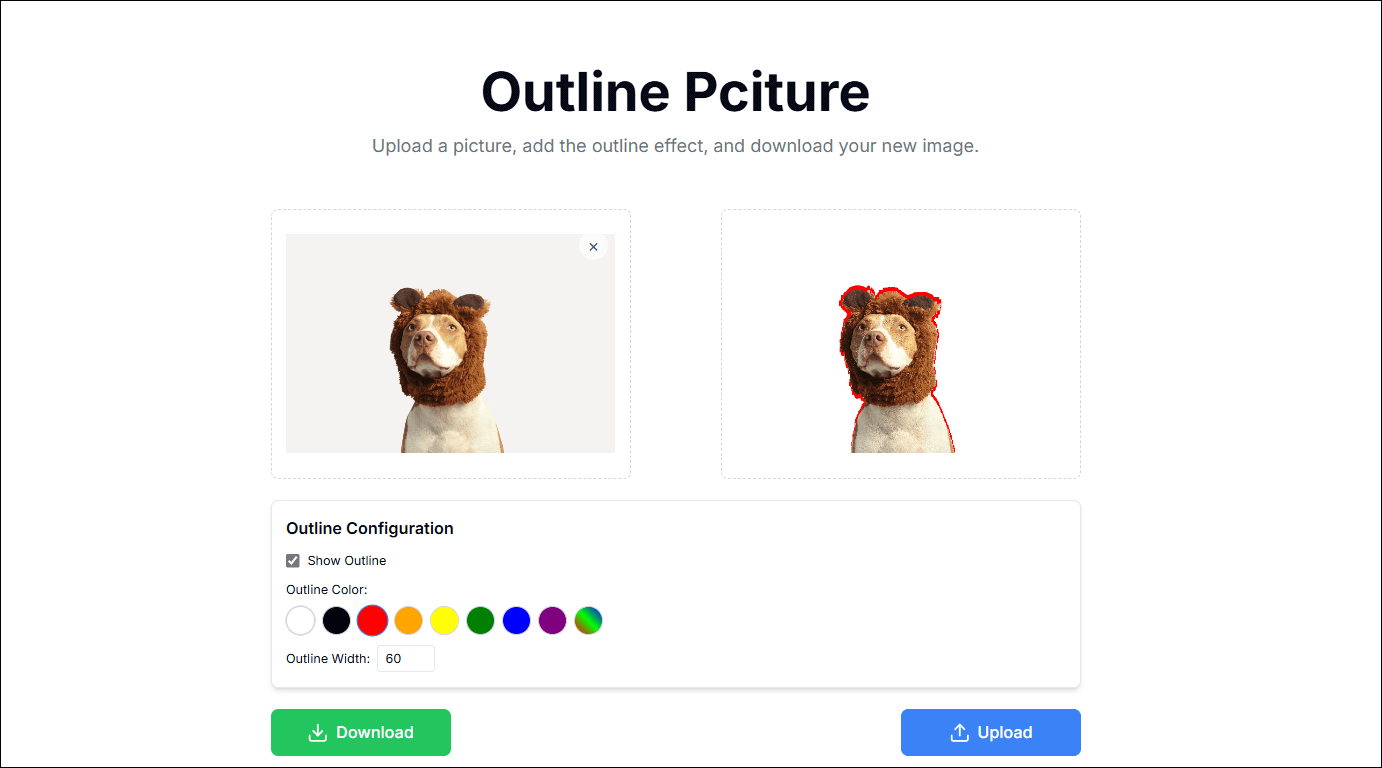
Step 2: Click Browse to import your image. After uploading the image, it will remove the background and add the outline for your image.
Step 3: You can adjust Outline Color and Outline Width in Outline Configuration as needed.

Step 4: After completing all operations, click Download to save your work.
How to Outline an Image Using Picture Outline Maker
Picture Outline Maker by Insmind is an efficient online tool designed to help users quickly convert ordinary images into versions with clear outlines. The tool is easy to use, with a user-friendly interface that is suitable for users of any level, greatly simplifying the design process and enhancing the visual effect of the work.
Step 1: Go to the Picture Outline Maker website and click Upload a photo.
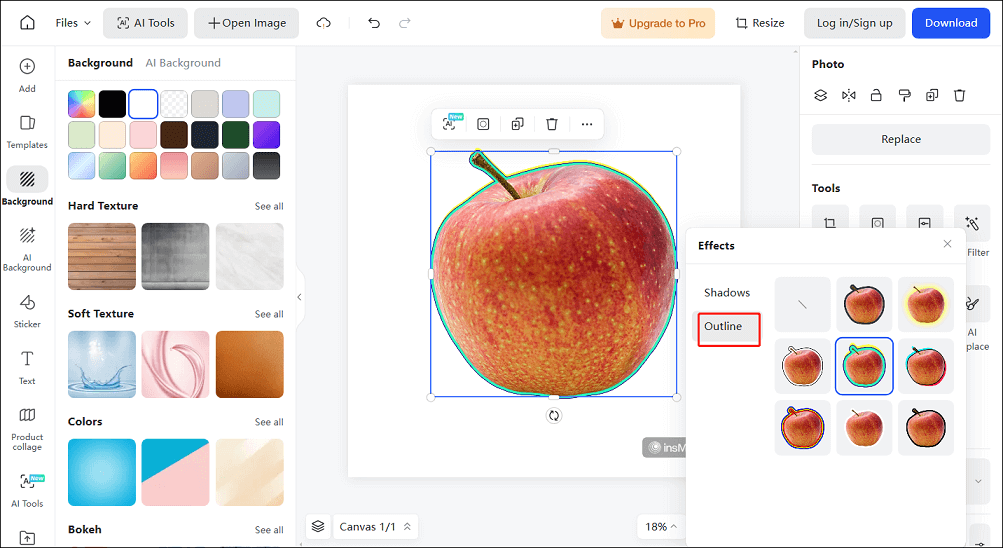
Step 2: Click Background to remove the background.
Step 3: Click Effects and choose Outline, then you can select an outline effect to your preference.

Step 4: Click Download to save your work.
How to Outline an Image in Illustrator
Adobe Illustrator is a powerful graphic design software widely used in graphic design, illustration, and typography. You can also use it to add outlines to your images precisely. Here are the exact steps on how to outline an image in Illustrator.
- Download and install the software on your PC.
- Open this app and click New Project.
- Click the File button and select Place.
- Select the image you need to outline.
- Click the Appearance button.
- Click Add New Strove.
- Press the Effect button and select Outline Object.
- Click File and choose Export to save your work.
Conclusion
Image contouring is an effective design technique that can make your work more vivid and eye-catching. I believe you have mastered how to outline an image through this article. Meanwhile, I hope you can keep experimenting with practical applications to find the most suitable style and effect for yourself.


User Comments :