If you’re looking for a tool to combine GoPro footage into one video, you’ve come to the right place. This post will show you how to merge GoPro videos on Windows computers using the best video editor - MiniTool MovieMaker.
Why Does GoPro Split Video into Segments
Before learning how to merge GoPro videos into one, let’s first figure out why your GoPro videos are split into chunks.
By default, GoPro cameras record in segments; this feature is called chaptering. In other words, when recording video, the GoPro camera will automatically start a new file chapter after it approaches a certain size. Therefore, when the camera shoots in high resolution, it automatically splits the recorded video into multiple small clips due to the larger file size.
Chaptering is an intentional setting in GoPro cameras; this feature cannot be disabled. This is mainly to prevent camera shake or sudden crash from affecting only part of the video rather than causing the entire video file to be corrupted. Additionally, if the camera’s file recovery feature fails to repair videos, chaptering can reduce the risk of file corruption due to unexpected interruptions during recording.
How to Merge GoPro Videos on Windows
How to combine GoPro videos into one? In this section, we’ll explain how to use MiniTool MovieMaker (one of the best GoPro video editing software for Windows) to join multiple GoPro clips into one.
MiniTool MovieMaker, a video editor without watermark, provides various tools and trendy effects to edit and enhance videos. It allows you to merge videos of different formats into one in just a few clicks, such as H.264, HEVC, AV1, MPEG-4 Part 2, MP4, MOV, and more. Now, let’s see how to merge GoPro videos together in this application.
Step 1. Install MiniTool MovieMaker
Click the button below to download and install this GoPro video merger on your computer. Launch the software and close the promotion window to enter the editing page.
MiniTool MovieMakerClick to Download100%Clean & Safe
Step 2. Import GoPro Videos
Under the Media tab, click the Import Media Files button to open the GoPro videos you’ve saved to your computer onto the app’s media library.
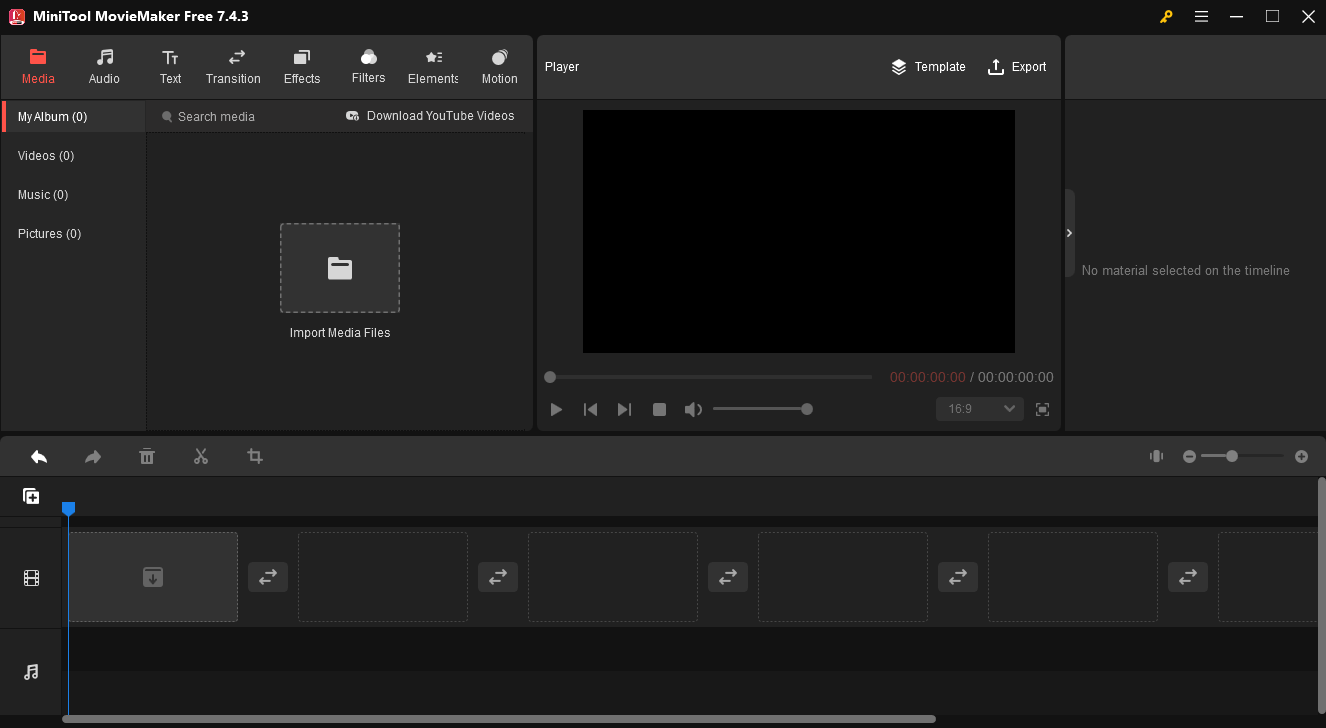
Next, you can add all the clips to the timeline at once: select the first clip, press the Shift key on your keyboard, select the last clip, and click the + icon on any clip.
Step 3. Edit the GoPro Clips
You can edit these clips before merging them into one video.
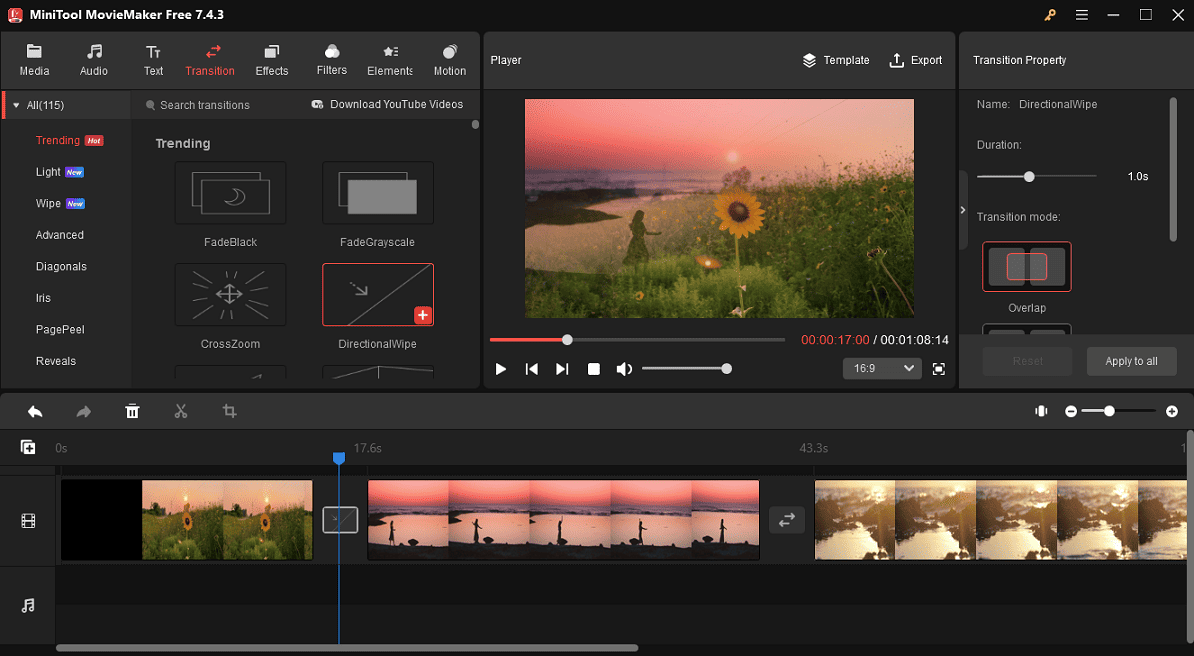
1. Add a transition between two videos to make one scene move to the next one smoothly. Go to Transitions at the top menu bar, browse these transitions and download the desired one. Drag the transition to the gap between any two video clips on the timeline. Next, adjust the transition’s duration and mode.
2. Add captions: Go to Text > Caption, choose a text template from the available options, and click the + icon to add it to the timeline. Next, go to Text Editor to enter and edit your text.
3. Add elements: Go to Elements, browse these elements, and download the element you like. Click the + icon on the target element to add it to the selected clip on the timeline. Then, you can change its duration, and position on the video, rotate and scale it.
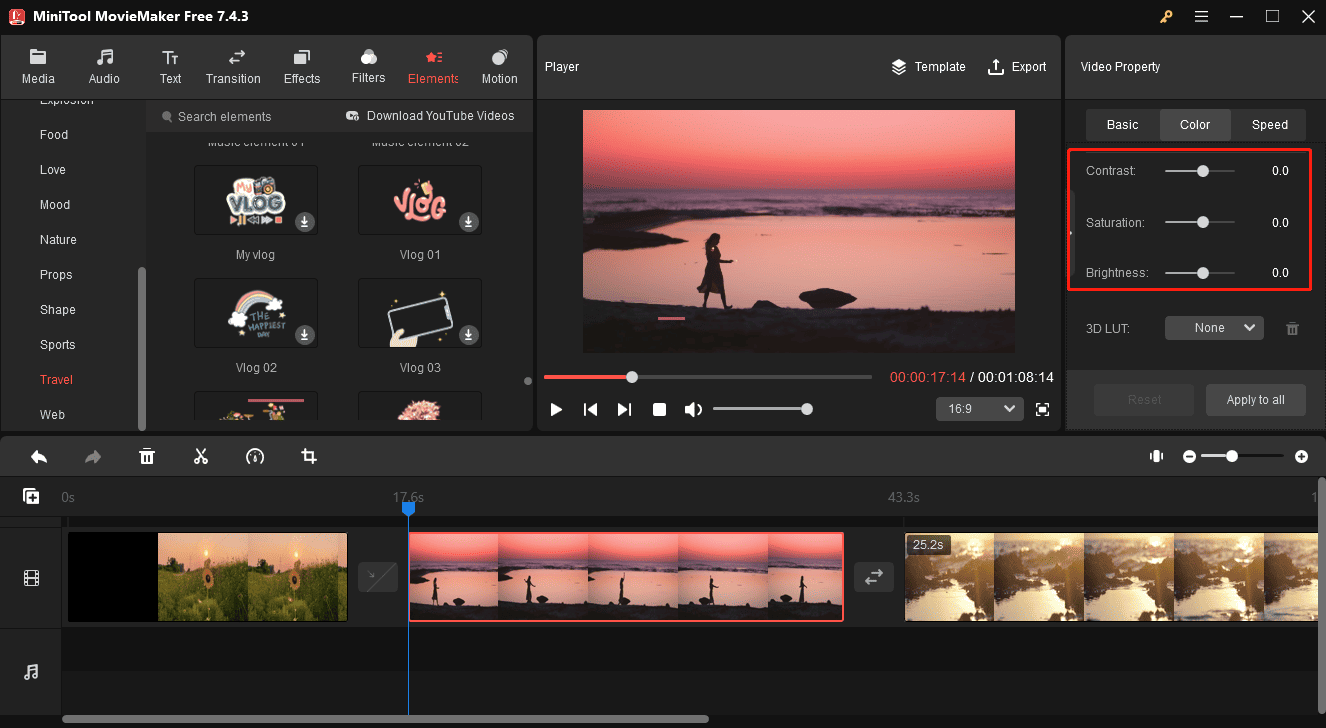
4. Adjust the clip’s color: Click the target clip on the timeline to open the Video Property, switch to the Color tab, and drag the sliders to edit the clip’s brightness, saturation, and contrast.
Step 4. Merger GoPro Videos
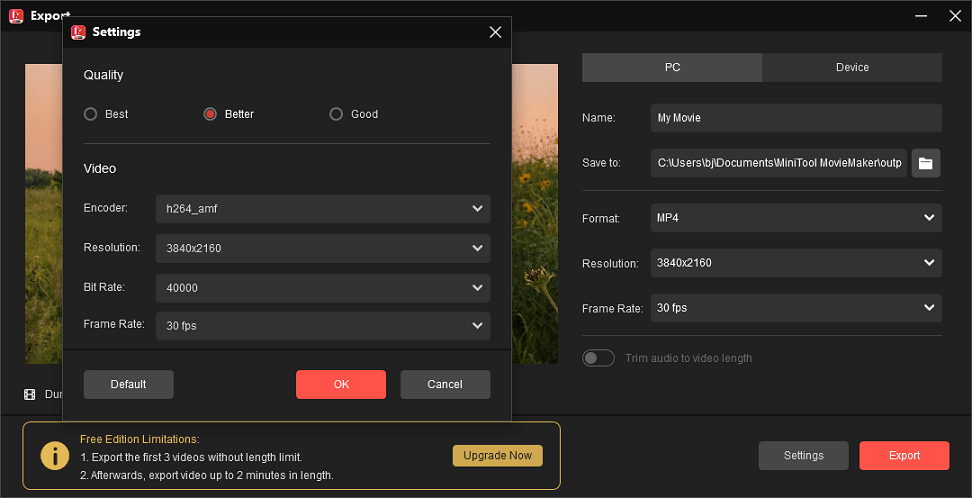
Click the Export button in the top right corner. In the Export window, give the file a name, select the destination folder, and choose the output format, resolution, frame rate, quality, bitrate, etc. for the merged video. Finally, click the Export button to start stitching these clips.
Conclusion
CoPro’s chaptering feature will automatically divide the recorded video into multiple small fragments, allowing users to more conveniently manage and edit the footage. If you want to merge them into one video, you can easily accomplish this task using MiniTool MovieMaker.
You may also like:



User Comments :